Most compact cameras enable you to record voice memos to accompany photos you've just captured. To get the most out of this function, however, you want to store the audio with the appropriate image.
Unfortunately iPhoto doesn't let you add straight audio files to its library. There has to be an image attached the audio file. So the dream of having voice memos associated with your pictures is only that, a dream. Or is it? By using this easy technique and QuickTime Pro, you can include voice memos with your images in iPhoto.
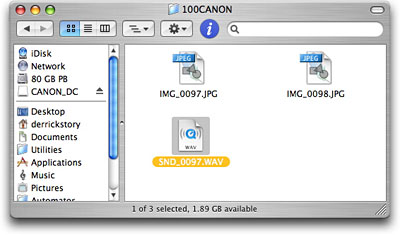
After you've uploaded your pictures to iPhoto, leave the memory card mounted on your Desktop so you can examine its internals. This is where card readers have a real advantage over uploading your images directly from the camera. Find the audio file, usually with a .wav extension, and the corresponding image file. The two should have the same number in their file names.
Drag the photo on to the QuickTime logo on your Dock to open it in QuickTime. You're going to convert it into a movie by exporting it selecting File > Export then choosing "Movie to QuickTime Movie" under the Export pop up menu. Click the Options button and choose "Photo Jpeg" as your compressor and 640 x 480 as the size. After you hit Save, your image will become a QuickTime movie. Double-click it to open it
Now drag your camera's sound file to QuickTime to open it. You have two QuickTime movies open -- the converted photo and the audio file. Go back to your photo and go to Edit > Select All, then choose Edit > Copy. Your picture movie is now on the clipboard. Go back to your voice memo and choose Edit > Add to Selection and Scale. The photo movie is now added to your voice memo. You can listen to the audio by clicking the play button. (You need the Pro version of QuickTime to use this technique. You can upgrade on the Apple site for $29.95.)
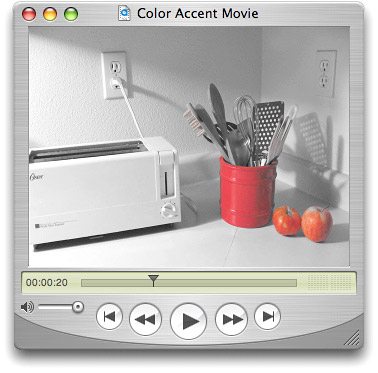
You're almost finished. Now choose Save As and select "Save as self-contained movie." Give your movie a name and click Save. Drag your voice memo photo movie into the iPhoto album where the other photos are stored. Now, in addition to all of the still images, you have a descriptive movie to accompany them that explains the technique you used to capture them.
You can download a sample movie here. Try it. It's really cool.


This is a great tip!. I am sure if I were using a digital camera and not record the audio file, I could record a voice clip in quicktime later and merge the two files.
Great idea. I had a few sound files from my camera that I didn't know what to do with. I kept them in iTunes. Now they're where they belong... in iPhoto with the picture. I can see myself using the audio feature of my camera much more now. Thanks.
Actually Geoff, your idea is a tip I'm going to publish in a few days. I'm going to combine the postcard feature that I wrote about with recording a simple audio file, then combine them to make a multimedia postcard that you can send to folks. Stay tuned.
Hi Derrick - -
Do you think I could also do this on my PC, using QuickTime Pro, to produce a video with my SND WAV file imbedded?
Hi Alan, Yes, this is a technique that works on both platforms. In my next installment, I'll do everything but create the image in QuickTime Pro. Windows and Mac users follow the same basic steps.
Have you ever considered adding more videos to your blog posts to keep the readers more entertained? I mean I just read through the entire article of yours and it was quite good but since I'm more of a visual learner,I found that to be more helpful well let me know how it turns out! I love what you guys are always up too. Such clever work and reporting! Keep up the great works guys I've added you guys to my blogroll. This is a great article thanks for sharing this informative information.. I will visit your blog regularly for some latest post.