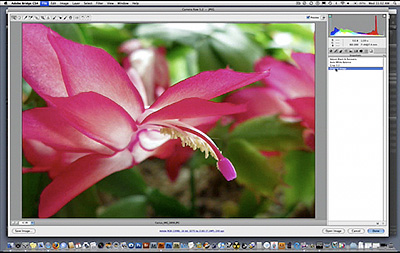
The latest version of Adobe Camera Raw (5.2) features some terrific new tools. Two of my favorites are the Targeted Adjustment Tool (TAT) and Snapshots. In this screencast, Snapshots and TAT in ACR 5.2: Photoshop CS4 Companion for Photographers Screencast 5, I demonstrate how darn useful Snapshots are for creating historical bread crumbs while adjusting an image in ACR. If you've ever used Snapshots in Adobe Lightroom, you know that you can save the state of an image as you're working on it, and return to that state whenever you want. I think this allows for more experimentation during image editing, knowing that you can always go back to a particular spot in the process.
I also show off the Targeted Adjustment Tool. It allows you to click and drag on a particular area of the photograph and target the adjustment for those tones or colors. Many people were excited when this appeared in Lightroom, and now we have it in Photoshop CS4 too.
You can learn more by watching the 6:45 minute screencast.
-
Learn what photographers need to know to organize and edit their images with Photoshop CS4. Take a look at The Photoshop CS4 Companion for Photographers. It fits in your laptop bag and is very easy on your wallet.
Technorati Tags: Adobe Camera Raw, Adobe Photoshop, digital photography, Photoshop CS4, Photoshop CS4 Companion for Photographers, technique, The Digital Story


What is the difference between "Smart Objects" and "Snapshots"? Aren't both a non-destructive method of making adjustments, saving and then readjusting images? Is one preferable to the other? What if one uses both?
Also, what's new/different in Camera Raw 5.3?
Thank you!
This is my first time i visit here. I found so many interesting stuff in your blog especially its discussion. From the tons of comments on your articles, I guess I am not the only one having all the enjoyment here! keep up the good work.