Sometimes it's the little things that make our Mondays just a bit easier. Like automatically straightening a horizon with just a single click (or tap). Let's start with Photos for macOS
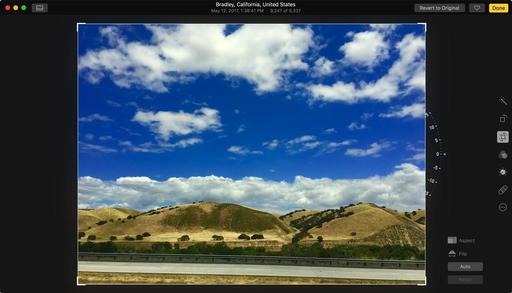 Nice grab shot with the iPhone. Unfortunately, the horizon is a bit askew. Photo by Derrick Story.
Open the image in Photos for macOS, and hit the Return key to enter editing mode. Click on the Crop icon, then click on the Auto button. The horizon will automatically level out.
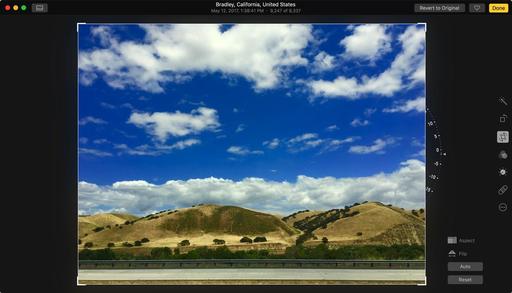 Click on the Auto button in the Crop tool, and the horizon levels out.
It's even easier if you're using Photos on an iPhone. Just open the crop tool and Photos will automatically fix that horizon without you even asking it to. And in either case, if you don't like what you seen, just tap on Reset. Also, regardless of where your make the correction, the edited image will be saved to all of your devices via iCloud.
Bonus Tip: Polarize the Sky
I also added a little bit of oomph to the sky. I used just three sliders to achieve this. Here's how.
In editing mode for Photos for macOS, click on the Adjust button. In the Light panel, move Brilliance to the right. Then, in the Color panel, move the Saturation and Contrast sliders to the right, as shown below. These sliders are also available on your iPhone in Photos.
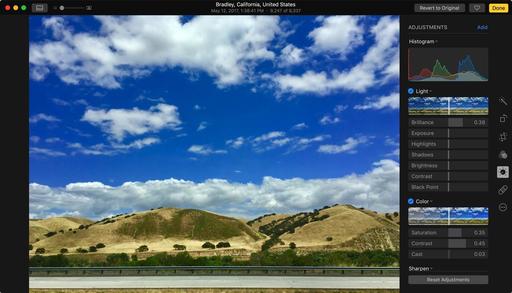 Make that sky even prettier.
What a difference just a few seconds of editing makes. You can see the Before and After by pressing the M key on your Mac, or by long-pressing the image with your finger on the iPhone. Now, your picture is ready for sharing.
Book or Videos: Photos for macOS
Explore the world of modern photography with my The Apple Photos Book for Photographers that features insightful text and beautiful illustrations.
And if you'd like to cozy up to a video at the same time, watch my latest lynda title, Photos for macOS Essential Training.
You can share your thoughts at the TDS Facebook page, where I'll post this story for discussion.


