This is The Digital Story Podcast #613, Dec. 12, 2017. Today's theme is "The Top 5 Photography Products of 2017." I'm Derrick Story.
Opening Monologue
It's been a good year for photography announcements. Across the board we've seen both innovations and refinements. But at the end of the day, what were the five that really stood out? I'm going to share mine, in no particular order, on today's TDS podcast.
The Top 5 Photography Products of 2017
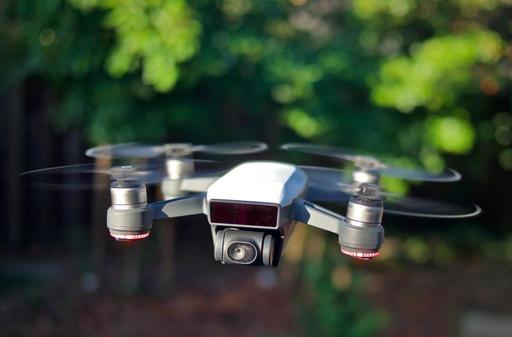 The DJI Spark is one of my top photography picks for 2017.
The DJI Spark ($349) - This compact quadcopter features an integrated camera with motorized stabilization to capture 12MP photos, 1080p Full HD videos, and even aerial selfies. The drone's compact size, 31 mph top speed, and up to 16 minutes of flight time will appeal to a variety of users, from FPV enthusiasts to racers to those just looking for more dynamic shots than are possible with simply a smartphone or camcorder. The drone features GPS- and vision-based navigation for outdoor or indoor use, a variety of flight modes, and a 3D obstacle-detection system.
Nikon D850 ($3,297) - Revolving around a newly designed 45.7MP BSI CMOS sensor and proven EXPEED 5 image processor, the D850 is clearly distinguished by its high resolution for recording detailed imagery. The back-illuminated design of the sensor is able to acquire greater detail and clarity when working in low-light conditions, and the sensor also forgoes an optical low-pass filter for improved sharpness. Working in conjunction with the sensor is the EXPEED 5 image processor, which together afford a 7 fps continuous shooting rate for up to 51 consecutive frames, an expandable sensitivity range from ISO 32 to 102400, and 4K UHD video recording using either a DX crop or the entire area of the full-frame sensor.
Sony Alpha a7R III ($3,198) - Revolving around a full-frame 42.4MP Exmor R BSI CMOS sensor and updated BIONZ X image processor, the a7R III affords an impressive 10 fps continuous shooting rate along with improved autofocus performance for faster, more reliable subject tracking along with wide frame coverage. This updated Fast Hybrid AF System employs a combination of 399 phase-detection points and 425 contrast-detection areas for quicker acquirement of focus in a variety of lighting conditions, and also maintains focus on subjects more effectively. In addition to speed and AF, the processing improvements also help to realize greater image clarity throughout the sensitivity range from ISO 100-32000, which can further be expanded to ISO 50-102400. Video recording capabilities have also been extended for enhanced quality when recording UHD 4K video with the full width of the full-frame sensor, or when using a Super35 area and 5K oversampling to minimize moir� and aliasing. Additionally, benefitting both stills and video operation, the a7R III retains the 5-axis SteadyShot INSIDE sensor-shift image stabilization, which is now effective to minimize the appearance of camera shake by up to 5.5 stops.
Apple iPhone X ($999) - A larger and faster 12MP sensor. A new color filter. Deeper pixels. And a new telephoto camera with OIS.
Olympus TG-5 ($399) - Utilizing a 12MP BSI CMOS sensor and TruePic VIII image processor, the TG-5 offers notable image clarity and low-light performance, to ISO 12800, along with fast 20 fps continuous shooting, 4K/30p video recording, and high-speed Full HD 1080p shooting at 120 fps. Balancing the imaging capabilities is a versatile 4x optical zoom lens, which spans a 25-100mm equivalent range, and has an f/2 maximum aperture to benefit working in low-light conditions. Additionally, the Variable Macro System also positions this lens for close-up shooting with subjects just one centimeter away for true macro photography.
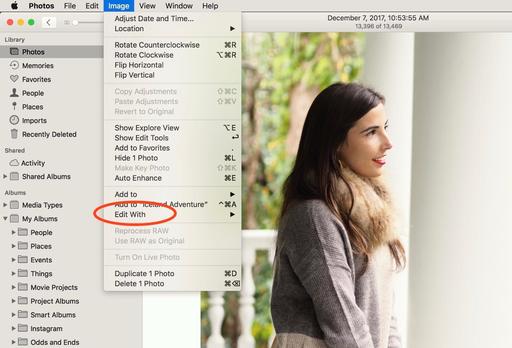
Comparing the Olympus 45mm Primes - f/1.2 vs f/1.8
The Olympus 45mm f/1.8 actually fared quite well in my field tests. It rendered pleasing bokeh, excellent sharpness, and fast performance. It's no wonder that I carry this lens with me all the time. In fact, I have two of them, one black and one silver, to match the camera that I'm packing.
The new Olympus M.Zuiko Digital ED 45mm f/1.2 PRO takes this performance to a higher level, however. First, the feather bokeh is different than any of my other optics. For lack of a better term, I would call it very artistic. The backgrounds have a painterly feel to them.
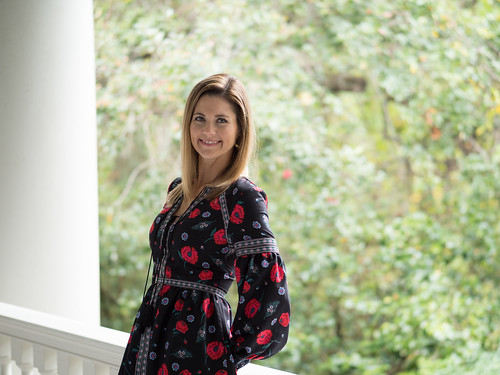
When I look at the f/1.2 images, the thought of bokeh doesn't jump out at me. Rather, I'm thinking more about an overall pleasing composition with outstanding subject sharpness and beautifully rendered background. In many ways, I feel like this is an optic for grownups (with grownup resources).
The sharpness is downright amazing. The portraits are crisp in all the right places, and softened where they should be. I honestly feel like the lens is doing most of the work for me. All I have to do is compose and focus on the eyes, and everything else just falls into place.
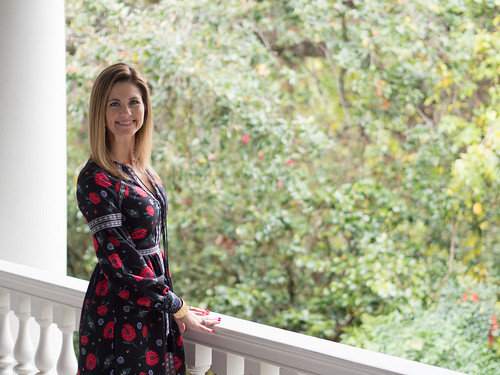
The improvements of the Olympus 45mm f/1.2 do come at a price, however. The lens weighs over 14 ounces compared to 4 ounces for the f/1.8 version. Plus the price is 3 times as much at $1,200, compared to $400 for its baby brother. And I think if you're really going to reap the benefits of the f/1.2, you need one of Olympus' Pro bodies, such as the E-M1 Mark II. Those are all real considerations.
So, is the Olympus 45mm f/1.2 PRO a must-have lens for you? It could be. If you're shooting with the E-M1, E-M1 Mark II, or E-M5 Mark II; regularly shoot portraits for hire or art, and have the budget for a $1,200 optic that is unlike any in its class, then I would say yes. It's magically impressive.
Most Downloaded Motion Backgrounds of 2017
So I've been talking about all of the royalty free content I can download via my videoblocks account. They help expand your horizons by constantly introducing you to new items in their library. This week, it was: Most Downloaded Motion Backgrounds of 2017. Here are just a few of the winners.
- Fly through outer space nebula and stars
- Abstract 1217
- Worship 1017
Over the next few weeks, I'll be your tour guide for this site. But if you need content right now, you can join Videoblocks for $149 a year and gain access to great video, stills, and audio content. This is really a great idea...
A Patreon Change
A new service fee of 2.9 percent + $0.35 will be paid by patrons for each individual pledge starting on December 18th. This streamlines fees for both creators and patrons to ensure that you pay no more than 5 percent. That works out to an extra 50 cents per month for our members.
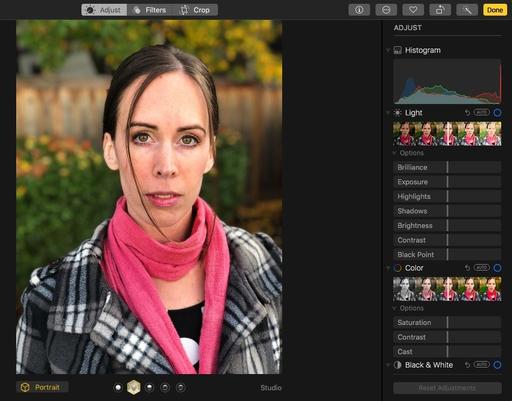
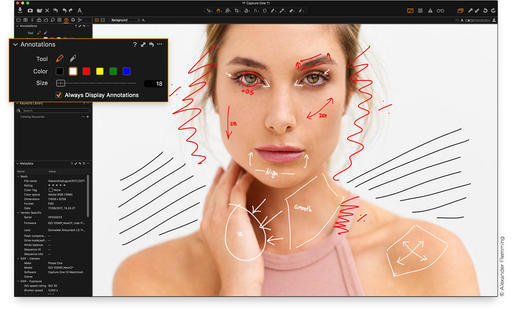
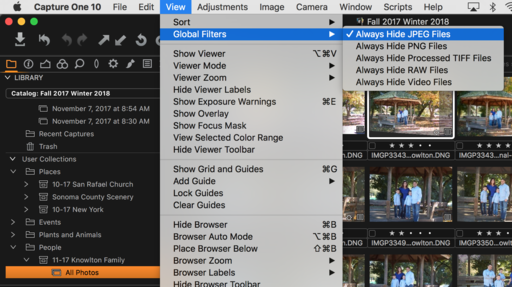
Since that wasn't the original agreement that we made, I'm going to make it up to you. For January 2018, I will post 3 training movies instead of the scheduled two. The software will be Capture One Pro, Photos for macOS High Sierra, and for Luminar. My hope is that the extra movie will make up for the additional 50 cents per month. Thanks so much for your support!
To become an Inner Circle Member, simple pledge $5 or more a month through the TDS Patreon program.
We have more benefits coming in 2018 for our Inner Circle Members. Join today and become part of the TDS Elite.
Updates and Such
Big thanks to all of our Patreon members!
B&H and Amazon tiles on www.thedigitalstory. If you click on them first, you're helping to support this podcast. And speaking of supporting this show, and big thanks to our Patreon Inner Circle members.
And finally, be sure to visit our friends at Red River Paper for all of your inkjet supply needs.
Texas-based Red River Paper recently announced a new fine art paper, Palo Duro Etching. The new paper is a 100 percent cotton rag paper and is free of optical brightener additives. The paper is designed to offer warm white tones, deep blacks and a subtle texture to accurately recreate traditional darkroom fine art prints.
See you next week!
More Ways to Participate
Want to share photos and talk with other members in our virtual camera club? Check out our Flickr Public Group. And from those images, I choose the TDS Member Photo of the Day.
Podcast Sponsors
Videoblocks - Go to videoblocks.com/digitalstory to get all the stock video, audio, and images that you can imagine for just $149. Save on millions of studio-quality clips, tracks, and graphics.
Red River Paper - Keep up with the world of inkjet printing, and win free paper, by liking Red River Paper on Facebook.
The Nimbleosity Report
Do you want to keep up with the best content from The Digital Story and The Nimble Photographer? Sign up for The Nimbleosity Report, and receive highlights twice-a-month in a single page newsletter. Be a part of our community!
Want to Comment on this Post?
You can share your thoughts at the TDS Facebook page, where I'll post this story for discussion.
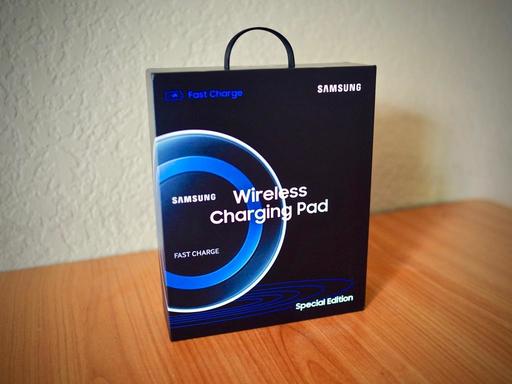
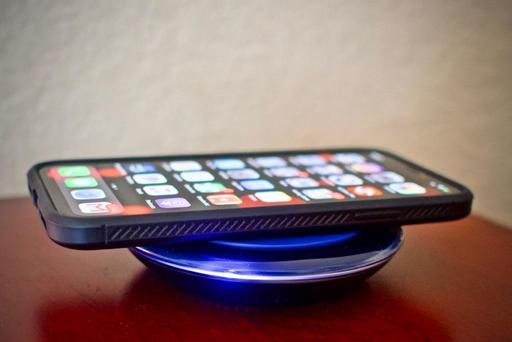 iPhone X with case charging on the Samsung Wireless Charging Pad. Photo by Derrick Story.