The DJI OSMO Pocket ($350) debuted before CES with much fanfare and discussion. The petite, 3-axis gimble, 4K movie camera fits nicely in a top shirt pocket, but packs an incredible amount of imaging power in its svelt frame. It's not perfect, but by any reasonable measure, it is a breakthrough device.

Highlight features include:
- Gimbal Camera with 1/2.3" CMOS Sensor
- Compact 4.1 oz, 4.8" High Design
- Up to 4K Video at 60 fps, up to 100 Mb/s
- Connects to Smartphone via Mimo App
- 12MP JPEG or DNG Raw Still Photos
- Includes Lightning & USB Type-C Adapters
- Optional Wi-Fi & Bluetooth Monitoring
- POV, ActiveTrack & FaceTrack Modes
- Standard Time-Lapse & Motionlapse
- NightShot & Panoramic Modes
The functions that I was most interested in were video recording (1080p and 4K), SloMo capture, timelapse, panorama, and audio recording. Because I've been using a DJI Spark for over a year, I felt like I already knew the OSMO when I first fired it up. They are indeed cousins from the same family.
Initial Setup
And like a DJI drone, the initial introduction might test your patience. Instead of powering up and recording a video, you must first endure a mildly tedious setup process where you register the device with your DJI account. All I have to say is you will get through it, and don't let it deter you from your goal of embracing the OSMO. Do plan on 10-15 minutes before you can actually get to work.
Using as a Standalone Device
There are two basic ways to use the OSMO Pocket: as a standalone device and connected to your smartphone. I began my journey using it as a standalone, walking through the press events at CES. It must have been quite a sight seeing a tall man strolling through the crowds with this petite device in his hand. As you will witness from the movie, no one seemed to care. The OSMO Pocket is too cute to be intimating.
With a little practice, I learned to shorten my stride providing even smoother capture. The gimble is terrific, in spite of the cameraman, and viewing the footage creates a real sense of presence. At this point, I was already hooked.
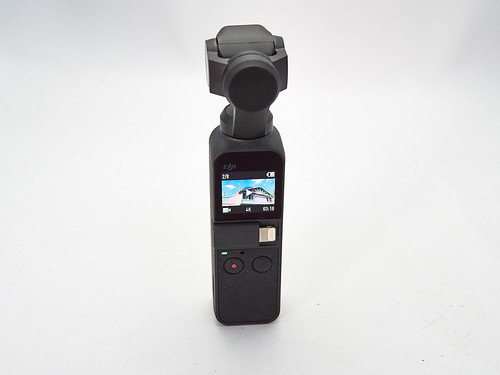
In standalone mode, you have a 1-inch screen to serve as the monitor. It's helpful for initial setup. Swipe right-to-left to configure the video settings, swipe up to initiate any of the special features such as ActiveTrack, and swipe down for the settings menu. When you've recorded the footage, swipe left-to-right for playback. It's that simple to operate.
But the real key to using the OSMO in motion is to set it up, then use your eyes to make the movie. Once I centered the screen on the scene that I wanted to record, I only checked it sporadically during capture, instead concentrating on holding the device steady as I moved through the crowd. With a little practice, this technique can produce very intimate moments. It's a little like becoming at one with the universe.
Working with a Connected Smartphone
When I did need to be more involved with the settings, such as working outside in contrasty light, I connected the OSMO Pocket to my iPhone X. This also requires downloading the DJI Mimo app. Again, controlling my Spark with the iPhone made the transition to the Mimo app quite comfortable. (The OSMO Pocket is both iOS and Android compatible, each with their own interchangeable connectors.)

Adding the iPhone X to the mix not only gave me a bigger screen to work with, but better controls for exposure and gimble operation. Plus reviewing the video is quite nice, and you can even save and publish at this point if you wish.
The Mimo app can also stitch your panoramas and produce the timelapse videos you've captured. If you want to build your own panos, such as with Lightroom, the individual files are the microSD card in the OSMO.
Night Photography and Slow Motion Capture
Since I was in Las Vegas, I decided to really push the envelope and record night video in slow motion mode. The OSMO Pocket has a tiny 1/2.3" CMOS Sensor, so this seemed like a challenging test.
I'll let you judge for yourself by viewing the following movie. Clearly, the footage isn't theater quality, but it's impressive if you stop and think that all I've done is pull this little device out of my pocket, hold it in my hand, and record.
Vlogging and Audio
Some of the harshest criticism of the OSMO Pocket comes from the very audience it was designed for: video bloggers. Triple-tap the right button, and the camera lens whips around pointing directly at the operator. Press the record button, and start talking.
The mic port is on the back side of the OSMO, so it's clearly there for field reports. I recorded my spot with car traffic in the background so you could get a feel for the dialog in normal outdoor settings. (I haven't enhanced any of the clips in any way.)
And just to be brutal, I set the OSMO Pocket to 4K capture. I thought it handled both the audio and video quite well, and is definitely usable for individual field reports. See what you think.
Bottom Line
The DJI OSMO Pocket is a perfect device for those who want to capture the world while moving through it. You can easily add your own commentary, suplement the reporting with 12MP still images, panoramas, and timelapse clips.
I don't see it as a device for two-person interviews and more sophisticated reporting. The OSMO Pocket is for individuals, sharing their thoughts and their view of the universe. And as such, I consider it a breakthrough device, especially for $350.

The DJI OSMO Pocket has a high Nimbleosity Rating. What does that mean? You can learn about Nimbleosity and more by visiting TheNimblePhotographer.com.
Want to Comment on this Post?
You can share your thoughts at the TDS Facebook page, where I'll post this story for discussion.


