Recently in Mobile

  Page 14 of 15 in Mobile  

If you're looking for a compact camera that works seamlessly with your iPad (or iPhone) for on-the-fly processing and sharing of images, you may want to investigate the just-released Canon PowerShot Nwith built-in WiFi. When paired with Canon's Camera Window app for iOS, you have an ultra compact "capture - edit - publish" duo.

Canon PowerShot N Camera Apple iPad mini 
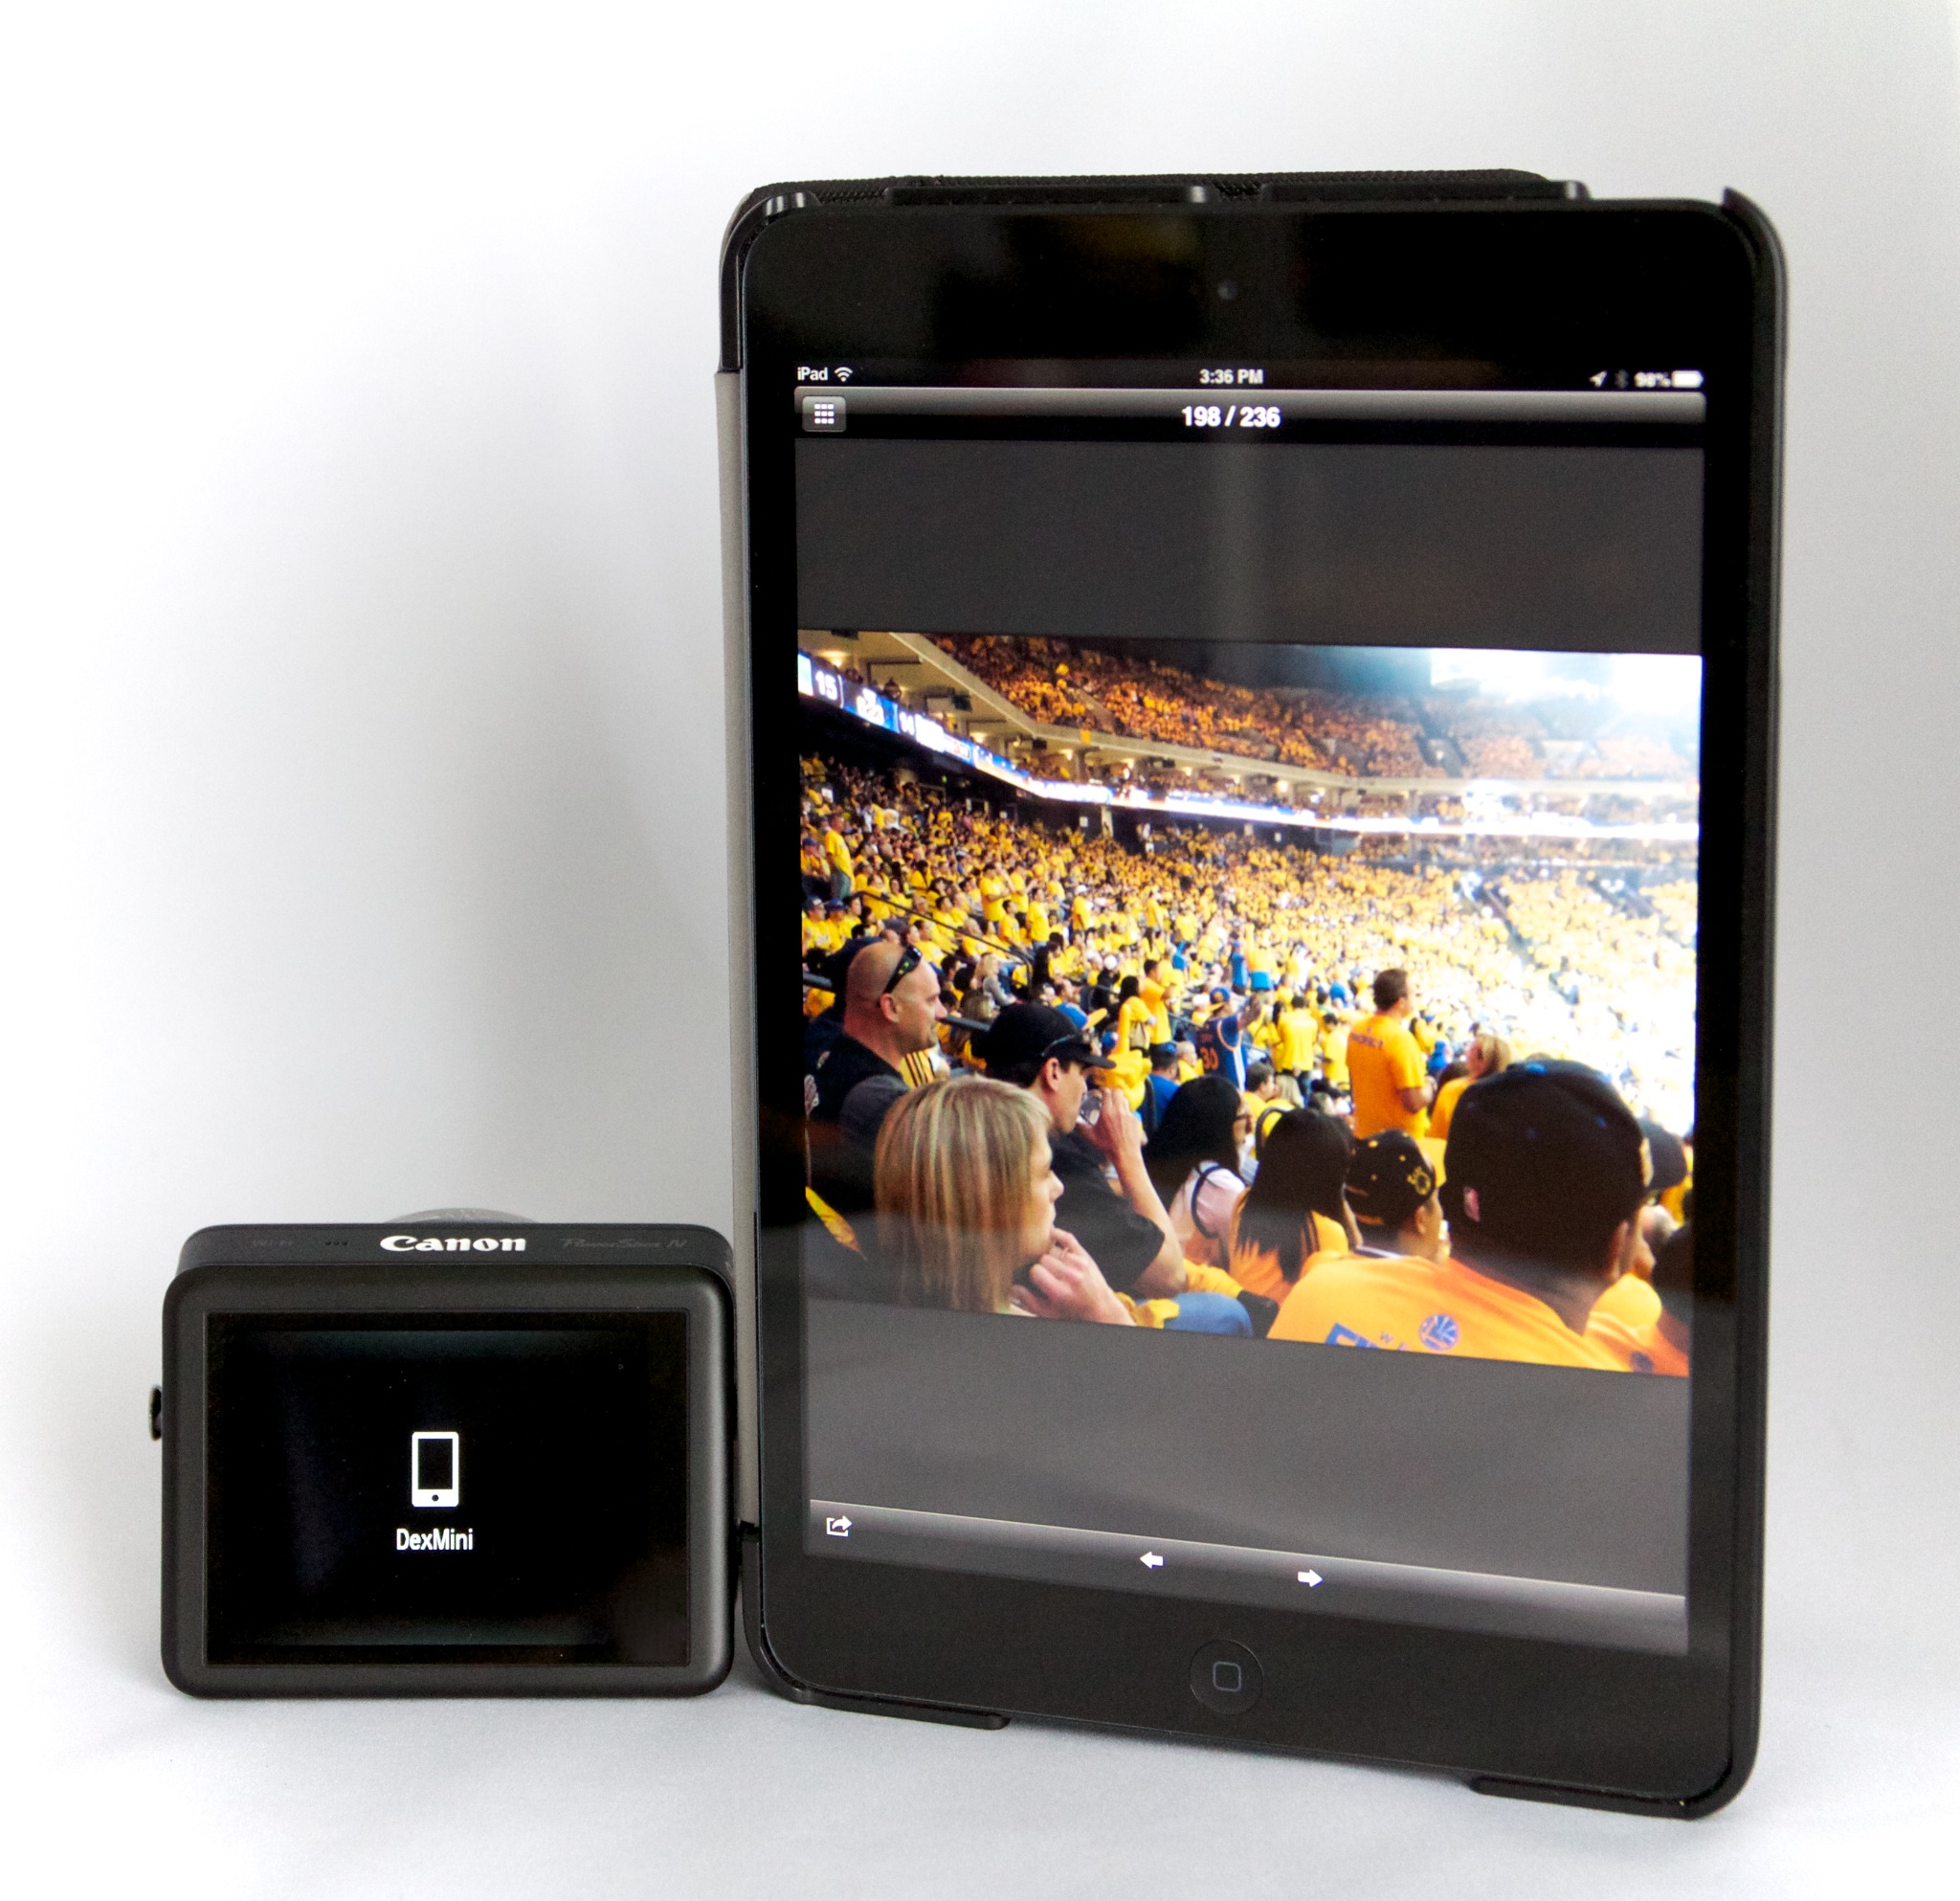
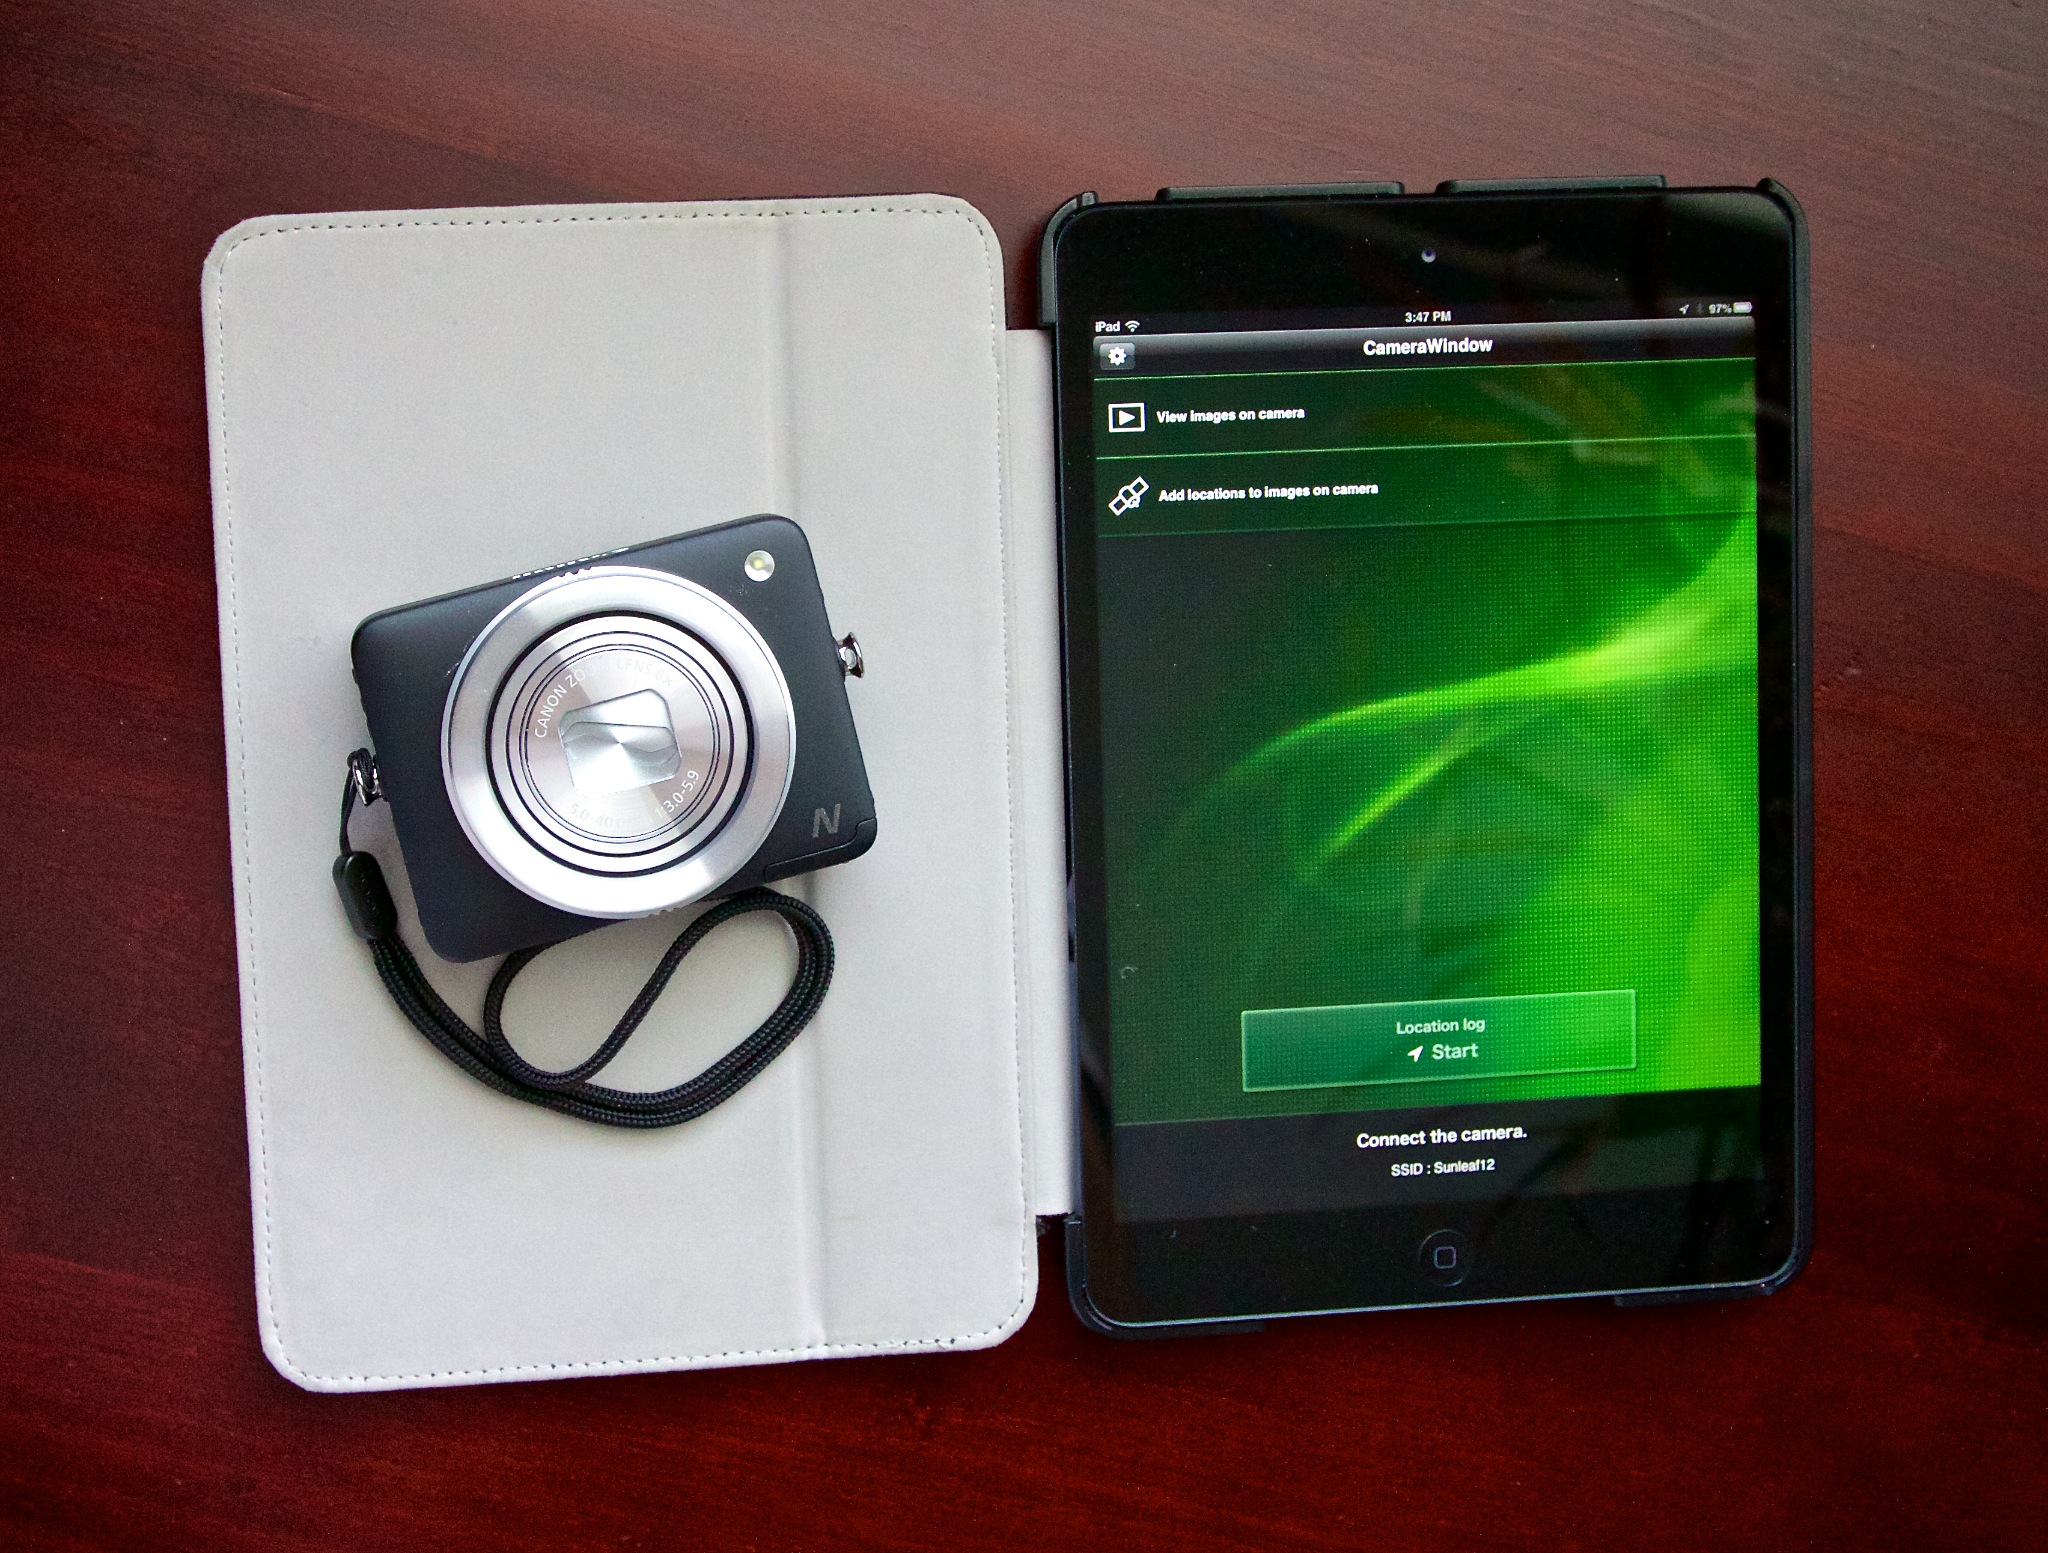
PowerShot N with an iPad mini.

Why not just use the camera on your iPad or iPhone instead? Of course you can (we all do). But the PowerShot N gives you these additional features.

  • Sharp 28mm - 224mm optical zoom (8X) with additional 4X digital zoom available.
  • High quality 12 MP sensor that is remarkably noise-free at higher ISOs.
  • True Program mode with exposure compensation and metering patterns.
  • Plenty of creative tools to create interesting images.

Device Options

Connecting to the iPad

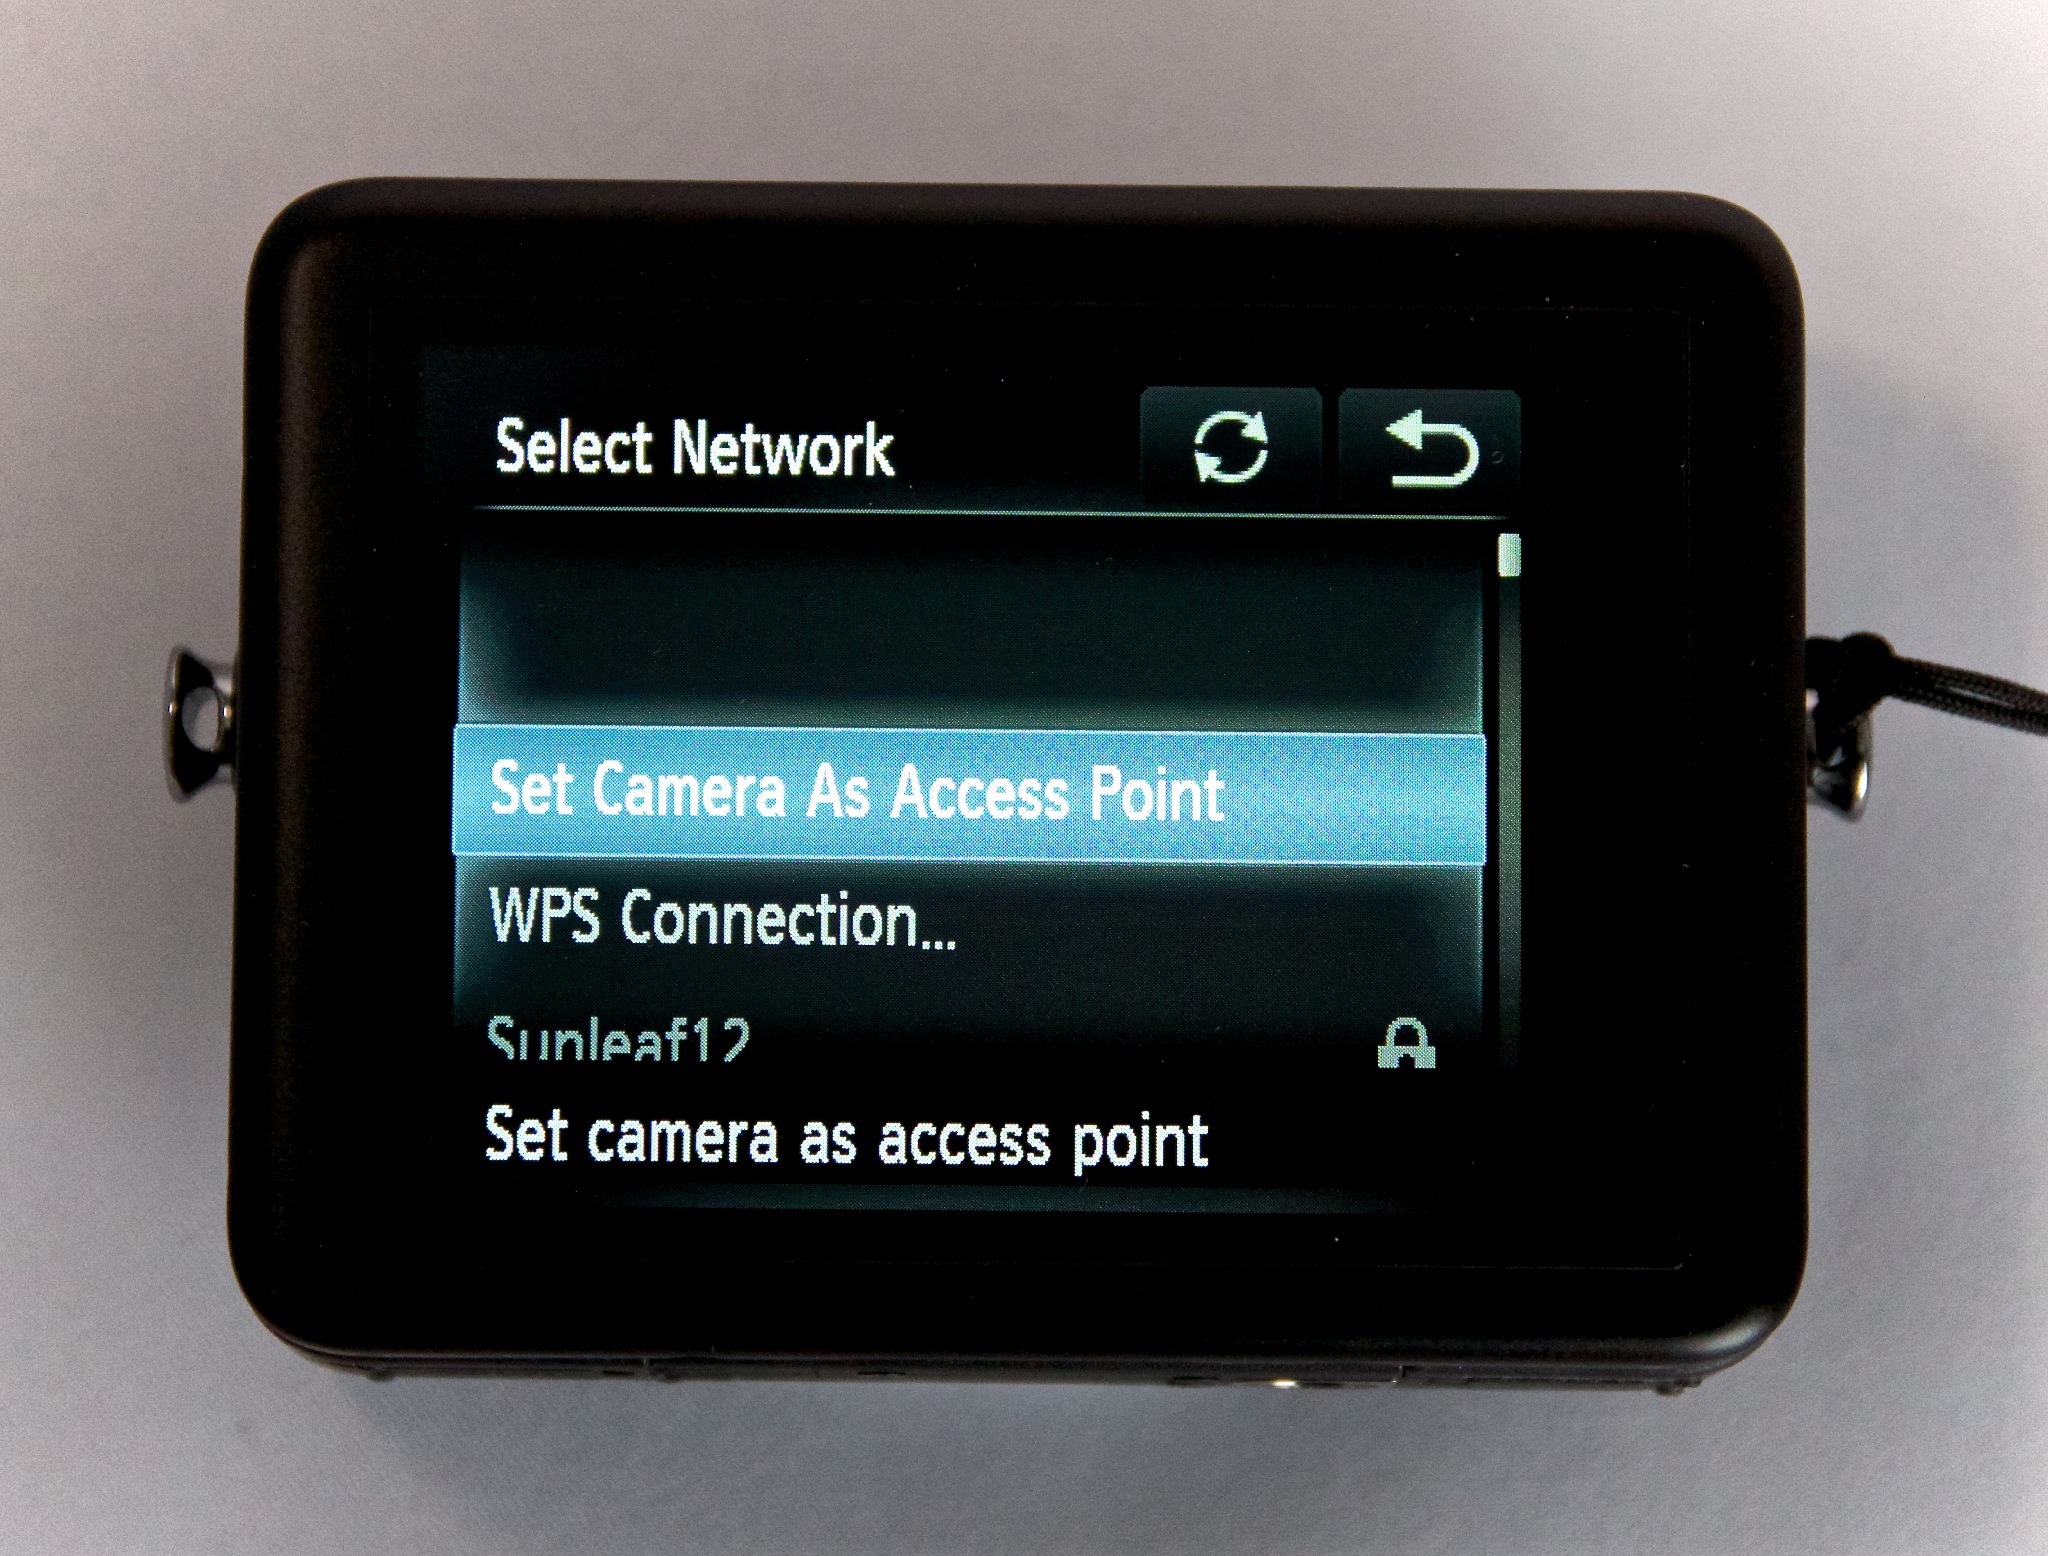
You can communicate with your iOS device over an existing network or have the camera establish its own access point. You can also set up a preferred device, such as an iPad, that connects with a single push of a button on the right side of the camera.

But you can add additional devices too, such as an iPhone and computer, that can be selected using the WiFi menu. Once you become familiar with navigating these menus, you can switch from one device to another in just a few seconds.

Creating an Access Point

Communication between the iPad and PowerShot N was flawless while at home or at my studio when I had control over the network. But what about in public? I packed my tandem and traveled to Oracle Arena in Oakland, CA to watch the Golden State Warriors battle the San Antonio Spurs with 19,000 of my closest friends. The networks are often quite busy at Oracle. So how would the PowerShot N fare there?

Right away it decided to create its own access network. It presented a network name and password on its LCD that I was to enter in the Settings app on my iPad. I did. And it worked.

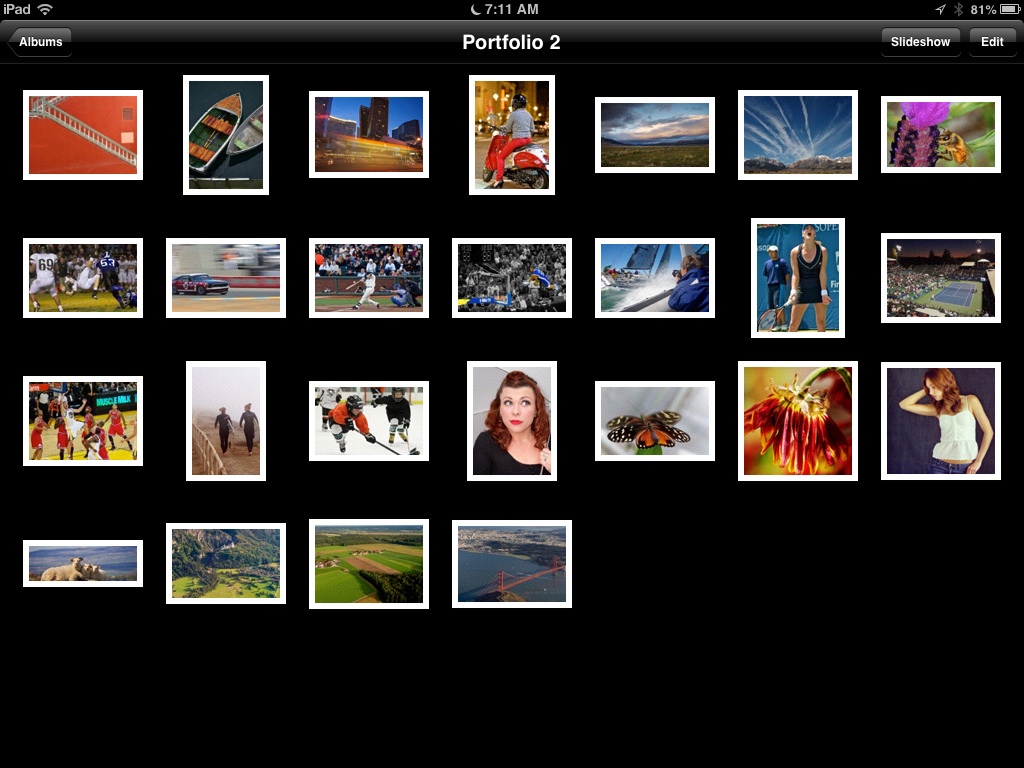
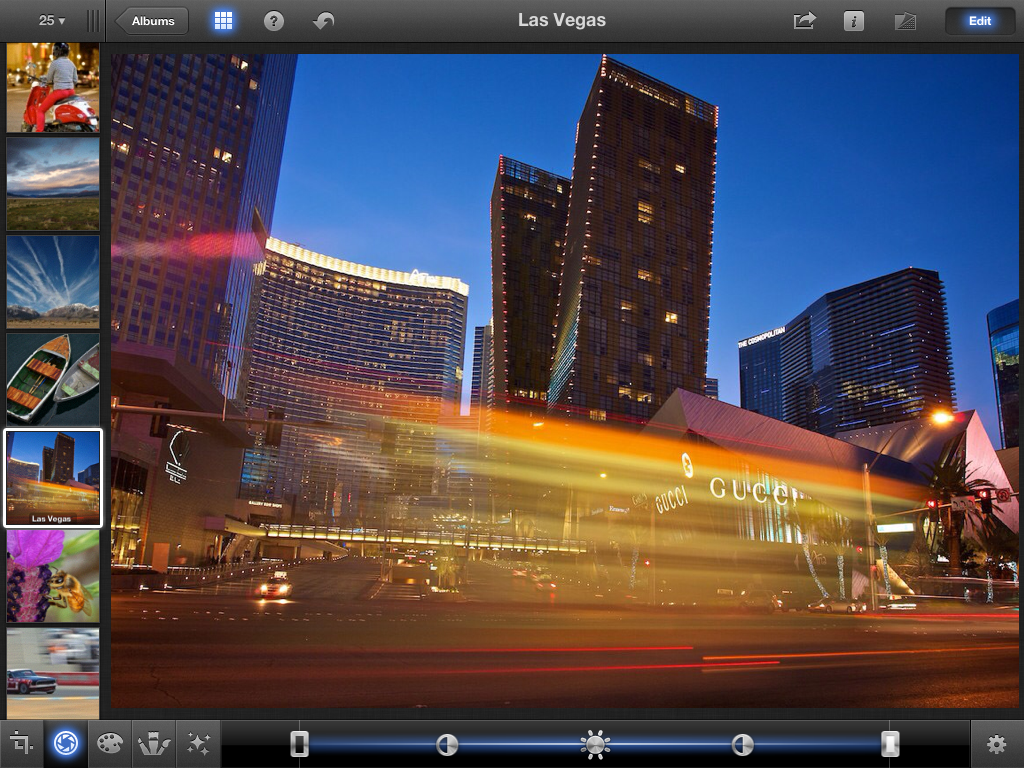
While at Oracle, I published four images that I had just captured to Instagram, Twitter, Facebook, and Flickr -- all from my iPad mini after transferring from the PowerShot N. This shot of Klay Thompson, for example, required all of 224 mm optical zoom on the Canon (ISO 1600). This is the actual shot I published to Flickr from Oracle Arena from the iPad mini.

Klay Thompson

Ultimate iPad Companion?

So is the $299 Canon PowerShot Nthe ultimate iPad companion? Well, in terms of communication and transferring photos, I would say that it's top drawer. But I'm still learning about this camera, and will file another report once I have a bit more experience with its other features. For the moment, however, I give it a very high nimbleosity rating.

PowerShot N and iPad Connected


iPad for Digital Photographers

This is the kind of stuff I write about in iPad for Digital Photographers-- now available in print, Kindle, and iBooks format.

Want to Comment on this Post?

You can share your thoughts at the TDS Facebook page, where I'll post this story for discussion.

Creating a portfolio on your iPad says that you have reached a certain point in your photography. It makes the statement, "Not only do I know how to make a photograph, I know how to present it as well."

Here are five tips from my latest book, iPad for Digital Photographers that will help you build your mobile portfolio.

iPad Portfolio

  • Don't add too many images. Limit your portfolio to 12-28 photographs.
  • When in doubt, leave it out. If you're debating whether or not to include a certain photo, you probably shouldn't.
  • When sharing your portfolio, avoid pointing out aspects of an image you don't like. Once you point out a "flaw," that's all the viewer will see.
  • Hand the iPad to the viewer and let them navigate. This allows them to enjoy your work at their own pace.
  • Listen to what viewers say. Comments about your photos are gifts. Accept them with an open mind.

Assemble your portfolio now and have it ready to go. Nothing kills the moment like fishing around for shots on a mobile device.

There's plenty more about this topic in Chapter 6 of iPad for Digital Photographers, titled, Presenting Your Mobile Portfolio.

Want to Comment on this Post?

You can share your thoughts at the TDS Facebook page, where I'll post this story for discussion.

In Camera Raw Processing Olympus OM-D

Photographers who shoot Raw often don't realize their camera might have a powerful image processing function that creates Jpeg variations of those Raw files in camera. There are many advantages to this capability.

For mobile shooters, it eliminates the need to capture in Raw + Jpeg. You can shoot in Raw, convert the images you like to Jpeg in-camera, then send those pictures to your iPad or iPhone for sharing. This approach saves space on the memory card and allows the camera to empty the buffer faster.

Creative photographers have lots to play with here too. Most cameras that support Raw processing (such as the Olympus OM-D and Fuji X20) allow you to add effects during conversion. The sample image in this article is a Raw file converted to Jpeg in an Olympus OM-D using the Key Line Art Filter. I still have the original Raw that I can process normally on my Mac at a later date.

The trick is to learn how your camera handles Raw processing. It's usually an option in the Playback menu. On the OM-D, for example, you press the OK button while viewing a photo. An option appears labeled JPEG Edit. Press OK again and the camera will convert the Raw file to Jpeg and add it to your memory card.

The secret with the OM-D is understanding that the file will be processed with the current camera settings. So if you want to apply an Art Filter, for example, then set that up before you process the Raw file. The result will be a Jpeg with the Art Filter settings applied.

On the Fujifilm X20, the options are presented to you when you choose Raw Conversion from the Playback menu. You have options for Film Simulation (my favorite!), color, exposure, noise reduction, and even push/pull processing. Check your camera's manual for its approach to Raw processing.

Once I convert the Raw file to Jpeg, I can send it directly to my iPad via the Toshiba Flash Air Card using Olympus Image Share iOS app that ignores Raw files on the card and shows me only the Jpegs.

Bottom line, if you love to shoot Raw, but sometimes need Jpegs, in-camera Raw processing might be the perfect workflow for you.


iPad for Digital Photographers

This is the kind of stuff I write about in iPad for Digital Photographers-- now available in print, Kindle, and iBooks format.

You can share your thoughts at the TDS Facebook page, where I'll post this story for discussion.

iPad for Digital Photographers Book

Photographers: Do you really want to lug your computer everywhere? My camera bag has become so much lighter since I started carrying an iPad when I travel. And yes, you can organize, edit, and share your pictures, just as easily, if not easier, than before.

In my new book, iPad for Digital Photographers ($13.45),I explain the workflows I've developed to upload, organize, edit, and share images while working virtually anywhere in the world.

Using inexpensive, but powerful software on the iPad, plus the latest in wireless technology and cloud services, you can create and publish beautiful images. And it doesn't stop there. I explain how to run your entire photography business using the iPad.

iPhoto for iOS

And yes, you can integrate all of these accomplishments with your Mac or Windows computer. Nothing will ever get lost or out of place. You'll have a workflow that streams from camera to iPad to your computer back home.

Sound too good to be true? It isn't. The tools are here now.

iPad for Digital Photographers is available as a paperback book or Kindle Edition from Amazon, or in the iBooks Bookstore for the iPad.

Get more out of your iPad than you ever imagined possible.

Want to Comment on this Post?

You can share your thoughts at the TDS Facebook page, where I'll post this story for discussion.

Which of the popular smartphones have the best camera for you? In the article, Super Shootout: Samsung Galaxy S4 vs HTC One vs Apple iPhone 5 vs Nokia Lumia 920 on DP Connect, they put these top four models through basic image testing.

Glif Tripod Adapter for iPhone 4 The iPhone 4S was a big photography story, sporting improved optics and an 8MP sensor housed in a very mobile device. Is the iPhone 5 better? How does it compare to the other top models?

Is there a clear winner? Well, not really. My take away was that if you're already shooting with any of these models, you have a pretty good mobile camera. But if you're debating among the group as part of a new purchase, you might want to look at the test results to see which phone best compliments your shooting style.


iPad for Digital Photographers

This is the kind of stuff I write about in iPad for Digital Photographers-- now available at a special pre-order price.

Want to Comment on this Post?

You can share your thoughts at the TDS Facebook page, where I'll post this story for discussion.

I like to write my podcast notes when ideas come to me, regardless of which device I'm using at the moment. That's why I use iA Writer for Mac and iOS. Thanks to iCloud synchronization, I can start my notes on an iPad 3, add to them on my MacBook Pro, then read them off my iPad mini during the show recording.

iPad mini, Insanely Great Holder iPad mini displaying show notes for the TDS podcast in my recording studio.

My biggest problem with this workflow had been finding a high-quality iPad mini stand that was light enough to set on my MacBook Pro 17" during recording, and adjustable enough to get just the right viewing angle.

Fortunately, I discovered the the FrameShift Mini stand for the iPad mini and iPhone 5. Assembled by hand, using anodized aircraft grade aluminum with abrasion-resistant rubber padding and stainless steel hardware, the FrameShift Mini can be adjusted to just about any angle, then folds up for easy transport. It's just as handy in the studio as it is on a fold-out tray table while flying.

Frame Shift Mini Stand The FrameShift Mini that I use to position my iPad mini to help me in the recording studio.

Of course, it's the iPad mini that pulls this all together. In addition to all of the other things it does so well, the mini is a terrific note-taking device, and my favorite PDF reference. I keep all of my owners' and technical manuals on the iPad. It's my own personal library availabe anywhere I happen to be.

Want to Comment on this Post?

You can share your thoughts at the TDS Facebook page, where I'll post this story for discussion.

iPhone as Your Third Camera Option

You have a DSLR around your neck, and another body in your camera bag. You should be able to cover just about anything, right?

Yes, indeed. Especially since you have a formidable third option in your pocket. An iPhone.

Artisan Cheese Festival Marketplace, iPhone, Derrick Story Wide angle shot captured with an iPhone 4S in panorama mode.

I love standing in the thick of things and pulling out my iPhone to record panoramas. Those images look much different than anything I shoot with my other cameras. I often hold the iPhone overhead and sweep across the scene to capture an entirely new perspective.

Panorama mode is built into the Camera app. Tap the Options button to reveal the Panorama control. Once enabled, you can sweep from left to right, or right to left. Just tap on the side that you want to begin recording.

If you have Photo Stream enabled, the images can go directly into your Aperture or iPhoto library. Since I'm an Aperture user, I've set up iPhoto to house my Photo Stream images. Then I use what I need and archive the rest.

When on location, you never know which perspective you're going to like the best. But you can't choose among them if you don't record 'em in the first place. So don't forget about that third option in your pocket.

Want to Comment on this Post?

You can share your thoughts at the TDS Facebook page, where I'll post this story for discussion.

Using Aperture and iPhoto Together

To learn more about using Aperture and iPhoto together, visit my Using iPhoto and Aperture Together on lynda.com. Also, take a look at our Aperture 3 Learning Center. Tons of free content about how to get the most out of Aperture.

dblcam_self-portrait

You have two cameras on your iPhone, why not put them to use? That's the feeling of Toad Murphy, the group that created Dblcam.

This free app captures two image in quick succession. The first with the back camera on the iPhone, then a second with the front. The obvious users are the growing numbers of selfy photogs on Instagram and Facebook. But the app has potential for anyone with a creative bent.

I recorded this image during a midday stroll on one of my favorite walking paths. I captured a half dozen images, liking them all, but preferred this version that I shared on Instagram.

If you're in the mood to try something different, Dblcam is definitely worth a look.

Want to Comment on this Post?

You can share your thoughts at the TDS Facebook page, where I'll post this story for discussion.

The easiest way to move a picture that you've just edited in your Aperture library to your iOS device is to drag and drop. That's right. It's that simple. And it works for iPhoto too.

AT&T Reflected in iPhone
Edited in Aperture, but want to use on my iPad. No problem! And it literally takes seconds to move.

Here's how to do it:

  • Purchase PhotoSync ($1.99) in the iTunes App Store and load on all of your iOS devices.
    • Download the free Mac version of PhotoSync from the Mac App Store and put it on your Dock.
    • Launch PhotoSync on your iOS device.
    • On your Mac, drag the thumbnail of the image you want to transfer (in either iPhoto or Aperture) on to the PhotoSync icon in the Dock.
    • Within seconds, the image will appear on your Camera Roll on your iPad or iPhone.

    Setting the Size for the File That's Transferred

    In Aperture, the Preview size of the file is what is moved from your Mac to iOS device. You can control that size by, in Aperture, going to Preferences > Previews, and setting the parameters you want. Here's what I use.

    aperture_preview_setting.jpg The size of your Preview in Aperture is the size of the file that's transferred.

    Once you have the image, or images on your iOS device, you can easily show them off, post to Instagram, or even add to your Flickr account. Actually, I prefer uploading to Flickr from my iPhone than on my computer. It's more fun, and I have all of those filters to play with.

    Aperture Tips and Techniques

    To learn more about Aperture, check out my Aperture 3.3 Essential Training (2012) on lynda.com. Also, take a look at our Aperture 3 Learning Center. Tons of free content about how to get the most out of Aperture.


    iPad for Digital Photographers

    This is the kind of stuff I write about in iPad for Digital Photographers-- now available at a special pre-order price of $13.70.


    Comments Are Off!

    Due to a wave of recent spam attacks, I've had to turn off the comments feature on The Digital Story. You can, however, add your thoughts at the TDS Facebook page, where I'll post these stories for discussion.

    Rode iXY Mic for iPhone

    You can record serious audio with your iPhone. With the new Rode iXY Stereo Recording Microphone for iPhone/iPad ($199) combined with the Rode Rec app in iTunes ($5.99), you can create audio for movie voiceovers, interviews, ambient environment, and more.

    Basic Features for the Mic

    The basic features for the mic include:

    • 30-pin Dock Connector - for iPhone 4/4S, iPad 1st/2nd/3rd gen
    • Two 1/2" cardioid condenser capsules
    • Onboard A/D conversion
    • Up to 24-bit/96kHz recording
    • Works with paid ($5.99) or free Rode app
    • Adjustable input levels
    • Foam windshield for outdoor recording and to control "pops" indoors
    • Reinforced protective zippered case

    Sample Recording

    Here's a sample recording with the RØDE iXY mounted to my iPhone 4S. The recording was captured with me holding the iPhone in my living room. I did not use the included windshield or a pop-screen on the mic. The file is unedited, but compressed to MP3.

    You can also download the audio test here (42 seconds).

    RØDE Rec App

    The $5.99 RØDE Rec app for the iPhone (there is a free version too) is a complete recording, editing, and sharing studio for your iOS device. Highlights include:

    Rode Rec app

    • High resolution 16-bit, 48kHz stereo/mono recording (up to 24-bit/96kHz when paired with the RØDE iXY microphone)
    • EQ and dynamics: Compression, high/low-pass filter, and frequency cut/boost
    • Live input monitoring
    • Preset recording profiles for a range of common situations (lecture, concert, interview and more)
    • Complete control of the iXY microphone, including high pass filter and LED behavior
    • Real-time waveform and one-touch markers
    • Landscape mode provides greater visibility when editing
    • Non linear cut/copy/paste/crop
    • Output in multiple formats including WAV, AIFF, AAC, Apple Lossless, FLAC and more

    Software and Hardware Working Together

    RØDE has put together a powerful tandem of hardware and software. In my sample recording with an iPhone 4S, I chose my living room at home and recorded without the foam windshield that comes with the mic.

    I could monitor my input with headphones while I spoke. I used the "Hiss Reducer" preset that's located in the Input menu for the app. Once I finish a capture, it's added to the Recordings menu where all of my "raw" files are listed. I say it that way, because I'm capturing at 44100 Hz (can go to up to 24-bit/96k Hz) and in mono (stereo is available too). But when I share the file, I have the option of sending it out as an AIFF, WAVE, CAF, AAC, Apple Lossless, FLAC, or Ogg Vorbis. The master audio remains in my Recordings menu until I remove it.

    Editing in the Rode Rec app Editing in the RØDE Rec app.

    I can edit what I've recorded on the iPhone or iPad before I share it. This is a terrific timesaver when working on the go. Rotate the phone sideways to reveal the editor. Tap and drag downward to select an area. Tap on the blue dot to reveal the contextual menu with options for your selection. It's easy and works great.

    Bottom Line

    The RØDE iXY Stereo Recording Microphone for iPhone/iPad is a quality stereo microphone that converts your iPhone into a high resolution audio recorder. As nice as the mic itself is, what pulls this package together is the RØDE Rec app that maximizes the hardware's capabilities.

    For best results, I recommend using the included foam windshield and mounting your iPhone on stand. The first version of the iXY Mic is available with a 30-pin Dock Connector. But it appears that Rode is working on a Lightning connector version too.

    I give the RØDE iXY Stereo Mic a very high Nimbleosity rating. It allows me to use my iPhone for recording on the go instead of having to carry a separate device. I'm sure you'll hear a podcast recorded with it before long.


    The Digital Story on Facebook -- discussion, outstanding images from the TDS community, and inside information. Join our celebration of great photography!