Recently in Mobile

  Page 4 of 15 in Mobile  

You can download RAW Power for iOS for free and transform your iPhone into a powerful mobile post production workstation. The app works on all devices running iOS 11, except: iPhone 5s, iPhone 6 and 6 Plus, iPad mini 2 and 3, iPad Air 1, and iPod Touch. I tested it on an iPhone 6S, and it worked great.

IMG_5178.jpg

The big selling point with this particular processor is that the app was developed by a team led by Nik Bhatt, a former Senior Director of Engineering at Apple and the former Chief Technical Officer of the Apple Photo Apps group. Hence, this app is able to efficiently tap Apple's RAW engine decoder so you can get the most out of your captures. Think mobile Aperture when you think about RAW Power.

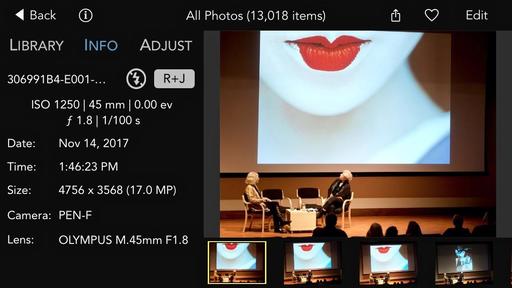
In use, the experience is terrific. It interacts seamlessly with iCloud and the Photos library system. Edit in one place and the results are available everywhere. When I opened edited images on my Mac, they looked great and even had the editing badge applied - very, very smooth workflow.

All the tools are available for free except for White Balance, Curves, and Depth Effect (for dual-camera iPhones). You can unlock those for $10.

The one thing to note is that you'll still need an app to capture RAW files with the iPhone. There are a number available. I've been using ACDSee Pro and Lightroom Mobile. I also transfer .ORFs from my Olympus cameras to my iOS devices in the field, then edit those with RAW Power. Either way, once you have the RAWs on your phone, RAW Power does a great job of decoding, adjusting, and helping you organize them. Well done!


Nimble Photographer Logo

RAW Power has a high Nimbleosity Rating. What does that mean? You can learn about Nimbleosity and more by visiting TheNimblePhotographer.com.

Want to Comment on this Post?

You can share your thoughts at the TDS Facebook page, where I'll post this story for discussion.

Like all good citizens in the air, I switch my iPhone to Airplane mode when it's time to takeoff, and I leave it there until landing. But that doesn't mean I'm not taking pictures.

IMG_5159.jpg "Flying Over Oakland" - Captured with iPhone 6S in Airplane mode. Photo by Derrick Story.

Much to my delight, the camera is still recording geotags, even in Airplane mode. So as I'm snapping my way across the U.S., I'll know approximately where each image was captured. How nice is that?

You can share your thoughts at the TDS Facebook page, where I'll post this story for discussion.

One of the great things about iPhone photography is that whenever I encounter an interesting scene, I have the ability to capture it. Such was the case last night at a family event.

Pool Scene at Night "Illuminated Pool" - Captured with an iPhone 6S and processed in Luminar. Photo by Derrick Story.

The original shot had the ballroom entrance illuminated with tungsten lighting with the pool in the foreground. My original instinct was to capture the complementary colors of blue and orange. And when I reviewed the images a bit later, I thought they were OK.

But I felt like there was a better shot hidden within this scene. So I opened the photo on my MacBook and started playing with cropping and graphical effects. And there it was. The really interesting composition didn't have the ballroom at all, except as a reflection in the pool. The edited image was more abstract instead of a literal interpretation of the scene. And to be honest, it is far more interesting.

My point is that we often have better images trapped within our ho-hum captures. And thanks to our high resolution capture devices, we can extract the art from within our snapshots, and still have enough pixels for publishing, or even printing.

Take a look at your shots from the last week. Are there any hidden gems?

You can share your thoughts at the TDS Facebook page, where I'll post this story for discussion.

iPhone Only Street Shooting

Zach and I caught the E Train last night from Queens to Midtown so I could introduce him to Times Square. He's never been to Midtown before, and I thought 42nd Street would be a good place to start.

times-square-liberty.jpg The Characters of Times Square - Photo by Derrick Story.

Since my focus was on being a tour guide and not a photographer, I decided to leave my gear back in the room and just pack the iPhone. It was an interesting exercise. Normally, my street shooting is a mix of smartphone, mirrorless, and film.

What I liked was the portability. It was easy to keep track of my phone and wallet in the hustle bustle of busy Manhattan. I could shoot RAW when I wanted to, and I didn't draw any extra attention since I was just like the other 10,000 tourists hanging out that night.

What I missed were my lenses. Back in the room I had a 45mm f/2.8 Zeiss Tessar and a 17mm f/1.8 Olympus Zuiko. And there were moments when I was craving focusing with those optics. The other thing I missed was looking through a viewfinder. I don't mind capturing off an LCD screen, and sometimes I need to for a particular angle. But I love the "isolation booth" sensation of composing with a viewfinder. I can really get into the shot that way.

I was looking at the images on our subway return trip and thinking about how the night went. I had made the right call. I was focused on Zach and not my cameras. We had a great time. And some of the iPhone pictures were pretty good.

So, apparently, I did choose the right tool for the job at hand.

You can share your thoughts at the TDS Facebook page, where I'll post this story for discussion.

No one loves mobile photography more than me. But my toolset goes beyond the iPhone, even though it remains an integral part of the workflow.

olympus-PEN-F-location.jpg The Olympus PEN-F on location. Photo by Derrick Story

What I also like is the act of rotating knurled dials, pressing physical buttons, and looking through a viewfinder. I like the way a well-designed camera with a half case and wrist strap feels in my hands. It makes me want to use it.

And thanks to WiFi, I can still quickly send the picture to my iPhone and publish on Instagram in just a minute or two. The fact that maybe I can enjoy a cup of coffee during the process just makes it all the better.

I just returned from 3 days of driving around Silicon Valley covering events and taking pictures. I used my iPhone all of the time. At moments, it was my camera, and other times it was my publishing conduit.

But when I could, I also reached for the PEN-F. And in the end, I captured more images with it than my smartphone. And I love those shots.

My point is, we don't have to limit ourselves to smartphones, no matter how wonderful they are. There are moments when I want photography to be more than simply tapping a screen. And that's what keeps me enthused about this craft.

You can share your thoughts at the TDS Facebook page, where I'll post this story for discussion.

As we rev up for the next iPhone super cycle (10 year anniversary and all), it's sounding like the top of the line handset will tip the scales at $1,000. That's more than what I would spend on a new Pentax KP or OM-D E-M5 Mark II (and the OM-D comes with a free $400 lens). Both are serious tools that I use in my photography business.

iPhone-Black.jpg

Based on Apple's track record, we're also pretty sure that we're going to have to purchase the top of the line model to get the best camera. In a very real sense, many mobile photographers have to look at this investment as photography gear. And as such, it should be pitted against the other cameras and lenses we're considering.

The waters get muddied a bit by the fact that we typically buy our smartphones on payment plans rather than splashing a big charge on to our credit cards. It makes the purchase easy, and therefore the investment might not be accounted for properly.

I'm thinking about all of this because I have an iPhone 6S that will be paid off in September. It's a great handset with a very capable camera. Typically I upgrade my phone every two years.

But I think I need to look at this in a more businesslike matter. If I spend a $1,000 on a new iPhone, that should be accounted for that in my budget (spanning two years). What else do I need? How will the iPhone purchase impact those other items?

The days of getting a semi-free phone with our carrier plan are over. The next iPhone will be a substantial investment, and it should be viewed as such for photographers on a budget.

You can share your thoughts at the TDS Facebook page, where I'll post this story for discussion.

There are many reasons why I carry the DxO ONE camera. It's super compact, works with my iPhone and Apple Watch, has an amazing editing extension for Photos for macOS, and provides tons of control and flexibility.

4th-july-plaza.jpg "4th of July Concert in the Square, Healdsburg, CA" - Captured with the DxO ONE by Derrick Story.

But at the end of the day, what really keeps me reaching for the camera is its outstanding image quality. It does capture in RAW, but most of the shots that I publish with it are Jpegs that have automatically been added to my Photos for macOS library, then fine tuned with the DxO Optics Pro for the DxO ONE editing extension.

For this outing on the 4th of July, I didn't want to carry a camera bag, but I wanted a bit more visual horsepower than just the iPhone. This is when the DxO ONE really shines. It fits in my pocket allowing me to travel light, but it provides amazing image capability when I want it.

I know that compact camera popularity has declined during the rise of smartphones. But the DxO ONE is different. It works with the iPhone and gives you the pixel grabbing power of a 1" sensor, but without the bulk. It's a beautiful combination.

If you want more than your iPhone, but don't want to carry a dedicated camera, reach for the DxO ONE. After all this time, it continues to amaze me.

Photos for macOS as Your Digital Darkroom

You can learn more about using DxO Optics Pro as an editing extension in my lynda.com training, Photos for macOS: Advanced Editing Extensions.

And if you'd prefer to cozy up with a book, check out The Apple Photos Book for Photographers that features chapters on basic editing, advanced post processing, and editing extensions.

You can share your thoughts at the TDS Facebook page, where I'll post this story for discussion.

Back in mid-June, Instagram introduced a new archiving feature that allows users to move images off their profile page into a separate area that only they can see.

IMG_4181.jpg

If you haven't looked at it yet, it's worth knowing. It allows photographers to clean up their profile page, while still keeping those "slice of life" images that are meaningful to us personally, but not so intriguing to others.

The feature is easy to use. Just tap on the 3 dot menu, then tap on Archive that appears at the top of the popup menu. The image is moved into a separate area that is accessible via the top menu bar.

You can move pictures back to your profile page via a similar process, this time choosing Show on Profile that appears in the popup menu.

What a great way to do a little Instagram housekeeping!

You can share your thoughts at the TDS Facebook page, where I'll post this story for discussion.

Recently I wrote about ACDSee Pro for iOS and how easy it is to shoot in RAW with an iPhone.

clouds-over-aurora-1024.jpg "Clouds Over Aurora" captured with an iPhone 6S and ACDSee Pro. Photo by Derrick Story.

One of the subjects I was looking forward to capturing in RAW was the landscape from above while flying. I wasn't disappointed.

Using ACDSee Pro, my images were stored as both Jpegs and DNGs. I saved the RAW files to my Camera Roll, which added them to iCloud as well. Once I reached my hotel room, I opened the images in Photos for macOS and quickly processed them using Luminar Neptune and the native tools in Photos.

And this is just quick and dirty stuff. Later on, if I want to apply noise reduction or other advanced adjustments, those RAWs will hold together nicely while doing so.

Having those DNGs, instead of Jpegs, for challenging subjects like this made my iPhone all the more valuable as a travel camera. I really like this workflow.

Photos for macOS as Your Digital Darkroom

You can learn more about using Luminar as an editing extension in my lynda.com training, Photos for macOS: Advanced Editing Extensions.

And if you'd prefer to cozy up with a book, check out The Apple Photos Book for Photographers that features chapters on basic editing, advanced post processing, and editing extensions.

You can share your thoughts at the TDS Facebook page, where I'll post this story for discussion.

Photography and the Apple Watch

You're not going to show off your portfolio on an Apple Watch, but there are a few photographer tricks that come in handy. Here are my favorites.

apple-watch-1024.jpg

The Camera App Companion

This app is included with the watch and adds functionality to your iPhone camera. You can find it by looking for the gray icon that shows a shutter release. And that's its primary function: allowing you to remote release the camera on your iPhone.

But if you explore it a bit more, the Camera App Companion has other tricks up its sleeve. For example, once it displays what the lens is viewing on the watch, you can change the focus point by tapping the area you want focused on the watch face image.

If you tap and hold, then a menu appears that allows you to change to the FaceTime camera, adjust the flash setting, control HDR, and even turn on and off Live View.

For single shot images, tap the shutter button on the watch face. For burst images, tap the 3s icon.

So, essentially, you have a full remote control for your iPhone camera. Combine this with a portable stand or tripod mount, and you can substantially expand its capabilities.

DxO One Camera Remote

If you shoot with the DxO ONE camera, then you can also use your Apple Watch to remotely trigger that camera when it's connected to the iPhone.

The Apple Watch app comes bundled with the iOS version of DxO ONE for the iPhone. With this configuration, you now have a full 1" sensor that can be remote released for long exposure shots or for compositions that require some separation between you and the phone. It's a handy bonus always having a remote release on your wrist.

And More...

Other apps that have watch compatibility include ProCamera, ProCam 4, Camera Plus, and Hydra. If you have any of these apps, and they are not showing on your watch, simply go to the My Watch app on the iPhone, scroll down the list of iOS apps, tap on the app you want to enable, then move the slider to green for: Show App on Apple Watch.

Soon after that, the watch app will appear in the software cluster on your device. You can add it to your dock if you plan on using it often.

Once I realized the additional capability that I have with the watch interacting with my camera phone, it expanded my use of the iPhone itself. If nothing else, always having a remote release is really handy.

You can share your thoughts at the TDS Facebook page, where I'll post this story for discussion.