Recently in Mobile

  Page 6 of 15 in Mobile  

While many mobile photographers await their upgrade to iPhone 7, there's a lot you can do right now with the 6S, including a nifty RAW workflow thanks to iOS 10 and Lightroom Mobile. It's easy, and the quality is outstanding.

lightroom-iphone.jpg 
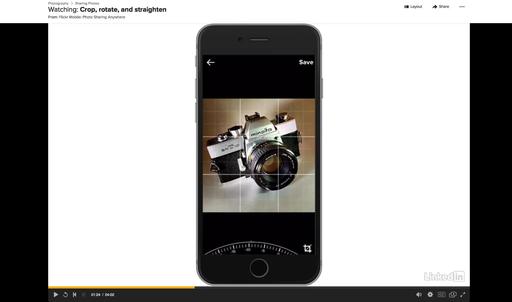
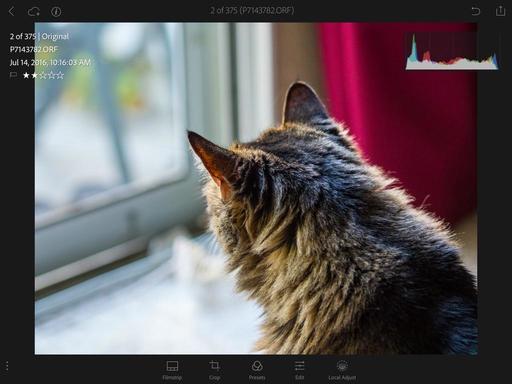
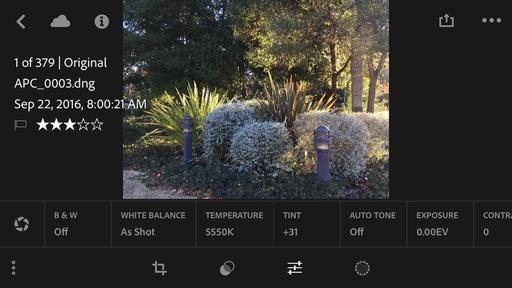
Lightroom Mobile on an iPhone 6S running iOS 10. Original image captured as a DNG file using the Lightroom camera app. No editing quite yet...

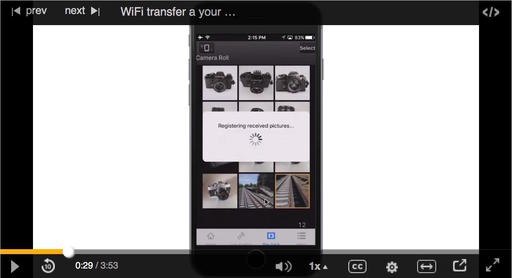
Start by making sure you have the latest versions of iOS and Lightroom Mobile loaded. Then open LR on the iPhone and tap on the camera icon in the lower right corner. At the top of the interface look for DNG. If you see Jpeg instead, tap on it and choose DNG from the popup option. Take a photograph. You've just captured a RAW file with the iPhone.

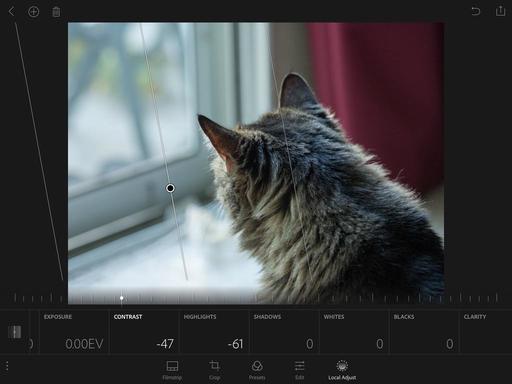
At this point, you can edit it with the excellent tools in LR Mobile. I spent a couple minutes with this file adjusting the highlights, shadows, and color temperature. I then added some clarity and a vignette. The image looked pretty good on my mobile display.

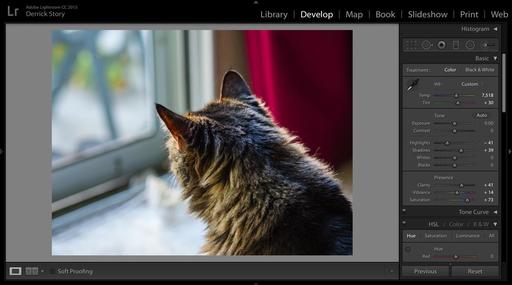
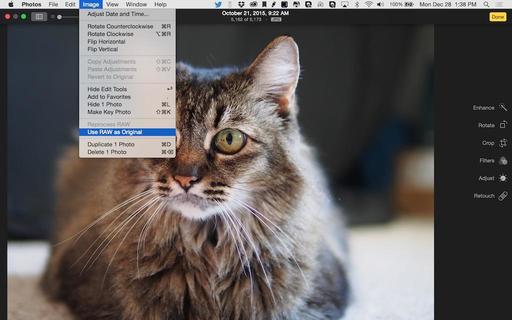
Since it automatically syncs with Lightroom on my Mac, via the Creative Cloud account, I launched Lightroom and examined the shot on the 13" MacBook. It was still a RAW file, and all of my adjustments from the iPhone appeared on the sliders in the Develop module. I made a couple more minor changes, and that was it.

lightroom-macos-web.jpg 
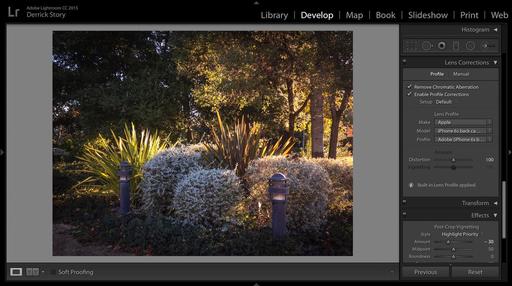
The image was automatically synced to Lightroom on my Mac, with all changes included.

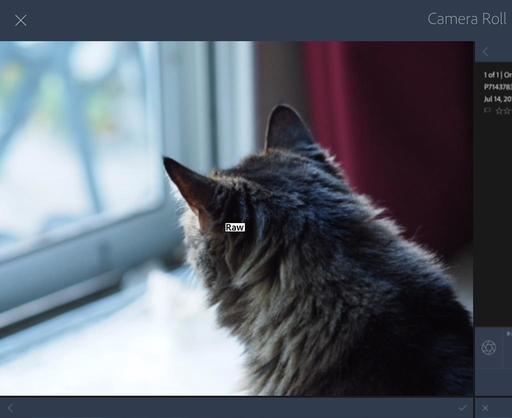
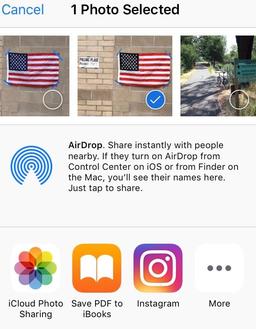
Since I like to use Photos for macOS also, I saved an edited version of the picture via Lightroom Mobile to the Camera Roll on my phone. Now I have the finished shot in the Apple ecosystem as well.

The entire process was intuitive, and the finished image, even when magnified on the MacBook's retina display, was sharp, detailed, and had excellent tonality and color.

APC_0003-web.jpg 
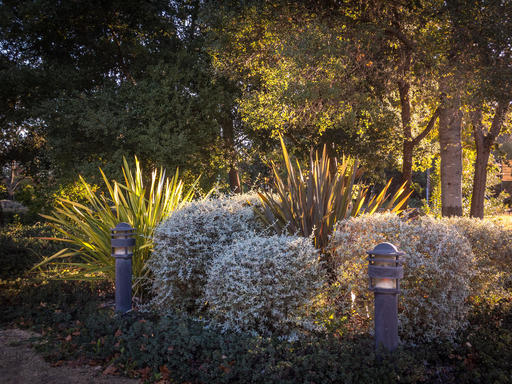
The final version of the iPhone RAW file. Photos by Derrick Story.

You might not want to capture every iPhone shot as a DNG, but it's great to have this option for situations where you want to milk every ounce of quality out of the device. I can't wait to see how this looks with an iPhone 7 Plus...

We're on Apple News!

Find us now on the Apple News App for iOS! Just open this link on your iOS device, then add The Digital Story to your Favorites.

Want to Comment on this Post?

You can share your thoughts at the TDS Facebook page, where I'll post this story for discussion.

I don't know about you, but I sometimes capture horizons with my smartphone that aren't perfectly straight. (I'm sure it has nothing to do with my one-handed, cavalier shooting lifestyle.) Then there are other times when rotating an image to the left or right actually makes a more interesting composition.

straighten-flickr.jpg

If the destination for this image is Flickr, I can crop, rotate, flip, and straighten right there in the mobile app. This comes in especially handy if you're just ready to upload, notice that the image isn't quite right, and want to fix it without having to exit out of Flickr to another app. Here's a video on how this works.

This is just one of the many conveniences built into the Flickr Mobile app that works wonderfully on Android and iOS devices.

More Flickr Tips and Techniques

If you want to master Flickr on your mobile device, check out Flickr Mobile: Photo Sharing Anywhere. Desktop users might be interested in Sharing Photos with Flickr. Of course the platforms work well together too, and I discuss how you can integrate all of your devices to create a seamless photography workflow.

Want to Comment on this Post?

You can share your thoughts at the TDS Facebook page, where I'll post this story for discussion.

Photo sharing is great, as long as you're not showing any more than you're comfortable with. A quick trip to the Privacy and Safety settings in Flickr Mobile insures that your posts are handled in a manner that you're comfortable with.

flickr-privacy.jpg

In the following video, I review settings for Default Post Privacy, Location Privacy, Photo Safety Level, and the Safe Search Filter, for both iOS and Android devices. These establish the experience that's appropriate for you, both sharing and viewing.

These adjustments only take a few minutes. And I highly recommend that you review them today on your mobile device running Flickr.

More Flickr Tips and Techniques

If you want to master Flickr on your mobile device, check out Flickr Mobile: Photo Sharing Anywhere. Desktop users might be interested in Sharing Photos with Flickr. Of course the platforms work well together too, and I discuss how you can integrate all of your devices to create a seamless photography workflow.

Want to Comment on this Post?

You can share your thoughts at the TDS Facebook page, where I'll post this story for discussion.

When I heard the news that Adobe had released Lightroom Mobile 2.4 for iOS and Android, I couldn't wait to test it on my aging iPad mini 2. I figured if it could process RAW files and add local adjustments on that device, Adobe has really created something special. And fortunately, they did not disappoint.

local-adjust-LR-mobile.jpg Applying a local adjustment in Lightroom Mobile 2.4 on my iPad mini 2

I started with a fresh memory card in my Olympus OM-D E-M5 Mark II and set the file format to RAW only. I then snapped a few pictures and put the memory card in the Apple Lightning Card Reader, then imported two files via Photos to my iPad mini 2. I opened one of the images in Lightroom Mobile 2.4.

show-raw.jpg The RAW badge confirms that I'm working on a RAW file.

The first thing I noticed when reviewing the Camera Roll in LR Mobile was the RAW badge over the image that I had just imported into the iPad. So right away I got confirmation that I was indeed working in the format that I wanted.

I then began testing highlight and shadow recovery. For me, that's the quickest way to distinguish editing a RAW from a Jpeg. And indeed the recovery was elegant in both areas, just like working with RAWs on my Mac.

adjusted-image.jpg The editing tools worked smoothly and as expected, providing the results that I wanted.

After a few color adjustments, I applied a gradient screen in the lower left corner to tone down those highlights, then finished off with a dash of clarity. Even on an iPad mini 2, the work flowed smoothly and the results were as one would expect on a computer. This was truly impressive.

I then opened Lightroom CC on my MacBook and inspected the shot I had edited on the iPad. It looked the same as on my iPad. (Yes, it automatically synced and was waiting for me.) The image was a full-sized RAW file complete with all of the adjustments I had made in Lightroom Mobile.

lightroom-cc-version.jpg All of my iPad edits display properly in Lightroom CC on my Mac.

For all of these features, you'll need a Creative Cloud account, which I've been maintaining for sometime now to stay current with Photoshop and Lightroom. And now Lightroom Mobile 2.4 elevates my nimble cloud-based workflow to new heights. And the fact that it works on a humble iPad mini 2 is even more impressive. Well done, Adobe!


Nimble Photographer Logo

Lightroom Mobile 2.4 has a very high Nimbleosity Rating. What does that mean? You can learn about Nimbleosity and more by visiting TheNimblePhotographer.com.

flickr-friends.jpg

The quality images that flow through my Friends feed is outstanding. But to be honest, I sometimes opt for scrolling through Instagram instead, primarily because it just seems easier. (I know, lazy me.)

I think the real issue was when my Flickr friends posted multiple shots in one session. One one hand, I like seeing the different aspects of a particular subject. Those images tell a more complete story.

But when viewing them on my iPhone 6s, as I do 90 percent of the time, groups of images are less immersive. That is, until Flickr updated their mobile app to be 3D Touch compatible. Now I can just press and hold on any shot in the group, and I get a full screen version, complete with title and name overlay. It's really cool. When I'm done viewing the larger size, I just lift my finger off the screen. Here's a short video about it.

camera-metadata.jpg

It's such a simple thing, but this approach keeps me in the flow of the photo stream. And that makes all the difference when casually browsing pictures.

You can favor the shot by double-tapping on it. If you want to see the metadata or comment, tap once on the image to make it full screen, then use the tool bar at the bottom. BTW: viewing camera metadata is one of the things that I really like about Flickr mobile compared to other apps. Seeing how the photographer got the shot, the settings that he or she used, is interesting to me.

Once I started taking advantage of the tools that were available to me in Flickr Mobile, I started using it more. And as a result, I am seeing more great photography than ever.

More Flickr Tips and Techniques

If you want to master Flickr on your mobile device, check out Flickr Mobile: Photo Sharing Anywhere. Desktop users might be interested in Sharing Photos with Flickr. Of course the platforms work well together too, and I discuss how you can integrate all of your devices to create a seamless photography workflow.

Want to Comment on this Post?

You can share your thoughts at the TDS Facebook page, where I'll post this story for discussion.

Flickr Mobile goes well beyond just taking pictures with your smartphone. The workflow extends to using your WiFi-connected camera too. The images that you capture with that device can be automatically backed up to your Flickr Camera Roll.

wifi-transfer.jpg

There are a couple things I like about this workflow. First, I'm not limited to using a smartphone for my photography. In the case of this demo, I have a Panasonic LUMIX GM5 connected to my iPhone running the Panasonic app. So I can use all of my Olympus and Panasonic lenses to get exactly the shot I want.

When I transfer the images wirelessly from the GM5 to the iPhone, Flickr sees them and automatically backs them up to my Flickr Camera Roll. This leads to the second thing that I like, which is automatic redundancy. At this point, I have the images on the camera's memory card, the iPhone itself, and online with Flickr. I didn't have to think about any of this. It just happens. Here's a video demonstrating the process from my Flickr Mobile: Photo Sharing Anywhere online training.

These images are also available for sharing online. When they're first uploaded to the Flickr Camera Roll, they're marked as private. So only I can see them. But for the shots that I want to share via my Photostream, I simply change the image from private to public, and it's instantly available to the world.

This is a great workflow for travel. It works with any WiFi camera and Android or iOS device, as long as there is WiFi available.

More Flickr Tips and Techniques

If you want to master Flickr on your mobile device, check out Flickr Mobile: Photo Sharing Anywhere. Desktop users might be interested in Sharing Photos with Flickr. Of course the platforms work well together too, and I discuss how you can integrate all of your devices to create a seamless photography workflow.

Want to Comment on this Post?

You can share your thoughts at the TDS Facebook page, where I'll post this story for discussion.

Instagram-iOS.jpg

At last, Instagram will now be available in the Share menu for iOS devices, allowing users to send a picture directly from Photos and other iPhone apps to Instagram. Version 8.2 adds this feature, along with bug fixes and performance improvements.

I just tested this capability on my iPhone 6S, and it worked well. I opened an image in Photos for iOS, tapped the Share icon, scrolled all the way to the right, and tapped on More to add Instagram to my list of Share applications. I then selected the Instagram icon. The Instagram option will stay in the Share menu once you've added it.

I was able to write a caption, but there were no editing options. So if you like to use Instagram's filters and adjustment tools, then you'll want to post the old fashioned way. But if you're fine with the image as is, then you can save time via the new Share capability.

The Apple Photos Book for Photographers

For photographers who are more than just casual snapshooters, or who are making the transition from Aperture or iPhoto, The Apple Photos Book for Photographers shines a light on the sophistication of this app and the ecosystem it taps into. Available as an eBook now, and coming to print later this year.

Want to Comment on this Post?

You can share your thoughts at the TDS Facebook page, where I'll post this story for discussion.

A Look at EyeEm's The Roll

IMG_1192.jpg

The quest to tame the mobile Camera Roll may have become a bit more attainable with EyeEm's new The Roll. I've tested it on my library of 5,000 images, and I'm pleased with the results.

The Roll has a few key features, including tagging your pictures automatically, then grouping them by type. This saves you time finding the image you want. For example, if I want to see pictures of my cat, I simply go to the section on Animals, and she's there along with other critters from my iPhone.

Beyond that, however, The Roll identifies what it determines to be the best of a group of images, then makes that the key thumbnail. It also assigns a score to each picture, which is interesting, but of course to be taken with a grain of salt.

The upshot is that your Camera Roll suddenly feels a lot more accessible. And it's fun to browse the groupings such as Portraits, Your Best Photos, Food, Landscape, Beauty, Cute, and plenty more.

IMG_1188.jpg

It does take some time for all of this processing magic. And you'll want a solid WiFi connection while it's working. My library took about 2 hours to tame.

Once completed, however, images can be viewed as previously described and shared using standard iOS options such as Twitter, Facebook, and Dropbox. According to EyeEm, your privacy is maintained. The app itself is free. And after a few hours of use, I can't see any downside to using The Roll, that is, unless you don't like an organized library.


Nimble Photographer Logo

This product has a high Nimbleosity Rating. What does that mean? You can learn about Nimbleosity and more by visiting TheNimblePhotographer.com.

sandisk-ixpand.png

SanDisk wants to expand the storage capability of mobile photographers and with the new SanDisk iXpand Flash Drive. This device plugs directly into the Lightning port of iPhones and iPads, providing between 16 and 128GBs of external memory - perfect for photographers who want to travel light.

The devices uses the free iXpand Drive app, which has a camera function, allowing users to shoot and save photos or videos directly to the drive instead of on their iPhone or iPad. The app also provides the option to automatically back up content from social networking sites, as well as play back music within the app.

Basic features include:

  • Free up space on your iPhone by moving photos and videos to your iXpand flash drive
  • Automatically back up photos and videos from your camera roll
  • Automatically back up your contacts
  • Watch popular video formats3 on your iPhone or iPad
  • Designed with a flexible connector to fit through most iPhone cases
  • High-speed USB 3.0 transfer to and from your computer
  • Secure file storage across your computer, iPhone and iPad
  • Videos automatically saved to the drive if captured from within the iXpand Drive app

The iXpand Flash Drive includes a one-year limited warranty in the United States. It's available in 16GB, 32GB, 64GB, and 128GB capacities, with MSRPs of $49.99, $69.99, $89.99 and $129.99, respectively. The drive is compatible with iPhone 6s, iPhone 6s Plus, iPhone 6, iPhone 6 Plus, iPhone 5s, iPhone 5c, iPhone 5, iPad Pro (12.9-inch), iPad Air 2, iPad Air, iPad mini 4, iPad mini 3, iPad mini 2, iPad mini and iPod touch (5th generation) running iOS 8.2 or later.

The Nimbleosity Report

Do you want to keep up with the best content from The Digital Story and The Nimble Photographer? Sign up for The Nimbleosity Report, and receive highlights twice-a-month in a single page newsletter. Be a part of our community!

Want to Comment on this Post?

You can share your thoughts at the TDS Facebook page, where I'll post this story for discussion.

IMG_0502.jpg

With iOS 9.2, Apple opened the door to use a Lightning SD Card Reader for uploading images directly from a memory card to an iPhone. We've had that functionality with an iPad, and now it works for iPhones too.

The process is fairly simple. Attach a Lightning to SD Card Camera Reader to your iPhone, and choose Import All or select the individual shots by tapping on them in Photos for iOS.

By doing so, Photos will put a blue checkmark in the lower right corner of the image designated for import. If you change your mind, tap the thumbnail again to remove the checkmark. (You won't see any checkmarks at all if you use the Import All command until the process has begun.)

Now tap the blue Import or Import All label in the upper right corner. The images will be copied from the memory card into your Photo Stream. If you have RAW+Jpeg pairs, only the Jpegs will be visible on your mobile device. You'll see the message, "Multiple formats imported" reminding you of how this works. But the RAWs will be accessible for editing when you use Photos for OS X on a Mac. Of course you'll need iCloud photo sync enabled for the images to automatically appear on your computer too. And when editing, be sure to choose "Use RAW as Original" from the Image menu while in Editing mode.

choose-raw.jpg

OK, now getting back to your iPhone... if you don't see your recently uploaded files in Collections in Photos for iOS, tap on the Albums tab and view the Last Import album. They should be there. The pictures should also be visible in the All Photos album.

From this point forward, you can mark images as Favorites, share them on social sites, edit them with Photos' adjustments, or work on them in other applications.

PC280517-iphone-sd-card-1024.jpg

This capability is also handy for viewing what's on a particular SD card that you find rattling around in the bottom of your backpack. Either way, with the large screens we now enjoy with the iPhone 6S and 6S Plus, adding the card reader function makes a lot of practical sense.

For more help mastering Photos for OS X, be sure to take a look at Photos for OS X Essential Training on lynda.com.

More Help and Insights on Photos for OS X

Don't forget about the Photos for OS X Special Feature Section on The Digital Story. It's a roundup of tutorials, videos, and articles focused on helping you master Apple's latest photo management software. You can also find it under Photography in the top nav bar.

Want to Comment on this Post?

You can share your thoughts at the TDS Facebook page, where I'll post this story for discussion.