
My M1 MacBook Pro, vintage 2021, had been a good soldier for me. It was my first Apple Silicon processor, which opened a whole new universe of power and battery life. There were ports everywhere, including a SD card slot. And the screen was beautiful.
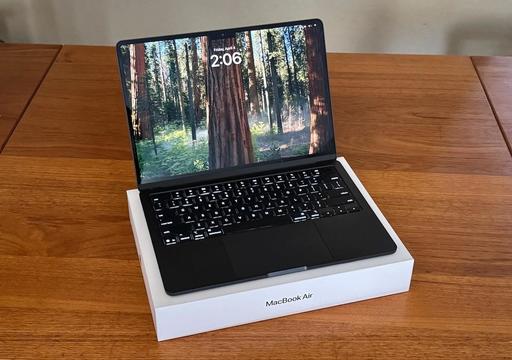
So I traded it in and put the money toward a brand new 13" M4 MacBook Air.
My photographer friends were surprised by this move. A MacBook Air did not seem like the right choice for running a business that depended on apps such as Capture One Pro, Lightroom, and Final Cut, not to mention audio software for the podcast.
"Plus, what about the ports? And there's no SD card reader!"
My response: this was not a decision that I took lightly. I researched my options and made a choice based on not only what I wanted, but what would work as well. They were interested in those reasons. And I thought you might be too.
What I Want from My Laptop
My overriding goal is to travel as light as possible. This influences my camera choices, lens options, and yes, post-processing tools. I carry around an OM System OM-3 and I love the iPad mini 7. It doesn't make sense to lug around a heavy laptop if I don't need to.
That's why my 2021 MacBook Pro just wasn't making as much sense as it once did. And with the evolution of the Air, I thought a switch might be feasible. Here are some of the factors I considered.
Nimble Size and Weight
I'm on the road quite a bit facilitating workshops and taking pictures. The MacBook Pro felt like a beast compared to the 13" M4 Air that I'm typing on right now. The difference between its 3.5 pounds vs the Air's 2.7 pounds does sound like much, but in real world use, it's substantial. My backpack, in particular, feels so much lighter.
The physical dimension difference is noticeable too. The MB Pro is 0.61 inch thick, 12.31 inches wide, and 8.71 inches deep. The Air is only 0.44 inch thick, 11.97 inches wide, and 8.46 inches deep. Again, that might not sound like a big difference, but The M4 Air fits in bags that the MacBook Pro did not. I'm no longer running into the problem of "it's just a little too big."
Processing Power
Compared to an M1 Pro processor, you wouldn't think that the 10-core M4 performance would be that discernible. And for tasks like web browsing, it isn't.
But when I set up an Export job in Capture One Pro and it's done so quickly that I was thinking that I forgot to initiate it, the speed difference is striking. I've found myself double checking folders to see if anything was happening only to discover the task was completed and all the images were there.
After a couple weeks of use, I can confidently say that the M4 MacBook Air has all the horsepower I need, and more, for my work.
You may be wondering about my configuration. I settled on the 10‑core CPU (4 performance cores and 6 efficiency cores) with the 10‑core GPU, 24GB RAM, and a 1TB SSD. The cost was $1,599. Subtract the $810 trade-in, and my outlay for the new laptop was $789.
What I'm Giving Up
One of the prime motivators for the 2021 MacBook Pro purchase was the return of the built-in SD card slot, HDMI port, and three Thunderbolt 4 ports (two on the charging side and one on the HDMI side). My prior MacBook Pro had an Intel processor with four Thunderbolt ports and nothing else.
But the world was different then. USB-C was not ubiquitous. So I was always fooling around with adapters and dongles. These days, my iPhone, iPad, and all of my cameras are USB-C. One cord works for all of them. And technologies like AirDrop and AirPlay reduce the need for cables and adapters.
The MacBook Air has two Thunderbolt 4 (USB-C) ports with support for charging, DisplayPort, Thunderbolt 4 (up to 40Gb/s), and USB 4 (up to 40Gb/s). It adds the same MagSafe charing port that my Pro had.
The extra ports don't seem as important as they used to be. I use a svelte Acer USB-C card reader for all my devices. It fits in my jeans coin pocket. I carry a USB-C cable that connects everything to everything, even my 15" 4K display that I use on occasion.
There are a couple of other specs I was curious about, such as 500 nits of brightness for the M4 Air vs. 1,000 nits for the M1. The Air refreshes at 60 Hz vs 120 Hz for the MB Pro. In real world use, I haven't thought about the differences. I could see situations where these specs could be important. Fortunately for my work, it doesn't seem to matter.
When I Do Need More Screen Real Estate
The new M4 MB Air upped its game with display support. It simultaneously supports full native resolution on the built-in display at 1 billion colors and up to two external displays with up to 6K resolution at 60Hz. It provides Thunderbolt 4 digital video output and support for native DisplayPort 1.4 output over USB-C.
With just one USB-C cable I can connect my 15" 4K display. And if I wanted, even add another. Plug and play. Honestly, it couldn't be easier.
Smile, It's Showtime
A welcome improvement with the M4 Air is the 12MP Center Stage camera with support for Desk View and 1080p HD video recording. Coupled with the three-mic array, I can Zoom from anywhere that has Internet, and look and sound great without any extra gear.
This is a noticeable upgrade from the previous 1080p FaceTime HD camera that I was using on the M1.
This is one of those areas that I so appreciate the feature improvements. It wasn't that long ago that I had to pack a webcam and external mic for teaching online away from my studio. Now, I open the M4 Air, launch Zoom, and I'm ready to go.
And Finally, Just a Few Little Nerdy Things
The M4 Air also incorporates wireless upgrades over the 2021 MBP with Wi-Fi 6E vs WiFi 6, and Bluetooth 5.3 vs 5.0. The M1 provided 11 hours of wireless Web compared to 15 hours of life for the M4 Air.
My Bottom Line
I would never have dreamed that I could switch from a MacBook Pro to an Air and be happier. But I am.
My productivity is just as good, if not better. I'm traveling lighter than ever. Plus, the Midnight MacBook Air is the most handsome laptop I've ever used.
I use my cameras and computers to make a living. But consumer electronics have improved to the point where professionals can use them, saving money and traveling lighter.
The 13" M4 MacBook Air is a perfect example of this.