When you need to convert your purchased AAC (MPEG-4) music files to MP3, you can do so in iTunes 11 following these basic steps.
Setting Up
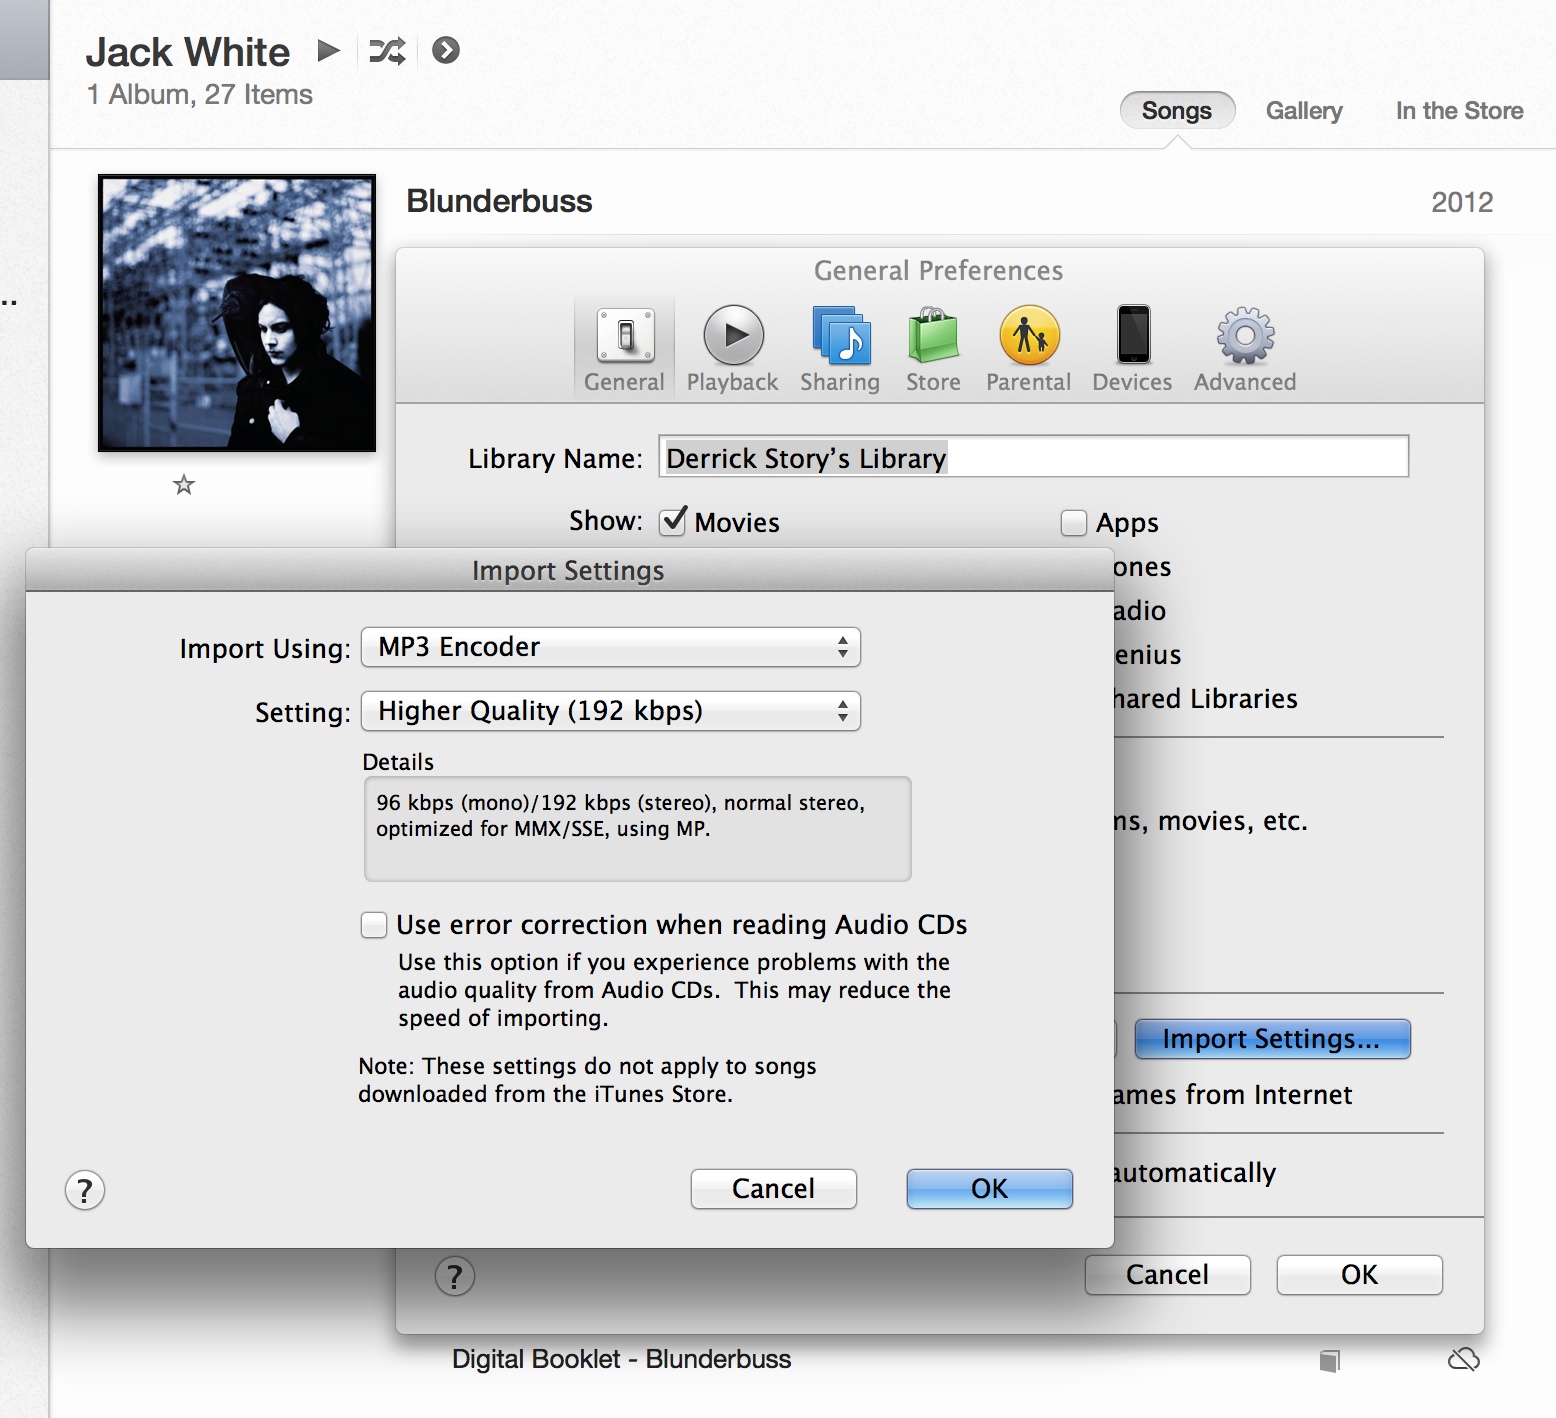
In iTunes 11, open Preferences and click on the General tab. Click on the Import Settings button. Choose MP3 Encoder from the pop up menu. For the Setting popup, I recommend the highest quality. Click OK. Then Click OK again to close Preferences.
Making the Conversion
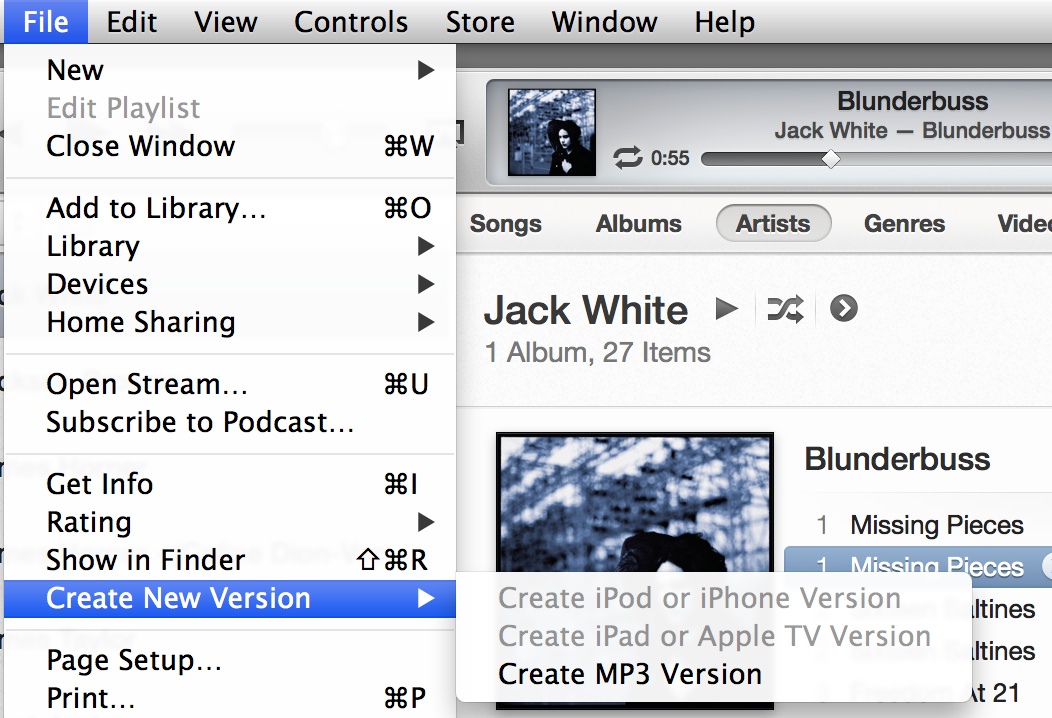
Select the songs you want to convert. Go to File > Create New Version > Create MP3 Version. iTunes will convert your AAC file to the MP3 specifications you established previously. The MP3 version is added to your library. So you will have two copies of the song.
You can also right-click or control-click on the song and choose "Create MP3 Version" from the popup menu.
Copying and Transferring
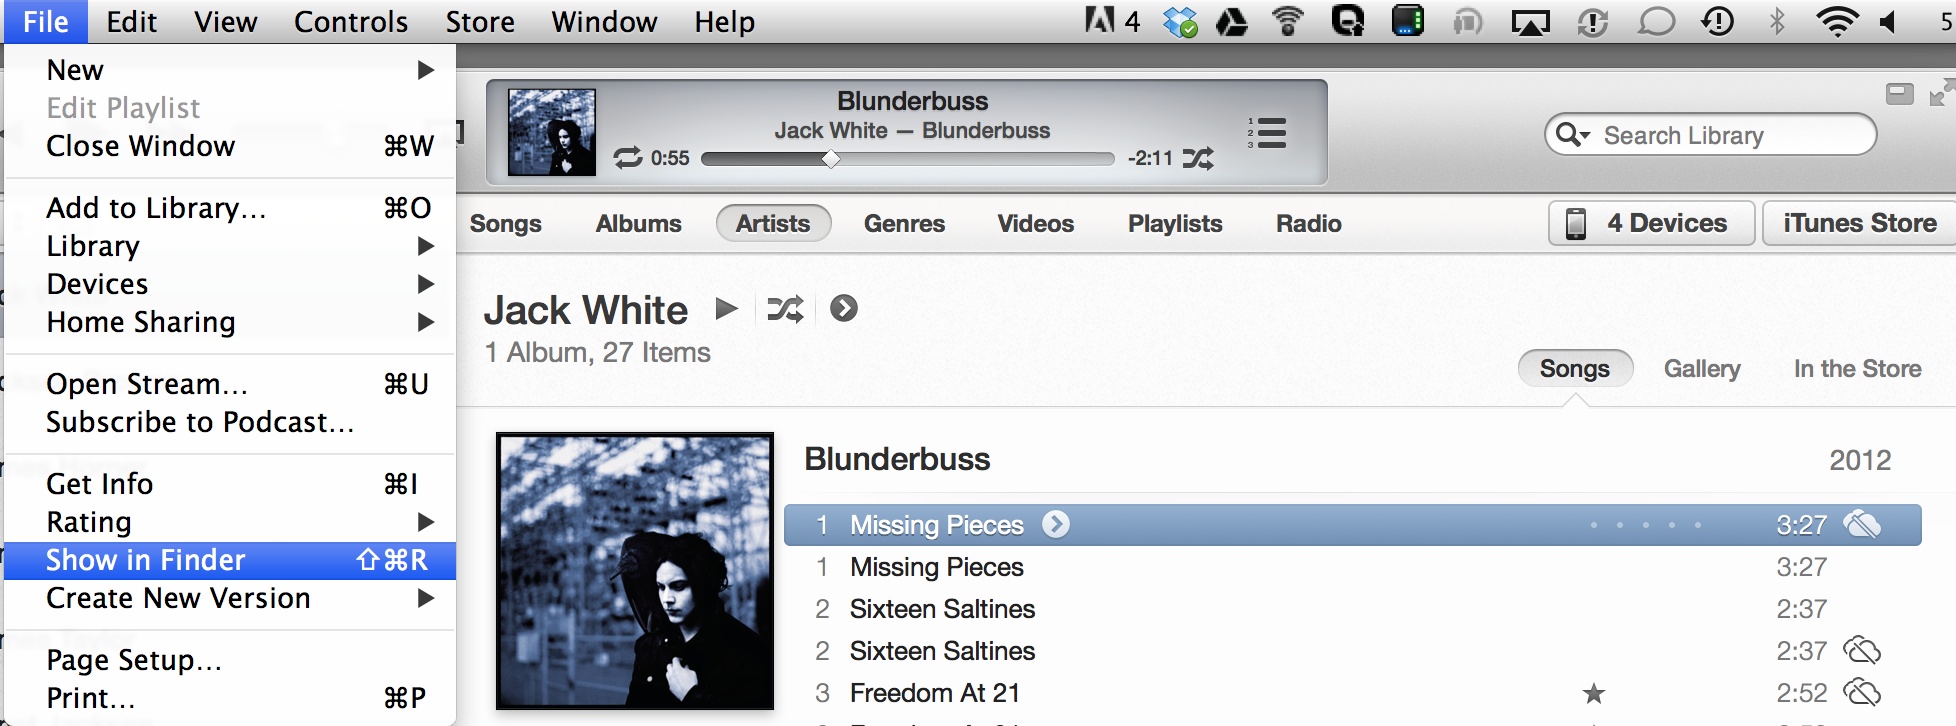
Once you've created the transcoded versions of your songs, click on one in the iTunes library, then go to File > Show in Finder. iTunes will send you to the location of your files.
From there you can copy the songs to a flash drive, SD card, or other media for playback on an MP3-only device. Once you've copied the files, you'll probably want to delete them from your iTunes library to save space.
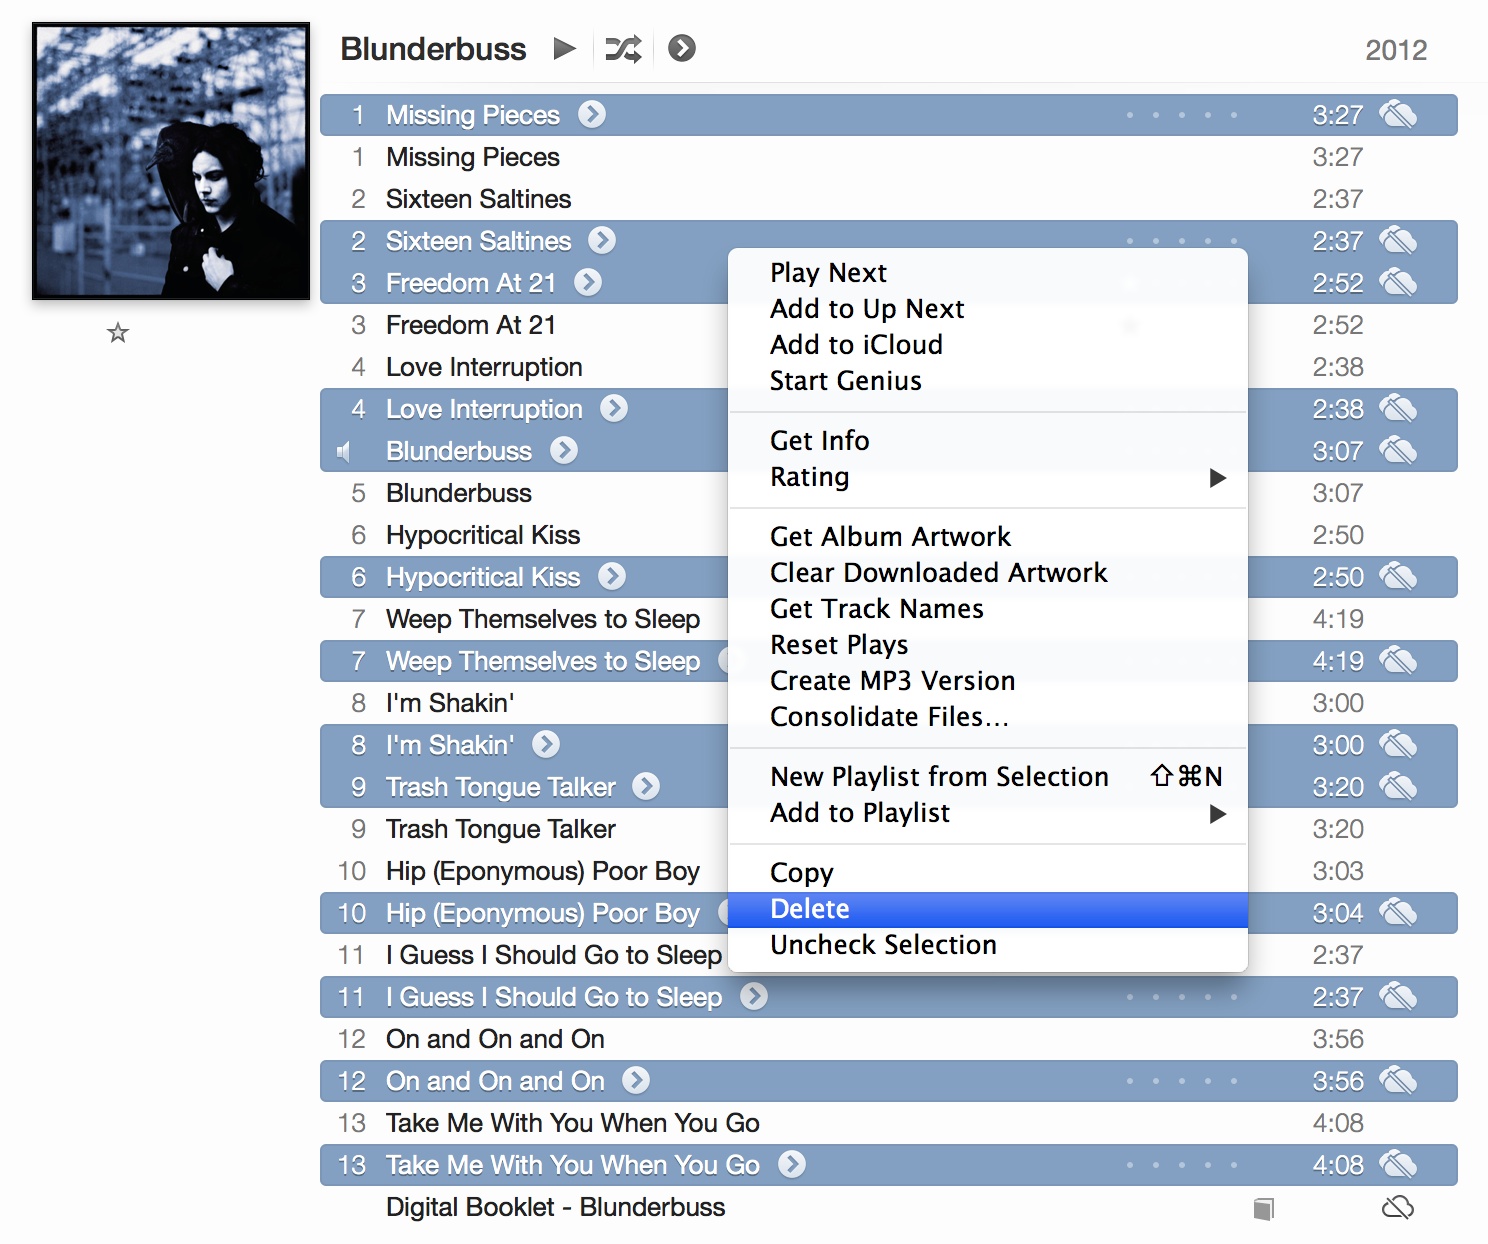
Click on the songs that have the "anti-iCloud" icon, then right-click or control-click on one of the selected and choose Delete. Make sure you don't delete your digital booklet if you have one in the album. They will be removed from your computer.
I've used this process to create MP3 files to play off a flash drive for my car stereo. It's very convenient, the ID3 tags accompany the files, and you still have your masters safe and sound in iTunes.
Want to Comment on this Post?
You can share your thoughts at the TDS Facebook page, where I'll post this story for discussion.


