One of the most useful non-destructive editing tools in Adobe Camera Raw (as part of the Photoshop package) is the Graduated Filter. It helps us cope with contrasty scenes where we often have to choose between not blowing out our highlights or plugging up our shadows. I used the Graduated Filter on this snapshot captured in Raw with a Canon S90 compact camera.
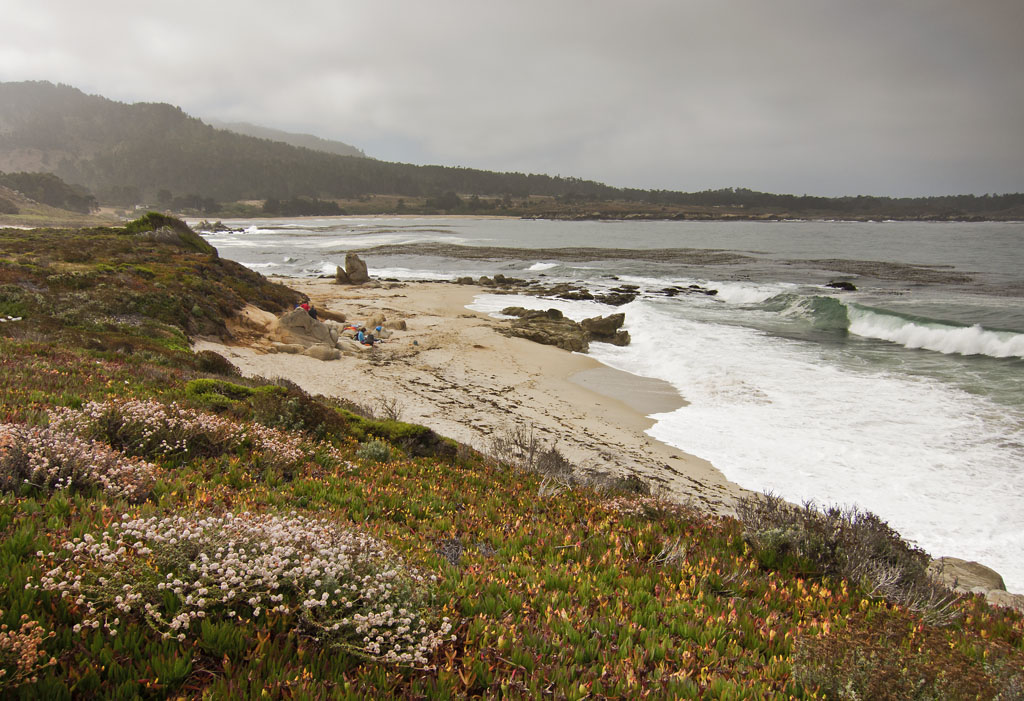 Carmel River State Beach, CA. I used the Graduated Filter tool in ACR to balance the blow out highlights in the sky and water with the properly exposed landscape foreground. Click on image for larger version.
Take the above image for example. What you see here is the finished product. But what I recorded originally with the Canon S90 is below. When I took the picture, I exposed for the ice plant foreground knowing that I was going to lose highlight detail in the overcast sky and water.
Knowing this, I shot in Raw and planned on using the Graduated Filter tool in ACR to recover those highlights in post production. I used two filters, pulling one down from the top and another (less intense) filter from the bottom up. My goal was to direct the viewer's eye to the beach, water, and ice plant in the lower 40 percent of the composition. If you want to see the difference, take a look at the original photo below.
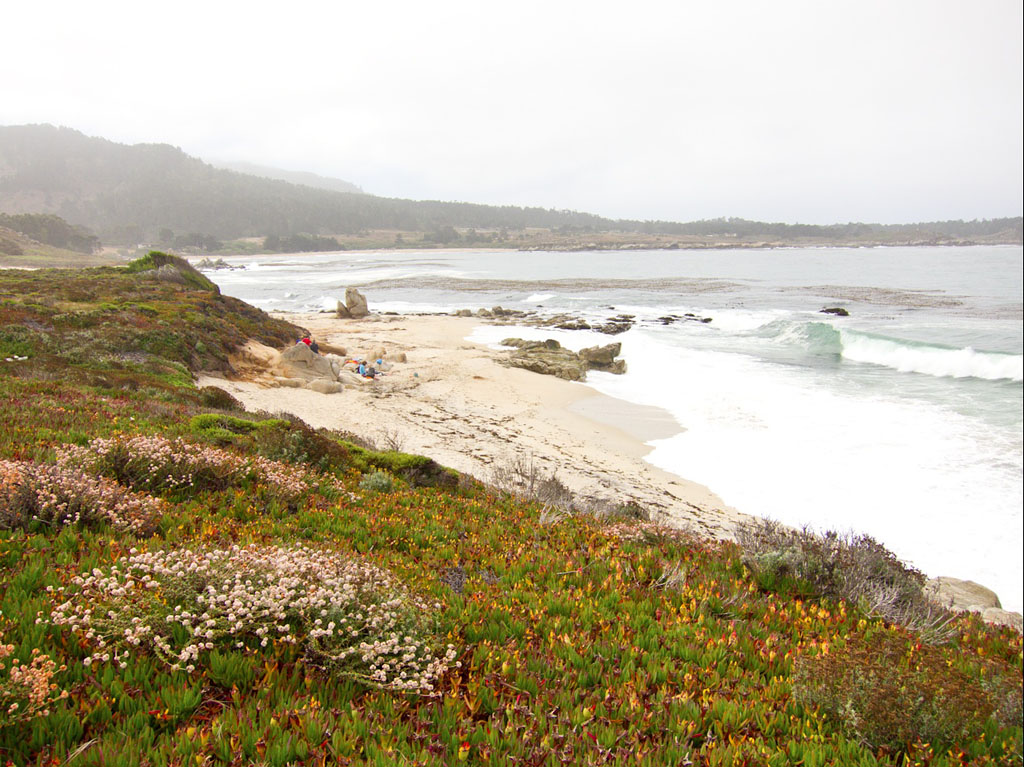 Original image with blown out highlights.
There's quite a difference.
If you want to use this tool, open your image in ACR (I usually go CMD-R from Bridge), and click on the fourth tool from the right in the upper tool bar. Drag the mouse from top to bottom, and just like that, you have a graduated filter adjustment that you can fine tune. It makes a tremendous difference, even in snapshots such as this. And not only is it good to help recover tones, but you can actually use multiple filters to shape the image in a way that highlights exactly what you want.


Wow, that's quite a difference! The extra power is slowly luring me into CS5, and some art stuff too… anyway, before I fully make the jump, is there anything similar in Aperture 3? I know of the recovery and Highlights / Shadows tools, but do you have any other good practices?
I'm amazed all that data was still even in the raw file! (One reason I always shoot raw, except my iPhone, but that HDR now! :))