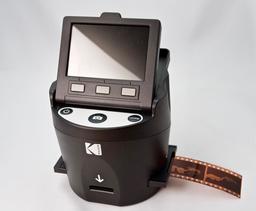
For those who enjoy loading the occasional roll of film, or who have an archive of images from the analog days, the new KODAK SCANZA Digital Filmand Slide Scanner ($169) might be a helpful addition to the home workspace.
Features include:
- 3.5" Tilting LCD Screen.
- 14 Megapixel Sensor.
- Integrated Interpolation: optional setting enhances images up to 22 megapixels (scans up to 5728 x 3824).
- A wide variety of adapters and trays for most film types.
- 3 Function Keys: correspond with various prompts on the screen.
- HDMI/Video Cables: connect to a television to view your photos on the big screen.
- USB Cable: connect to a computer, laptop or other device for image upload; can also be used to power the scanner (AC adapter included).
- User Manual: provides complete instructions and tips for operating the scanner.
- Color Adjustments: helps you tweak image coloring (red, green, blue, reset).
- Brightness Adjustment: Lightens and darkens the image per your preference.
- USB Upload: transfers images on your SD card (Not Included , supports up to 128GB) to any computer or compatible device.
I've been using the Wolverine F2D Mighty for my quick and dirty scans, so I decided to test the new Kodak Scanza against both it and professional lab scans. Here's the first comparison with no image adjustments, right out of the respective scanners.
 From Left to Right: Professional Lab Scan - Kodak Scanza Scan - Wolverine F2D Mighty Scan - No adjustments to any of the images. Straight out of the scanners.
In this comparison, the pro lab wins, with the Scanza running second, and the Wolverine a distant third. I then made a few quick adjustments in Photoshop to the Scanza image, and here's how it stacked up to the pro lab.
 The Scanza image is on the left, with pro lab on the right. The quality gap narrowed quite a bit after adjustment.
I could easily create an adjustment profile and apply it to the images on import to my photo management software, giving me a good starting point for the film scans.
The Scanza workflow is straight forward. Choose the right adapter for your film, load the negative/positive, insert a SD card into the scanner, power it up, choose your film type, and press the capture button. You can make adjustments to the resolution, color, and brightness via the settings.
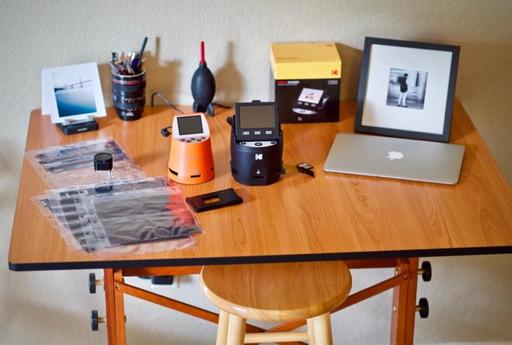 The Kodak Scanza (center) doesn't take up much room, yet provides solid results. By comparison the orange Wolverine scanner is on the left.
In terms of image quality, the pro scans are better. The color is more accurate and details are crisper than with the Scanza. The Kodak algorithm to control noise in the scans does produce some smearing of details, noticeable mainly if you zoom in.
But the Kodak images are overall pleasing, especially after minor adjustments. And when printing them or viewing at normal magnification, they hold up quite well.
The KODAK SCANZA Scanner is a good value at $169, especially for quick digitizing for online work and inkjet printing. The 22MP mode doesn't present any quality tradeoffs compared to scanning at 14MP, so you might as well enjoy the big 5728 x 3824 files. The color is reasonable and can be easily adjusted in post.
As for the built in adjustments in the Scanza, they weren't quite as fine as I would like. I found myself usually want half as much with any of the sliders. I felt a lot better about this after correcting in post, however.
If you're looking for a compact film scanner for your home office, the Kodak Scanza is worthy of serious consideration. I had fun using it, and I love the convenience. It's definitely replacing my old Wolverine F2D Mighty.
You can share your thoughts at the TDS Facebook page, where I'll post this story for discussion.


