There are very few plug-ins that I'd consider necessay. The editing tools in Aperture 3 and Lightroom 3 are so robust, that I can handle most of the things I need within those applications. But after working with Nik Software's Silver Efex Pro 2 for a few weeks, I've decided that this is my next "must have" enhancement.
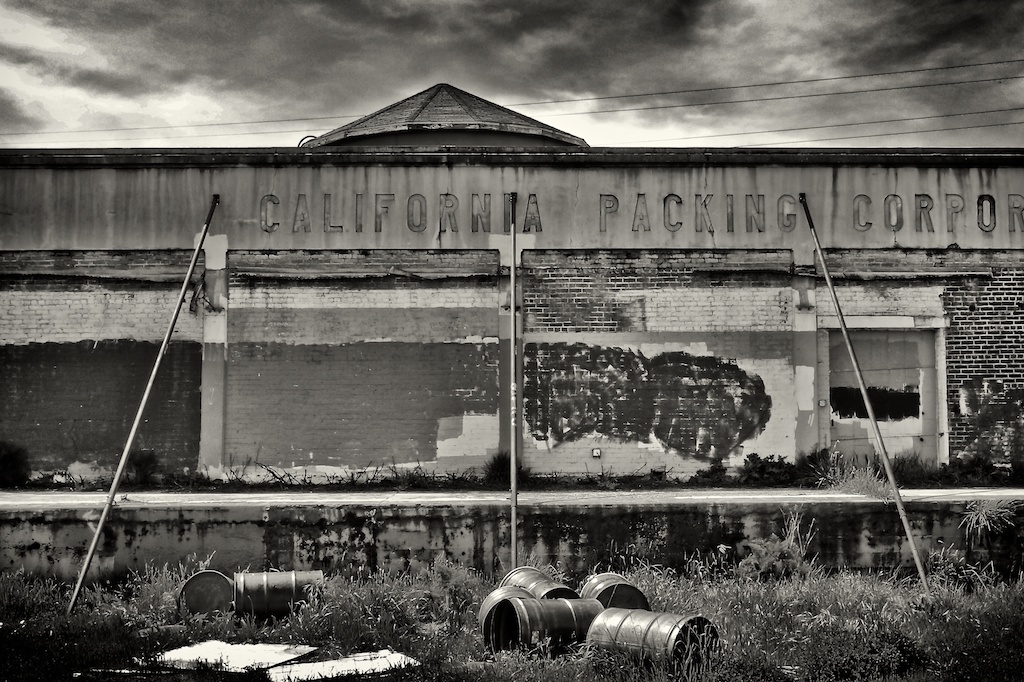 Abandoned Warehouse: processed in Aperture 3 and finished with Silver Efex Pro 2 plug-in using global adjustments only. Photo by Derrick Story with an Olympus XZ-1. Click on image for larger version.
Silver EFEX is a tool to convert your images to Black & White. Now you may be saying to yourself, "I know 10 ways to create a B&W photo." So do I. But none of them work as well at this plug-in. The whole reason I even paid attention to this app in the first place was because I saw images that looked great, and I wanted to know how they were created. Many of them with Silver Efex Pro 2.
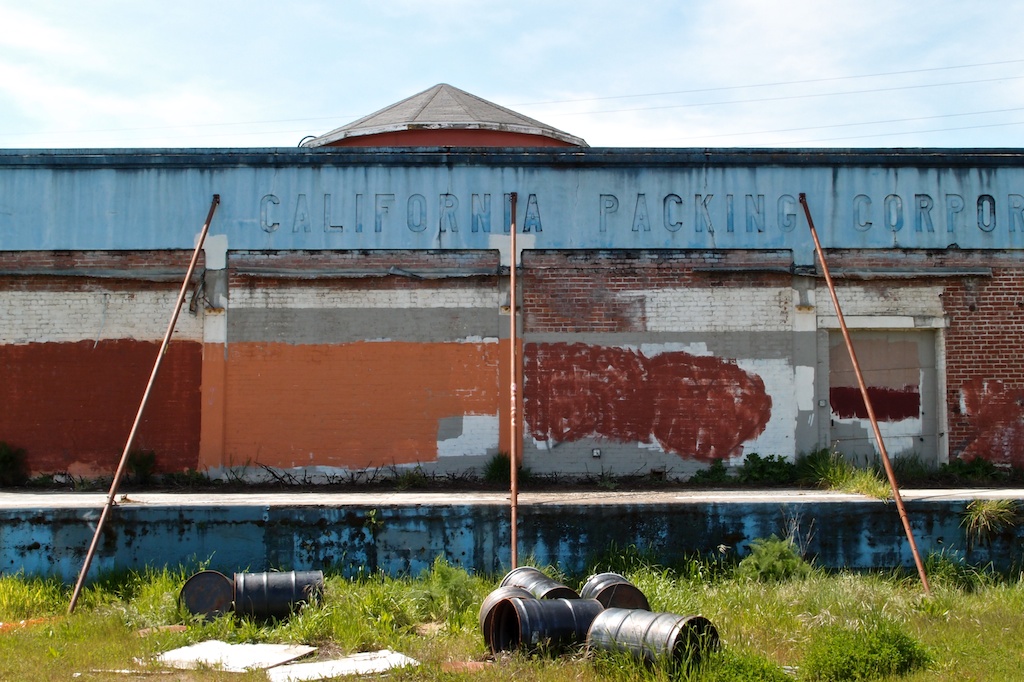 Original image captured in mid-day lighting. Click on image for larger version.
New Features in Silver Efex 2
This new version adds many important tools:
- Refined and improved black and white conversion algorithms
- Highlight, Midtone,and Shadow Brightness control
- Dynamic Brightness control
- Amplify Blacks and Amplify Whites controls
- Soft Contrast control
- Highlight, Midtone, and Shadow Structure control
- Fine Structure control
- Selective Colorization
- Image Borders
- History Browser
- GPU Processing
- Improved interface and interaction controls
Most of the images I've worked on have only required the global controls. There are selective adjustments available, using control points, if you need them. I was surprised at how often I didn't. The basic workflow I use is relatively simple.
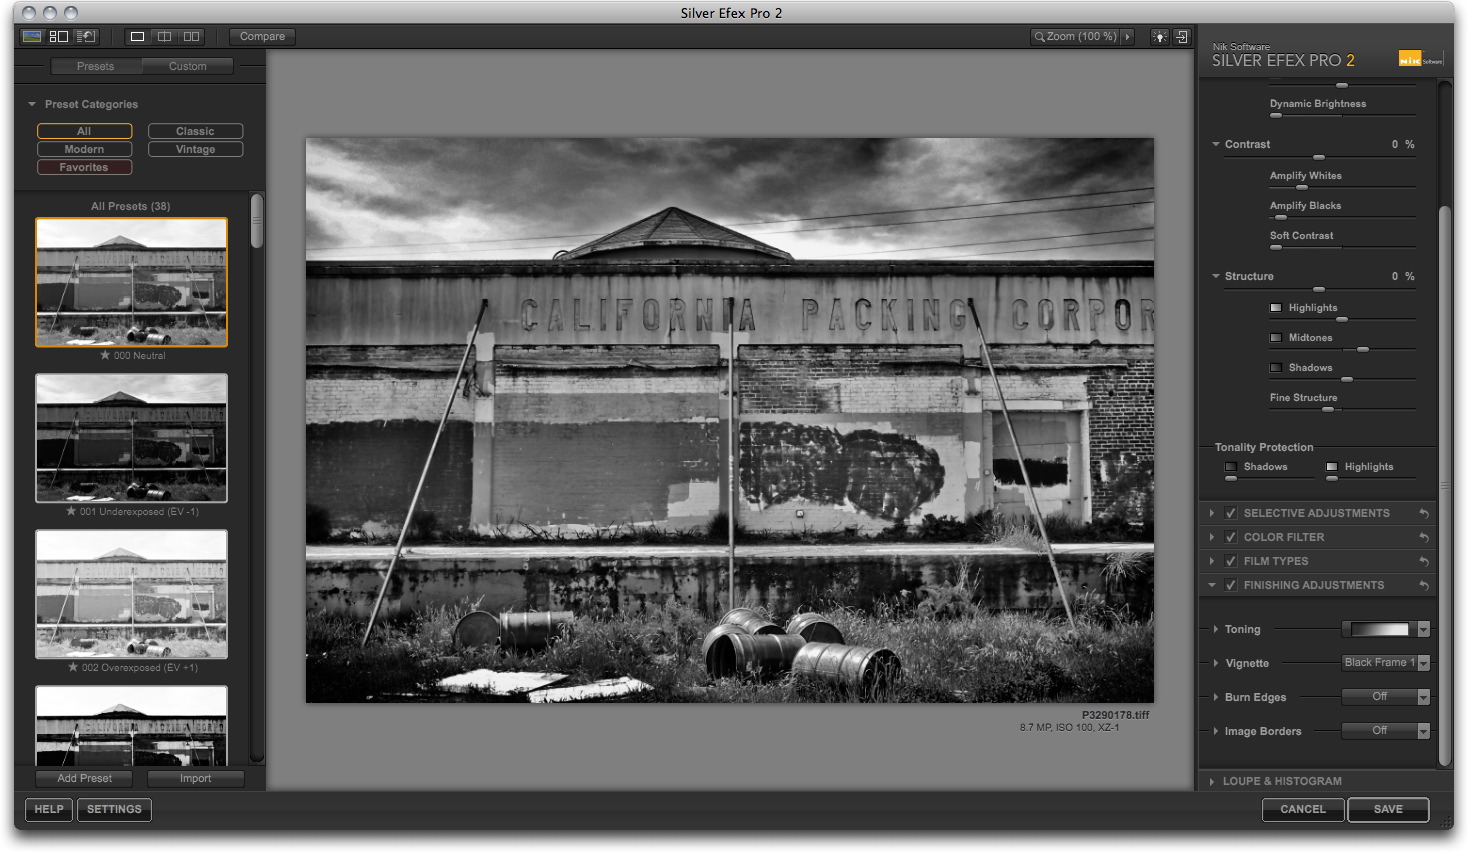 Silver Efex Pro 2 interface. Click on image for full size version.
Basic Silver Efex 2 Workflow
For this example, I'm using Aperture 3 as the host app. But the plug-in works with Aperture, Lightroom, and Photoshop. And you get compatibility for all three in the box.
In Aperture, first I choose a color image, then I go to Photos > Edit with Plug-In > Silver Efex Pro 2. Aperture prepares the image for hand-off. Once the Silver Efex interface appears, make it full screen by pressing the "F" key.
On the left side of the three-paned interface are the presets, with the "000 Neutral" selected at the top of the column. You can preview the other presets by clicking on them. This is helpful to get a feel for the possibilites of your photo. I usually return to Neutral, however, and start working the controls on the right side of the interface. This way, I get the exact look I want.
Typically, the three basic global controls (Brightness, Contrast, and Structure) are collapsed. Click on the triangle next to their names to reveal more sliders. I also open the Loupe & Histogram window at the bottom of the right column, and click on Histogram. This graph is helpful when making tonal adjustments.
Now begin working on the highlights, midtones, and shadows of your picture. Be sure to play with the new Dynamic Brightness slider. It brightens areas of the photo while protecting the darker tones.
Next, I'll use the Amplify Whites and Amplify Blacks sliders to fine tune those areas. But the real killer slider here is the Soft Contrast control that adds mood by selectivly adding contrast in areas of the photo based on an intelligent alograithm.
Then I move to Structure, which is similar to "Definition" in Aperture and "Clarity" in Lightroom. But with Silver Efex 2 you have four Structure sliders, one for each tonal area, plus Fine Structure. Fine Structure can increase detail, as in the building photo. Or, as in this portrait, I decreased Fine Structure to soften the skin tones.
Now, I'll go back to the left column and click on the History Browser Icon. It's at the top of the column, third from the left. Then click on the Compare button. I generally use the Split Screen view to compare the work I've done with the original conversion. You can click anywhere in your "history" to compare that point in your work to the final product.
Once I'm satisfied with my adjustments, I click the Save button, and Silver Efex 2 prepares a Tiff and returns it to Aperture. I "stack" the new Tiff and original image for convenience.
The Bottom Line
Nik Software's Silver Efex 2 runs smoothly on my MacBook Air and keeps me excited about Black & White photography. There are many more features than I've covered here, such as the image borders, film emulators, vignettes, and toners -- plenty to keep you occupied well into the wee hours of the night.
You can see more images processed with this software on the TDS Flickr site.
Update! Hunt's Photo and Video is offering Silver Efex Pro for $129, plus free shipping, and a free upgrade to Silver Efex Pro 2. While supplies last.


