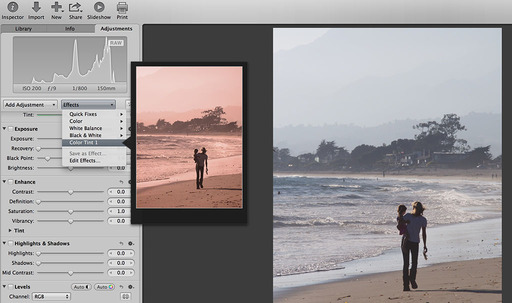
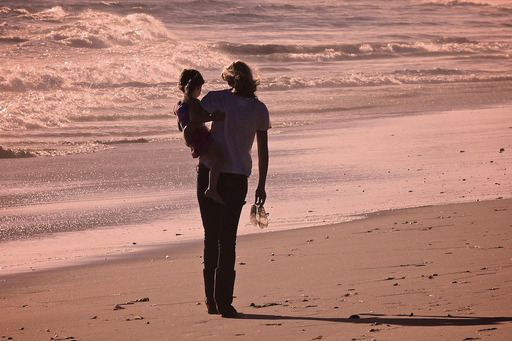
Half the fun of image editing in a non-destructive environment is playing with different techniques. If you stumble across a look that you want to repeat in the future, you can save those settings as an Effect in Aperture. Here's how.
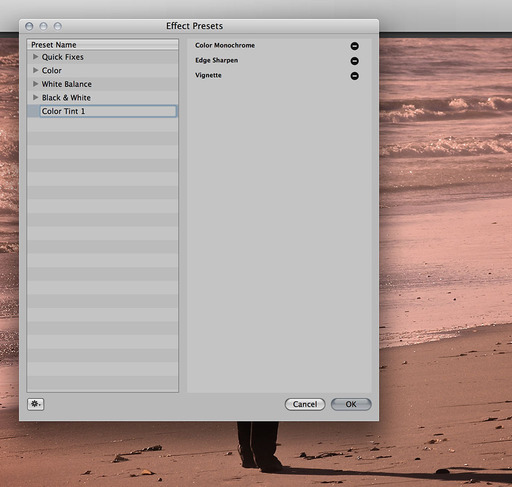
Click on the Effects popup menu (near the top of the Adjustments panel) and choose "Save as Effect." This brings up the Effects Presets dialog where you can name your new look. At the same time, decide which image edits you want saved as part of the Effect. Some of the adjustments you might have done, such as tweaking Curves, might be specific to the photograph, but not necessarily part of the preset you're creating.
To eliminate an adjustment from the preset, just click on the "-" symbol next to its name. When you're done, click the OK button.
To apply the Effect to another image, go back to the Effects popup menu, and you should see your new preset in the list. Mouse over it to get a preview of how it will look. If you like it, just click and it will be applied to your image.

You can fine-tune the picture by using the other tools in the Adjustments panel.
Aperture Tips and Techniques
To learn more about Aperture 3, check out my Aperture 3 Essential Training on Lynda.com. Also, take a look at our Aperture 3 Learning Center. Tons of free content about how to get the most out of Aperture.
My next open Aperture Workshop is scheduled for Nov. 2012, in Santa Rosa, CA. You can get on the pre-registration list, plus learn about all the other photography workshops offered this season by visiting the TDS Workshops page.
The Digital Story on Facebook -- discussion, outstanding images from the TDS community, and inside information. Join our celebration of great photography!


