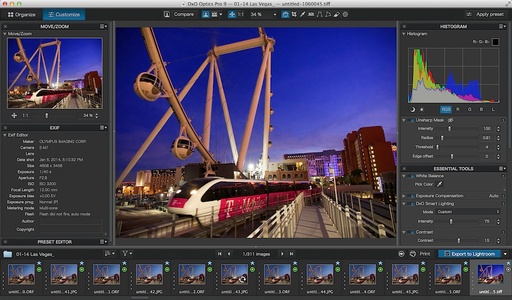
The software engineers at DxO Image Science have created a modern, powerful RAW processing app with DxO Optics Pro 9.5. The program includes an array of useful tools for Aperture users such as noise reduction, lens corrections, geometric straightening, intelligent presets, and more.
 Image from Aperture opened in DxO Optics Pro 9.5.
With the latest version, DxO can integrate smoothly into a Lightroom workflow. I explain how this works in the article, DxO Optics Pro 9.5 Intelligent Integration with Lightroom on c't Digital Photography Magazine. But what about Aperture? Can DxO Optics Pro work with it too?
The short answer is, "yes." The Aperture integration isn't as smooth as with Lightoom where DxO can read the original RAW file. With Aperture, you set up DxO as your external editor. Aperture sends out a TIFF file, and you can return a TIFF, JPG, or DNG to your Aperture library. Here's how it works.
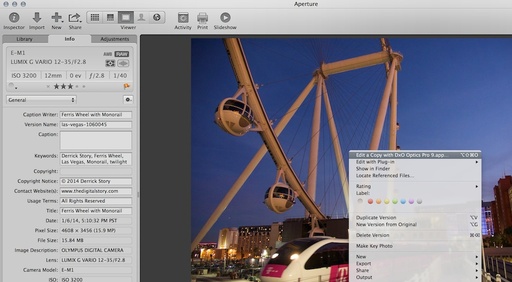
 Exporting from Aperture to DxO Optics Pro.
Step by Step Workflow for Using DxO Optics Pro with Aperture
- Download the trial version of DxO and install on your Mac.
- Open Aperture and go to Preferences > Export and select DxO Optics Pro as your external editor. Use TIFF (8-bit) as the file format and Adobe RGS as the color space. Close Preferences.
- Open a RAW file in Aperture, right-click (or Control-click) on the image, and choose Edit with DxO Optics Pro from the top of the popup menu. (See figure above.)
- Experiment with the different presets and editing tools in DxO.
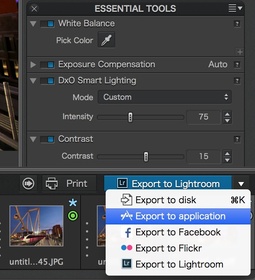
- Export your finished image out of DxO by clicking on the Export Triangle icon in the lower right corner of the interface and choosing Export to Application. (See figure below.)
- Choose Aperture from the dialog box, then set the parameters for your exported file.
- Aperture will receive the file in a new Project. You can leave the image there, or move it to the project with the original RAW file. I recommend that you stack them.
- At this point, there's no need to keep the TIFF file that Aperture used as the handoff. You can delete that from your Aperture library.
What this workflow lacks in smoothness, it more than makes up for in capability. Having access to top notch lens corrections, presets, and noise reduction fills major gaps with Aperture's editing tools.
And the price is reasonable right now. Until June 15, 2014, the Standard Edition is discounted to $99 and Elite is on sale for $199. The difference between the two are the number of cameras supported. They have a compatibility checker to help you make the right choice. In my case, the Standard Edition was sufficient.
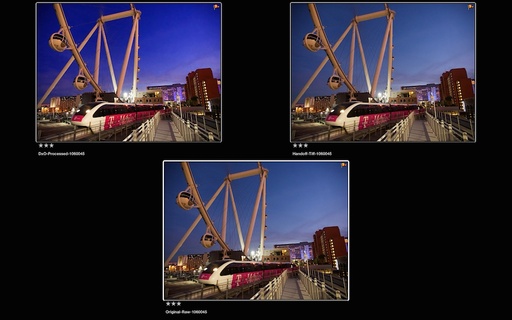
 Comparing Files: Image on the bottom is the original RAW file. Upper right photo is the TIFF used for the handoff (you can delete this). Upper left corner is the Jpeg that was returned from DxO Optics Pro 9.5 to Aperture (it looks great!).
Bottom Line
DxO Optics Pro 9.5 is top drawer software that is a good fit for Aperture users. At this time, the workflow is a bit clumsy, but for your best images that you want to get the most out of, the effort is worth it.
Aperture Tips and Techniques
To learn more about Aperture, check out my Aperture 3.3 Essential Training (2012) on lynda.com. Also, take a look at our Aperture 3 Learning Center. Tons of free content about how to get the most out of Aperture.
The Digital Story on Facebook -- discussion, outstanding images from the TDS community, and inside information. Join our celebration of great photography!


