Mac OS X Yosemite builds upon photo browsing improvements we saw in earlier versions, creating a terrific working environment for photographers. And the best part is, you never have to leave the Finder.
Here are a few basic buttons to click to supercharge your photo browsing experience in Yosemite.
Turn On Finder Preview
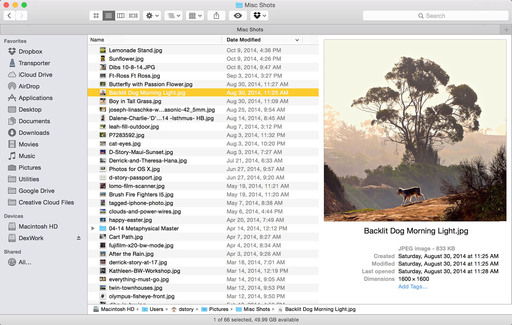 Finder Preview on in Yosemite
With Finder Preview turned on, you can work in List View and still get a good look at your images. It's easy to activate. In the Finder, go to View > Show Preview. Most photographers will want to use the shortcut: Shift-Command-P.
Bonus Tip: You can add Tags directly from the Finder Preview window by clicking on the blue "Add Tags" link.
Even a Bigger View with Quick Look
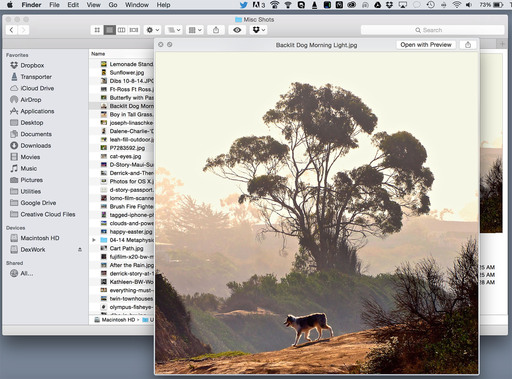 Quick Look for even a better view.
We had Quick Look in Mac OS X Mavericks, but it seems more useable now in concert with Finder Preview. With a file highlighted, click on the "eye" icon in the Finder Toolbar to open a larger version of the photo. If you like keyboard shortcuts, Command-Y will enable Quick Look, or even faster, just tap the spacebar (thanks Scott Stuart).
Bonus Tip: You can "pinch to zoom" on a trackpad for a more detailed look at your photo.
Share from Quick Look
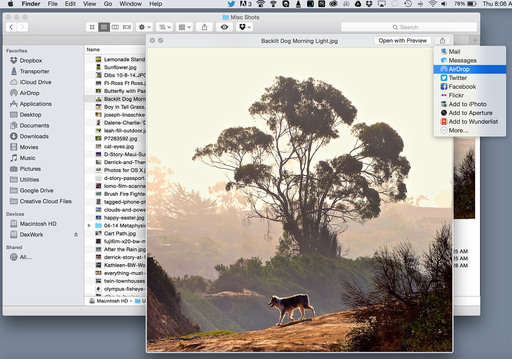 It's easy to share the image directly from Quick Look.
Once you're in Quick Look, you have a variety of sharing options. We had a more basic version of this in Mavericks, but Yosemite adds "Share Extensions," which enable you to customize this menu. You can build a sweet workflow, starting with the Finder.
More to Come
I have more Yosemite gems for photographers coming in future posts. Try these out, and see what you think.
Join me on my Instagram site as I explore the world of mobile photography. And now Instagram features 15-second movies too.
Want to Comment on this Post?
You can share your thoughts at the TDS Facebook page, where I'll post this story for discussion.


