One of the advantages to processing RAW files in Adobe Lightroom is taking advantage of camera profiles. A favorite example is choosing among Fuji's film effects from the X20.
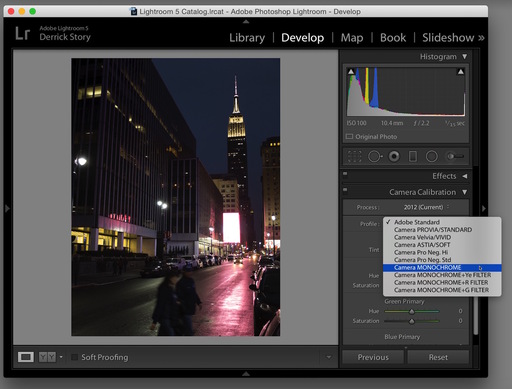
The process couldn't be simpler. Open the RAW file in the Develop Module. Scroll down to Camera Calibration. Choose the look you want from the Profile popup menu.
The options are based on the actual profiles offered in the camera menu. So, for example, I'll see different available profiles for my Olympus RAW files than those from the Fuji X20.
The thing I really like about the profiles feature is this: there are times during post processing that I say to myself, "I wish I had used the monochrome film effect when I took that shot." With these profiles available in Lightroom, I get a second chance.
Want to Comment on this Post?
You can share your thoughts at the TDS Facebook page, where I'll post this story for discussion.


