When Adobe introduced Photo Merge to Lightroom CC, it improved my high dynamic workflow. Even though I like the occasional over-the-top HDR image, generally speaking, I'm just looking to make a better photograph. If that's your intent also, here's a simple workflow that you can put into practice today.
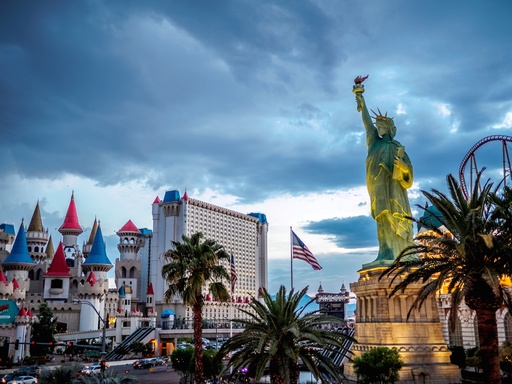
Identify the HDR Candidate. This isn't something you want to do with every image. Practice spotting scenes where expanding the dynamic range will improve the photograph. My favorite is a twilight sky with foreground that's a bit to dark.
 Las Vegas at Twilight - Here's a perfect HDR candidate. Nice sky, but foreground is backlit and too dark. Wouldn't it be nice to have both properly exposed? Photos by Derrick Story.
Enable auto-bracketing on your camera with a -2, 0, +2 sequence. You only need 3 frames for Lightroom's Photo Merge. If two stops are too extreme for you, you can use -1.5, 0, +1.5. I recommend that you shoot in RAW. I have my Olympus OM-D E-M5 Mark II programmed so I can turn this off an on with the HDR button on the top deck.
Process the 3 Frames in Lightroom. Load the files into Lightroom CC, select the 3 you want to process, then choose Photo > Photo Merge > HDR. Lightroom will preprocess the images for you. I usually check the boxes next to Auto Align and Auto Tone. For most of my sequences, Low deghosting works just fine.
 Improved scene created by combining 3 frames using Photo Merge in Lightroom CC.
Adding Finishing Touches in the Develop Module. Now that you have a high resolution RAW merge, finish off the shot in Lightroom's develop module. The file should respond well to your exposure adjustments.
That's all there is to it! If you want to learn more about this process, download my free eBook, HDR & Panoramas with Photo Merge in Lightroom CC, available at the Rocky Nook site.
Want to Comment on this Post?
You can share your thoughts at the TDS Facebook page, where I'll post this story for discussion.


