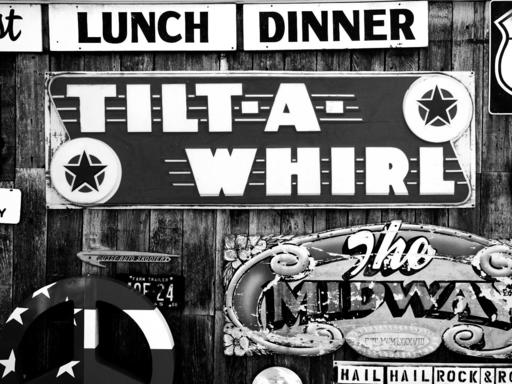
Among its many processing skills, Capture One Pro is an excellent B&W converter. And thanks to its built-in presets, you can create a beautiful monochrome in just 3 steps.
Step One - Choose a Preset
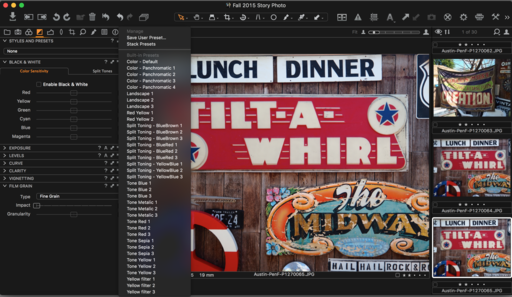
Choose your image and go to B&W in the Tool Tabs. It's the icon that's box with a diagonal line through it. The list of presets are listed in the B&W pane.
Mouse over the list to see how the various options affect your image. Choose your favorite.
Step 2 - Fine Tune Exposure, Clarity, and Grain
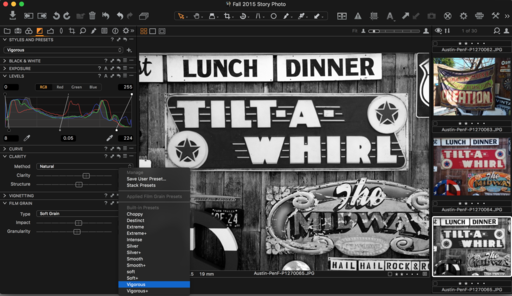
Once you've applied the preset, fine tune the image using the other tools in the B&W panel. I like the B&W sliders and Clarity. Exposure and Levels are usually helpful too.
Don't forget to add some grain. It's a wonderful effect and adds a little crispness to the image too.
Export to Your Desktop
Now all you have to do is go to File > Export Images > Variants, then set the parameters and click Export 1 Variant. Your B&W photo will be ready to share.
More Capture One Pro Tips
I've published a short tutorial for organizing the User Collections area of your library. Take a look at One Way to Set Up Your Capture One Library. Following those simple techniques will help you add the structure that you crave for your image library.
Capture One Pro Essential Training on lynda.com
Later this month, my new video training titled, Capture One Pro Essential Training will be live on lynda.com. Keep your eyes peeled for my announcement. More than 100 movies that show you the easiest way to master your library, edit files, and output them in a variety of ways.
Thinking About Making the Transition from Aperture or Lightroom? - Download my free eBook titled, Rocky Nook's Guide to Moving to Capture One Pro. I show you the steps to create a test library, then build the foundation for a smooth transition to Capture One Pro.
Want to Comment on this Post?
You can share your thoughts at the TDS Facebook page, where I'll post this story for discussion.


