That innocent looking Preview app on your Dock can handle so many photography tasks that we sometimes forget all the things that it can do... such as digitize a snapshot in 3 easy steps.
Just make sure your Mac and Multi-Functional Printer are on the same network. Put the snapshot on the glass scanning surface, then fire up Preview.
 Step 1 - File > Import from Scanner.
Go to File > Import from Scanner. You should see your device online. Select it.
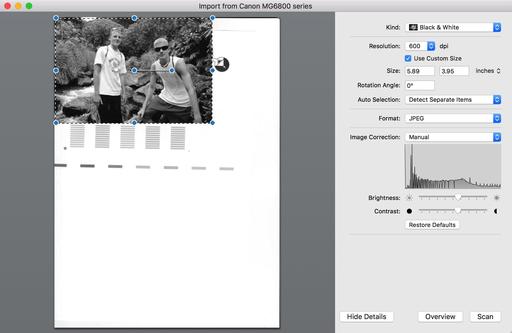 Step 2 - Choose your settings.
The scanner should begin to generate a preview for you. If you don't like what you see, such as wanting to make an adjustment or repositioning the snapshot on the glass, do so, then click the Overview button to generate another preview.
Now you can choose your settings such as B&W or Color, DPI (I like 600), Auto Selection (easy way to scan just the image and not the entire surface), Format (Jpeg is the most common), and any image correction necessary. Once you've set those, click on the Scan button (see figure 2).
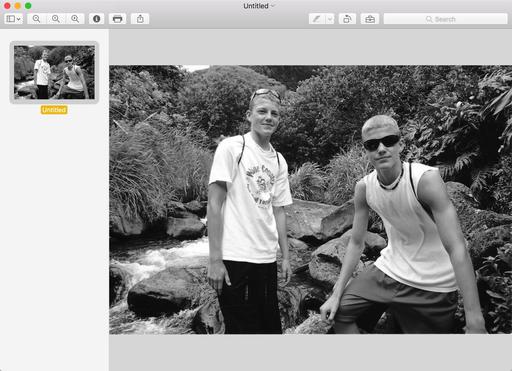 Step 3 - Save the image.
Soon, your scanned image will popup in Preview ready for you to name it and save to your hard drive. Or, if you wish, you can print the scanned file, thereby making a semi-instant duplicate of it. (And don't forget to add the file to your photo management software for cataloging.)
Book or Videos: Photos for macOS
Explore the world of modern photography with my The Apple Photos Book for Photographers that features insightful text and beautiful illustrations.
And if you'd like to cozy up to a video at the same time, watch my latest lynda title, Photos for macOS Essential Training
You can share your thoughts at the TDS Facebook page, where I'll post this story for discussion.


