I love the RAW editing tools in Capture One Pro. But there are times when I want to tap the magic of Luminar and its extensive set of filters. And I don't want to compromise my digital asset management system to do so. As a result, I needed to figure out how to get these two kids to play together. And that's what I'm going to show you right now.
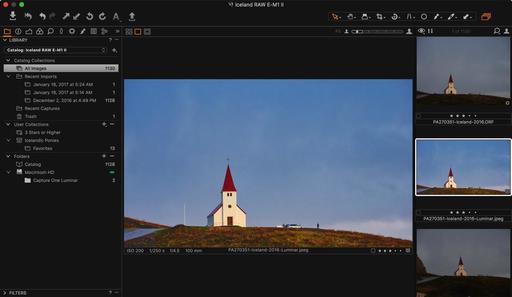 Image edited in Luminar, then returned to Capture One Pro for asset management. Photos by Derrick Story.
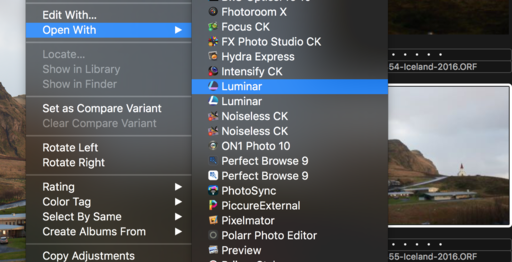
Going from Capture One Pro to Luminar
Since you're not going to get a clean roundtrip from Capture One to Luminar then back, the next best thing is to use the Open With... command in Capture One (right-click on the image and choose Open With... from the popup menu). Luminar can process your RAW files, so you're sending over a high quality image for editing. Select Luminar from the popup menu, and the image will open in the app.
Edit in Luminar
Edit as you normally would in Luminar, using the filters and presets to achieve the look you want. Once the image is ready to send back to Capture One, choose the Export command in Luminar, File > Export. This is the point where you have to think about your file organization.
Sending Back to Capture One Pro
My recommendation is to set up a standard receiving folder for the Luminar images, then import from that folder back into Capture One. Mine is a referenced system, leaving the images where they are and pointing the Capture One database to them. I tend to send back full sized Jpegs to keep file size reasonable. But you can choose Tiffs or another format, if you wish, during the export process.
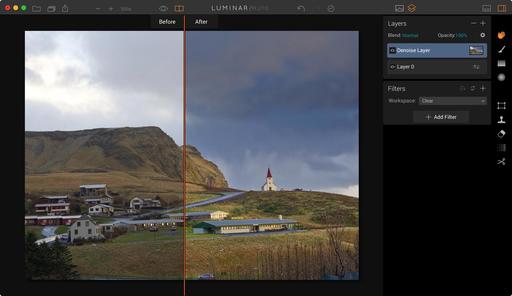 The before and after for this image in Luminar.
I add the word Luminar to the file name when exporting it, so I will know a bit about the picture's history when reviewing it in the Capture One catalog. Since the file name for the edited image is the same as the original, except for having Luminar at the end, the picture shows up in the catalog next to the original.
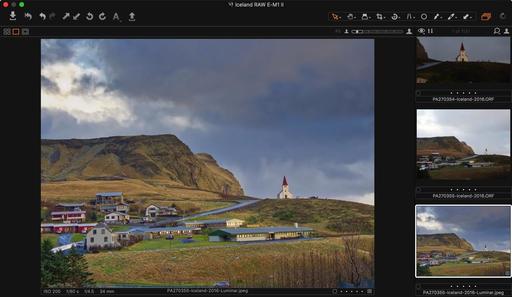 Luminar image back in Capture One Pro for asset management.
All my IPTC and EXIF metadata is intact, and I now have another powerful option for working on my images stored in Capture One. If I do a lot of work to the shot in Luminar, multiple layers for example, I may also want to save the image as a separate Luminar file so I can go back and pick up my work at a later time. I can always export the updated version into Capture One Pro for management with the others.
Haven't tried Luminar? You can download a free trial here.
More Capture One Pro Tips and Techniques
Improve your skills by watching Capture One Pro Essential Training now available on lynda.com. More than 5 hours of tips, tricks, and techniques. Plus many free movies using advanced techniques.
I've also created a dedicated Capture One Pro Training page on The Digital Story. You can follow all of the tips and techniques that I publish in one convenient spot.
Thinking About Making the Transition from Aperture or Lightroom? - Download my free eBook titled, Rocky Nook's Guide to Moving to Capture One Pro. I show you the steps to create a test library, then build the foundation for a smooth transition to Capture One Pro.
Want to Comment on this Post?
You can share your thoughts at the TDS Facebook page, where I'll post this story for discussion.


