Luminar is almost magical for aerial photography. Using the free bundled Aerial presets, the images spring to life. And this is one of the scenarios where I think Luminar 2018 is the perfect plugin complement to Lightroom.
Take a look at this round trip from Lightroom to Luminar and back.
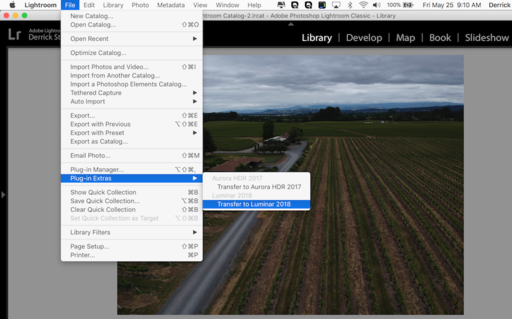 Unedited drone image sent to Lightroom using the Luminar 2018 plugin.
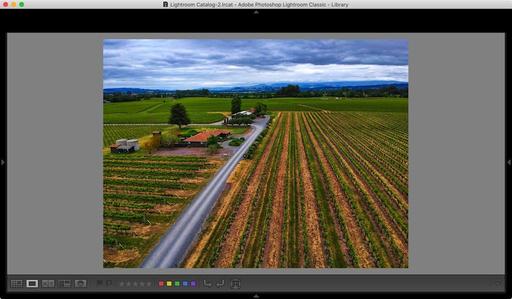 Returned image after using an Aerial preset in Luminar. The entire process took about 1 minute. Photo by Derrick Story.
Setting this up is easy. First, make sure the plugin is enabled by opening Luminar 2018, and going to "Luminar 2018" > Install plugins. There are four choices: Lightroom, Photoshop, Aperture, and Photos. Click on Lightroom. The open Lightroom, find an image, and go to File > Plugin Extras > Transfer to Luminar 2018.
Enhance the image in Luminar 2018 and click the Apply button. The edited image will return to your Lightroom catalog. It's that easy. And the results are amazing.
Rock Luminar with my new Essential Training
You learn all the ins and outs of Luminar 2018 via my Essential Training on lynda.com and on LinkedIn Learning. It's fun, and I promise, you will learn a lot.
You can share your thoughts at the TDS Facebook page, where I'll post this story for discussion.


