It's no secret. The vignette tool in Capture One Pro left plenty to be desired. But with the release of version 12, we now have the Radial Gradient Mask. And suddenly, we have much better control for creating a vignette effect.
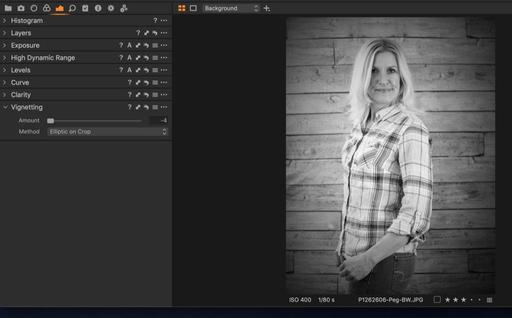 Standard vignette in Capture One Pro. For portraits like this, the shading covers part of the face, and there's no way to position the effect. Photos by Derrick Story.
The steps to create a radial mask are as follows:
- Create new Empty Layer in the Layers panel.
- Choose Draw Radial Gradient Mask from the brush tools in the Layers panel.
- Adjust the size and shape of the mask by dragging on its handles.
- Use the tools in the Exposure panel to adjust the tones of the mask.
It's that simple! Here's a radial mask in progress.
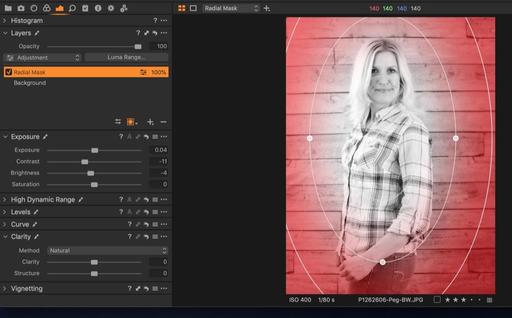 You can toggle the red mask indicator on and off by pressing the M key.
And here's the finished (and improved) vignette using the radial gradient mask.
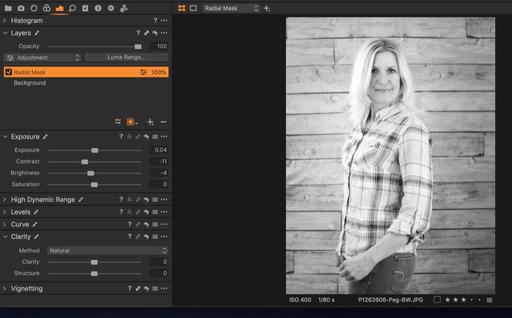 More natural vignette effect using the radial gradient mask instead of the vignette tool.
At first you may think that's it's more complicated to create a mask than just using the vignette slider. But to tell you the truth, once you've done it a couple times, it's just as easy... and so much better.
Learn Capture One Pro
You can get familiar with this imaging software by checking out Capture One Pro 11 Essential Training on LinkedIn Learning. You can also tune in on lynda.com if you prefer your training there. My updated Capture One Pro 12 Essential Training should be out next month. Stay tuned.
You can share your thoughts at the TDS Facebook page, where I'll post this story for discussion.


