We tend to think of High Dynamic Range photos as saturated, sometimes over the top, landscape interpretations. But the practice of expanding dynamic range applies wonderfully to black and white photography as well. And using this technique can help you produce rich monochrome pictures with plenty of tonal depth. Here's my basic workflow using Lightroom. You can adjust to your tastes and available software.
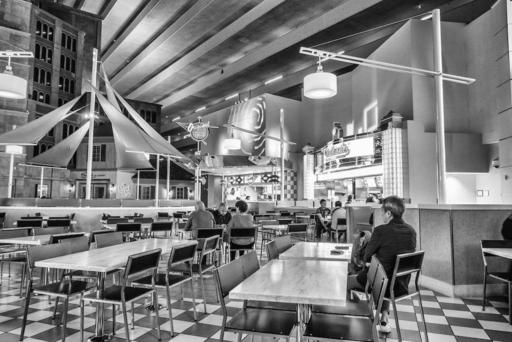 Black and White HDR - Las Vegas, NV.
The B&W HDR Workflow
- Capture a 3-frame sequence using the underexposure - normal exposure - overexposure technique. I usually bracket 1.5 or 2.0 f/stops for these. What ever you normally do for HDR capture will work great for this project.
- Import the shoot into Lightroom and select your favorite 3-frame sequence. One of the nice things about Lightroom is that is provides for DNG output of your merged HDR. This provides lots of options for the B&W conversion step.
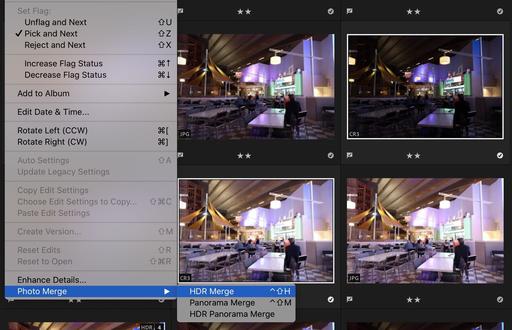
- Choose HDR Merge: Photo > Photo Merge > HDR Merge. You can use other software for your merging. But Lightroom is convenient and everything lives in the catalog.
- Duplicated merged photo and remove from stack. By default, Lightroom likes to keep things neat and tidy by putting all the components and finished merge in a stack. I'm fine with that. But once I duplicate the merged HDR, I pull it out of the stack for the next steps. You can salt to taste here.
- Convert to B&W or open in a new app such as Silver Efex 2. This is a wide open step. I still love Silver Efex for B&W work. But there are good alternatives as well. For example, some folks don't realize that the B&W conversion tools in Photos for macOS are great.
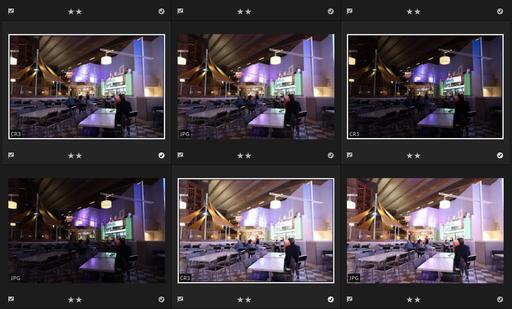 Select your 3-frame sequence.
 HDR Merge in Lightroom.
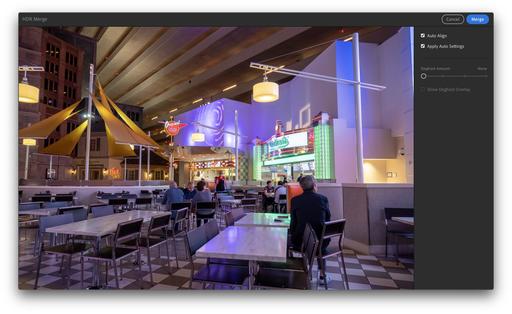 Merged HDR image in color.
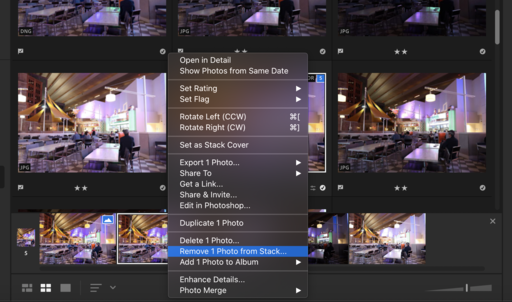 Remove duplicated photo from the stack.
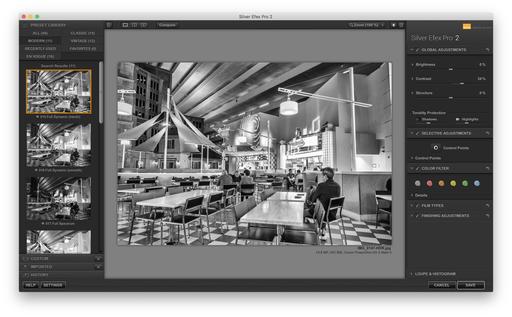 Convert to B&W and finish processing in the app of your choice. I like Silver Efex Pro 2.
When you compare a standard, single exposure color shot with the HDR black and white, you can really see a difference.
 Single exposure color shot.
Black and White HDR.
Tips
- Shoot in RAW.
- Better to bracket with shutter speed and maintain the same aperture.
- Look for subjects strong compositional elements and a wide dynamic range.
- Don't be afraid to push the envelope with your the B&W processing.
A Fun Alternative Process
On both my Olympus and Fujifilm cameras, I've played with putting the camera in a monochrome mode and then capturing in HDR where the camera builds the merged shot and produces a finished B&W HDR shot on its own.
Obviously you don't have as much control over the process, but it's fun. And if you're in a setting where you want a preview of what you might be able to do in post later on, try this method, review, and if you like it, do a separate 3-frame capture in RAW for later.
Final Thoughts
Once you get your B&W HDR workflow dialed in, I'm pretty sure you will go to it time and time again. You can produce such beautiful images this way. It is definitely worth the few extra steps.


