After months of pandemic isolation, I am way too familiar with every inch of real estate within a 5-mile radius of my house. And to be honest, it feels like I've taken every picture there is to take. That is, until I rediscovered infrared photography.
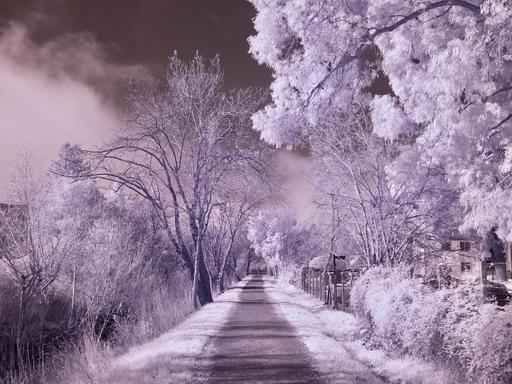 I've walked this path a 1000 times. But today I'm excited to be shooting here. Photo by Derrick Story with a 720 nm filter.
Now, when I take my walks with an Olympus OM-D E-M10 Mark III converted by Kolari Vision, my world looks brand new. And I'm excited to be taking pictures again.
"Infrared photography is a look into the invisible world. The human eye can see wavelengths from about 400nm-700nm (from purple to red); infrared is the light beyond 700nm. IR photography can be done with either infrared film, or a digital camera, and typically involves near infrared light in the 700nm to 1200nm range."
You can read an excellent introduction to IR on the Kolari Vision site. My experience is that you can "start simple" with a camera that you already have and a Hoya R-72 Infrared Filter. This is how I began, using a Fujifilm X20 digital camera that is relatively sensitive to IR light.
 Fujifilm X20 camera with a Hoya R72 filter.
(You can test any digital camera by pointing an TV remote control at the lens in live view and seeing if a white dot appears on the LCD screen when you press any remote button.)
The advantages of the Hoya R-72 plus existing camera is the small investment. Depending on the diameter, you can usually buy the filter for around $50. The disadvantage is the filter is dense resulting on long shutter speeds for non-converted cameras. The good news is, if you move on to a full-spectrum converted camera, your R72 filter is even more useful on it.
If you catch the IR bug, and it is highly contagious, then chances are good that you will begin to explore the different types of camera conversions. You can go for a specific wavelength, such as a 720nm conversion, or get a full-spectrum conversion that makes all wavelengths available. You then simply add the appropriate filter to get the look you want.
 The Kolari Vision IR Chrome lens filter on a full-spectrum Olympus OM-D E-M10 Mark III.
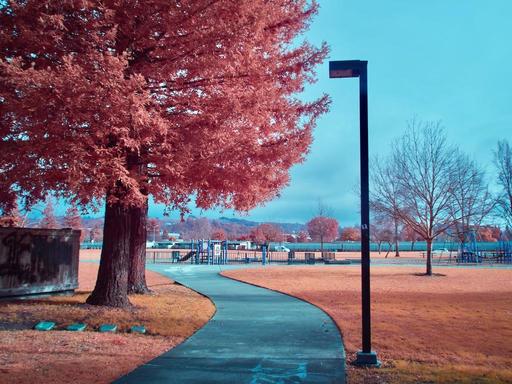
One of my favorites is the Kolari Vision IR Chrome lens filter that produces the look of Kodak Aerochrome IR film. I think the look is beautiful with its complementary color scheme. And I can use auto white balance and just shoot normally. But the results are anything but typical.
If you're looking for a creative way to survive the challenges of 2021, then I would seriously consider dabbling in infrared photography. I'm once again excited to take my morning walks, exploring what was once familiar territory that now looks like an entirely new world.
The Infrared Photography Workshop - Online March 2021
Do you feel like the world is looking like "the same old same old" through your camera's viewfinder? Have you felt your enthusiasm for photography waning as the pandemic wears on? Then it's time for you to consider exploring infrared imaging. This online event will reenergize your creativity and show you how to produce images that are unique and bursting with life.
You can learn more and sign up by visiting The Infrared Photography Workshop Page. Hope to see you there!
Product Links and Comments
There are product links in this article that contain affiliate tags. In some cases, depending on the product, The Digital Story may receive compensation if you purchase a product via one of those links. There is no additional cost to you.
You can share your thoughts at the TDS Facebook page, where I'll post this story for discussion.


