I truly enjoy using the iPhone 12 Pro Max with the HEIC file format for my everyday pictures. The results are terrific, and the file sizes are compact.
But when I want to have a little extra fun with those images, I've been firing up ON1 Effects 2021 that works as both a standalone app and as an Editing Extension for Photos for macOS. Effects has a wide variety of adjustments that work great with HEIC files (Jpegs and RAWs as well), and the workflow couldn't be easier.
Effects is also an excellent plugin for Photoshop, Lightroom, and Capture One Pro. The steps are similar as these.
Basic Steps to Using Effects as a Photos Editing Extension
Here are the basic steps that I use to add a little punch to my everyday pictures.
 Step 1 - Go to Edit mode in Photos for macOS and choose ON1 Effects from the Extensions dropdown menu.
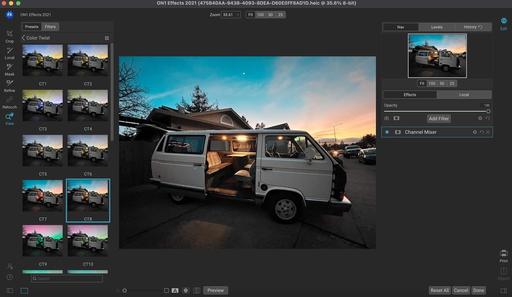 Step 2 - Once you're in Effects, experiment with the Presets on the left side of the interface.
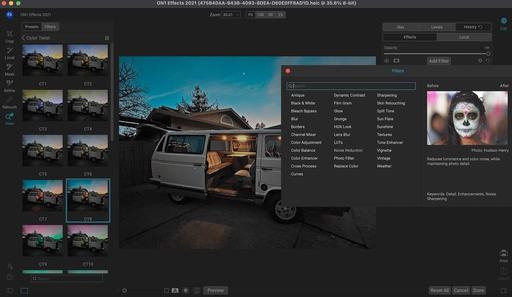 Step 3 - Further enhance your image by tapping a variety of adjustments. ON1 calls them Filters.
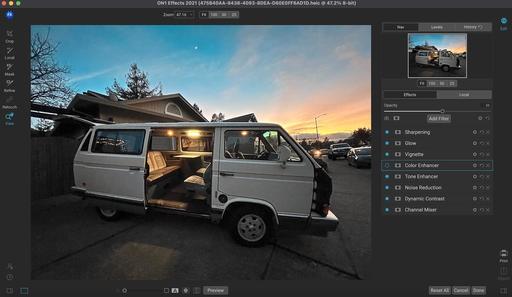 Step 4 - Collapse the pallet on the left side to get a better look at your image before sending back to Photos. Click the Done button when satisfied with your work.
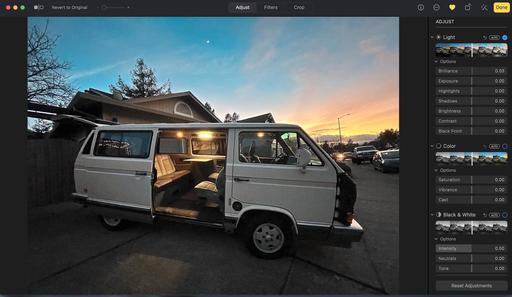 Step 5 - Back in Photos. Exit the editing interface by clicking on the yellow Done button.
More You Can Do with Effects
There are many different ways to approach ON1 Effects. It works as a standalone app. You can use it as an editing extension for Photos, as shown here. And it's a very nice plugin for Photoshop, Lightroom, and Capture One Pro 21.
I usually start with browsing presets to get a feel for where I might want to go with an image. For my infrared photography, I create my own presets as starting points. These include the red/blue channel swaps and other adjustments that I commonly use.
Beyond that, local adjustments are available, as are gradient masks and more. There's really no limit to what you can do with your pictures in this app.
Creating a Totally Non-Destructive Workflow with Effects and Photos
When you send an image from Apple Photos to Effects, any settings you apply will be saved with the image, so that you can send the image back to Effects with your edits intact, as long as you do not subsequently edit that image inside Photos.
To re-edit an image processed inside Effects, click on the image in Photos and follow the same steps above. When your image is opened inside Effects, you will see all of the changes you made in your previous session.
Keep in mind however, once you make any editing changes to your image inside Photos, your Effects edits will be "baked in" to the image. You can send the image again to Effects, but your original settings won't be visible.
If you wish to keep your original Effects edits, duplicate the image inside Photos (Image > Duplicate), which will create a new virtual copy of the file. You can then edit one of the versions in Photos, using the other one to preserve your Effects edits.
Downloading a Free Trial or Purchasing ON1 Effects 2021
You can try ON1 Effects 2021 free for 14 days. If you decide to purchase, you can buy for $69.95. Save 15% off that price by using coupon code: THEDIGITALSTORY.
Bottom Line
I started using ON1 Effects for my infrared photography because of its excellent Channel Mixer, LUTs, and presets. But I've discovered that it's useful for all of my photography. It's a robust tool for both my Photos and Capture One Pro workflows. And it's a great way to get the most out of my iPhone shots as well.
Product Links and Comments
There are product links in this article that contain affiliate tags. The Digital Story may receive compensation if you purchase a product via one of those links. There is no additional cost to you.
You can share your thoughts at the TDS Facebook page, where I'll post this story for discussion.


