You're going to hear a lot of pros and cons about the just-released iPad version of Capture One, just like you would with any V1 software. But the fact of the matter is that this is a great start for mobile photographers who like to shoot RAW.
And to make it an even better start for you, here are 5 tips to get you headed in the right direction.
Its Minimum Specs are Conservative
Technically, according to the FAQs, Capture One only runs on newer iPads. For example, my iPad mini 5 is not officially supported, but I've been using the software on that device without any problems since the official release.
There is a 7 day free trial period if you want to test your iPad. If you're only a generation off, I would definitely try it out.
Dig Out Your iPad SD Card Reader
The joy of Capture One on the iPad is its beautiful RAW processing. And unlike tossing around Jpegs wirelessly from device to device, a SD card reader is the best way to go for RAW files.
So, it's time to dig around in the bottom of your gadget bag to retrieve that iPad card reader. You'll be glad you did.
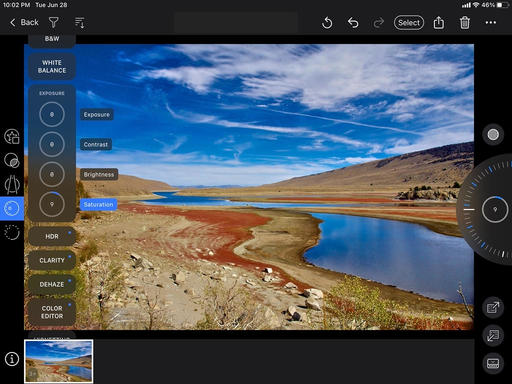
Load All of the Styles You Own on to the iPad
The user interface for the adjustment tools on the iPad are good, but your existing Styles for the desktop version of the app work on the iPad as well, and they are easy to use.
You'll always know which Style you applied, which is really helpful if you want to use it again on another image. And it's easy to stack Styles too.
Here are the instructions for adding Styles to the iPad. I really like using them with this workflow.
Add Cloud Transfer
At the moment, Cloud Transfer isn't anything to get really excited about. But it is the easiest way to move an album of freshly edited iPad images to your desktop application.
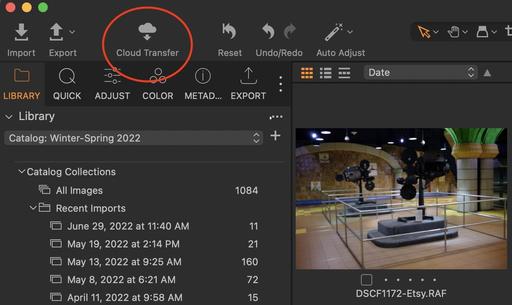 Add Cloud Transfer to your desktop app toolbar.
The first thing you'll want to do is add Cloud Transfer to your top toolbar in Capture One Pro on the computer. Here are the instructions for setting up Cloud Transfer.
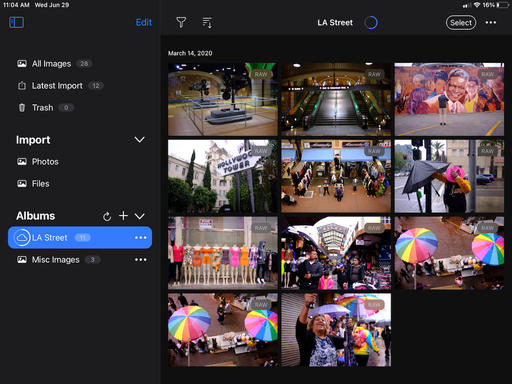 An album of iPad images being uploaded from the iPad to the cloud.
This is one area that we will see workflow improvements in the coming versions.
Remove from Cloud after Transfer
Since you're driving on a one way street here (iPad to desktop), you should remove transfers from the cloud server after completion.
"Once you have transferred your photos, you can go back to your iPad and in the three-dot menu for an album you will find an option to "remove from cloud". This will free up space for your next uploads. If you also want to remove the photos from the iPad, you can delete them by selecting them and pressing the delete button. They will be moved to the trash if you want to restore them; if you remove them from the trash too, they will be completely gone from your iPad."
How you manage the RAW files you've uploaded to the iPad will depend on your particular workflow. Some folks will want to keep some of the images on the mobile device to play with while on the go. For others, once the files have been moved to the desktop application, they will want to free up space on their device and in the cloud.
Final Thoughts
Once I dug into Capture One on the iPad, I enjoyed editing my images there. You can bring in content from Files, Photos for iOS, and of course camera memory cards.
It's too early to tell how my workflow will shake out with this new option. But the journey looks like a lot of fun.
You can share your thoughts at the TDS Facebook page, where I'll post this story for discussion.


