The typical approach for most photographers is to take a color photo and convert it to black & white while editing. I recently published a podcast talking about my favorite software for doing that. But actually shooting in B&W with your mirrorless camera has a few advantages, and it's really enjoyable.
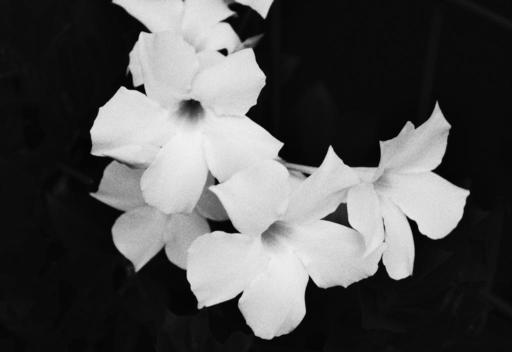 Captured in Monochrome 2 mode with an Olympus PEN-F. Photo by Derrick Story.
Let's start with the benefits, then I'll share some of my favorite settings.
Why Shoot in B&W?
The components of a successful B&W photograph are often a bit different than their color counterparts. Line and tone become very important in monochrome, and composing an image in your electronic viewfinder in B&W mode helps you see the best combination of elements.
Additionally, the cameras that I use by Fujifilm and Olympus allow you to apply digital versions of traditional B&W filters: yellow, orange, red, and green. These settings simulate filtering the light as a physical glass filter would, changing the camera's response to the scene.
- Yellow Filter - The most versatile of B&W filters. It darkens the sky a bit, sometimes helping clouds "pop" just a bit more, while at the same time lightening greens a little.
- Orange Filter - More dramatic effects on landscape than yellow with darker skies and snappier rendering of plants and flowers.
- Red Filter - Boldly darkens skies and brings clouds forward, plus cuts haze and adds contrast. Red filters are good for robust architecture compositions.
- Green Filter - Helps to lighten up foliage that sometimes can go very dark in non-filtered B&W photography. The effect varies, but worth a look with lots of green in a scene.
The luxury of having these digital filters and previewing their effects in your electronic viewfinder has a wonderful impact on your compositions while standing there before a scene.
Capturing in RAW+Jpeg
Most cameras apply the B&W effects to their Jpegs, leaving all of your color options available with RAWS. So if you shoot in RAW+Jpeg, then you can view the world in monochrome and come home with lovely B&W Jpegs, but still have your full-information RAW files available for any type of processing, color or B&W. I highly recommend RAW+Jpeg for B&W work.
Setting Up Your Camera for B&W
For Fujifilm cameras, tap the Film Simulations menu. I would start with Monochrome+Yellow, Dynamic range: 100, Sharpness: +1, Highlight tone: +1, and Shadow tone: 0. Many Fuji cameras include their wonderful Acros film simulation as well, which is even bolder than the straight monochrome. So be sure to look at Acros+Yellow (or even Red) too.
For Olympus mirrorless, I recommend setting Custom Picture mode to monochrome. (This is the same menu where you can set Portrait, Vivid, etc.) This alone will render good B&W, but if you have an OM-1, EM-1 II, EM-X, PEN-F, and some others, you can also add a filter (Yellow, Red, etc.) and set Sharpness along with a few other tweaks.
Once you find a combination that you like, I suggest saving them as a Custom Setting (C1, C2, etc.) so that you can easily go back to them when you're in a B&W photography mood. I've found that I shoot B&W more often when I set up the Custom Settings. It's so easy to change gears.
Final Thoughts
Black & white photography is a great option for midday work and other harsh conditions that might make color work difficult. Personally, I prefer urban settings over landscape for monochrome, but there are many great opportunities that will present themselves once you start viewing the world in B&W through your electronic viewfinder.
You can share your thoughts at the TDS Facebook page, where I'll post this story for discussion.


