When I'm in big cities, I try to travel by foot as much as possible. That's when I see the good shots, and if I'm lucky, I come home with one or two.
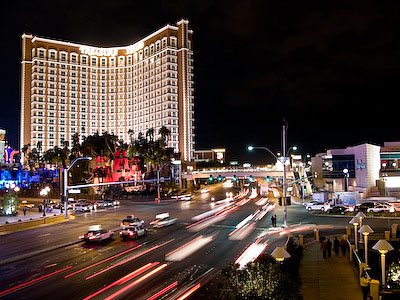
I was walking back from a dinner meeting in Las Vegas with a Canon G9 and a small Gorillapod tucked away in my jacket pocket. I felt like shooting something, but nothing caught my eye until I climbed a set of stairs for a street overpass and noticed this scene. I wanted the streaming lights of traffic driving by, but I thought they would look best in context with the Las Vegas cityscape.

I mounted the Canon G9 to the Gorillapod and wrapped its legs around the edge of the overpass so I could compose the scene. I made sure the flash was turned off and set the ISO to 80 to control noise. I then went to manual exposure mode, which is very easy to use on the G9, and played with the settings until I saw what I liked on the LCD screen. The exposure was 1.3 seconds at f-2.8. I set the self-timer to anticipate when traffic would begin to move, then pressed the shutter button.
Some of the frames didn't have the right look. But this image has a nice combination of moving lights and stationary objects. So it became my "keeper" for the night.
Photo of Las Vegas traffic by Derrick Story using Canon G9, 1.3 seconds at f-2.8, ISO 80, using manual exposure mode.
"How I Did It" is a new feature of The Digital Story featured on The Digital Photography Companion mini site. These are techniques from virtual camera club members who have built upon information in The Digital Photography Companion, or have come up with new tips altogether.
We're building a living library of knowledge for everyone to use (and contribute to). If you have a "How I Did It" tip to share, just send it to me with the sample photo, and put "How I Did It" in the email subject.
Technorati Tags: digital photography, Digital Photography Companion, technique, Technology, The Digital Story, How I Did It


Very nice! What kind of post processing did you do to this photo, if any?
Thanks for your comment. I made some minor adjustments in Adobe Lightroom, such as increasing the blacks a bit and recovering a little highlight detail, but that was about it. Love getting it right at capture! :)