We spent Sunday afternoon at the TDS Workshop creating prints from the edited images we had been working on. During this session, I helped participants fine tune their workflow to get the best images possible out of the Epson R2000 we had set up in the classroom.
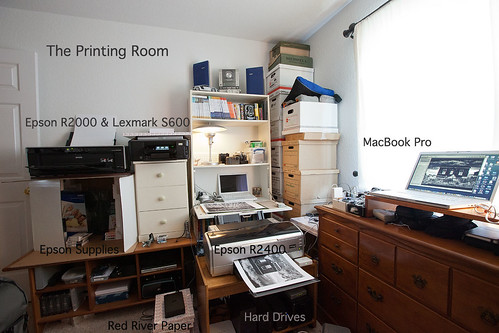 My personal printing room when not teaching workshops.
Here are five tips that resulted from the workshop:
- Turn off auto brightness in your Displays preferences. Then manually set brightness to two notches below full. Some participants had their displays set too dark which would adversely affect their print output. You may need to further adjust this for your particular computer and work environment. But this is a good starting point.
- Review your output under a daylight balanced light source. I use natural light from a nearby window when possible. Non-balanced light sources, such as tungsten lights, fluorescents, etc. make it difficult to accurately judge what comes out of the printer.
- Keep the workflow as simple as possible. Modern printers, such as the Epson R2000 have very intelligent software. In Aperture, we used "Printer Managed" in the Aperture print dialog box, then simply chose the correct paper surface in the ensuing Epson Print Settings dialog: Epson dialog > Print Settings > Media Type. Modern printers are much smarter than they used to be.
- Find a printing paper that you really like. We were printing our portraits on a luster surface that looked and felt great -- Red River Arctic Polar Luster. There are a variety of papers our there. Find one that you love.
- Improve your image editing skills. By knowing how to fine tune the color and luminance in your images, you'll get more satisfying output when you print. Keep in mind that your computer is backlit, and that paper is reflective. So prints often don't "glow as much." You can help compensate for this by fine tuning your settings in the print dialog box. Get familiar with these options so you feel more in control.
Printing your own work can be a very satisfying experience. By following these tips, and practicing with your equipment, you can produce some great artwork.
The Digital Story on Facebook -- discussion, outstanding images from the TDS community, and inside information. Join our celebration of great photography!


While I do agree with the five tips there is only one that I question. The tip of letting the R2000 manage the print color rather than Apurture. The extra step(s) of downloading the ICC profiles directly from RedRiver and installing them to Aperture isn't difficult at all.
Do you really feel you get better results from letting the printer software decide on the color of the paper rather than be sure how RedRiver intended it?
I don't consider myself a pixel peeper but I don't quite grasp the logic here. Love your show Derrick. Keep up the good work.
Ron Gergely