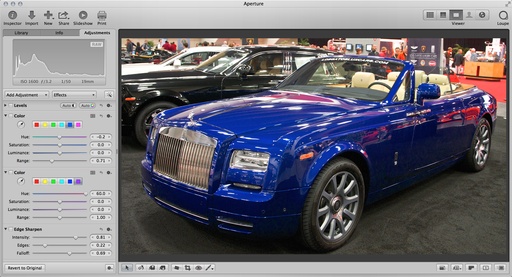
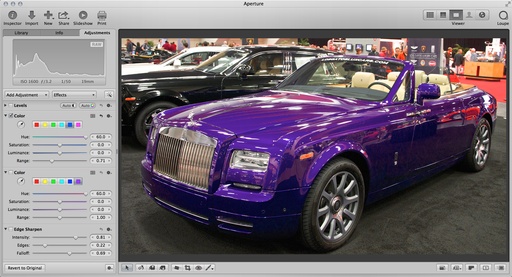
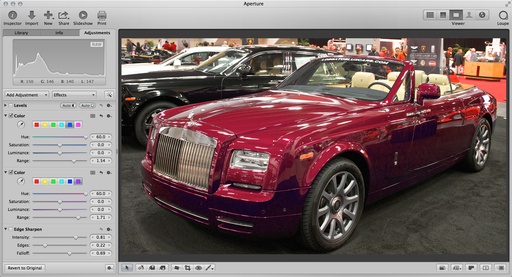
The Color brick is one of the most powerful tools in Aperture 3. Not only can you adjust colors, you can change them all together. By way of example, I'm going to change this blue Rolls-Royce to a red model.
In the Adjustments inspector, add a Color brick by going to the Add Adjustment popup menu, then choosing Color. Once the Color brick is loaded, click on the eye dropper icon in the brick, then click on the color in the photograph you want to play with. Move the Hue slider back and forth to get as close to the new color as possible.
Since the Hue slider is constrained to neighboring colors, you sometimes can't get the exact color you want. In this case, I could go from blue to purple. But I want red.
So here's the trick, you can add a second Color brick and continue adjusting. To do so, click on the gear icon in the Color brick, and choose "Add New Color adjustment" from the popup menu. You now have two Color bricks.
Repeat the process you used before: click on the eye dropper, click on the color you want to change, then adjust the Hue slider. Once the color is close, you can fine tune it with the Saturation, Luminance, and Range sliders. You can turn off and on the adjustment via the checkbox in the upper left corner of the brick. (Notice how I don't have either Color bricks activated in the first illustration, then one Color brick in the second, and finally both bricks active in the third illustration.)
I now have a red Rolls-Royce!
The colors you want aren't always available using this simple technique. But it comes in very handy for adjusting clothing the clashes with the background, or an offending color in an otherwise good composition. You can also use this technique with the brushing tool to apply color changes to a specific area of the photograph.
Aperture Tips and Techniques
To learn more about Aperture, check out my Aperture 3.3 Essential Training (2012) on lynda.com. Also, take a look at our Aperture 3 Learning Center. Tons of free content about how to get the most out of Aperture.
The Digital Story on Facebook -- discussion, outstanding images from the TDS community, and inside information. Join our celebration of great photography!


Nice one! I'll be using this technique!
Thanks for showing us that! I've had a few occasions where knowing that trick would've been very handy.