Painting without a brush. Artist Tim Mancusi joins Stephanie Scheetz and demonstrates how you can transform your photographs into beautiful works of art. Tim begins with a photograph, then creates a stencil from it using a simple craft knife. He spray paints over the stencil on to art paper to render his unique portraits. It's a great technique for photographers who always wanted to paint, but never mastered working with a brush.
Tim shows you everything you need to know, step by step. Start with one of your photographs, cut out areas with a craft knife, tack the stencil to your blank paper, then spray paint. The finished product is truly artwork, and you are the sole creator of every element.
Other Creative Output Projects with Stephanie
Stephanie has many more creative output projects waiting for you. Just visit our Creative Output section, right here on The Digital Story. Some examples are:
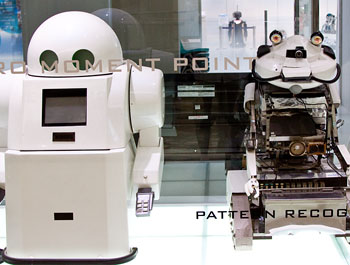
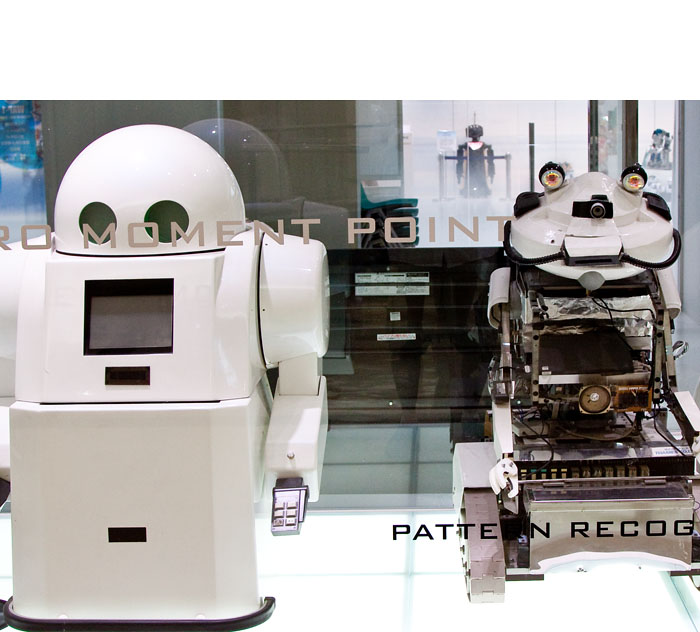
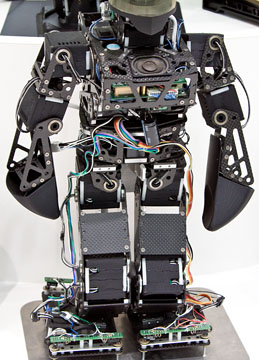
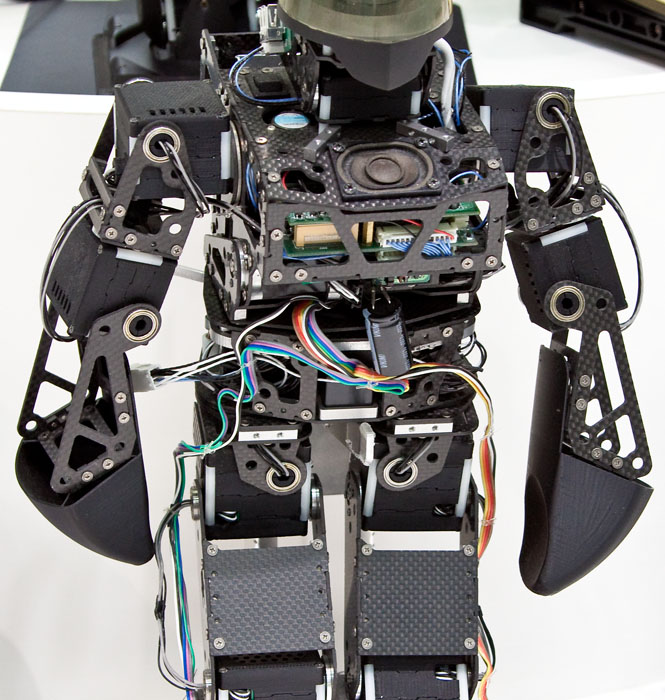
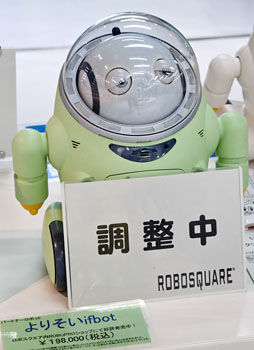
Inside what looks like a typical shopping mall, within walking distance of the Fukuoka Tower, is one of the most amazing retail establishments I've ever visited: Robosquare. It's a combination of tech museum, research facility, and toy store for geeks. In the spacious visitor area there are dozens of robots on display. Some are for sale; others are just to marvel at. Off to the side behind glass windows is an assembly and research area where you can watch technicians work on various robotic projects. Everywhere you turn, there is something to excite the senses.
It was a lucky find for me. I had been traveling on my own during this visit in Fukuoka. But there were times when I would end up at the same places as my shipmates. People would spot me, we'd compare notes on the day, then go our separate ways.
I had already been to the top of Fukuoka Tower, and I was hanging around downstairs contemplating where to go next. It was hot outside, so I wanted to make a good decision before leaving the comfortable air conditioned environment where I had just finished lunch. At that point I spotted a few of my comrades getting ready to go up the tower. They were part of an excursion. A few in the group hated heights and had asked for something else to do while the rest took the elevator to the top. The tour guide lived locally and suggested the Robosquare. As they were dashing off to see the robots, one of them mentioned the diversion to me. "Perfect," I thought. So I dashed off with them. The beauty of my situation, however, was that I could stay there as long as I wanted. They had to rejoin the tour 20 minutes later. It took me an hour to pull myself out of the store.
Part of what kept me engaged were the three demonstration areas that had robots in action. One in particular, the baby seal, was impressive. This robot had been developed to comfort the elderly who were in extended care facilities, often without companionship. The seal could locate people in the room, make eye contact, then interact with them. If the person pet the seal, it would really turn on the charm. The combination of movement and sound were very compelling, enhanced by the thick fur that felt so good to stroke. Within minutes, I felt better myself, and I was in great shape to begin with. What a truly marvelous invention.
Then, after I had looked over every display twice, I went to the shopping area where there were plenty of projects to take home and build. I opted for a couple car kits and a robotic pencil sharpener. They'll make great presents for a couple of boys back home. But there was plenty more, including Lego Mindstorms, robotic arms, and simple kits too.
As I walked out with my purchases, I was thinking that sometimes you just need to be in the right spot at the right time. Robosquare was definitely a good spot for me.
Photos by Derrick Story, captured with a Canon T1i DSLR. For more photography from Asia, visit the TDS Flickr page.
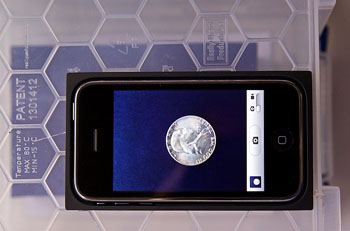
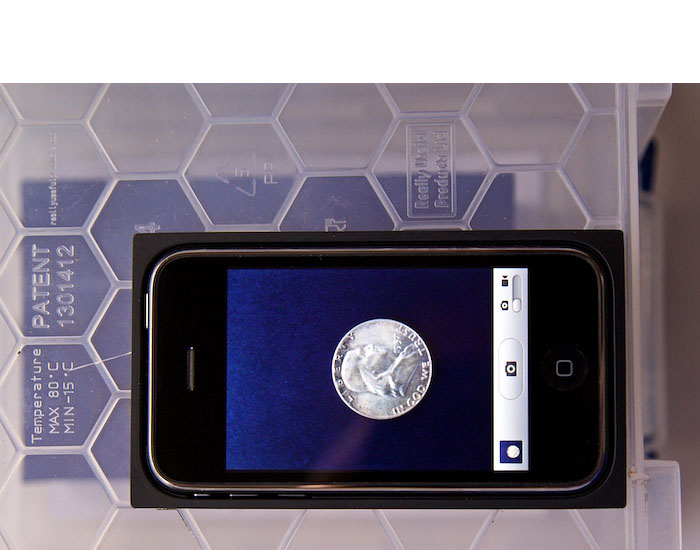
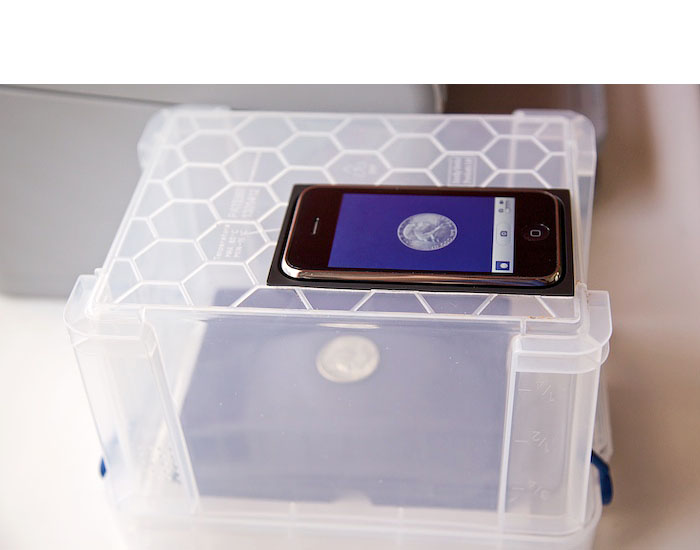
The camera in the iPhone 3GS has improved close-up capabilities, tap focus, and more resolution than previous models. You can use the 3GS to photograph small objects, business cards, even duplicate 4" x 6" prints. With this DIY copy stand that's easy to make, you can produce high quality images with just a couple taps on its screen.
If you've ever tried close-up work with the iPhone, you know you have two challenges. The first is holding the camera steady enough to avoid camera shake. The second is getting the plane of the camera parallel to the plane of the subject to avoid distortion. This little device helps with both, plus diffuses the light for a more flattering rendering.
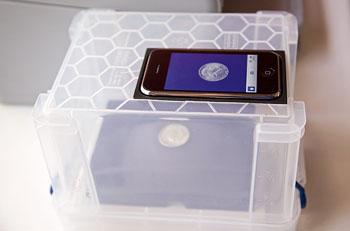
I have step-by-step photos showing the key elements of this project on The Digital Story Flickr page. In short, it works like this. You remove the tray from the iPhone packaging, drill a hole in it for the lens to see through, cut an opening in the bottom of a translucent box to set the tray in, and you're done. It's really that simple. I recommend that you start with a box that's at least 6" tall. That will give you enough distance to copy 4" x 6" prints. You can use "risers" such a little boxes to photograph smaller items that need more magnification. Here's a short instructional video that provides a nice overview.
Please feel free to add your comments, improvements, or variations on this project. The iPhone 3GS is a handy little camera, and I want to squeeze every ounce of capability out of it.
This week Stephanie begins by taking you shopping to a bargain store,
then heads back to the studio to design a custom notebook that
features your photography on the cover. Even though they are easy to
assemble (and very affordable), these beautiful notebooks make excellent
gifts.
You'll learn, step by step, how to take apart an existing notebook, customize the front and back covers, then reassemble it. The final product becomes an expression of your art.
Your photos can be used to make beautiful custom gift bags. And the best part is, you don't even need a photo printer. Stephanie Scheetz shows you how to transform your images, printed on regular white office paper, into personalized gift bags that will impress your friends and family. All you need is a little tape and Stephanie's expert guidance.
Meet Stephanie Scheetz. She's a photographer, an artist, and is very handy with do it yourself crafting projects too. In this first of a series of "Creative Output" instructional videos on The Digital Story, Stephanie introduces herself and previews a couple of the projects she'll be showing you in upcoming episodes.
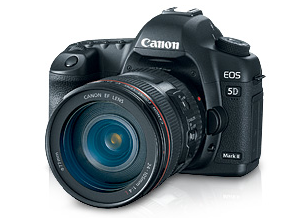
Editor's Note: I had a conversation on Twitter with Kip Beatty about the difficultly of editing HD video from the Canon 5D Mark II in Apple's iMovie '09. Kip said he had researched a solution, and I want to share his findings with our readers. Here's what Kip Beatty wrote.
The Canon EOS 5D Mark II shoots stunning 1080p 30 fps video. However, if you're using iMovie '09 to edit your movies, you'll find using anything but a Mac Pro to edit the native .264 files from the camera will bring iMovie to its knees. In fact, Apple recommends using the "Large" (960 x 540) setting when importing movies from the 5D Mark II. Even if you don't encounter the unexpected quits mentioned in the support document, you'll likely encounter a lot of stutters, pauses, and sluggishness. A simple workaround is to convert the .264 files to iMovie's preferred AIC (Apple Intermediate Codec) format using the free MPEG Streamclip.
Copy your movie files from your CF card to your computer (you can, if you prefer, convert them directly from the CF card). Open MPEG Streamclip and open the movie you want to convert. From the File menu choose Export to Quicktime... (CMD-E). At the top drop down menu, change the compression to Apple Intermediate Codec and slide the quality slider to 100 percent. You may also wish to open up the Adjustments options and bump brightness, contrast, and saturation just a bit to get an exact match, but be very conservative with any changes to these sliders (I'd suggest running a couple of tests on a small file to get the look you like). Click Make Movie and you're done with MPEG Streamclip.
You'll find the resulting file, once imported, plays much more nicely with iMovie, especially on a MacBook Pro or iMac. Unfortunately, you'll also find the resulting file is much larger than the original .264 version. In my tests, it's almost twice as large. This is the main drawback to using AIC. Nonetheless, if iMovie is choking on your native files, it's a worthwhile tradeoff. If you're going to do a lot iMovie editing with AIC converted files from the EOS 5D Mark II, you'll need a lot of storage space. Look at it this way, it's a great excuse to pick up a DroboPro.
I'm posting a link to this excellent article about Final Cut Server because A) it's interesting B) it's good, and C) this is something that I would love to see for still photographers using Aperture or Lightroom. Having a robust asset server that works with our desktop photo applications would be terrific. I'm hoping that this is a glmpse into the (near) future.
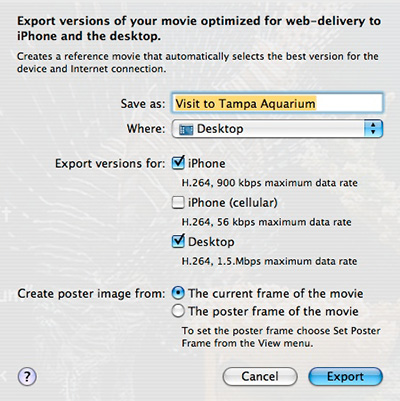
If you have your own web site, QuickTime Pro makes it easy to take video snippets off your digital camera and post them there. Its "Export for Web" option under the File menu presents you with some sophisticated publishing options... except now they're as easy to implement as checking a box.
The process couldn't be simplier. Open the movie you want to publish. Choose "Export for Web" from the File menu. Select the options you want: iPhone (WiFi), iPhone (cellular), and/or Desktop. Choose as many as you want. When you hit the Export button, QuickTime will create a folder with the different versions of the movie in there. It also creates a web page with instructions for publishing to your site.
My little bonus tip is this. Open that web page of instructions in your text editor, change the text to what you want to say, save the html file as a new name, and upload the entire folder to your web server. That page contains all the scripts you need, perfectly formatted, and pointing to your movie. As long as you leave everything in the same folder, you're set.
That's how I created this version of A Visit to the Tampa Aquarium. It is viewable in a web browser, on Apple TV, or on an iPhone. The built in script identifies what type of device is accessing the page, then serves the appropriate movie for that device. It's really quite clever.
You already know that I'm a big fan of the movie mode on our digital cameras. Now sharing those movies on your own web site is as easy as capturing them in the first place.