A challenging aspect of image adjustment for many photographers is figuring out what needs to be done, then choosing the right controls to do it. The good news is, in iPhoto '11, you can let the application analyze the photo for you, have it make an initial set of corrections, then you can fine tune the picture's appearance to your taste. I call this the 3-Step Image Adjustment Technique.
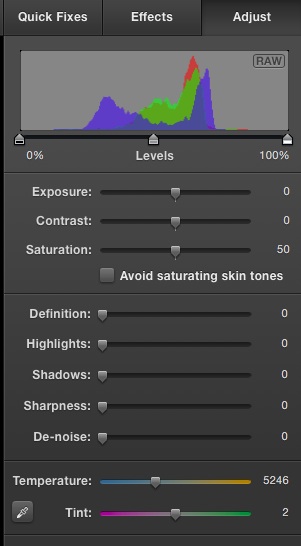
Step 1 - Choose your image in iPhoto, then click on the Edit button in the lower right corner of the application. Then click on the Adjust tab in the upper right corner. Take a look at the Histogram and get a feel for your image. For example, this image is lacking a bit in contrast. We can tell that by seeing that most of the data in the histogram is bunched up in the middle. You don't have to spend a lot of time on this, just a few seconds. We'll return to this view in a minute.
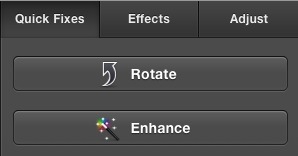
Step 2 - Click on the Quick Fixes tab, then click on the Enhance button. iPhoto will make a number of adjustments for you, based on its analysis of the image. You'll probably like most of what it does, but you may want to make a tweak or two. No problem. This is just a starting point that you can now fine tune.
Step 3 - Return to the Adjustment tab. You'll notice that iPhoto has made a number of adjustments here. This is where you can fine tune.
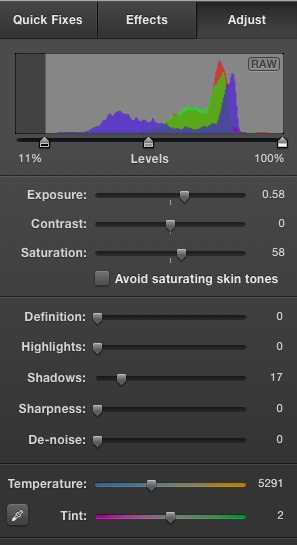
If you feel it made the photo too bright, move the Exposure slider to the left. If the blacks in the image look too dark, move the Shadows slider to the right. If the colors in the image are now too intense, check the box beneath the Saturation slider (labeled Avoid saturating skin tones) and play with the Saturation slider until you get the look you want. And finally, if you want to make the overall appearance of the image "cooler," move the Temperature slider to the left, and to make it warmer, move the slider to the right.
Once I have the basic tones and colors the way I like, I usually add a little Definition (about 20-25) and a bit of Sharpness (15-25). Don't forget to crop if your image needs it. This entire workflow should only take a minute or two. And with practice, you'll get even faster. To see how much you've improved the picture, hold down the Shift key to see the original version. There will be quite a difference!
Learn More Tips!
There are more ways to learn and have more fun with iPhoto '11: my iPhoto '11 Essential Training ONLINE at Lynda.com, and the new iPhoto '11 Essential Training DVD that you can purchase from the Lynda.com Store for $49.95 US. You can get a feel for how this works by watching Creating Smart Albums in iPhoto '11.


