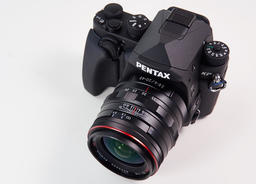
The Pentax KP DSLR is an innovative, rugged, high resolution camera designed for active photographers who like innovation and portability.
This is the first installment of a multipart review that will help new owners get off to a great start with the camera, and hopefully answer questions for prospective buyers. Today's focus is learning to operate the top deck.
Top Deck
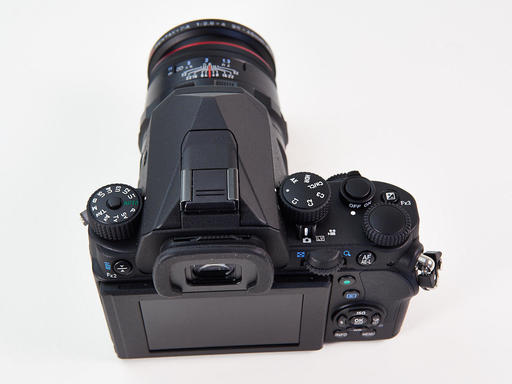
The first thing that you'll notice is that there is no LCD on the top deck. Instead, Pentax uses a Mode Dial (left side), Function Dial (right side next to the pentaprism), Setting Dial (right side, below the shutter button), Fx3 button, and the Capture Mode Selector (beneath the Function Dial) for controlling the camera. Changes can be reviewed on the 3" articulated LCD on the back of the body.
To be honest, I have not missed the top LCD at all. And I like the clean, traditional look without it.
The Mode Dial on the left side should be intuitive for DSLR shooters. The are the traditional PSAM exposure options, plus full Auto and Bulb. Pentax adds Sv (Sensitive Priority that based on your ISO preference) and TAv (Shutter and Aperture Priority). You have to push the Mode Dial Lock Button in the center of the dial to change modes.
The Mode Dial also include 5 User Settings where you can create different combinations of settings and change to them quickly. This is handy for going from product photography, to landscape, to Black & White. You can name each of these, making it easy to keep track of them.
I recommend setting the Mode Dial to P as a starting point and default mode.
The Function Dial on the right side of the top deck is handy, but it takes some explaining since it's not a typical DSLR control. It has three pre-programmed settings: AE - AE Metering, rotate the Settings Dial to change metering patterns; HDR - HDR Capture, rotate the Settings Dial to selected the type of HDR capture you wish to use; and CH/CL - Continuous Shooting, rotate the Settings Dial to select the burst mode that you want to use. Pentax includes a Medium burst mode in addition to Low and High.
You can program the C1, C2, and C3 positions to you personal preferences. I've done so like this: C1 - Outdoor View Setting, rotate the Settings Dial to brighten or dim the LCD; C2 - EV Compensation, rotate the Settings Dial to change exposure compensation; and C3 - Bracket Value, rotate the Settings Dial to change Auto Exposure Bracketing. Pentax provides up to 5 stops for this function.
You can set the Function Dial to the white dot if you aren't interesting in using any of the functions. I recommend programming C1 for Outdoor View and using that as your default setting.
The Fx3 button is pre-programmed for Exposure Compensation. And I recommend that you leave it that way. To change EC, hold down the Fx3 button and rotate the rear e-dail. Ergonomically speaking, I prefer to use C2 on the Function Dial and Settings Dial combination. It's easier for my large hands. But I leave Fx3 programmed for exposure compensation in case I need to use it when I have the Function Dial set to another adjustment.
You can program the Fx3 button by going to Menu > Tab 5 > Button Customization. There are seven different options available, including depth of field preview and change AF area.
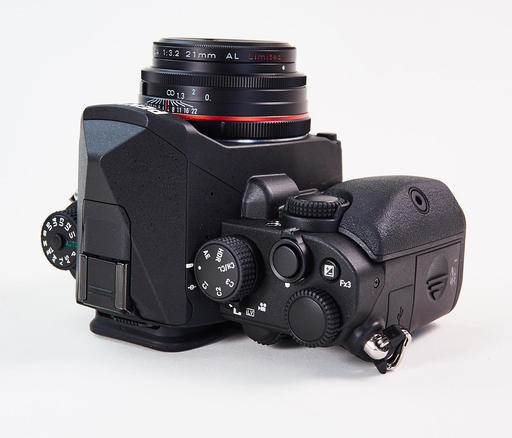
The Capture Mode Selector Switch allows you to change from optical viewfinder, to live view (LV) to movie capture. Live View is quite handy with the Pentax KP because the articulated LCD swings up and down for different viewing angles.
If you like to use Live View, as I do often, I recommend that you set the AF Active Area parameter to User Selectable. This limits focusing to one active point that you can move around with the back jog dial. It's far more efficient that wrestling with the camera's choices during live shooting. You can make this change in the Menu > Tab 1 > AF with Live View > AF Active Area > SEL.
To enable this option while shooting in Live View, hold down the back OK button for a few seconds until the arrows appear, then use the four-button jog dial to move the focusing point. It works great, and is quite efficient.
The Pentax KP DSLR starting shipping this week for $1,099. In the next installment of this review, I will explain the ins and outs of the back panel controls. Until then, happy shooting!
More Articles About the Pentax KP
Pentax KP Review - Part Two - Back Panel - Looks at the buttons on the back of the camera and the menu system for the Pentax KP.
Pentax KP Review - Part Three - Image Quality - I programmed the KP to do the heavy lifting so I could focus on composition. Here's how the photos look.
You can share your thoughts at the TDS Facebook page, where I'll post this story for discussion.


