I turn to Luminar when I need to add a little creative magic to my images. But there are a few older Macphun apps that I love as well, specifically Tonality and Noiseless. These can be tapped as plugins with Luminar 2018 to keep the workflow simple. Unfortunately, even though Luminar is cross platform, the older Macphun apps only work with mac OS. They are available on the Skylum site. Here's how it works.
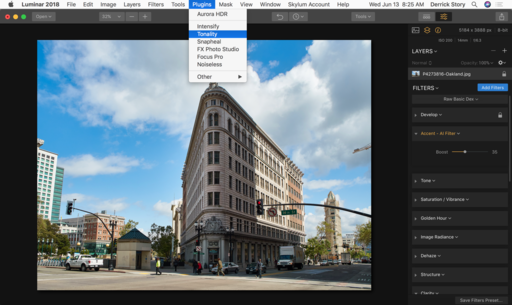 Step 1 - With the image open in Luminar, go to the Plugins menu and choose the one you want. (You have to have these already purchased and loaded on your computer.) In this case, I'm going with the B&W editor, Tonality.
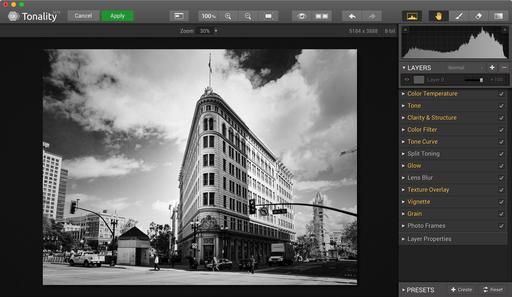 Step 2 - In Tonality, I make my edits. Once I'm finished, I click on Apply to return to Luminar.
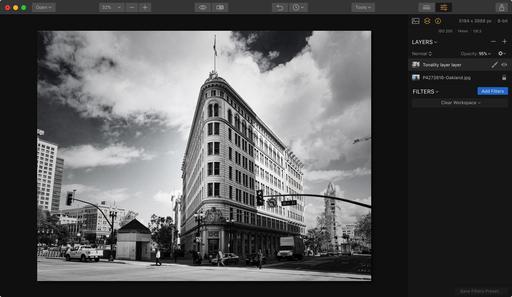 Step 3 -Back in Luminar, all of my options are open. The Tonality-edited image appears on a separate layer. I can adjust its opacity or use a blending mode.
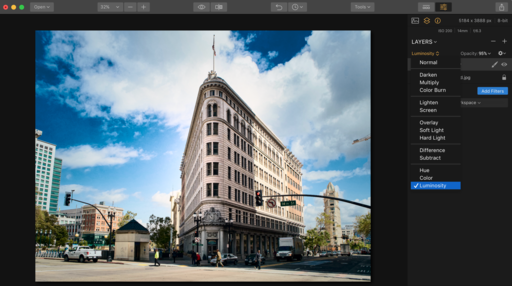 Step 4 - On the Tonality layer, I used the Luminosity blending mode to create the look I wanted.
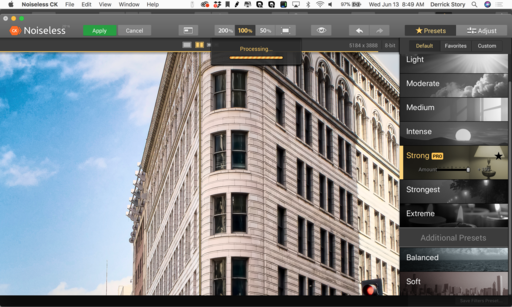 Step 5 - Next, I tapped the Noiseless plugin to help me control the noise that was visible in the sky. Same process as before. It also returns on its own layer.
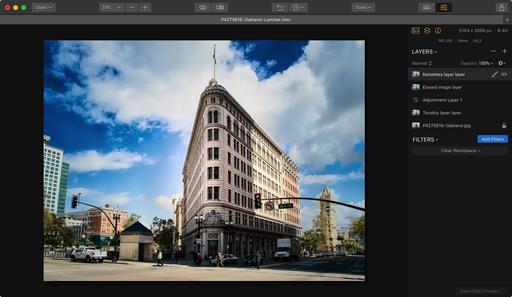 Step 6 - I save the the image as a Luminar file (.lmnr) by using the Save command. I can then export the image in any format or file size for sharing.
I published the finished image on Flickr for sharing and enjoyment. Compare it to the original shot illustrated in Step 1. There is a big difference in the rendering of the building.
I used plenty of native Luminar tools as well, such as Erase and the Accent-AI filter. But having access to some of my favorite Macphun apps, especially Tonality and Noiseless, makes for a powerful, creative work environment.
Rock Luminar with my new Essential Training
You learn all the ins and outs of Luminar 2018 via my Essential Training on lynda.com and on LinkedIn Learning. It's fun, and I promise, you will learn a lot.
You can share your thoughts at the TDS Facebook page, where I'll post this story for discussion.


