This is The Digital Story Podcast #547, August 30, 2016. Today's theme is "WiFi and GPS." I'm Derrick Story.
Opening Monologue
I must admit that in the beginning, cameras that added WiFi and GPS felt more like novelties than real tools. But that was because the initial supporting software, and the implementations themselves, were a bit crude. But we've come a long way since those early days, and those radio technologies are very important to my work now. I explain why in today's show.
WiFi and GPS
I'll start with WiFi because it has had such an impact on my mobile photography and the speed at which I can share images. I tend to shoot in RAW+Jpeg then move the Jpegs to either my iPhone or iPad wirelessly.
I know some photographers would like to be able to make this transfer to their computers also. Well, all they have to do is use Macs and Photos for OS X. Images that are transferred to the mobile device's Camera Roll, automatically show up in the Photos application on the computer. You don't really have to do anything.
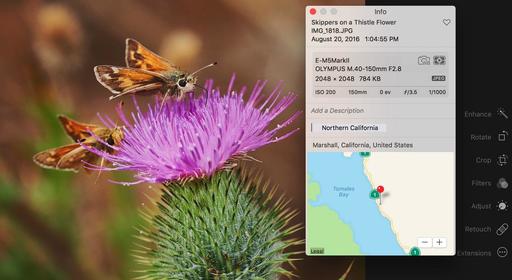
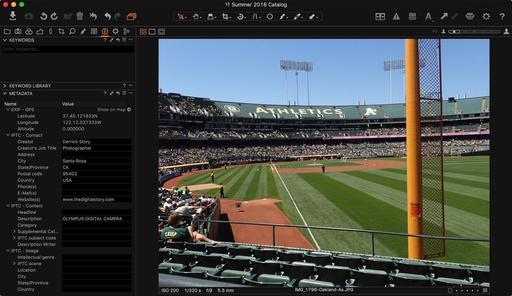
As for GPS, Photos, Lightroom, and Capture One Pro all take advantage of this data. Photos 2.0 that ships with macOS Sierra will be the most unique because it integrates the location data into its overall organizational scheme.
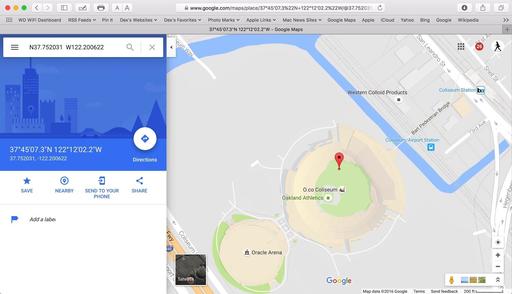
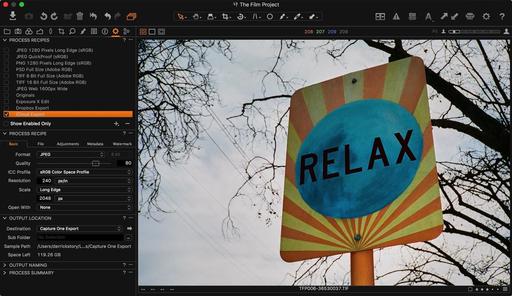
Because I've found so many ways to use location data: my dairy entries into Day One, Memories organization in Photos 2.0, and even Google Maps pins via Capture One Pro, I find myself shooting more and more with cameras that record this information.
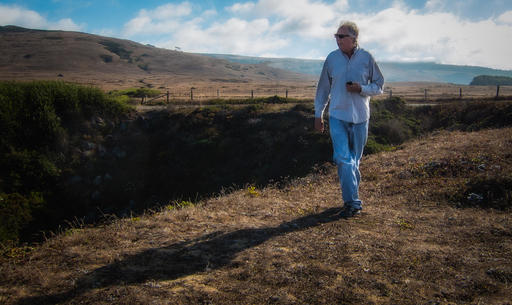
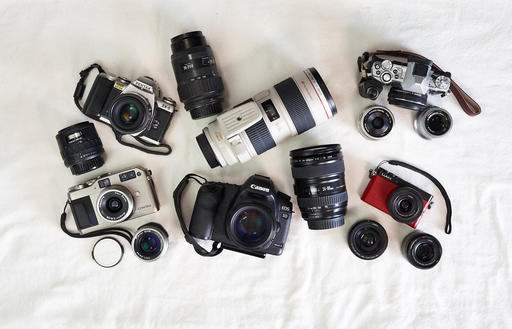
My current GPS favorites are the iPhone 6S, Olympus TG-4, and the DxO ONE when connected to the iPhone. If I'm shooting analog, then I always capture a digital version too with one of these devices. It's nice that they all fit in my pocket.
And I'm getting to the point where if I shoot with the E-M5 Mark II or the E-M10 Mark II, I record a couple frames with a GPS camera too, just so I can have those coordinates available in the same collection.
In the News
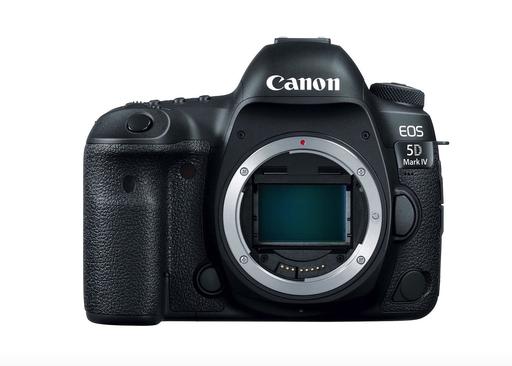
Canon 5D Mark IV Includes Built-In GPS - For news photographers capturing hundreds or even thousands of images while moving around throughout the day, landscape photographers on location and even photographers on vacation, GPS has become an indispensable part of a daily workflow.
The EOS 5D Mark IV camera's built-in GPS helps photographers and filmmakers both tag their images with critical location data, and also adjust the time and timestamp on the camera automatically. Featuring both built-in GPS and Wi-Fi technology, the EOS 5D Mark IV can use GPS and WFT (Wireless File Transfer) together, making it easy to upload numerous images and movies both quickly and from increasingly distant locales. Compatible with American GPS satellites, Russian GLONASS satellites and Japanese quasi-zenith satellites Michibiki, the EOS 5D Mark IV's GPS information stays reliably accurate in many locations.
The camera has two GPS modes to help manage battery life. One keeps the GPS on, even when the camera is off, and the other turns off the GPS radio when the camera is off.
Hedge at IBC in Amsterdam Sept. 9-13
Hedge is teaming up with LaCie at the show to give away a LaCie 12Big array - (48TB, 72TB, 96TB) comes with Enterprise Class Drives (24/7 operations) and
5-year warranty and 25 Hedge Pro licenses. You can enter to win even if you're not attending the event. Just go to hedgeformac.com/ibc and click on the Create It Big link.
Keep these three things in mind...
- Hedge is the fastest app for importing and backing up media on macOS.
- Import multiple sources to multiple destinations, at the same time.
- Every file copied by Hedge is cross-verified with the original.
There's a free version and a premium version. Use this URL, hedgeformac.com/tds and save 20 percent off the price of the pro version that provides the full Hedge experience with Fast Lane copies, unlimited simultaneous transfers, plus NAS and RAID support.
Drobo Diaries
Speaking of massive storage, I've just unpacked a Drobo 5Dt five bay storage device that can manage up to 64TB with Thunderbolt 2 or USB 3.0 connectivity.
"Drobo 5D Turbo builds on the fully automated functionality of previous Drobo arrays by adding blazingfast performance. Leveraging cutting-edge Thunderbolt TM 2 and USB 3.0 connectivity Drobo 5Dt is the highest performing personal storage array on the planet."
I have 2 6TB drives and 3 2TB drives to start out with. "The Turbo Edition supports 4k Thunderbolt connected displays, includes an mSATA card for increased performance of up to 30 percent on streaming video and 3x read performance via Drobo's Hot Data Cache. Three years of DroboCare support is included on every 5Dt sold to ensure the best storage experience ever."
"The Drobo 5Dt doesn't just protect from drive failures, it also includes a battery backup system that protects all data in memory or cache. That's right, Enterprise grade data protection for you on your Drobo 5Dt! If power spontaneously goes away, the Drobo stays alive long enough for the data to be written to disk, ensuring your important information is always safe. The onboard battery recharges itself and is designed to last for the life of the product."
Over the next few shows, I'll be reporting on how I integrate this new drive into my workflow. Stay tuned. This is going to be fun.
Updates and Such
B&H and Amazon tiles on www.thedigitalstory. If you click on them first, you're helping to support this podcast. And speaking of supporting this show, and big thanks to our Patreon Inner Circle members.
And finally, be sure to visit our friends at Red River Paper for all of your inkjet supply needs.
See you next week!
More Ways to Participate
Want to share photos and talk with other members in our virtual camera club? Check out our Flickr Public Group. And from those images, I choose the TDS Member Photo of the Day.
Podcast Sponsors
Red River Paper - Keep up with the world of inkjet printing, and win free paper, by liking Red River Paper on Facebook.
MacPaw Creators of CleanMyMac 3 and other great software for Apple computers. Visit www.macpaw.com today.
Hedge for Mac - The fast solution for moving photos and videos from memory cards to drives, or drives to drives for that matter. Learn more at Hedge for Mac.
The Nimbleosity Report
Do you want to keep up with the best content from The Digital Story and The Nimble Photographer? Sign up for The Nimbleosity Report, and receive highlights twice-a-month in a single page newsletter. Be a part of our community!
Want to Comment on this Post?
You can share your thoughts at the TDS Facebook page, where I'll post this story for discussion.
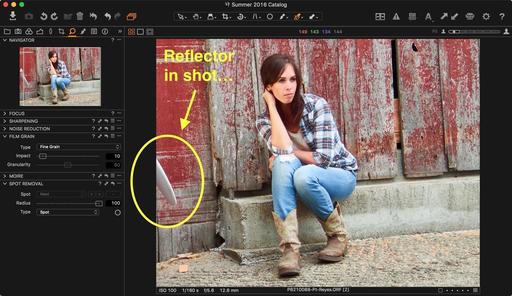 This fix is easier in Photoshop.
 Easy fix in Photoshop.