Recently in Mobile

  Page 1 of 15 in Mobile  

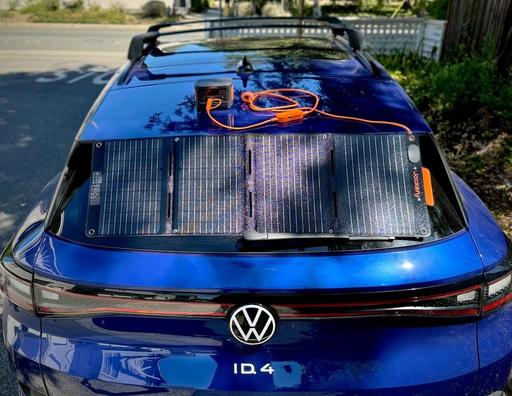
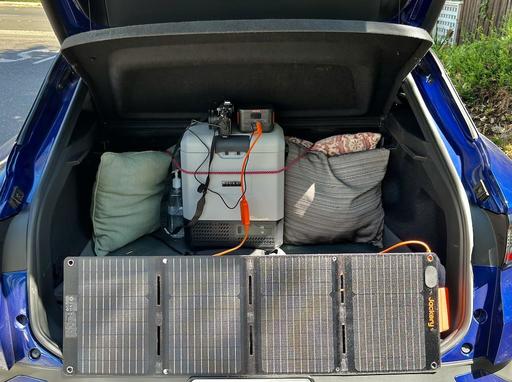
40W-on-ID4-1024.jpeg The Jackery SolarSaga 40W Mini Solar Panel on the back window of a VW ID.4

If you want to keep your cameras, laptops, phones, and tablets topped off while camping and on the go, the Jackery SolarSaga 40W Mini Solar Panel ($129) might be the perfect solution. It's super compact (about the size of a laptop when collapsed), weighs just 2.6 pounds, and has a maximum output of 40 watts.

40W Mini Solar Panel Top Features

  • Direct Device Charging: With direct charging capabilities via its included hub, you can power up your devices quickly and efficiently.
  • Efficient Solar Conversion: Featuring a 23 percent solar conversion rate, ensures you get the most power possible from the sun.
  • Extreme Durability: With an IP68 waterproof rating and verified through 8 IEC tests, this solar panel is built to withstand extreme temperatures and conditions.
  • Solar panel cable with multifunctional USB hub, which is exclusive to the standalone version of the SolarSaga 40W panel.

Pairing the Solar Panel with a Mini Power Station

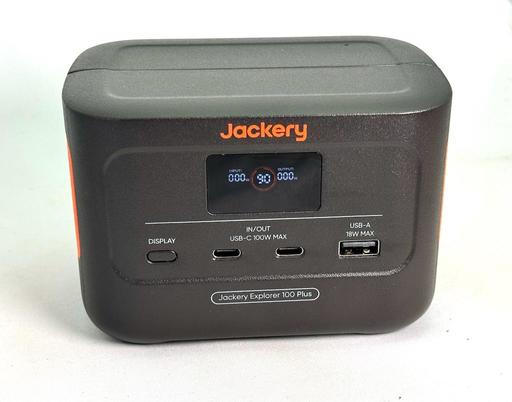
The solar panel fits perfectly on the back window of my VW ID.4 SUV, serving as both a sunshade and a solar generator at the same time. Devices can be plugged directly into its hub that includes one USB-C and one USB-A port, or you can pair the solar panel with the Jackery Explorer 100 Plus Portable Power Station ($129) that features 100W Dual PD charging and discharging.

Jackery-100-Plus-1024.jpeg The Jackery Explorer 100 Plus Portable Power Station that fits in the palm of your hand.

This is how I typically work with the 40 watt solar panel - I have the panel plugged into the Explorer 100 to add power while I use the other USB-C port to charge a device. This can happen simultaneously.

charge-and-discharge-1024.jpeg The Jackery 100 Plus can be charged and discharged simultaneously, providing a constant flow of energy for your digital devices.

All of my current cameras can be recharged via USB-C - Fujifilm X100V, Olympus OM-1, and Nikon Zf - as well as my iPhone 15 Pro Max and MacBook Pro M1 14" laptop. A full Explorer 100 Plus can do a complete round of charging of all three cameras, the iPhone, and the iPad. After recharging the Explorer 100, it can also completely refuel my MacBook Pro.

Using the 40-watt solar panel, I usually see about 25 watts of juice flow into the Explorer 100, recharging it in a couple hours.

Safer than Drawing Off the Car's 12 Volt Battery

Many cars allow for charging off their 12-volt batteries via a 12-volt car accessory plug or via USB ports. This is convenient when the car is running, but should be used with caution when not in motion, especially in remote locations.

The last thing you want to do is compromise your 12-volt car battery so it can't do its intended job: keep your car running. Having a separate power source for digital devices is an extra layer of protection against mishaps.

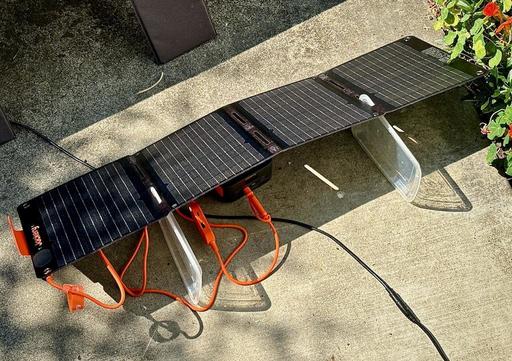
40-W-Panel-Patio.jpeg The Jackery 100 Plus power station can be shaded by the 40W solar panel when working in hot conditions.

Bottom Line

The Jackery SolarSaga 40W Mini Solar Panel combined with the Jackery Explorer 100 Plus Portable Power Station provides a flexible, powerful energy source for your digital devices when away from home.

The panel folds down to 10" x 12" and the mini power station is only 5" x 3.5". Together they will fit easily in any gear bag for the working photographer. Both items can be stowed in carry-on for air travel and used on location when you arrive.

USB-C Power Delivery allows this compact duo to refuel every piece of gear I use without having to lug around bulky power adapters. All I need is a USB-C cable, and I'm in business.

Other Articles in This Series

The Bluetti AC70 Power Station Review - Off-the-Grid Freedom.

The Jackery Explorer 300 Plus Review - Power Your Roadtrips.

Roadtripping with the BODEGAcooler Mini 12V Portable Fridge/Freezer - A Review.

Hot Coffee, Soup, on the Road with this Portable Electric Kettle.

Note: The affiliate links in this article help support my research and writing. There is no additional charge to you the customer. Thank you for using those links.

NikonZF-iPhone.jpg

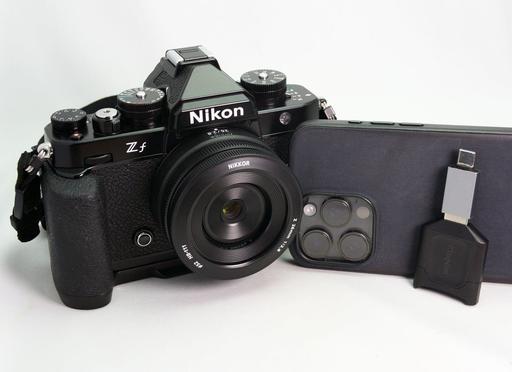
Nikon Zf, iPhone 15 Pro Max, Kingston Card Reader with USB-C adapter.

For years I have tried to bend smartphone software to my will. They do some things OK, like geotagging pictures. But they're painful at best when it comes to getting real work done. And by real work, I mean copying images from my camera to an image editor on the phone where I can edit and share them.

I've tested software created by Nikon, Fujifilm, OM System, Pentax, and others. Most of the time, I can get them to work, but in the end, I feel like it's easier to lug around my laptop and use a card reader. But I shouldn't have to.

The processing power in today's iPhone is ample for managing and editing pictures from mirrorless cameras. The screens are absolutely beautiful and large enough for basic tasks. They are cloud-connected devices, so our work is immediately backed up and shared to all of our computers. But where they really shine compared to full-sized laptops, is that they fit in our pockets.

So, with a mirrorless camera around my neck and an iPhone in my jacket, I should be conquering the world. Instead, I find myself wasting time trying to get the two devices to talk to each other with fiddly WiFi software.

Making a Better Connection

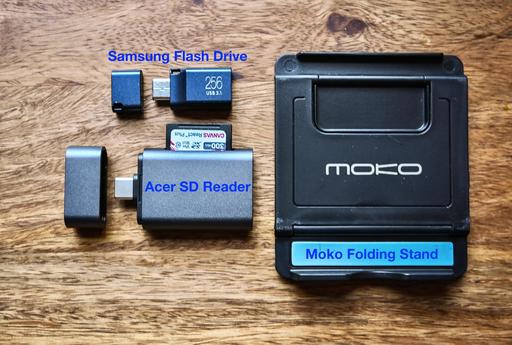
One thing that the European Union had right and Apple had wrong was using USB-C for all smartphones. As of iPhone 15, the Lightning connector was replaced by a standard USB-C port. Not only did this ensure that we always have a charging cable available, but many of the accessories that we use with laptops now work with our smartphones... including portable SD card readers.

Card-Reader-Connection.jpg

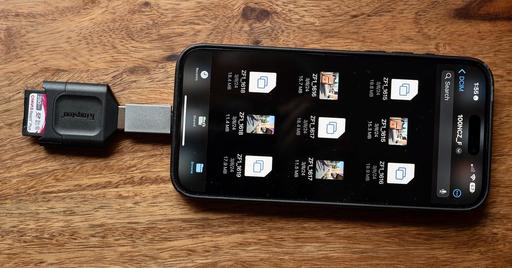
Kingston USB-C card reader connected to an iPhone 15 Pro Max.

Combine this reliable hardware connection with universal software that's included in iOS, and you can say goodbye to frustrating WiFi transfers between cameras and mobile devices. Within iOS we have the Files app, which is rock solid. Additionally, Lightroom Mobile is very adept at managing and editing mirrorless camera pictures, as is Photos for iOS.

On the hardware side, a card reader is faster and more stable than fighting with wireless transfer. Plus, it's small. I stash mine in the little coin pocket in my Levi's jeans. Ditching wireless transfer and using a USB-C card reader allows me to leave the laptop behind and travel lightly with just my camera and the iPhone. And when I do get home, all of my pictures are waiting for me on the computer thanks to cloud connectivity.

Step-by-Step Guide to Transferring Pictures from a Mirrorless Camera to an iPhone

For my latest shoot, I used a Nikon Zf camera, iPhone 15 Pro Max smartphone, a Kingston 1 TB SD card, and a Kingston portable card reader.

I like to shoot RAW+Jpeg because I enjoy experimenting with film simulations that I've loaded into the Nikon. With this workflow, I can decide if I want to copy the Jpegs, RAWs, or both to my iPhone. Let's start with the most basic approach using the Files app.

The Files app is included in iOS. Unlike software designed by camera manufacturers who seem to have a limited understanding of the iPhone, Files is perfectly integrated into the device. Look for the icon with the blue file folder. Now, let's move some pictures.

  • Remove the SD card from the camera, put it in the card reader, and connect the reader to the iPhone.
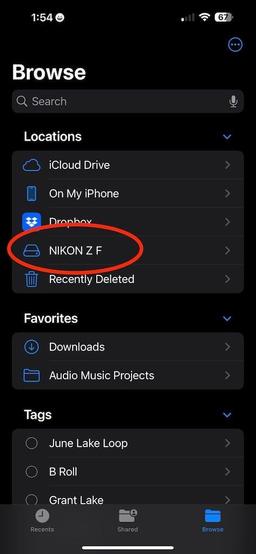
  • Open the Files app on the iPhone and look for your SD card under Locations. In my case, it will read NIKON Z F.
  • Files-Nikon.jpg

    The SD card in the Apple Files app.

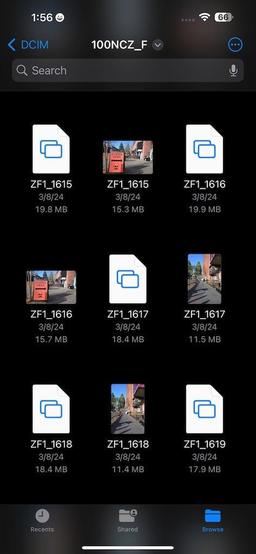
  • Tap on the SD card name to take you to the next screen. You will see one or more file folders there. Tap on the one that reads DCIM. Depending on how your camera sets up the file system, an additional folder may exist inside DCIM. Tap on it and your photos will be revealed.
  • Files-Pictures.jpg

    Both RAWs and Jpegs are displayed here. The Jpegs show the image thumbnails.

  • If you shoot RAW+Jpeg, you will see both versions of your pictures there. To choose the ones you want to copy to the iPhone, tap on the 3 dots in the upper right corner of the screen. Then tap on Select.
  • Now, tap on the thumbnails of the pictures you want to copy to the device. They will be marked with a blue check.
  • Tap on the Share button in the lower-left corner of the screen. Choose Save Images.
  • The pictures are now copied to your camera roll on your iPhone and are accessible via Photos and other apps.
  • Swipe up to close the Files app, disconnect the reader from your phone, and return the SD card to your camera.

This process is fast. And the best part is, it works every time.

Kingston-Card.jpg

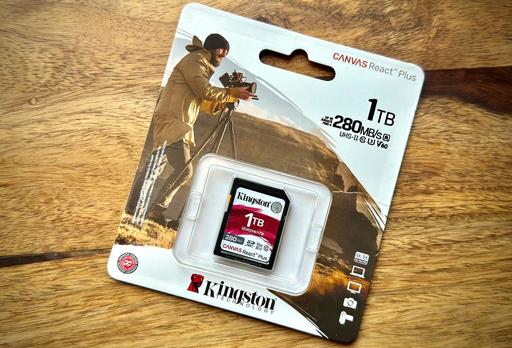
You'll notice that I have a large 1 TB card for the Nikon Zf. I like to keep all the pictures from an adventure on the card as an additional backup.

With WiFi transfer, this becomes untenable because it takes so long to read all of the files on the card. But with USB-C connectivity, it's nearly instantaneous. In terms of speed, there is no comparison between WiFi and USB-C.

Adding Lightroom Mobile to the Mix

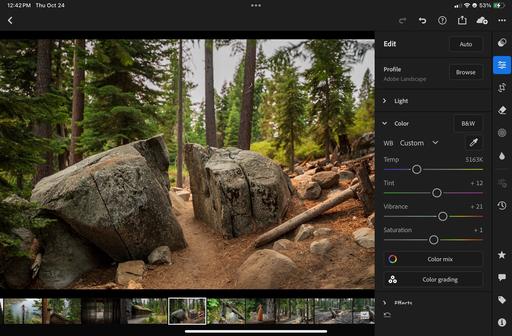
Lightroom on the iPhone and iPad provides a powerful set of editing tools, and it plays nice with the other software. For example, from the Files app, as described above, you can send selected images directly to Lightroom on your mobile device via the Share button.

Lightroom-Mobile.jpg

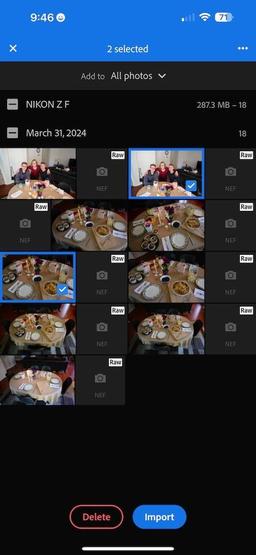
Direct import using Lightroom Mobile.

Or you can copy directly into Lightroom, bypassing the Files app altogether, by connecting the SD card and tapping on the blue import icon in the lower right corner of the Lightroom interface.

Lightroom will ask you if you want to add photos from the Device (iPhone), Files (app), or Connected camera/card. Choose Connected camera/card, select the pictures you want, then tap the blue Import button at the bottom of the screen. Bingo!

Once the pictures are in Lightroom, you have a powerful set of imaging tools to adjust them. If you haven't used the mobile version of Lightroom for a while, I think you'll be surprised at how elegantly it has evolved.

After editing, you can share the finished files with other apps on your mobile device, save them to the camera roll, or publish them on social media. They'll also be available when you get home on your computer via the Cloud Tab in the upper lefthand corner of the Lightroom interface. You can pick up right where you left off.

Additional Apps and Hacks

If you're not a Lightroom fan, an excellent alternative is RAW Power from Gentleman Coders. No subscription is required, it's a very affordable one-time purchase, has a powerful set of editing tools, and the developer does a great job of keeping it up to date with the latest camera releases.

Photomator for iOS is also very popular, and for good reason. Easy to use combined with powerful editing tools make this Lightroom alternative a winner.

And here's a fun little hack... Lightroom has a handy export function that enables you to copy files from your mobile device to a USB-C flash drive.

Tap on the Share button at the top of the Lightroom interface, tap Export As... from the popup menu, choose Save to Files, then navigate to the connected flash drive icon in Files, and tap on Save. Yes, you can use USB-C to copy pictures to a flash drive as well.

Wrapping Up

I've waited far too long for camera software that provides a reliable workflow for my iPhone. Now, I don't need it. With my pocket-sized card reader, I can work as fast with mobile devices as I do with a computer. And that means more time to focus on my pictures.

Apple's recent Wonderlust event debuted the iPhone 15 in four different flavors. The biggest, most expensive model, the Pro Max has many useful features for pro and enthusiast photographers. Let's take a look.

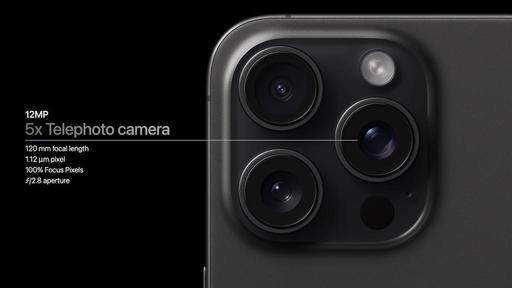
The 5X Telephoto Camera

Telephoto-Lens.jpg

No doubt that Apple had to increase the reach of its flagship phone. Competitors already have telephotos in the 10X range.

Personally, I'm OK with the 5X version on the Pro Max. Its 120mm focal length at f/2.8 provides plenty of magnification for iPhone photography. Since I am a pro, if I need more, I'm going to use an interchangeable lens camera.

This is a new feature that I've been waiting for. My current iPhone 12 Pro Max doesn't have enough reach, so the new telephoto is definitely a check in the plus column.

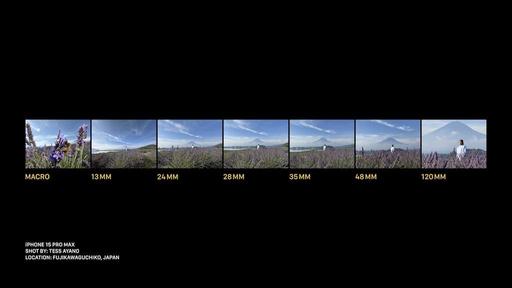
Presets for Different Focal Lengths

Different-Focal-Lengths.jpg

Maybe because I've used prime lenses for so many years, I do think in terms of focal lengths, especially for my starting position when I initially frame a scene.

My iPhone 12 starts at the wide end, 26mm, which is a bit too much for me. With the iPhone 15, I can start at 35mm focal length that's far more comfortable.

USB 3 vs USB 2

A17-Processor.jpg

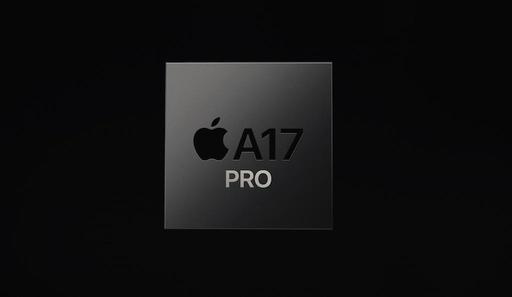
Not all USB-C ports transfer at the same speed. So yes, we're getting the new I/O on the iPhone 15. But the A17 Pro chip, which is only in the two Pro models, supports USB 3 when using a compatible USB cable. The non-pro models will still be at USB 2.

This can make a noticeable difference, especially if you're going to do things like tether the iPhone to Capture One Pro, which you can now do with the new model.

Speaking of under the hood, the iPhone 15 Pro and Pro Max will have 8 GBs of RAM compared to 6 GBs in the standard models.

All of this, plus faster processing and better battery life - Gotta love the A17 Pro.

The Action Button

Feature-Set-Pro-Max.jpg

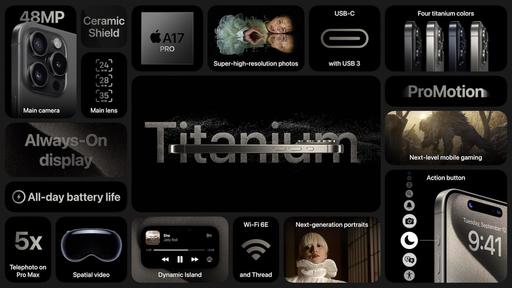
Personally, I would have added to Action Button to all four iPhone models, but as it turns out, we only get it on the Pros. And I think it's a big deal.

I know about the other tricks for quickly enabling the camera, such as setting up two taps on the back. But none of these will work as well or be as convenient as the Action Button.

Long press and you're in camera mode. Done. Plus, you can program it to enable other features too.

Rolling It All Up

Camera-Lenses.jpg

iPhone photographers already know about the other great features, such as automatic iCloud backup, beautiful portraits, and excellent low-light performance. Add what's new with the iPhone 15 Pro Max, and we have a camera that we can depend on to augment our interchangeable lens model.

Apple is taking orders now. I'm going to trade in my iPhone 12 Pro Max (for $450!) and buy the iPhone 15 Pro Max.

Illustrations complements of Apple from the Wonderlust event.

It's become more difficult than ever for spectators to bring decent camera gear into pro arenas. The one device that doesn't raise any eyebrows is our smartphone. But is it worth the effort to try to capture sports action with an iPhone?

Well, that depends.

Sharks-Pressure-1024.jpeg San Jose Sharks match captured with an iPhone 12 Pro Max. Photos by Derrick Story.

The iPhone does a great job for certain kinds of shots, such as wider overviews, crowd activity, and portraits of friends and family in attendance.

But if you want those pro-caliber action shots, it can't compete with a top-drawer DSLR or mirrorless interchangeable lens camera. That said, you can come away with some memorable images.

Get the Best Seats Possible

Honestly, the closer the better when it comes to capturing action with a mobile device. The minute you have to start pinch-zooming for a decent composition, the photo game is over. But, if you can frame a decent shot with the 2.5X optical camera on the iPhone, you have half a chance.

Good Lighting Is Important

Bright, well-lit arenas allow for faster shutter speeds (to freeze the action) and for lower ISOs (to help control image noise). Many professional hockey and basketball venues have very good lighting. You can take advantage of this to squeeze a bit more image quality out of your smartphone camera.

Burst Mode Increases Your Odds

Anticipating when something is going to happen and recording a short burst of frames might yield that magic moment. The iPhone allows you to keep the best frame in a series and delete the others. I highly advise taking advantage of this feature.

Sharks-Entry-1024.jpeg I love the mood of this image, but the lighting and motion presented problems for the iPhone. Wish I had my OM-1 mirrorless for this one.

Realize that Some Shots Just Won't Meet Your Expectations

There are often great moments when the lights go down and something special happens. Go ahead and try. But realize that the iPhone is challenged by moving object in dim lighting. You may luck out, but don't count on it.

Final Thoughts

When I don't have my regular camera rig with me, I get the most that I can out of the iPhone. My hit rate goes way down for sporting events, but even if I get one or two mementos from the event, I feel it's worth the effort.

You can share your thoughts at the TDS Facebook page, where I'll post this story for discussion.

Tell More of the Story with Panoramas

Even though all of my cameras can record impressive panoramas, my favorite device is still the iPhone because of its ease of use and image quality. My only problem with it is remembering to switch to Pano when standing before an expansive scene.

Oregon-Coast-Pano.jpeg Panorama of the Oregon Coast captured with an iPhone 12 Pro Max. Photo by Derrick Story. Click on image for larger view.
I think we've all remarked at one time or another, "It looked so much bigger than this," when showing pictures of our travels. Part of the reason for that is that our eyes are taking in so much more information than our camera is recording, even when using a wide angle lens.

Take a look at the photo below, captured from the same location as the panorama above.

Oregon-Coast-Normal.jpeg Oregon Coast captured with a wide angle lens.

It's a nice photo, for sure, and I'm glad I took it. But if I wanted to show a more complete description of the location to someone else, then it's good to have both photos - the bog picture and the more detailed view.
I don't think anyone would want to see a slideshow of just panoramas. They have their place in the mix just like everything else. By the same token, you don't want to forget to record a few panos in locations that have compelling big pictures.

I use panos for simple things as well, such as to show the view from the back patio of a vacation location. Again, it tells more of the story and better represents what my eyes were taking in at the time.

back-door-pano.jpeg Back patio pano.

My takeaway photo tip this week is to remind you to capture a pano or two alongside the other pictures you take when in beautiful locations. They will help you tell a complete story about your adventures.

You can share your thoughts at the TDS Facebook page, where I'll post this story for discussion.

PA202130-1024.jpeg

I'm surprised at how often I want to connect an iPhone to some sort of tripod. Yes, it's a mobile device, but it's so good at so many things.

And if you're a photographer who appreciates the imaging athleticism of the iPhone 12 and 13, then you realize that their capabilities can stretch into areas that we traditionally used a tripod for, such as time-lapse, video interviews, panoramas, and night photography.

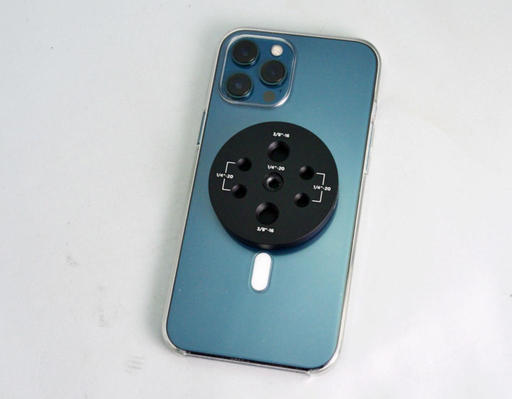
The problem was, until a week ago for me, that I hadn't discovered a satisfactory way to connect my iPhone 12 Pro Max to any type of 3-legged beast, large or small. That is, until I found the Moment Multi-Threaded Mount for MagSafe (best deal: $29.95).

PA202132-1024.jpeg

This machined disc that feels like a slim hockey puck has a powerful magnet on one side that attaches to the MagSafe connector on the back of an iPhone 12 (or later), and an array of 3/8" and 1/4" female threads on the other. Now I can attach my iPhone to practically anything.

I can use the adapter with a MagSafe compatible case on, or just on the phone itself, making it the simplest and most versatile mobile photo accessory that I've to date. Just pop it on and it stays put.

PA202134-1024.jpeg

In addition to attaching the phone to a tripod, I can also use the adapter to connect flash adapters, microphone holders, magic arms, and anything else that uses a 1/4" thread. I can even hitch the iPhone to a camera.

If you're serious about iPhone photography, then you'll want one of these on your pocket tripod.

Product Links and Comments

There are product links in this article that contain affiliate tags. In some cases, depending on the product, The Digital Story may receive compensation if you purchase a product via one of those links. There is no additional cost to you.

You can share your thoughts at the TDS Facebook page, where I'll post this story for discussion.

What do you do with the plethora of photos on your smartphone after taking them? It's easy to have hundreds, if not thousands, of photos in your library, but it isn't so easy to back up and keep track of them. In this course, get tips on how to manage your ever-growing mobile photography collection.

Mobile-Photo-Backup-LinkedIn-1024.jpg Check out this free video, A few things about this course from Mobile Photography: Image Management by Derrick Story

I delve into several different backup and organizational methods for both Android and iOS devices, highlighting the benefits and risks of each approach. Plus, I share tips for enhancing the appearance of your shots right on your mobile device.

Discover how to leverage your iPad as a mobile photography studio, transfer images from your digital camera to your mobile device, back up and edit photos with Lightroom, and much more.

Mobile Photography: Image Management is a course that practically anyone who enjoys photography on their smartphone would enjoy. Take a look and see what you think.

You can share your thoughts at the TDS Facebook page, where I'll post this story for discussion.

Of all the features that I use on the iPhone 12 Pro Max, the ultra-wide camera is one of the most satisfying.

D-Story-SF-Giants.jpeg San Francisco Giants vs. the Washington Nationals at Oracle Park in San Francisco. iPhone 12 Pro Max using the ultra-wide camera. Photo by Derrick Story.

When you think about it as a traditional photographer, having access to a 13mm, f/2.4 lens with an expansive 180-degree field of view, in your pocket, is incredible.

I've always liked wide-angle photography, but didn't shoot as much of it as I would prefer because the lenses were bulky. So many times when I was putting together my nimble kit for the day, those optics were left behind.

All of that has changed. I can now carry a camera with just one prime lens (such as the Fujifilm X100V or Olympus PEN-F) with the iPhone 12 Pro Max in my pocket. The smartphone covers ultra-wide and mild telephoto, while the camera is used for my normal lens work.

The iPhone 12 Pro Max is my first phone with the wide optic, having upgraded from the iPhone X (which I love!), and I must say, that 13mm lens has changed everything.

You can share your thoughts at the TDS Facebook page, where I'll post this story for discussion.

I've always been fond of the iPad mini. But my affection grew deeper when Apple released iPadOS that opened the door to more capability. Now, a year later, I can't imagine work without it.

Derrick-Story-DSCF2410-iPad-mini-1024.jpg

Even though I use this tablet for everything from reading the NY Times, to checking email, to running TheFilmCameraShop, my focus for this post is its usefulness for photography. Considering that this device fits just about anywhere, I'm impressed with how versatile it is.

Powerful Imaging Apps

Here are my "go to" imaging apps that I use with the mini.

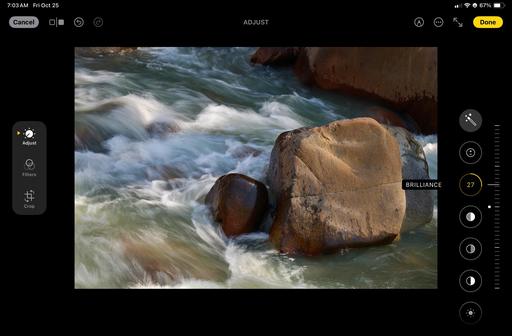
  • Photos for iPadOS - Photos is one of those apps that I think photographers don't take seriously enough. The editing tools are solid, and if you shoot with a modern iPhone, there are amazing things you can do with this app, such as changing the depth of field of your portrait shots in post production.
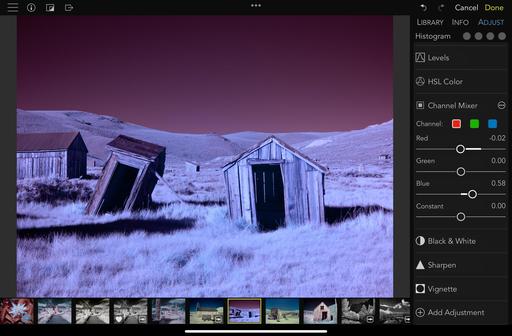
  • RAW Power - Not only can it tap right in to your Photos library, once you're there, RAW Power puts an incredible set of editing tools at your fingertips. Whether the images are imported from a digital camera, or captured with an iPhone, you can get the most out of them with this app. It even has Depth Effect adjustments for iPhone portraits. (I also use it regularly for my infrared work because it has a channel mixer and LUT capability.)
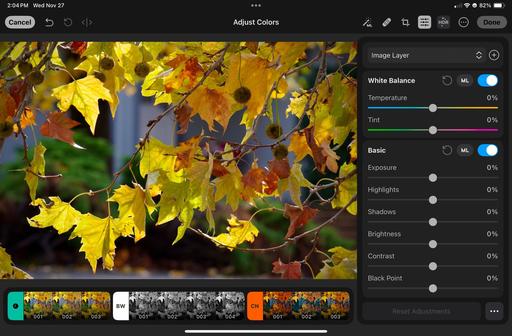
  • Pixelmator Photo - Like RAW Power, Pixelmator lets me tap your Photos library, or work at the file level, and can easily switch back and forth. If there's a picture I want to edit on your iPad, Pixelmator can get to it. Plus it has fantastic tools including a Retouch Brush and Channel Mixer. Lots of creative filters to experiment with are included in the app. And Pixelmator has incorporated Machine Learning into the software for excellent automated results. I can even "sample up" my 12MP iPhone files to higher resolution. All of this on an iPad mini that goes just about anywhere.
  • Lightroom Mobile - For those in the Adobe ecosystem, Lightroom Mobile is the perfect addition to the iPad workflow. This app has continued to evolve intelligently, and add to the mix its big brother, Photoshop for iPad, and that's a powerful tandem. All of your work can be stored in Adobe Creative Cloud, so you can pick up right where you left off when you return to the computer (if you ever do...).

Apple Pencil

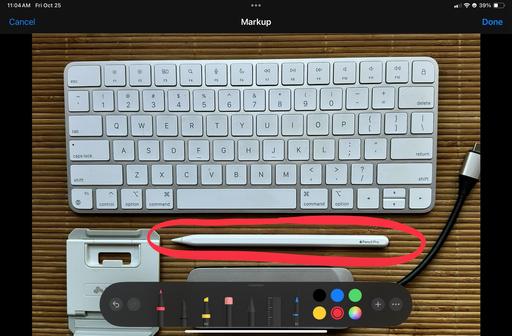
When Apple refreshed the iPad Mini, they added Apple Pencil capability. This is a feature that I wanted, but I wasn't sure how much I would use in day to day life.

As is turns out, the pencil is in my hand quite a bit. I particularly like it for marking up photographic illustrations when I'm trying to explain how to do something. But I also like it for image editing and making handwritten notes. It's as fun as it is useful.

A Real Web Browser

There are so many things about iPad OS that I like. But the most important is a real web browsing experience that allows me to use the device for administrating my blog and managing the store. I can now do anything on the tablet that once required a laptop. Fold in the touch screen and Apple Pencil, and it's an enjoyable tool for real work.

Related to this are its connectivity options. I do use WiFi when I can, but the cellular expands its boundaries. Since I use AT&T for the iPhone, I opted for Verizon with the iPad. Rarely am I unable to connect to get work done, regardless of my location.

For this photographer/writer, it's vital that I am able to work from anywhere. Combine the real web browser with outstanding connectivity options, and I can.

Final Thoughts

Nimble photography has been a mantra of mine for years. But that practice isn't limited to my camera gear. Everything has to work together for me to be truly agile in this world.

Last night, I transferred an IR shot from my Olympus E-M10 Mark III to the iPad mini via WiFi. I edited the image in RAW Power, then published it online.

Fantastic tools that fit in my jacket pocket. That's what Nimble Photography is to me.

You can share your thoughts at the TDS Facebook page, where I'll post this story for discussion.

Since I've been working more with the iPhone 12 Pro Max, I've found myself wanting to push the envelope for those lovely ProRAW files. One of my old friends, Raw Power for iOS not only taps ProRAW capability, it has some unique tools that you won't find in the standard Photos app. One of my favorites is the ability to add LUTs (lookup tables) to my pictures.

Raw-Power-LUT.jpeg Raw Power running on an iPad mini editing a ProRAW picture. Here I'm applying a Fujicolor Provia film simulation LUT.

Not only does the app come with a nice selection of built-in LUTs, such as a collection of Fuji film simulations, but you can add your own. For example, I've added a handful of Red/Blue swap LUTs so I can quickly edit my IR shots in Raw Power on the iPad. (Raw Power also includes a great Channel Mixer!)

If you're upping your iPhone photography game, especially with the new models, then why settle for the "out of the can" look? Work those files! And tapping LUTs is one fun and easy way to do so.

You can share your thoughts at the TDS Facebook page, where I'll post this story for discussion.