February 2007 Archives

Lightroom Adventure Slideshow

iceland_wedding.jpg

To help celebrate the 1.0 release of Adobe Photoshop Lightroom, the Lightroom Adventure Team has released a beautiful 800x600 slideshow with soundtrack. The 4:40 presentation includes photos from a variety of Adventure photographers, complete with piano music by Kevin MacLeod. This presentation is a healthy 16 MBs, so you might have to wait a minute or two for the download to complete. (I initially had "fast start" enabled, but it broke when I added the ID3 tags.)

Speaking of preparing the movie, it was actually a bit of a challenge for Mikkel Aaland and me to create using Lightroom. The problem was that you can only export slideshows to PDF out of Lightroom, so we had to overcome that in order to create this presentation. Mikkel has just blogged an interesting write up about how we accomplished this in his post titled, A Lightroom QuickTime Slideshow. Yes, QuickTime!. If you're using Lightroom, you might want to take a peek at what he has to say.

You can download the Lightroom Adventure Slideshow here.

Technorati Tags: , ,


Sponsor Note...

ExpoDisc Custom White Balance -- Simply Better Color. Simply Better Pictures. Visit www.expodisc.com

image_size.jpg

How many megapixels do you really need to make big enlargements? You'd be surprised how much you can do with your 6-8 megapixel camera if you learn how to intelligently "sample up." It's a process you can use in Photoshop CS where you let PS add pixels to your image to increase resolution.

My photographer friend, Ben Long, recently tested different methods for "sampling up," and we both agree after looking at lots of prints, that Photoshop's "Bicubic Smoother" produces the most photographic results.

In this episode, I discuss how to sample up using the "Image Size" dialog box in Photoshop, and explain how you're existing camera can probably produce much bigger results that you'd initially expect.

Listen to the Podcast

Now that I've piqued your curiosity, it's time to listen to today's audio show titled, "Sample Up." You can download the podcast here (20 minutes).

Technorati Tags: , ,


Sponsor Notes...

Add Magic to Your Slideshows -- FotoMagico presentations are so amazing that your audience will be asking how you did it.

iview_mediapro.jpg

The latest version of iView Media Pro continues Mac support (Universal Binary even) and adds Vista compatibility. Features and fixes include updated Nikon libraries for compatibility with Nikon D80/D40 camera files, corrected issues with some .XMP sidecars not being recognized (Win), and fixed a problem where preferences might not be displayed correctly (Mac). You can read the version history (PDF) for more details.

I think Microsoft is doing a good job of moving the application forward for both Mac and Windows users. If you're looking for a solid Digital Asset Manager (DAM) for photos and other media, this application is definitely worth investigating. You can download a 21-day trial if you want to take a peek.

Technorati Tags: ,

I Messed Up, and Raw + Aperture Saved Me

camera_raw_plugin.jpg

I was driving by the Sebastopol Lagoon the other morning right after the rain had stopped. I've always had a soft spot for how the big puffy clouds reflect in the still pools of the Lagoon, accented by stately trees and a variety of vibrant green plant life.

I found a good vista point and captured about 30 frames. I was thinking that one of these might make a nice 13 x 19 inch enlargement. Unfortunately, I made a bonehead mistake by shooting the series with the white balance set on “custom” from the night before. Fortunately, I record in Raw, so I was able to correct the blunder quickly during post production in Aperture.

I began my path to redemption by selecting the “Daylight” white balance preset that I had created previously in the Adjustments HUD, then applied it to the first image in the series. With the photo still selected, I used Shift-CMD-C to copy my adjustment. Then I selected the other images in the series and used Shift-CMD-V to add the Daylight white balance setting to them.

Within just minutes, I had corrected an otherwise disasterous mistake that would have ruined my day back in the “Jpeg/destructive editing” dark years. Now I'm off to the printer to see how these shots look on paper.

PS: You can learn more about Aperture by checking out the Lynda.com training video I authored with Scott Bourne titled, Aperture 1.5: Beyond the Basics.

Technorati Tags: ,

Grab Shot 92 - "Waiting to Ride"

waiting_to_ride.jpg

"The little girl is waiting for her mom to get change so they can ride the carousel," says Victor Cenac-Mehedinti. "While she waits, she looks through the bars with anticipation!"

Victor captured this image at the Santa Monica Pier with a Canon 5D, Canon EF 24-105 USM L. The ISO was set to 400, shutter speed was 1/100, and aperture was f-4.

If you have a candid you'd like to share, take a look at our Submissions page, then send us your Grab Shot. If we publish it, you'll receive an ultra cool custom carabineer keychain.

Technorati Tags: , , ,


Sponsor Note...

Add Magic to Your Slideshows -- FotoMagico presentations are so amazing that your audience will be asking how you did it.

canon_tx1.jpg

You'd think that I'd be crazy-excited about a new compact camera that has 7 megapixel resolution, a 10X optical lens, and high definition video capture. And to some degree, I am impressed with the just-announced Canon PowerShot TX1.

This device fits in your shirt pocket, yet can record full-motion video (to an SD card) and shoot 7 megapixel still shots. And like a dedicated video recorder, you can zoom the lens during capture -- something that many still cameras don't allow you to do in movie mode. And how about that 39-390mm optical zoom in a camera the size of a deck of cards? Wow. That is impressive. The TX1 is also Vista certified right out of the box, in addition to being Mac OS X 10.4 compatible.

But it has two major shortcomings that will keep me from purchasing it. First, if you can record stunning high-definition video (1280 x 720 @ 30fps), but have to use an onboard microphone for the audio, what are you really gaining? The image is only half of the equation in movie making, and until camera manufacturers provide us with a microphone jack so we can record equally impressive audio, we can't use these devices instead of a camcorder.

Also, I'm totally mystified by Canon's insistence on using the AVI Motion JPEG WAVE format for video instead of some flavor of MPEG. Using the AVI format, you get a whopping 13 minutes of continuous movie recording at 1280x720 resolution on a 4GB memory card. If Canon were to switch to an advanced MPEG format, they could quadruple capture time for the same amount of storage space.

So, I have to view the new PowerShot TX1 as a potentially impressive still camera (10x optical with 7 megapixel resolution) that also records movies. But as a state of the art hybrid, it comes up short for me.

Technorati Tags: , ,


Sponsor Note...

ExpoDisc Custom White Balance -- Simply Better Color. Simply Better Pictures. Visit www.expodisc.com

iLifeZone

Want to hear the latest about digital photography software from Scott Bourne, Alex Lindsay, Colleen Wheeler, and Derrick Story? Then tune-in to the latest episode of the iLifeZone. Find out Derrick's top three features for Lightroom and Aperture, discover why Colleen still uses Adobe Bridge, and learn which of these interfaces Scott likes the best. It's all there in another lively episode of the iLifeZone.

You can subscribe to the iLifeZone via iTunes Music Store.

Technorati Tags:

camera_raw_path.jpg

Sometimes people don't install great software, such as the new Adobe Camera Raw Plug-In 3.7, because they're not exactly sure how. Even though you know you could look it up, other tasks seem to come first.

When Adobe released the 1.0 version of Photoshop Lightroom, they also posted Camera Raw Update 3.7. If you haven't done so already, this is an important plug-in for your to add to Photoshop. By doing so, you get an improved Camera Raw workspace, the latest camera support including the Nikon D40 and Pentax K10D, plus compatibility with Lightroom.

There are two ways you can update Camera Raw. Open Photoshop CS and use the Update Tool in the Help menu. Or you can download it and place it in the File Formats folder yourself. The file path is:

Hard Disc > Library > Application Support > Adobe > Plug-Ins > CS2 > File Formats

Regardless of which method you use, I highly recommend this update for Raw shooters. You can find out more by opening the Read Me file. And if you have Photoshop CS loaded on a Windows machine, you can download that version here.

Technorati Tags: ,

camera_bag.gif

In Podcast 69, I talked about what's in my camera bag. One of the things I mentioned during the show was that I wanted to know what you're packing these days when you go out for a shoot. Virtual camera club member, Anthony Watson, took me up on the offer, and here's what he has to say.

"I like your idea of having 'application specific' photo bags," says Anthony. "Some day I will do that. In the meantime, I have most everything in one bag as follows:"

  • Nikon D70 body
  • Sigma 50/2.8 macro lens (from my N70)
  • Sigma 24-70/2.8 (also from my N70, now you know why I chose a D70)
  • Sigma 70-300/4-5.6 (again, from my N70)
  • Vivitar ring flash (for the macro lens)
  • Nikon SB800 flash (my favorite purchase so far)
  • Cokin filter system
  • Cokin circular polarizer
  • Cokin 2 stop hard gradient filter
  • Lens pen
  • Rocket blaster (thanks for the suggestion on one of your early podcasts!)
  • Batteries, batteries, and more batteries
  • 2 SanDisk 2GB CF cards

"This setup seems to cover just about all of my needs. I wish I had a macro lens somewhere between 85 and 135 - hopefully someday."

Tell us what you have in your camera bag. Just write a few words about your packing philosophy and add the contents list. Go to the Submissions page for contact information.

Technorati Tags: ,

d_story_iceland.jpg

There are as many ways to convert a color image to B&W as there are to capture the picture in the first place. In this podcast, I explain two of my favorite methods using Photoshop CS or Elements.

You may wonder why I pick these two "traditional" methods of B&W conversion when there are new tools available in Adobe Lightroom, Apple Aperture, and the beta version of Photoshop CS3. Well, quite honestly, many photographers aren't using those new applications yet, but almost everyone has some version of Photoshop. So, we'll start with the basics, then revisit this topic again with new techniques up the road. Today, let's start with one of my favorite methods using adjustment layers.

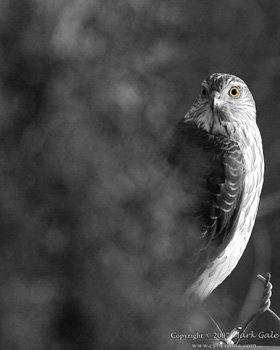
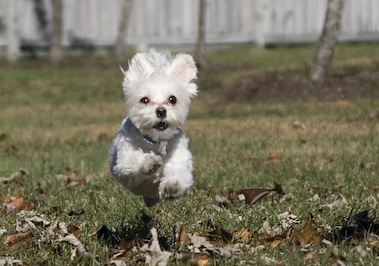
Black & White photo of Derrick Story taken by George Jardine in Iceland.

Hue/Saturation Adjustment Layers

If you've never worked with Layers before in Photoshop, this will be a terrific introduction to their power. I like this method for B&W conversion, because once you have it set up, all you have to do is move a slider back and forth until you get just the right tonal look. It's really cool. This method works both in Photoshop CS and Elements. Here are the steps.

  1. Open the image you want to convert, and display the Layers palette (Window > Layers).
  2. Create a new Hue/ Saturation Adjustment Layer (Layer > New Adjustment Layer > Hue/Saturation). Name it "Hue" and select "Normal" from the Mode popup menu.
  3. Create another new Hue/ Saturation Adjustment Layer (Layer > New Adjustment Layer > Hue/Saturation). Name it "Saturation" and select "Color" from the Mode popup menu.
  4. In the Saturation menu, move the "Saturation" slider all the way to -100. Click "OK."

  5. Now, go back to your Layers palette and click once on the "Hue" layer to select it, then double-click on the adjustment icon to open its dialog box. Move the "Hue" slider back and forth until you get eactly the right look you want. Click "OK."

  6. If you want to make any final tonal adjustments, click once on the background layer to select it, then open the "Levels" dialog box for final highlight, shadow, and midtone correction.
  7. Select "Save As" and give your file a new name, and save as a Photoshop file with Layers perserved. That way you can always come back and readjust the image.

  8. If you want to make a Jpeg copy of your B&W converted photo, choose "Save As" again, select "Jpeg" from the Format popup menu, and give your file another unique name. Photoshop will flatten your layers for you and convert the image to Jpeg. You're set!

hue_layers.jpg
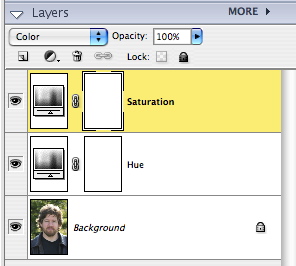
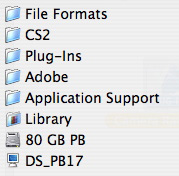
Layers Window in Photoshop Elements for above technique: Make sure the "Saturation" layer is on top of the "Hue" layer for this technique to work properly.

Monochrome Mixer

The second method works in Photoshop CS using the Channel Mixer. This method is a bit simplier. All you have to do is open the Channel Mixer (Image > Adjustments > Channel Mixer...). Then click the "Monochrome" box. Set the sliders to Red=30, Green=60, Blue=10 as your starting point. Adjust to taste from there, keeping in mind that you want the total of your sliders to add up to 100. Then finish off your adjustments using "Levels," and Save As a B&W version of the image. Simple!

Feb. Photo Assignment

I also mention the February 2007 photo assignment, "Texture." Deadline for submission is Feb. 28. You can read the details on our Submissions page.

Listen to the Podcast

Now that I've piqued your curiosity, it's time to listen to today's audio show titled, "Convert to B&W." You can download the podcast here (28 minutes).

Technorati Tags: , ,


Sponsor Notes...

Add Magic to Your Slideshows -- FotoMagico presentations are so amazing that your audience will be asking how you did it.

inside_aperture.gif

With the official release of Lightroom 1.0, it's a good time to take a look at the respective strengths of both offerings from Adobe and Apple. Along those lines, something kind of fun is brewing on the O'Reilly Digital Media site. On the Inside Aperture blog, Micah Walter is field testing both Aperture and Lightroom on a real shoot, and posting his findings daily for this week. His first post, Aperture vs. Lightroom: Let the Games Begin, sets the stage on location in the West Indies.

Over on Inside Lightroom, Michael Clark is conducting a similar comparison, and has posted his first round of thoughts in A Comparison: Adobe Lightroom vs. Apple Aperture. Both Micah and Michael are working photographers with good technical chops. I think they will handle this comparison with skill and fairness.

If you're weighing the pros and cons between these two applications, you might want to follow what these guys have to say.

Technorati Tags: ,

Grab Shot 91 - "USB Kittie"

usb_kitty.jpg

"Here's my cat having some fun with the USB end of my iPod cable," said Joe Rodricks. "This was taken with my Nikon D50 at f/22.0 with an exposure of 1/60 and a focal length of 80mm in direct sunlight. The cat is on an old wood sign that was turned into a coffee table with a thin sheet of Plexiglas on top, thus the reflection, which made the whole picture very bright."

"While the cat chewing on the cord was impromptu, this was the result of my experimenting with such a bright setting. I'm pretty happy with the results, my iPod cable, not so much."

If you have a candid you'd like to share, take a look at our Submissions page, then send us your Grab Shot. If we publish it, you'll receive an ultra cool custom carabineer keychain.

Technorati Tags: , , ,


Sponsor Note...

Add Magic to Your Slideshows -- FotoMagico presentations are so amazing that your audience will be asking how you did it.

hp_printer-cover3.jpg

If you thought you had to pay $1,000 or more for a 13 x 19 inch printer that produced gallery quality images on a variety of stocks, you're wrong. The HP B9180 is available for around $500, and you get a top quality machine for that money.

I've been testing the B9180 for a couple months, and I'm impressed with its output, the variety of excellent paper stocks available for it, the archival permanence of its output, and the closed loop color calibration system for consistent color. Here is a list of its strengths and weaknesses that I compiled over the months.

Pros

  • Outstanding color and B&W output
  • Densitometric closed loop color calibration system for consistent output
  • Excellent paper stocks for fine art printing
  • Impressive 200+ year archival rating with HP inks and paper
  • Easy to use Photoshop Pro Printer plug-in
  • No cartridge swapping for different paper stocks
  • Rugged construction that feels durable with user-replaceable print heads
  • Convenient ink level LCD indicator on outside of unit
  • Large capacity 28cc ink cartridges for long life
  • Always ready to print thanks to auto printhead monitoring system
  • Both USB 2.0 and Ethernet connectivity built right in
  • Very competitive price: as low as $510 US

Cons

  • No roll paper adapter
  • Temperamental manual paper feed when using the Specialty Media Tray
  • Paper and ink hard to find at standard retail outlets; often must order online
  • Certain types of paper jams force you to restart the printer and wait a long time to resume work

The HP Pro B9180 Inkjet Printer is an ideal "first serious" photo printer. It produces gallery-quality output up to 13 by 19 inches, is well-designed, is very affordable (around $500 US with a set of inks and sample paper), and reasonable to maintain. Photographers ready to move up to gallery-quality output at home or in the studio should take a close look at this unit.

Technorati Tags: ,

Color Management Tips with Aperture

aperture_announce.jpg

One of the holy grails of digital photography is maintaining consistent color management all the way through the workflow. We want our prints to look as close as possible to what we see on the computer monitor.

Recently, I sat down for a chat with Joe Schorr, Senior Product Manager for Aperture, to get to the bottom of color management workflow. Joe shared some great tips for maintaining the consistency that we all strive for, and I thought you might want to listen in on this 18-minute podcast interview. Even if you're not an Aperture user, there's lots of good information in this conversation.

Technorati Tags: ,


Sponsor Note...

ExpoDisc Custom White Balance -- Simply Better Color. Simply Better Pictures. Visit www.expodisc.com

capture_nx.jpg

Nikon announced Capture NX 1.1 today, its robust image editing software that is now updated for the latest operating systems on both Mac and Windows.

Mac users will be happy to hear that Capture NX 1.1 is Universal Binary. It runs natively on Intel Macs, which makes it a perfect companion to applications such as Apple's Aperture. (You can find out more about this by listening to my conversation with Ben Long on roundtripping out of Aperture.)

Capture NX 1.1 is also optimized for Windows Vista, plus Nikon has updated the user interface making this program a great choice for photographers who shoot Nikon Raw, or for anyone who wants a robust image editor for their Tiffs and Jpegs. You can download a 30-day trial from the Nikon USA site.

Technorati Tags: ,

camera_bag.jpg

There's no greater satisfaction than having packed the perfect camera kit for the assignment at hand. In this podcast, I discuss what was in my camera bag as I ventured out to shoot an indoor basketball game. After covering all the items in the picture above, I then solicit readers for what's in their camera bags.

Feb. Photo Assignment

I also mention the February 2007 photo assignment, "Texture." Deadline for submission is Feb. 28. You can read the details on our Submissions page.

Listen to the Podcast

Now that I've piqued your curiosity, it's time to listen to today's audio show titled, "What's in my Camera Bag." You can download the podcast here (28 minutes).

Technorati Tags: , ,


Sponsor Notes...

Add Magic to Your Slideshows -- FotoMagico presentations are so amazing that your audience will be asking how you did it.

ExpoDisc Custom White Balance -- Simply Better Color. Simply Better Pictures. Visit www.expodisc.com

Grab Shot 90 - "Hunter's Eyes"

hunters_eyes.jpg

"My niece was just leaving from visiting us before heading back to college," said Mark Gale. "As she walked out the door, I stopped her and said there was a beautiful photograph for her to take right behind her. She turned and didn't even see this hawk sitting on our fence until it flew. After my niece left, I grabbed my 30D with a 300 on it, and went to the back yard and crouched. The small birds came back in to the feeder, and I knew the harrier would try again. She dodged in and tried but the small birds once again eluded her. She perched on the fence slightly behind a evergreen chest towards the setting sun."

"After looking at the black and white images, I thought it would be fun to do a selection in Photoshop around the eyes, inverse the selection and then apply the layer style, and that is how I got the above. Just a simple round trip from Aperture to Photoshop and back."

Technorati Tags: , , ,


Sponsor Note...

You're Not Ken Burns -- But FotoMagico slideshows are so good that people will believe that he helped you.

Inside Lightroom - A New Community Site

lightroom_180.jpg

With the upcoming release of Adobe Photoshop Lightroom 1.0, lots of new users will have questions about how best to use the application and get up to speed quickly. Fortunately, Inside Lightroom just launched to meet those very needs.

On Inside Lightroom, you can absorb tips from power users on the daily blog, download tutorials, listen to podcasts, watch instructive screencasts, and peruse a variety of links to other Lightroom resources. One of the bloggers, Mikkel Aaland, was the organizer of the Lightroom Adventure: Destination Iceland, and is writing a book covering post production tips used by professional on location in Iceland. He'll be sharing lots of insights on Inside Lightroom.

And if you want to contribute to the site, just click on the mail link at the top of the page and state your case.

Technorati Tags: ,

ricoh_500se.jpg

The Ricoh 500SE GPS-enabled camera is a rugged (dust-proof and waterproof) 8-megapixel model with a wide 28mm to 85mm (equivalent) zoom lens, 2.5" LCD monitor, supports both Bluetooth and WiFi networking... oh, and has built-in GPS hardware and software.

The camera's integrated GPS module provides for geo-coding images and video at the time of capture. For applications that require even greater precision, the camera is capable of receiving NMEA data streams from external GPS devices via its on-board Bluetooth radio. Once the captured geo-image files are transferred to a computer, they can be converted to shape files or merged into geo-databases for instant integration into Geographic Information Systems (GIS). Points representing each file's position may be hovered over to display a thumbnail of the file, or clicked on to access the original image or video.

Although I don't have confirmation from Ricoh, it appears that the 500SE is both Mac and PC compatible. It's not cheap, however. The 500SE will set you back around $1,200 US with all the bells and whistles. I hope to get a hands-on look at it during the PMA show this coming March.

Technorati Tags: ,

Grab Shot 89 - "Off the Leash"

off_leash.jpg

"I live in a small apartment in New York City," said Shane Woodall. "This shot was taken with my Canon Digital Rebel XTi on Thanksgiving in my parent's back yard. It was the fist time my dog was able to run on the grass off his leash. As you can see, he rather enjoyed it."

Shane set his Rebel XTi to 1/500 in Shutter Priority mode. ISO 100 and the focal length at 90mm.

Technorati Tags: , , ,


Sponsor Note...

You're Not Ken Burns -- But FotoMagico slideshows are so good that people will believe that he helped you.

sony_pocketcam2.jpg

Camera manufacturers continue to find ways to squeeze more pixels onto the sensors in our digital cameras. In a recent Cnet article by Stephen Shankland, the question comes up: Is this compromising overall image quality?

The answer varies among experts. Camera manufacturers don't think that more megapixels in the same space hurt image quality. Other folks, such as Dave Etchells from The Imaging Resource thinks there is an overall increase in image noise as a result of the megapixel race.

I tend to take a middle of the road approach here. I see no need to cram 10 megapixels into my compact camera. Six or 7 megapixels are just fine, and I am happy with the image quality I'm getting at the lower ISOs. For my DSLRs however, I want more resolution so I can make big prints. It's a scenario of choosing "the right tool for the job" for me.

But the Cnet report is interesting, and you might want to take a look at it.

Technorati Tags: ,

s_bourne.jpg

Many photographers hate the flash because they haven't learned how to tame it. But you can employ your strobe to create interesting, and yes even natural looking images... if you know just a few secrets.

Modifiers that redistribute the light have some value, such as the Gary Fong Lightsphere. But there's much you can do with just your flash and good technique. In this podcast I review some of my favorite flash tips to help you get more natural looking pictures.

Feb. Photo Assignment

I also mention the February 2007 photo assignment, "Texture." Deadline for submission is Feb. 28. You can read the details on our Submissions page.

Listen to the Podcast

Now that I've piqued your curiosity, it's time to listen to today's audio show titled, "More Flash Techniques." You can download the podcast here (29 minutes).

Technorati Tags: , ,


Sponsor Note...

Add Magic to Your Slideshows -- FotoMagico presentations are so amazing that your audience will be asking how you did it.

heath_clayton.jpg

The January Photo Assignment was "Glimmer," and we have a sparkling gallery for you -- 21 images submitted by The Digital Story members demonstrate the creativity and craftsmanship of our virtual camera club shooters. These shots shine!

To produce the gallery, the pictures were first loaded into Aperture. I then added the accompanying stories to the IPTC caption field and combined it with the EXIF data from the photograph. The final step was to create a web gallery in Aperture and upload it to the Digial Story server. You can view this month's photo assignment here.

The February assignment is "Texture." Start working on your contribution now. Details can be found on the Submissions page. Because of our new gallery format, you can now submit photo assignment pictures up to 600 pixels wide for horzontal shots, 400 pixels wide for verticals. Please follow the instructions carefully for labeling the subject line of the email for your submission. It's easy to lose these in the pile of mail if not labeled correctly. Also, if you can, please don't strip out the metadata. I use that for the caption data.

Good luck with your February assignment, and congratulations to all of the fine contributors for January. It's a terrific collection of images.

Photo by Heath Clayton

Technorati Tags: , ,


Sponsor Note...

ExpoDisc Custom White Balance -- Simply Better Color. Simply Better Pictures. Visit www.expodisc.com

digi_photo_frame.jpg

The variety and quality of digital photo frames available today offer photographers a viable way to display their work. The advantages of these devices include the ability to stream many images through one frame, it's easy to prepare your work for digital display, and they have become quite cost effective. Most digital frames can read images directly from a memory card you're that prepared either in-camera of via your computer. Want to change the pictures? Just change the card. Some models are WiFi and Internet-enabled allowing you to stream pictures from your flickr account or other sources. I've even seen models with remote controls.

You can find quality digital frames starting as reasonable as $100 US. The curious can survey an overview of some of the frames available today here at Yahoo Shopping. Could be a clever Valentine's gift for that special someone in your life.

Technorati Tags: ,

strobist_inside.jpg

One of my favorite lighting guys, Strobist, has just finished an assignment where he had to light a large interior. One of the things he mentions in the article is a tip that I want to pass along here. You can often brighten your flash-illuminated shots by taking your exposure off program mode and setting it to a slower speed, such as 1/30, 1/15, or 1/8 of a second.

Photo credit: Strobist.

bowl_diffuser.jpg

Virtual camera club member Sarah Kim discovered the CCRRFDv2 by Photophool while browsing flickr. This device helps you evenly illuminate subjects when using macro mode with a Canon S2. The DIY device consists of three plastic foam cereal bowls stapled together with holes cut in the bottom to slip-fit on the lens barrel, and it delivers shadowless lighting in supermacro mode.

Photophool has updated the instructions for building this handy device. You might want to take a look at what's going on here, and think about ways that you could apply the technique to your camera and photography. If you get some cool shots, or discover a clever variation on this theme, be sure to drop me a line.

Sarah has already put her diffuser to work capturing this close-up of her husband's hand while working. Thanks for the tip Sarah!

Photo of the diffuser by Photophool, who has lots of other interesting stuff.

Technorati Tags: ,