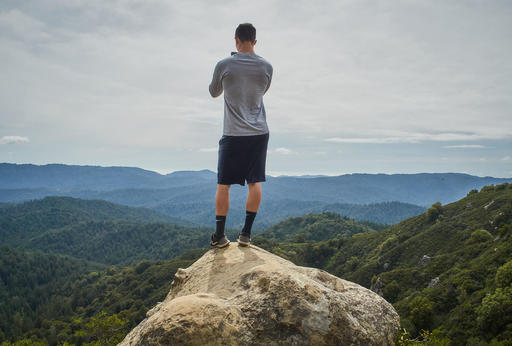
May 2017 Archives

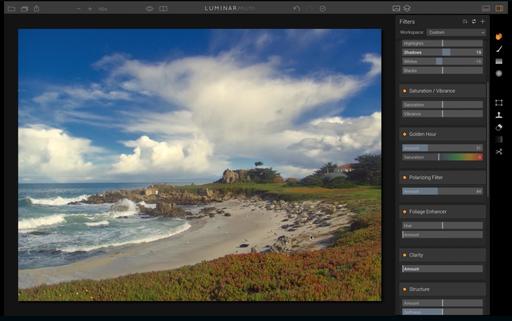
Late-day lighting is more than just adding a orangish-yellow cast to the scene. There's a bit of magic mixed in there too. And you can infuse a little of that vibe into your images by using the Golden Hour filter in Luminar.

goldern-hour-filter.jpg

In this free video on the Macphun site, I demonstrate how easy and powerful the Golden Hour filter is. Then you can add a little magic to some of your landscape work as well.

Luminar is an Editing Extension as Well

You can learn more about using Luminar as an editing extension in my lynda.com training, Photos for macOS: Advanced Editing Extensions.

And if you'd prefer to cozy up with a book, check out The Apple Photos Book for Photographers that features chapters on basic editing, advanced post processing, and editing extensions.

You can share your thoughts at the TDS Facebook page, where I'll post this story for discussion.

This is The Digital Story Podcast #586, May 30, 2017. Today's theme is "Wide Glass Can Save Your..." I'm Derrick Story.

Opening Monologue

Clients can put you in the tightest spots, and I don't mean just with scheduling. Physically, I've found myself with big shots to capture and virtually no room to record them. Then there are the times your arms aren't long enough, the steps aren't high enough, and room just isn't deep enough. How does one survive such tight squeezes? By going wide, my friend. And that's the focus for today.

Wide Glass Can Save Your...

IMGP0896.jpg

When I'm walking around exploring the world, I typically have a standard zoom mounted to the camera. With my Pentax KP, I like the 20-40mm HD. On the Olympus Micro Four Thirds, I favor the 14-42mm EZ zoom.

But I dare not attempt a pro shoot for clients with just my standard zooms. Sometimes I need longer lenses, but the ones that have really saved me are the super wides. And here are a few stories about them.

My Favorite Wide Lenses

There are some great wide optics on the market today. Here are five that have caught my eye.

Exposure Even More Important for Video Work

As helpful as an external light meter is for our still photography, it's even more critical for movie making. And anyone who has ever had to correct exposure in post knows exactly what I mean.

The Sekonic Speedmaster L-858D-U handheld light meter has full HD Cine and CINE modes, with the ability to measure from 1 to 1000 fps or shutter angles of 1 to 358 degrees. One of the features that I really like, is that you can hold down the meter reading button and see continuous readouts as you move the meter around the scene. This will help you choose the best overall aperture for that take.

If you want to learn more about the Sekonic Speedmaster L-858D-U handheld light meter, visit the link in these show notes.

Red River Paper's new Palo Duro Etching paper aims to recreate look and feel of fine art darkroom prints

Via Imaging-Resource.com.

Texas-based Red River Paper recently announced a new fine art paper, Palo Duro Etching. The new paper is a 100 percent cotton rag paper and is free of optical brightener additives. The paper is designed to offer warm white tones, deep blacks and a subtle texture to accurately recreate traditional darkroom fine art prints.

Red River Paper owner Drew Hendrix says of the new paper, "Our new Palo Duro Etching paper is one of the finest photo papers we have ever produced. From its subtle-textured surface and quality 'feel,' to rendering warm natural tones and deep rich blacks, Palo Duro Etching will satisfy even the most critical eye." The museum-grade paper is produced to deliver this high quality over a long period of time too thanks to its acid free base stock and coating. Further, the paper has a thickness of 21 mil and a weight of 315gsm.

The textured matte paper is said to offer deeper blacks than most traditional matte papers thanks to a special barrier coat that is placed between the paper base and the inkjet receiving layer. This ensures that the ink remains in the inkjet coating rather than bleed through into the paper base, which would diminish the richness of the black ink.

Palo Duro Etching paper is available now in both sheets and rolls. The sheet sizes are: 4 x 6, 5 x 7, 8 x 10, 8.5 x 11, 9 x 13, 11 x 14, 13 x 19, 17 x 22, 17 x 25 and 13 x 38 inches. Fifty-foot rolls are available in 17, 24 and 44-inch widths.

Updates and Such

Big thanks to all of our Patreon members! I was able to pay for the podcast server and the backup system from last month's pledges. Your contributions are making a positive impact.

Registration invitations have gone out to Reserve List members for the Autumn in Wine Country Photography Workshop. If you are on the Reserve List, but didn't get your invite, please contact me. You can learn more about the workshops by visiting the TDS Workshops Page.

B&H and Amazon tiles on www.thedigitalstory. If you click on them first, you're helping to support this podcast. And speaking of supporting this show, and big thanks to our Patreon Inner Circle members.

And finally, be sure to visit our friends at Red River Paper for all of your inkjet supply needs.

See you next week!

More Ways to Participate

Want to share photos and talk with other members in our virtual camera club? Check out our Flickr Public Group. And from those images, I choose the TDS Member Photo of the Day.

Podcast Sponsors

Sekonic Light Meters - Learn more about the amazing Sekonic Speedmaster L-858D-U handheld light meter by listening to next week's show and visiting the Sekonic web site.

Red River Paper - Keep up with the world of inkjet printing, and win free paper, by liking Red River Paper on Facebook.

The Nimbleosity Report

Do you want to keep up with the best content from The Digital Story and The Nimble Photographer? Sign up for The Nimbleosity Report, and receive highlights twice-a-month in a single page newsletter. Be a part of our community!

Want to Comment on this Post?

You can share your thoughts at the TDS Facebook page, where I'll post this story for discussion.

For those who visit Sonoma County regularly, such as for my workshops, another must see stop while in town is the California Indian Museum and Cultural Center.

IMG_3775.jpg Greeting card by Eric Wilder, a Kashaya Pomo Indian of Northern California. You can see more of his work at ericwildergraphics.com.

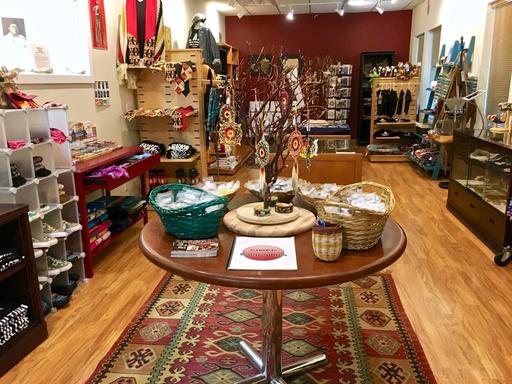
Among its many treasures, is a gallery of portraits by well known photographer of Native Americans, Edward Curtis, educational materials, many outstanding displays of Native American works, and a truly interesting museum store.

IMG_3766.jpg A display in the Precious Cargo exhibit, California Indian Cradle Baskets and Childbirth Traditions.

The museum staff is both knowledgable and open to spending time with visitors to answer their questions. Admission is free, but you can make a donation or purchase a keepsake in the Museum Store. It's definitely worth a visit.

IMG_3769.jpg The Museum Store is filled with artwork, gifts, housewares, smudge sticks, ointments, and more.

You can share your thoughts at the TDS Facebook page, where I'll post this story for discussion.

If you've never explored the Skin Tone tab in Capture One Pro's Color Editor, you're in for a real treat.

skin-tone-adjustment-web.jpg

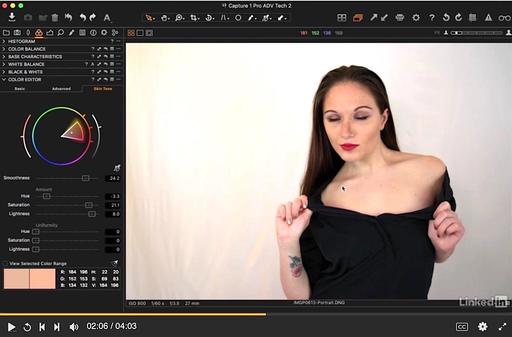
Unlike trying to adjust skin tones with the more generic white balance setting, Skin Tone in the Color Editor is designed just for portraits. In addition to hue, saturation, and lightness just for the complexion, you also have smoothness slider that makes everything look just a little better.

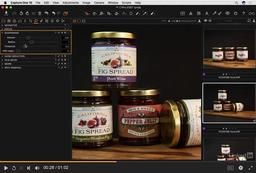
But the real magic surfaces with the uniformity sliders that help you offset areas of color shift, especially in the shadows. And what a difference these controls make in the professional appearance of your portraits. Take a look at this free training video that walks you through the entire process.

This is just one of the videos from my latest lynda.com/LinkedIn Learning course, Capture One Pro 10: Retouching. I focus on portraits and product photography in this course. And there are lots of handy tips, like the magic uniformity slider, for you to discover.

Master Capture One Pro

Start with Capture One Pro 10 Essential Training that will quickly get you up to speed with this pro level imaging application.

Then drill down into mastering the editing tools with Capture One Pro 10: Retouching and get supremely organized with Advanced Capture One Pro: Catalog Management.

You can share your thoughts at the TDS Facebook page, where I'll post this story for discussion.

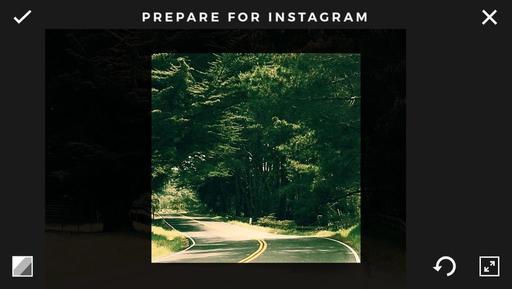
At first, I thought that infltr was just another filter app for my iPhone. But after a little testing, I've found it to be quite the creative workspace.

IMG_3612.jpg

My initial interest was to find something new for my Instagram shots. And infltr is quite good for that purpose. You choose an image from your camera roll, select a filter, then tap on it and move your finger around the shot. As you do so, the filter changes. When you see something you like, stop and publish. You can also save your creation as a custom filter.

But the app goes well beyond that, including features such as:

  • Saturation, brightness, contrast & filter intensity.
  • Crop: 17 different presets.
  • Transform: rotate, straighten, flip horizontally & vertically, perspective horizontally and vertically.
  • Undo edits & view the history of your edits.
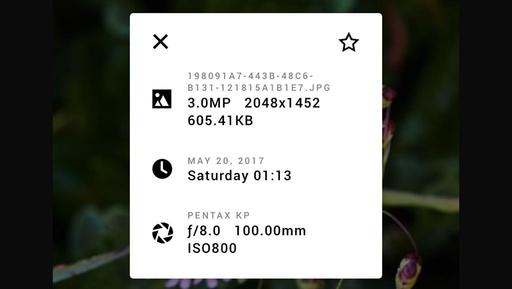
  • Metadata screen that includes camera type, lens, ISO and more.

IMG_3613.jpg

Plus, infltr allows you to edit photos, Live Photos, videos, and GIFs. In other words, just about any type of visual content on your iPhone.

Other handy features include a built-in camera function, iMessage App and Apple Watch compatibility, and the ability to connect to Adobe Creative Cloud and Dropbox.

For a mere $1.99 investment, you will breath new creative life, and functionality into your iPhone photography with infltr.

You can share your thoughts at the TDS Facebook page, where I'll post this story for discussion.

This is The Digital Story Podcast #585, May 23, 2017. Today's theme is "The Crossover Shot" I'm Derrick Story.

Opening Monologue

How many times have you held back a shot because you thought it was too cliche? Or maybe it featured what we call a mature subject, such as a sunset or the Golden Gate Bridge. But, maybe, just maybe, it's more artistic than you realize. And it's even possible that both photographers and the general public would admire it. That's what I call the crossover shot. And it's the first topic for today's show.

The Crossover Shot

IMGP1266-Stillwater-Cove-Luminar-Web.jpg

I want to start by telling you a story that happened just a few days ago. Seven of us were reviewing 3 days worth of pictures that we had captured on the Northern Sonoma Coast. This is postcard territory for sure, and one of the biggest internal struggles group members were having was choosing eight original images for the final class presentation.

Among the various subjects, everyone had a sunset shot. Yet, not one of those dazzling twilight images made it into the final presentation. And afterwards, as we talked about our choices, each photographer felt that it was either too cliche or that someone else would present theirs. So no-one did.

This gave me the opportunity to talk about the crossover shot. Images that appeal to both the hardened photographer as well as the Mom with loving eyes. And from that discussion, I have five key points to share with you today.

  • Just Because It's Common, that Doesn't Mean it's Bad - Most of us are leery of photographing postcard subjects. But that doesn't mean that you can't add your own artistry to them.
  • Just Because It's Difficult, that Doesn't Mean it's Good - Yes, we're proud of those images that we had to work really hard to capture. But...
  • We're Often Not the Best Judge of Our Own Work - Having non-photographers review and comment on our photos helps bring balance to our final selects.
  • Consider a Mix for Your Final Choices - If someone lobbies hard for an image that you feel isn't artistic enough, consider including it with one that you also feel strongly about.
  • Respect for Those Who Achieve Crossover - And learn from them. Just because someone is popular, that doesn't mean they've sold out.

A Remote Trigger As Well

In order to accurately measure the flash output on your subject, you want to measuring from that position. So how do our trigger the flashes?

The Sekonic Speedmaster L-858D-U handheld light meter also is compatible with optional radio triggering modules for PocketWizard, Elinchrom EL-Skyport system, and the Phottix Strato/II protocol.

These modules provide multiple zones, flash power control (except for Phoenix), and model light control (except for Phoenix). And since this is a radio system, you can stand just about anywhere, inside or out, to trigger the flashes and take a reading. The Speedmaster also provides the old school PC terminal connector for those who use wired systems as well. And if you don't want to mess with any of that, there's a tripod socket in the bottom of the unit, so you can mount it on a stand.

If you want to learn more about the Sekonic Speedmaster L-858D-U handheld light meter, visit the link in these show notes.

More Stupid Photographer Moves

Here are some of my favorites from the TDS Facebook comments on last week's podcast.

Mark: Yup, I've done the 'Went out with a spare discharged battery', and I can add one 'Formatted the wrong card' (fortunately without erasing any good images that mattered!).

Carl: Realizing half way through a shoot that the only memory card I have is nearly full because I failed to format it. Now that I think about it this is two stupid mistakes.

Richard: I often leave the house with just a camera and lens...and no memory card. Then I'm just carrying jewelry.

Rob: My doh moments: camera still in bracketing mode from the day before, and I wonder what is wonky with the exposures.

Jim: I routinely found myself with a bag of discharged batteries. Now when I charge a battery I wrap an elastic band around it. Now the discharged ones are easily identifiable because they are the ones in my bag with no elastic on them. It also has a side benefit in that it prevents anything in the camera bag from shorting the terminals.

Jerry (from our recent workshop): Yes, I put my batteries in their chargers on the power strip before I went to bed. Problem was, the switch on the power strip was off. So I was looking at a day of exciting workshop shooting with a batch of dead batteries.

New Capture One Pro 10 Training Videos

lynda.com and LinkedIn Learning have just released Capture One Pro 10 Essential Training. And I talk about this title, and those related to it, during this segment of today's show.

Updates and Such

Big thanks to all of our Patreon members! I was able to pay for the podcast server and the backup system from last month's pledges. Your contributions are making a positive impact.

Registration invitations have gone out to Reserve List members for the Autumn in Wine Country Photography Workshop. If you are on the Reserve List, but didn't get your invite, please contact me. You can learn more about the workshops by visiting the TDS Workshops Page.

B&H and Amazon tiles on www.thedigitalstory. If you click on them first, you're helping to support this podcast. And speaking of supporting this show, and big thanks to our Patreon Inner Circle members.

And finally, be sure to visit our friends at Red River Paper for all of your inkjet supply needs.

See you next week!

More Ways to Participate

Want to share photos and talk with other members in our virtual camera club? Check out our Flickr Public Group. And from those images, I choose the TDS Member Photo of the Day.

Podcast Sponsors

Sekonic Light Meters - Learn more about the amazing Sekonic Speedmaster L-858D-U handheld light meter by listening to next week's show and visiting the Sekonic web site.

Red River Paper - Keep up with the world of inkjet printing, and win free paper, by liking Red River Paper on Facebook.

The Nimbleosity Report

Do you want to keep up with the best content from The Digital Story and The Nimble Photographer? Sign up for The Nimbleosity Report, and receive highlights twice-a-month in a single page newsletter. Be a part of our community!

Want to Comment on this Post?

You can share your thoughts at the TDS Facebook page, where I'll post this story for discussion.

Capture One Pro is a powerful imaging application that combines photo management, RAW conversion, and post production all under one well-designed roof. And version 10 ups the ante by adding features such as output proofing and 3-step sharpening.

In this course, I embark on an in-depth exploration of Capture One Pro 10. The teaching structure mirrors the design of the software itself, with chapters that step through each of the tabs in the program, from organizing to editing to outputting images.

welcome-c1ten-esst.jpg

Highlights include:

  • Organizing assets in the library
  • Correcting color casts with the Color Editor
  • Understanding the HDR sliders
  • Straighten lines with keystone correction
  • Diffraction correction
  • Using a gradient mask to fix a sky
  • Soften skin with a brush
  • Output proofing
  • 3-step sharpening

Here's an overview movie that will give you a good feel for the course.

You can share your thoughts at the TDS Facebook page, where I'll post this story for discussion.

Old Lens, New Flowers

Having just spent 3 days on the rugged coastline of Sonoma County for our Northern CA Coast Tour workshop, I had the opportunity to photograph the bounty of spring.

Stillwater Cove

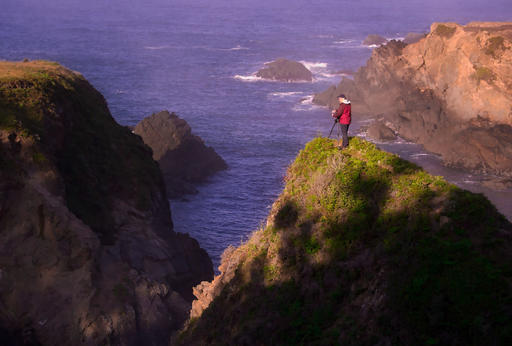
I was packing my Pentax KP with a 1998 SMC Pentax-FA 100mm F3.5 Macro lens mounted on it. I had purchased the lens used for $90, and I wanted to see how it performed on the state-of-the-art KP digital body.

IMGP1345-web.jpg

As I was looking at the previews on the back of the camera, I thought, "Hmmm, those look pretty good." So I kept shooting. The autofocusing was relatively swift, although not as quiet as with modern systems. The lens itself was very light, so it was easy to hike with. And I could turnaround and capture a landscape shot with it when I wasn't tracking down flowers. In fact, I like looking a landscapes at 150mm (cropped sensor) for a change of pace.

Stillwater Cove

When I got back to my room and reviewed the images in Capture One Pro, I thought again, "Wow, these are alright." So my $90 purchase for a autofocus macro lens with a maximum aperture of f/3.5 seemed like a good investment. A very good investment.

Stillwater Cove

We all have our "go to" optics that we buy new and pay top dollar for. They serve as the foundation for our work. But it's fun to have a few speciality optics too. And finding them at bargain prices is even better.

More Articles About the Pentax KP

The Pentax KP Review: The Final Verdict

Pentax KP Review - Part One - Top Deck - An overview of the Mode dial, Function dial, and other controls on the top panel of the camera.

Pentax KP Review - Part Two - The Back Panel - An overview of back panel controls and the menu system for the Pentax KP.

Pentax KP Review - Part Three - Image Quality - A hands-on look at how the camera performs with Pentax Limited Edition optics.

You can share your thoughts at the TDS Facebook page, where I'll post this story for discussion.

capture-one-retouching.jpg

Capture One Pro 10 -- a professional, robust image editor and organizer -- allows you to handle all of your post processing in the same application that manages your images.

In this course, learn techniques for improving your images using Capture One Pro 10. Join Derrick as he demonstrates how to create uniformity in skin tones for professional portraits, use the Curve tool to adjust a specific tone, convert a selected color into a mask, and sharpen specific areas of an image. He also explains how to speed up your workflow by creating styles and presets, and using variants for different looks. When you wrap up this course, you'll have the knowledge you need to get the most out of the retouching features.

Topics Include:

  • Using brushing tools in the Local Adjustments tab
  • Adjusting a specific hue with the Color Editor
  • Minimizing an offending color in the Color Editor
  • Fine tuning hues with Color Balance
  • Exploring Color Balance presets
  • Addressing a specific tone with the Curve tool
  • Exposure adjustment tricks
  • Making color corrections to specific areas
  • Speeding up your workflow

Take a look at this intro video that provides you with an overview of the course.

If you've wanted to improve your image editing chops with this professional level photo app, then take a look at Capture One Pro 10: Retouching. I think you'll be happy you did.

You can share your thoughts at the TDS Facebook page, where I'll post this story for discussion.

This is The Digital Story Podcast #584, May 16, 2017. Today's theme is "The Stupid Things I Do" I'm Derrick Story.

Opening Monologue

Photography isn't about getting some of the settings right; it's about nailing all of them. If there are 10 things you need for a great shot, and you accomplish only 9, then guess what? You're probably going to be disappointed. I was thinking about this after my latest blunder, and realized that there are a handful of mishaps that have plagued me repeatedly. And that's the theme for today's show.

The Stupid Things I Do

stupid-things-TDS.jpg

After I had just missed a cool shot because of one of my classic dumb moves, I asked my son, "Do you ever do stuff like this?" You see, I have this misguided belief that millennials never make tech mistakes. Instead, he replied, "I do that all the time."

This got me thinking. Maybe I'm not the only ten-thumbed photographer on the planet. So I thought I'd share my top five bonehead moves, then have you submit your favorites on our TDS Facebook page.

  • Stuck in Self-Timer Mode - I love using the self-timer for group shots and long exposures on the tripod. But I hate it when I forget to turn the drive mode back to normal single shot.
  • Over-swipe to Video - It's hard to see the iPhone screen in bright contrasty light. And in those situations, sometimes don't realize that I've swiped from photo mode to video.
  • High ISO Landscapes - Sure, if you want to have your landscapes look like something that NASA has sent back from Mars, leave your ISO at 6400. But if you don't like that lovely grainy, denatured look, you might want to ratchet it down a few notches.
  • Rangefinder Lens Cap Left On - Maybe I though use through-the-lens cameras only?
  • Backup Dead Battery - I always carry a backup battery. Whether it's charged or not is a different matter.

The Practical Benefits of High-Speed Sync (HSS)

Generally speaking, our cameras top out at 1/250th (or slower) for flash synchronization. This is fine for indoor and low light work. But if you need to freeze action at a higher shutter speed, or if you want a wide aperture in bright light outdoors, you'll probably need a faster shutter speed, such as 1/1000th or more.

By using HSS, you can raise the shutter speed and still get a proper flash exposure. Instead of firing the flash at the start of the shot, HSS pulses the flash throughout the whole exposure, trying to simulate the effects of a continuous light. Many camera systems can do this, including Canon and Nikon. But your range is limited because of the weaker output, and the flash unit can really heat up using this technique.

That said, you can also create some amazing portraits and action shots because you're able to combine flash and high shutter speed.

One of the very practical features of the Sekonic Speedmaster L-858D-U handheld light meter is that it can measure flash output from one or more units when using HSS technique. This enables you to balance the flash output with the ambient light to create the exact look that you're after. This is particularly important for shoots when you don't have time for a lot of experimentation. You need to set your camera and flashes right the first time, and hope you capture the shot you're after.

"The L-858D-U is the first meter of its kind that can measure the stroboscopic pulses fired from strobes when they are used for Hi-Speed Sync. Finally, photographers now have an accurate way of measuring their lights when they want to overpower the sun or achieve a very shallow depth of field through using HSS."

If you want to learn more about the Sekonic Speedmaster L-858D-U handheld light meter, visit the link in these show notes.

Federal Jury Awards $900K to Plant Retailer in Photo Theft Lawsuit

Petapixel reports: "An Oregon-based plant retailer was just awarded almost one million dollars in actual damages by a federal jury in one of the biggest photography copyright wins of the year so far. Despite the strange circumstances of this case, it's being called, "a huge win for artists, photographer, and creators."

According to PDN, the case revolves around the unauthorized use of 24 copyrighted images captured by Under a Foot Plant Co. president Frances White for use in marketing a product they came up with called Stepables--basically, plans that can be walked on.

White and co. were able to show, in court, that competing company Maryland-based Exterior Design used 24 of White's images in marketing materials ranging from Web pages, to posters, to brochures for their own Treadwell Plants, infringing on White's copyright a total of 133 times from 2011 until the suit was filed in 2014.

Despite several cease and desist requests sent between 2011 and 2014, Exterior Design continued using the photographs, leaving White no choice but to sue for unauthorized use of the photos, unfair competition, and unjust enrichment. Exterior Design denied all claims, but a federal Jury in Maryland ultimately sided with Under a Foot, awarding the company either $900,000 in actual damages or $300,000 in statutory damages. It's fair to say the plaintiff will probably pick the former.

"These photographs were the result of countless hours of time, attention, planning and preparation," White said in a statement. "This was a huge win for artists, photographers, and creators."

Updates and Such

Big thanks to all of our Patreon members! I was able to pay for the podcast server and the backup system from last month's pledges. Your contributions are making a positive impact.

Registration invitations have gone out to Reserve List members for the Autumn in Wine Country Photography Workshop. If you are on the Reserve List, but didn't get your invite, please contact me. You can learn more about the workshops by visiting the TDS Workshops Page.

B&H and Amazon tiles on www.thedigitalstory. If you click on them first, you're helping to support this podcast. And speaking of supporting this show, and big thanks to our Patreon Inner Circle members.

And finally, be sure to visit our friends at Red River Paper for all of your inkjet supply needs.

See you next week!

More Ways to Participate

Want to share photos and talk with other members in our virtual camera club? Check out our Flickr Public Group. And from those images, I choose the TDS Member Photo of the Day.

Podcast Sponsors

Sekonic Light Meters - Learn more about the amazing Sekonic Speedmaster L-858D-U handheld light meter by listening to next week's show and visiting the Sekonic web site.

Red River Paper - Keep up with the world of inkjet printing, and win free paper, by liking Red River Paper on Facebook.

The Nimbleosity Report

Do you want to keep up with the best content from The Digital Story and The Nimble Photographer? Sign up for The Nimbleosity Report, and receive highlights twice-a-month in a single page newsletter. Be a part of our community!

Want to Comment on this Post?

You can share your thoughts at the TDS Facebook page, where I'll post this story for discussion.
Sometimes it's the little things that make our Mondays just a bit easier. Like automatically straightening a horizon with just a single click (or tap). Let's start with Photos for macOS

crooked-horizon.jpg Nice grab shot with the iPhone. Unfortunately, the horizon is a bit askew. Photo by Derrick Story.

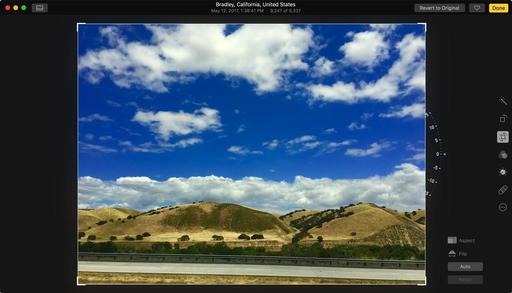
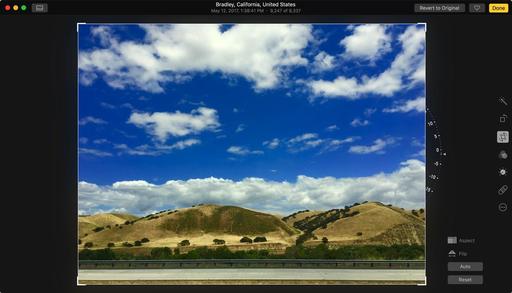
Open the image in Photos for macOS, and hit the Return key to enter editing mode. Click on the Crop icon, then click on the Auto button. The horizon will automatically level out.

auto-horizon.jpg Click on the Auto button in the Crop tool, and the horizon levels out.

It's even easier if you're using Photos on an iPhone. Just open the crop tool and Photos will automatically fix that horizon without you even asking it to. And in either case, if you don't like what you seen, just tap on Reset. Also, regardless of where your make the correction, the edited image will be saved to all of your devices via iCloud.

Bonus Tip: Polarize the Sky

I also added a little bit of oomph to the sky. I used just three sliders to achieve this. Here's how.

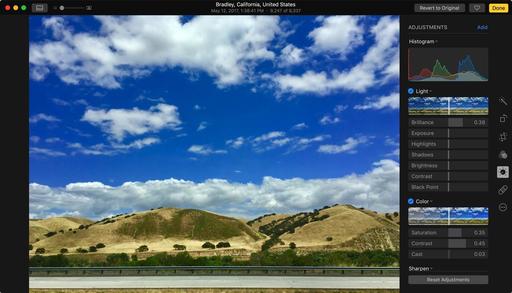
In editing mode for Photos for macOS, click on the Adjust button. In the Light panel, move Brilliance to the right. Then, in the Color panel, move the Saturation and Contrast sliders to the right, as shown below. These sliders are also available on your iPhone in Photos.

dramatic-sky.jpg Make that sky even prettier.

What a difference just a few seconds of editing makes. You can see the Before and After by pressing the M key on your Mac, or by long-pressing the image with your finger on the iPhone. Now, your picture is ready for sharing.

Book or Videos: Photos for macOS

Explore the world of modern photography with my The Apple Photos Book for Photographers that features insightful text and beautiful illustrations.

And if you'd like to cozy up to a video at the same time, watch my latest lynda title, Photos for macOS Essential Training.

You can share your thoughts at the TDS Facebook page, where I'll post this story for discussion.

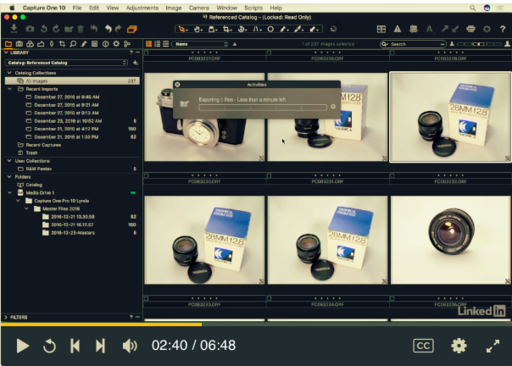
You can share a Capture One Pro catalog with coworkers on a network, but someone has to be in charge of locking and unlocking it.

capture-one-network.png

"What?" you ask. Yes, catalogs can only be shared if they are locked first. Once locked, others can view all of the images and download the ones they need.

But when it's time for maintenance, the ringmaster must unlock the catalog to work on it. And during that time, others do not have access to it. Here's a video that explains the entire procedure.

For the most part, this is good news. Knowing that you can let an entire workgroup browse and download images from a master catalog is a handy feature of Capture One Pro. Just make sure someone is in charge of the entire operation.

Take Control of Your Capture One Library

My lynda.com title, Advanced Capture One Pro: Library Management, shows you how to organize like a pro, covering techniques for referenced and managed catalogs, plus integrating sessions, backing up masters, and configuring your Capture One environment specifically to your needs.

You can share your thoughts at the TDS Facebook page, where I'll post this story for discussion.

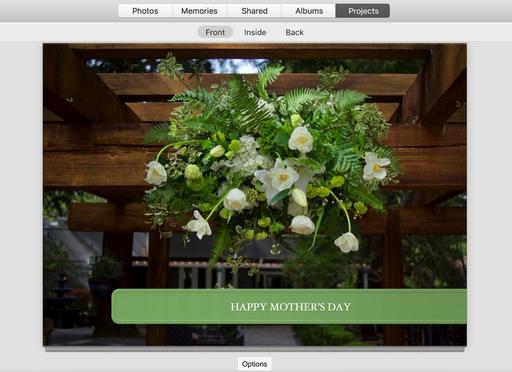
Sunday, May 14th is Mother's Day. And I'm guessing that if you're lucky enough to still have Mom in your life, that you want to do something nice for her... maybe create a fine art card to give her?

mothers-day-card.jpg

I use Photos for macOS to create all of my fine art cards. And because I'm a good son, I just mailed this year's version to Mom. Here's how I did it.

  • Open Photos for macOS and choose a picture for the cover of your card.
  • Click on the + icon in the top toolbar and choose "Card."
  • Design your card, starting with one of the Mother's Day templates in the application.
  • Order your card and have it sent directly to her, or print it out yourself.
  • If you're printing it yourself, use the Print command in Photos for macOS, and output one side at a time. (Then turn it over and print the other side.)

I printed mine on Red River Paper 60lb. Polar Matte 7x10 card stock (Item #1958) using my Epson R2000 inkjet printer. The card folds nicely to 5" x 7", with a lovely design inside and out.

I have more detailed printing instructions in my Apple Photos Book for Photographers. It's worth doing. They look great. And if you've never tried your hand at creating your own fine art cards, I can't think of a better time to start.

(Happy Mother's Day, Mom!)

Book or Videos: Photos for macOS

Explore the world of modern photography with my The Apple Photos Book for Photographers that features insightful text and beautiful illustrations.

And if you'd like to cozy up to a video at the same time, watch my latest lynda title, Photos for macOS Essential Training

You can share your thoughts at the TDS Facebook page, where I'll post this story for discussion.

This is The Digital Story Podcast #583, May 9, 2017. Today's theme is "What Separates You from the Other Guy" I'm Derrick Story.

Opening Monologue

There are millions of smartphone cameras out there clicking billions of photos every year. Styles range from snaps of a sweetheart to attempts at fine art. Now, more than ever before, everyone is a photographer. Which is great, that is, unless photography is your craft. And if it is, how do you distinguish your work from those who don't know the difference between an f-stop and a bus stop. Thoughts about this, and more, on today TDS podcast.

What Separates You from the Other Guy

photo-by-derrick-story-sr.jpg

My friend Oliver is staying at the studio during his visit here from Germany. When he first arrived, I was showing him around the place, and he noticed the film cameras I had out for testing.

"You're shooting film," he asked.

"Yes I am," I answered. "For both fun and business."

I then told him about TheFilmCameraShop on Etsy that I run. After I laid out the whole gameplan to him, he asked,

"Why wouldn't people just buy something dirt cheap on eBay rather than paying a bit more from you?"

"It's all about quality and consistency," I replied. "When you buy on eBay, you really don't know what you're going to receive. Believe me, I know firsthand. But when you make a purchase from TheFilmCameraShop, you know that you're going to get a clean, properly functioning camera that is packed nicely and arrives on time. And judging by the popularity of the store, those qualities are important to a lot of people."

This is the same approach that I apply to working with clients, and to making pictures. And if you're interested in distinguishing your work from others, you might want to think about these five suggestions.

  • Practice using the best light possible - I still can't believe what a big difference a few steps make. I'm also looking for the best angle of light, and by looking at my series of photos, it makes a big difference. And remember, if a different angle makes a minor improvement to your eyes, it will be even more so for the camera.
  • Compose with great care - Pay attention to distracting background elements, look at all four corners of the frame, and think about the highlight and shadow areas.
  • Post production is important - Whether it's taking advantage of the filters and adjustments in Instagram or the advanced controls in Lightroom and Luminar, post production matters.
  • Presentation elevates - I've taken my Instagram shots, printed and framed them, then marveled how absolutely different they look.
  • Take pride in your work - Pride won't serve you well in relationships, but it's very useful when it comes to producing beautiful images.

Me and My Sekonic Lightmeter

I've been getting to know a Sekonic Speedmaster L-858D-U handheld light meter. I'll start digging into the particulars of this device in next week's show. But before I do that, I thought we should cover why someone would want to use a handheld meter in the first place.

  • Not limited to reflected light readings. The meters in our cameras are quite good. But they only can measure reflected light, which can be influenced by color, and often needs to be compensated for.
  • Incident light readings measure directly from the source. In this case, you point the meter directly at the light source and measure. So colors, highlights, and dark areas don't influence the measurement.
  • Can measure flash output. Again, our cameras have TTL flash metering, and again it can be easily fooled. Whereas a separate handheld meter can read the light from the flash itself.
  • Handheld meters can help you balance ambient light and flash output in ways that you never dreamed before. And once you find the magic formula for your work, you can repeat it time and time again because you working with actual light measurements.

At first you may thing that handheld light meters would be used primarily for commercial work. And it's true, they are used there. But when you really want to get creative and balance various light sources for a truly creative effect, they are indispensable.

We'll dig deeper into this subject next week. If you want to learn more about the Sekonic Speedmaster L-858D-U handheld light meter, visit the link in these show notes.

Olympus announces significant firmware updates for OM-D and PEN cameras

Imaging-Resource.com reports: "Olympus has announced significant firmware updates that enhance the performance and capability of the OM-D E-M1 Mark II, the OM-D E-M5 Mark II, the PEN-F and select Zuiko Pro and Premium lenses. These updates are available immediately, and for the OM-D series cameras includes true compatibility with the Profoto Air Remote TTL-O, a new "Save Settings and Mysets" which preserves camera settings on a computer (currently on the E-M1 Mark II, but now available for the E-M5 II and PEN-F), and a midtone adjustment function which has been added to Highlight & Shadow control.

With the update, the PEN-F will offer touch-to-select Art Filters while viewing the effect in real time, and you can set the slowest shutter speed allowed before the camera raises the sensitivity in ISO Auto. For the E-M1 Mark II specifically, High Res Shot and Focus Stacking Modes are now compatible with non-Olympus flashes, and AF HOME settings are saved when the camera is turned off. The E-M5 Mark II is upgraded to Version 3.0, while the PEN-F makes its way to Version 2.0.

Updates and Such

Big thanks to all of our Patreon members! I was able to pay for the podcast server and the backup system from last month's pledges. Your contributions are making a positive impact.

Registration invitations have gone out to Reserve List members for the Autumn in Wine Country Photography Workshop. If you are on the Reserve List, but didn't get your invite, please contact me. You can learn more about the workshops by visiting the TDS Workshops Page.

B&H and Amazon tiles on www.thedigitalstory. If you click on them first, you're helping to support this podcast. And speaking of supporting this show, and big thanks to our Patreon Inner Circle members.

And finally, be sure to visit our friends at Red River Paper for all of your inkjet supply needs.

See you next week!

More Ways to Participate

Want to share photos and talk with other members in our virtual camera club? Check out our Flickr Public Group. And from those images, I choose the TDS Member Photo of the Day.

Podcast Sponsors

Sekonic Light Meters - Learn more about the amazing Sekonic Speedmaster L-858D-U handheld light meter by listening to next week's show and visiting the Sekonic web site.

Red River Paper - Keep up with the world of inkjet printing, and win free paper, by liking Red River Paper on Facebook.

The Nimbleosity Report

Do you want to keep up with the best content from The Digital Story and The Nimble Photographer? Sign up for The Nimbleosity Report, and receive highlights twice-a-month in a single page newsletter. Be a part of our community!

Want to Comment on this Post?

You can share your thoughts at the TDS Facebook page, where I'll post this story for discussion.
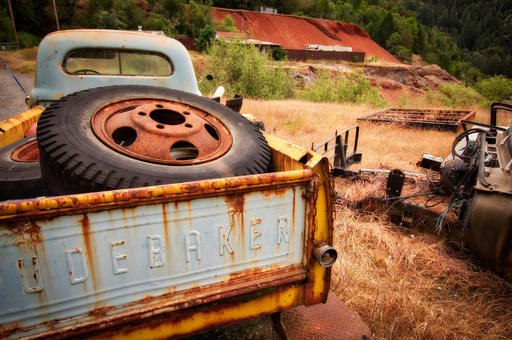
Some shots we can take our time improving in post, and others we have to turn around quickly. For those portraits that need to be posted right away, I have a speedy Luminar workflow that only takes 1-2 minutes.

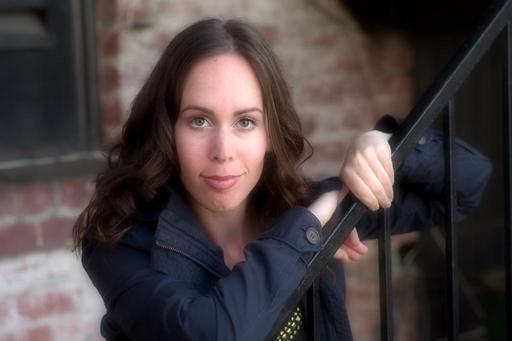
final-portrait-TDS.jpg "Leah at Railroad Square" - Pentax KP, Pentax 70mm f/2.4 HD lens, speed edit in Luminar. Photo by Derrick Story.

Take a look at my article, Speed edit portraits with Luminar where I outline the steps for this workflow. You can use this technique with the standalone version of the app, the Photos for macOS editing extension, or as an external editor for Lightroom. If you don't need to save your changes and history, feel free to use the editing extension for a one-off. To return to the app for more work later, I would go the standalone route, and follow the instructions in the article.

After you use this approach a few times, you may want to save your favorite filters as a custom Workspace instead of starting with the standard Portrait Workspace. I've been very impressed at how much better my shots look after just a couple minutes in Luminar. Try it for your portraits and see what you think.

Luminar as Your Digital Darkroom

You can learn more about using Luminar as an editing extension in my lynda.com training, Photos for macOS: Advanced Editing Extensions.

And if you'd prefer to cozy up with a book, check out The Apple Photos Book for Photographers that features chapters on basic editing, advanced post processing, and editing extensions.

You can share your thoughts at the TDS Facebook page, where I'll post this story for discussion.
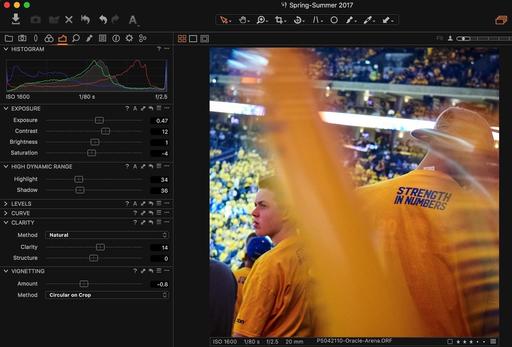
Of all the cool new stuff in Capture One Pro 10.1, Temporary Reset is the feature that I've been waiting for.

before-reset-c1.jpg "Strength in Numbers" Oracle Arena, Olympus OM-D E-M10 with Panasonic 20mm f/1.7 at ISO 1600. Photo by Derrick Story. Showing image edits in Capture One Pro 10.1.

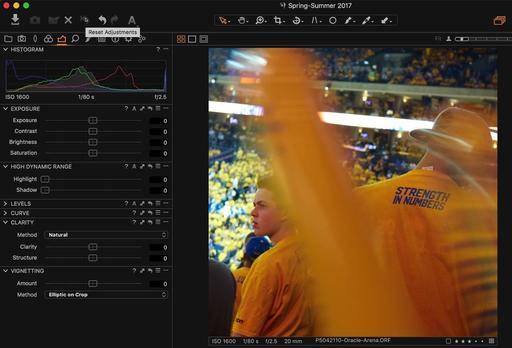
master-reset-c1.jpg Holding down the Alt/Option key while clicking on the Reset Adjustments icon.

Essentially, we now have a Before/After function. To enable it, hold down the Alt/Option key while clicking on the Reset Adjustments icon in the top toolbar. You will see the original image. Let go of the keys and you're returned to the edited version. Cropping is not temporarily reset, but everything else is.

Sometimes it's the small things that make post production easier. I'm glad to finally have this function in Capture One Pro.

More Capture One Pro Tips and Techniques

Improve your skills by watching Capture One Pro Essential Training now available on lynda.com. More than 5 hours of tips, tricks, and techniques. Plus many free movies using advanced techniques.

I've also created a dedicated Capture One Pro Training page on The Digital Story. You can follow all of the tips and techniques that I publish in one convenient spot.

Thinking About Making the Transition from Aperture or Lightroom? - Download my free eBook titled, Rocky Nook's Guide to Moving to Capture One Pro. I show you the steps to create a test library, then build the foundation for a smooth transition to Capture One Pro.

Want to Comment on this Post?

You can share your thoughts at the TDS Facebook page, where I'll post this story for discussion.
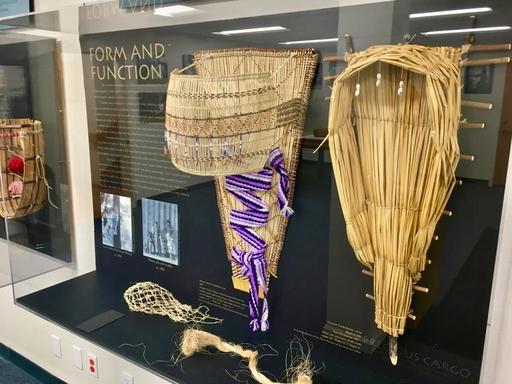
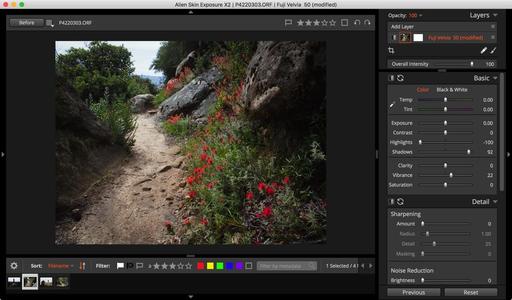
Image applications tend to develop their own personality over time, and Exposure X2 by Alien Skin has evolved into a sleek, creative image processing program that should be appealing to photographers who want a catalog-free workflow with a powerful toolset.

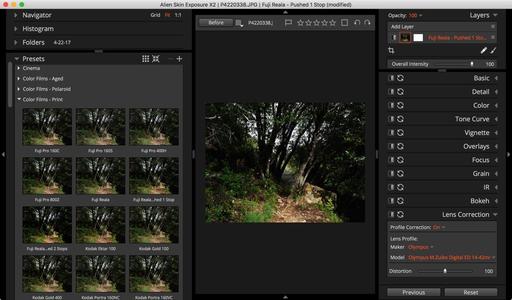
000-exposure-x.jpg Exposure X combines an attractive interface with great editing controls.

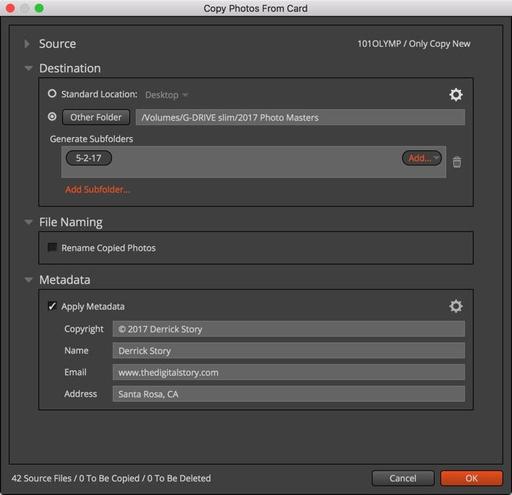
Exposure X2 V2.6 has plenty of new, robust features such as layers, spot healing, lens corrections, and a nifty history panel, but what caught my eye was the way that I could quickly copy a card full of images to my G-Drive Slim, pick out a few pictures that I liked, edit them, then export out to social. All in just a matter of minutes.

File Management

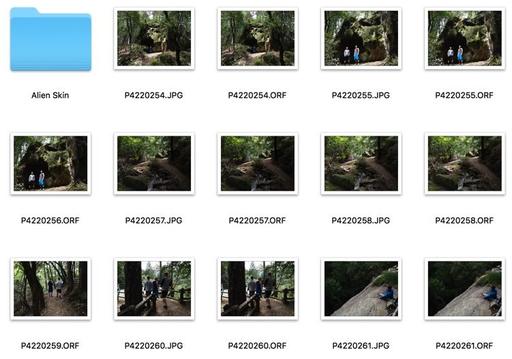
Instead of using a database model to manage your pictures, Exposure X2 lets you place them anywhere (in my case on a slim G-Drive that I carry with my laptop), then organizes the folders to your liking. The application places an "Alien Skin" folder inside each directory of images. This folder contains all of your added metadata and adjustments. The upshot of this approach is that I can plug my G-Drive into another laptop, and pick up right where I left off with my photos. It's fast and flexible.

001-image-directory.jpg The clever Alien Skin folder inside each directory of master images. It contains all of your metadata and corrections.

Later, if I wish, I can point Lightroom, Capture One Pro, Photos for macOS, or Luminar to that same directory, and work on the files with those applications as well. In other words, I don't have to make a lot of organizational decisions when I first import with Exposure X. I can edit quickly knowing that my files are stored in a logical structure on the drive, and available to other applications if needed.

002-import-dialog.jpg I like the import dialog box. But I wish that it had a few more options for file renaming.

There are pros and cons to Exposure X2's import dialog. On the plus side, its fast and straightforward. I pick the destination, subfolder style, and IPTC metadata that I want added, then let it fly. But, I can't pick and choose individual images to import, and the "file renaming" feature doesn't have an option to preserve the original file name plus additional data. So it's either original file name or custom data.

Rating and Editing

Once the images have been copied to the drive, there are many options for rating and editing. Flags, star ratings, and color labels are available to help you identify your favorite shots. You can activate a filter toolbar at the bottom of the interface to sort your images. And there are tons of film and effects presets and really terrific editing tools.

003-presets-and-tools.jpg Plenty of powerful tools here, including one of my favorites, lens corrections.

I like the news lens correction feature, and love that X2 includes the Olympus 14-42mm EX zoom among its many Olympus profiles. The layers control is easy to use and is a terrific addition to the app, as is spot healing. It's really fun to edit with this app.

Exporting

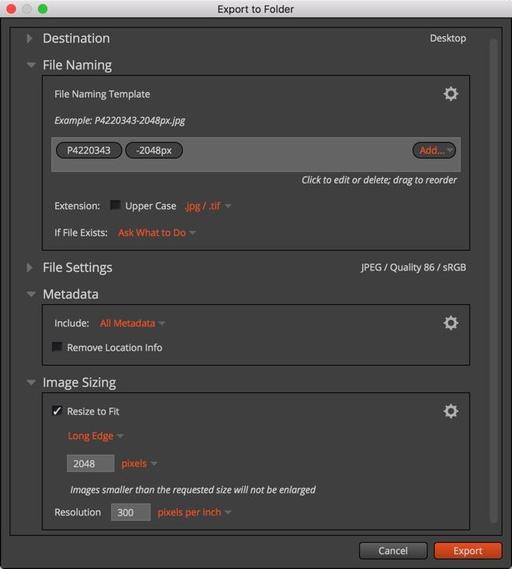
Once it's time to export, you have access to a nice dialog that provides you with options for destination, file naming, metadata, and image resizing. The output looks very good. You can also use a quick export function that optimizes the files for your favorite social sites.

004-export.jpg The export dialog is easy to use and the output looks great.

The Bottom Line

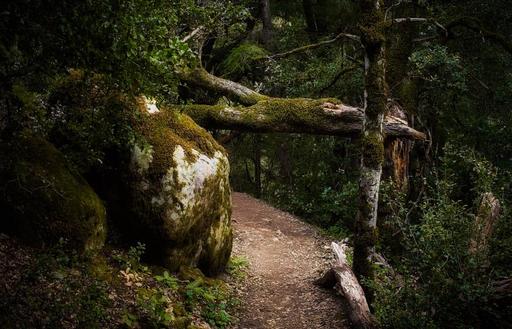
On my Mac laptops, file import from memory cards was faster with Exposure X2 than with Lightroom or Capture One Pro. Largely this was due to the fact that it doesn't build previews as part of the import process. I could pick out a few favorites, edit them, then move them along online. The entire process took just a few minutes.

The editing tools and presets are quite good, certainly capable enough to handle everyday work. Combine that power with an attractive interface, snappy performance, and a truly flexible workflow, and Exposure X2 could be the answer for photographers desiring a catalog-free workflow that features power and simplicity.

Currently, all Alien Skin products are on sale for 30 percent off (through May 10, 2017). So you can purchase Exposure X for $104.30. They also have a trial download if you want to test drive the app.

You can share your thoughts at the TDS Facebook page, where I'll post this story for discussion.
This is The Digital Story Podcast #582, May 2, 2017. Today's theme is "5 Unique Trail Tips for Day Hikers" I'm Derrick Story.

Opening Monologue

Spring is in the air, and the allure of the great outdoors calls to our spirit of adventure. What a pleasant thought after a long winter: bubbling mountain springs, picnics beneath a shady tree, and expansive vistas to ponder and photograph. But Mother Nature isn't just flowery meadows and puffy clouds. So a little preparation goes a long ways toward a safe and satisfying adventure. And that's the first story in today's TDS Podcast.

5 Unique Trail Tips for Day Hikers

P4220340-Castle-Rock-1024.jpeg

I've been strapping on my day pack since I was in grammar school. I completed my first 50 mile hike when I was 11 years old. By the time I was 17, I had earned the rank of Eagle Scout and was spending my summers as a counselor and guide for camp in the Sierras.

These days, I hike with my boys and my camera. I'm not as fast up the mountain as I once was, but I still enjoy outdoor life. And a big part of that comes from being prepared and staying nimble.

In that spirit, here are five tips that I find myself sharing often with those who I spend time on the trail with.

  • Learn the good plants from the bad ones - In California, we have a lot of Poison Oak and Stinging Nettle. At the beginning of the hike I remind folks that "leaflets three, let it be" to avoid bring home a nasty souvenir from the day's activities. On the other hand, leaves from a Bay tree make a pleasant natural insect repellant, and Miner's Lettuce can serve as a refreshing afternoon snack.
  • A little food and a lot of water - Don't bother packing a lot of food for a day hike. The activity will usually keep your appetite at bay, that is until the hike is over and you're suddenly starving. But you need at least one liter of water, per person. So a couple snack bars or a peanut butter and jelly sandwich and a HydroFlask of H2O should get the job done. No drinking out of streams, ever.
  • Protective clothing works on many fronts - High tech fabrics these days are amazing. You can wear a long sleeved shirt that provides sun protection equal to SPF 50, keeps the bugs off your neck and arms, and provides an additional barrier from plants and rocks. Plus, much of this apparel helps keep you cool in the heat and warm in the shade. Definitely worth revisiting if you haven't shopped outdoor clothing for while.
  • Trail shoes over sneakers - Just like outdoor clothing as improved, so have hiking shoes. I look for soles that provide good traction on rocky surfaces, reasonable ankle support, and protection from blisters and hot spots. Plus, if you have to cross a stream and accidentally step off into the mud, you won't ruin your favorite Nikes.
  • Excess weight is your enemy - When hiking season approaches, I like to lose a few pounds. It's amazing how much easier it is getting up the hills. Plus, I keep my packing weight to a minimum. One camera, two snack bars, water, and the 10 essentials are all I like to carry.

Great Deal on a Panasonic Lumix GM5

Normally, I sell my used gear on Amazon Marketplace. But for some reason, they won't allow me to list my Panasonic gear there. So I'm offering up a great deal on my Lumix GM-5 with 12-32mm Panasonic Zoom in the Nimble Store. This model has the attractive red leather, which is quite handsome against the black satin finish of the camera. Everything is in beautiful shape, and includes all original accessories in the original box. If you're interested, you can purchase the camera in the Nimble Store for $399.

Final Schedule Set for Norther CA Coast Tour

We have one seat open for the The Northern CA Coast Tour - May 18-20, 2017. Check out this list photo spots:

  • Armstrong Woods
  • Goat Rock
  • Ft. Ross State Park
  • Still Water Cove Regional Park
  • Kruse Rhododendron State Natural Reserve
  • Salt Point
  • Ocean Cove Lodge

If you're interested in registering, visit the Registration Page and sign up!

Photojournalists reveal their favorite publications to work with and what they pay

DP Review reports: "Columbia Journalism Review recently surveyed a group of photojournalists on their favorite publications to work with based on several criteria, including arguably the biggest one - pay. As a result, they've published an article revealing the day rates for some top publications as well as some insight into other factors, such as balancing a lower day rate with exposure to a wider audience."

"So by the numbers, how do top publications stack up for freelance photographers? CNN comes out on top with the best day rate at $650, though National Geographic is close behind with typical rates between $500-650. Harper's Magazine's rate was hard to pin down but reported rates varied from $500 up to $1000 per day."

"The New York Times' recently boosted rate of $450 per day makes it more competitive with the top-paying outlets, but CJR notes that the photographers they spoke with acknowledged the Times' wider reach and top-notch editorial staff go a ways to compensate for the lower pay. Coming in with the lowest day rate of the bunch is the Washington Post, offering $350."

Updates and Such

Big thanks to all of our Patreon members! I was able to pay for the podcast server and the backup system from last month's pledges. Your contributions are making a positive impact.

Registration invitations have gone out to Reserve List members for the Autumn in Wine Country Photography Workshop. If you are on the Reserve List, but didn't get your invite, please contact me. You can learn more about the workshops by visiting the TDS Workshops Page.

B&H and Amazon tiles on www.thedigitalstory. If you click on them first, you're helping to support this podcast. And speaking of supporting this show, and big thanks to our Patreon Inner Circle members.

And finally, be sure to visit our friends at Red River Paper for all of your inkjet supply needs.

See you next week!

More Ways to Participate

Want to share photos and talk with other members in our virtual camera club? Check out our Flickr Public Group. And from those images, I choose the TDS Member Photo of the Day.

Podcast Sponsors

MeFOTO Air Tripods - MeFOTO Air Tripods are a nimble photographer's dream.

Red River Paper - Keep up with the world of inkjet printing, and win free paper, by liking Red River Paper on Facebook.

The Nimbleosity Report

Do you want to keep up with the best content from The Digital Story and The Nimble Photographer? Sign up for The Nimbleosity Report, and receive highlights twice-a-month in a single page newsletter. Be a part of our community!

Want to Comment on this Post?

You can share your thoughts at the TDS Facebook page, where I'll post this story for discussion.
Warm Spring days are perfect for outdoor photography. The landscape remains green from Winter rains, the days are a bit longer, and temperatures tend to be milder compared to their Summer counterparts.

At the same time, however, we tend not to be in as good hiking shape as we will be later in the season. So it's often best to keep it light for those first few climbs up the mountain.

P4220289-Castle-Rock-web.jpg "Top of the Ridge" - Olympus PEN-F with 14-42mm EZ zoom. Photo by Derrick Story.

Consider this as standard gear for "getting in shape" hikes:

  • 1 liter water bottle
  • Mirrorless camera with lightweight zoom lens.
  • Basic hiking essentials (sunblock, shades, hat, etc.)

And that's it.

As you work into shape over the Spring/Summer, you can modify your gear list. But don't overdo it on the first couple hikes.

One thing that I've learned is that biking shape is not hiking shape. Ease into your treks and you'll have a better time and still get great shots.

You can share your thoughts at the TDS Facebook page, where I'll post this story for discussion.