February 2006 Archives

"Metering Modes" - Podcast 21

Metering Modes

Evaluative metering is the most popular mode for determining exposure on digital cameras. But many intermediate and advanced models have other options such as spot, partial, and center weighted. What's the difference between them?

In this podcast I cover all four metering patterns to help you choose the best one for any given situation. Additionally, I talk about how the camera's light meter often sees the world differently than how it appears with your two eyes.

I also announce the topic for the next photo assignment: Friends. As of the end of February, we're closing the books on the "Fur" assignment and beginning the next round for March. You can interpret "Friends" in any creative way you see fit. I hope you come up with something interesting, and submit it by the end of the month.

Listen to the Podcast

Now that I've piqued your curiosity, it's time to listen to today's audio show titled, "Metering Modes." You can download the podcast here (32 minutes).

Technorati Tags: , , , ,

Natasha the Fortune Teller

Natasha

Monday was my first full day at PMA, and it really had a little bit of everything. I began my assault on the Expo Hall floor. This is not something I can conquer in one day. There are so many exhibitors, many of whom are doing truly interesting things in their booths. At the Canon booth, for example, I had a couple of extended conversations about the new 30D and the just announced PIXMA Pro9500 printer. This is a very tempting entry into the high end consumer printing market. I then watched a shooting demo with ace photographer Robert Farber. Just like that, an hour had passed.

Once the floor closed at 5:30 pm, the social gathering began. Here's where you get to meet the people you've heard of, read about, or had worked with but never met in person. In these settings is where I also learn about what's coming down the pike... conversations that aren't appropriate for the booth during show hours.

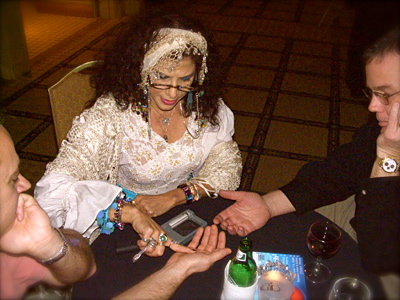
I saw Natasha the fortune teller at one of these gatherings. She was circulating among the crowd, reading their palms and peeking into events yet to come. I asked Natasha if I could take her picture, and she agreed. As I said, you see a little bit of everything at this show.

Oh, and one more thing. My experiment with photoblogging from the show floor seems to be working out. I posted a half dozen pictures yesterday on my SplashBlog site. I'm using a Casio EX-P505 compact camera to capture the images. I then take out the SD memory card and put it in my Palm LifeDrive. I then launch SpalshBlog, choose the picture I want to upload right off the memory card, add the text, and upload the image via WiFi that's available in the conference building. After the image is uploaded, I remove the memory card and put it back in the Casio. I never have to copy images to the LifeDrive, I just upload to the site directly off the card. I'll make some more posts today.

And who knows what I'll find...

Technorati Tags: ,

PS Elements 4 Mac

Adobe released Photoshop Elements 4 for the Mac today at PMA. I had a chance to meet with an Adobe engineer last night in Orlando to talk about Elements 4 and some of its notable features. Adobe has packed quite a bit of power in this affordable package.

First, and a bit of a surprise, Elements 4 now has a streamlined version of Bridge. So there's a fully capable file browser built right into the app. The biggest "wow" feature however, is the new "Adjust Color for Skin Tones" control that lets you click on a spot of skin, then Photoshop analyzes it and corrects the color. I saw it tested on a variety of subjects, and it worked remarkably well. Speaking of our people shots, the new red eye correction tool is the model of simplicity. You just enable it and Photoshop finds all the instances of red eye in the image and fixes them for you. The Mac version isn't able to correct red eye on import as in the Windows release, but this approach works quite well.

Adobe has included some very helpful selection tools too. The Magic Select Brush and the Magic Extractor tools speed up the tedious task of selecting an element within your picture to adjust or copy and place elsewhere. They don't achieve perfection automatically, but they do get you close enough so that with a little clean-up you're in business.

The price for Elements 4 is still $89. This a great value for a powerful image editor. Considering that it includes Bridge and the latest version of Camera Raw, this application is all most hobbyist photographers would ever need.

Technorati Tags:

PMA Reporting Via Splashblog

PMA 2006

The Photo Marketing Association Show (PMA) is underway in Orlando, Florida. I'm landing in Orlando Sunday evening and will begin reporting on Monday. I'm going to try something new this year. I've set up a SplashBlog. Mine will be called Dex's Mobile Blog. It will have an RSS feed too.

I'll be taking photos with Casio and a Contax compact cameras. I'll then take the memory cards and put them in a Palm LifeDrive that has WiFi connectivity. The SplashBlog software will enable me to upload the photos and captions directly to Dex's Mobile Blog.

Sounds fun. Let's see how it works.

Technorati Tags:

Grab Shot 17 - "Throw the Ball"

Dog

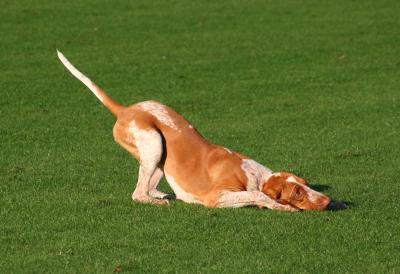
"I was shooting field hockey (boy, that is hard, timing is crucial, but I guess practice makes perfect. I do think an IS lens will help tough...)," says Maarten Sneep. "On the next field someone was playing with his dog. Again, more timing challenges, but I think I got this one. The dog was waiting for the ball to be thrown, and the anticipation is what I really like in the picture."

Maarten used a Canon EOS 350D, Sigma 55-200mm zoom @ 200mm, set at ISO 400, f/7.1, and 1/1600. (Automatic action program mode, just getting the shot during a sporting activity is enough work for me right now...)

If you have an interesting candid you'd like to share, take a look at our Submissions page, then send us your Grab Shot. If we publish it, you'll receive an ultra cool custom carabineer keychain.

Technorati Tags: ,

Full Review of Nikon D200 on DP Review

Nikon D200

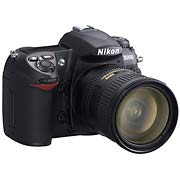
Digital Photography Review has just published their full review of the Nikon D200. As we expected, Phil Askey highly recommends this camera. If you're considering making the jump to this pro-level Nikon, I recommend that you read what Phil has to say. It will help you understand both its strengths and weaknesses, and help you decide if it's the right DSLR for you.

Technorati Tags: ,

Nikon Coolpix P4

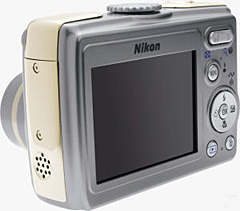
More PMA Announcements -- Nikon jumped into the pre-PMA announcement frenzy with a raft of items, one of my favorites being the new Nikon Coolpix P4. It's more sophisticated than your average point and shoot with additional controls such as Aperture Priority and a speedy continuous shooting mode of 1.8 fps (for a compact). The 3.5X optical zoom comes with image stabilization, and there's a 2.5" LCD monitor on the back. This svelt package will run less than $400. For an extra $50, you can get the P3 with similar specs, but includes 802.11 WiFi connectivity.

Aperture Training Redux -- If you're serious about your digital photography, then you may be wondering if Apple's Aperture is software you should consider. That was on the minds of many people who attended the Aperture Power Tools workshop at the recent Macworld in San Francisco. If you missed that training, Scott Bourne and I are teaming up again for an Introduction to Aperture 2-Day Lecture/Demo Course at Pixel Corps in San Francisco on March 17 and 18. This two full days of immersion into Aperture is only $249. And the facilities at Pixel Corps are terrific.

Ultra Clamp Assembly -- I spoke last night at the North Coast Mac User Group meeting and was showing off some of my "dumb photography tricks." One of the favorite gadgets was the Ultra Clamp Assembly, and I promised to list the url where folks could buy one.

Technorati Tags: ,

Aperture

No question RAW photography provides shooters with more quality options than standard JPEG formats. But until 2006, the workflow for managing RAW files was clunky at best.

The problem was that we really didn't have a pro-level integrated environment for organizing, editing, and outputting RAW files. The general workflow was to open here, store there, edit with this, then, create a new file that had to be managed too. Software companies such as Adobe, Apple, and Light Crafts realized that there had to be a better way, and then did something about it.

As a result of their efforts (and others too), we are now entering the New Age of RAW Photography. Integrated environments with smooth workflows enable photographers to focus more on taking their shots and less on managing them. Applications such as Apple Aperture, Adobe Lightroom, and Light Crafts Lightzone are leading the way.

Another factor is that our input devices, also known as digital cameras, are much improved. We no longer have inferior images as the starting point for the photographic process. Having quality data upfront means that if we apply good shooting technique, we don't have to engage in hours of post production just to get a "photographic" image.

In this audio show, I discuss the notion that it's time for us to refocus our efforts on taking good pictures, then leverage these new tools to quickly manage our RAW files for beautiful output.

Listen to the Podcast

Now that I've piqued your curiosity, it's time to listen to today's audio show titled, "New Age of RAW Photography." You can download the podcast here (32 minutes).

Technorati Tags: ,

canon_30d

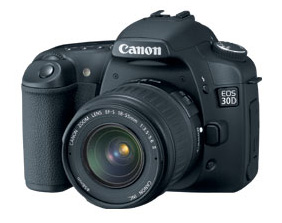
Canon has announced an update to its popular midlevel DSLR line -- the EOS 30D. Even though this model sports a larger 2.5-inch, 230,000 pixel LCD monitor and a shutter rated up to 100,000 cycles, the price remains $1,399 USD for this 8.2 megapixel body. The other notable upgrade over the 20D is a new spot meter covering 3.5 percent of the viewfinder. This will be welcomed by serious shooters who were often frustrated by Canon's "partial metering" mode which had a much broader 9 percent coverage.

Two new lenses were announced too: the EF-S 17-55mm f-2.8 IS USM with internal stabilization ($1,149) and the EF 85mm f-1.2L II USM ($2,099).

Technorati Tags: ,

Lacie d2 Extreme

Backing up your photos and music is vitally important. Even though I use optical media too, the ease of backing up to redundant hard drives has made this my favorite and most-used option. And as we all know, the easier it is, the more often we'll do it.

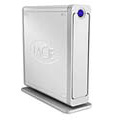
My current favorite drive is the LaCie 300GB d2 External Hard Drive With Triple Interface ($225). It combines 3 interfaces (FireWire 400, FireWire 800, and USB 2.0), fast spin speed (7200 RPM), decent buffer (8MBs), excellent reliability, and good looking design. I've been using d2 drives for years now (have five in two locations), and I've been very satisfied with their performance.

These drives work equally well with both Macs and PCs. If you have a newer Mac, I recommend using the FireWire 800 connection for maximum throughput. By doing so, you also have your other ports (FireWire 400 and USB) for connecting other drives (such as an iPod) for copying from one device to another. LaCie provides you with the necessary cables.

Even though styling shouldn't necessarily be at the top of the list when considering a new hard drive, I have to say, I really like the look and feel of these units. The attractive metal case with cobalt blue light looks great on your desk, shelf, or wherever your store your drives.

You can daisy-chain these devices too so that they are all accessible at once. This makes it easy to search across all the units or copy data from one to the other. LaCie even makes a handy desk rack ($49) if your want to stack up to four units horizontally.

Indeed, there are plenty of hard drive options out there. And the most important consideration is that you pick one of them and start backing up today. But if you'd like an attractive combination of style and performance, include the 300GB LaCie d2 on your list of options.

Technorati Tags: ,

Grab Shot 16 - "Someone Do the Dishes!"

Many Cups

"I was attending the Philadelphia Auto Show when I noticed these cups filling the space underneath the escalator at the Pennsylvania Convention Center," said Manley Walker. "I silently wondered if my kitchen would look like this one day."

Manley captured this shot with his point-and-shoot Casio Exilim Z750, set to "autopilot," but with the flash turned off. Good tip here about the flash, because with it on, the shot would not have been nearly as effective. He would have had a hot spot somewhere in the middle trailing off to darkness. Nice job!

If you have an interesting candid you'd like to share, take a look at our Submissions page, then send us your Grab Shot. If we publish it, you'll receive an ultra cool custom carabineer keychain.

Technorati Tags:

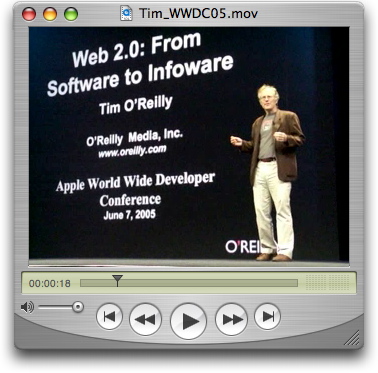
Tim O'Reilly at WWDC 05

If you have an iPod Video (5G), and want to quickly convert your existing QuickTime movies so you can watch them on your iPod, here's how to to do so using iTunes 6 or later.

  • Use the "Add to Library..." command to bring your movie into iTunes.
  • Click once on the movie to highlight it.
  • Choose Advanced > Convert Selection for iPod.

iTunes will convert your video to the appropriate format then add it as a copy to your iTunes library. I recommend that you adjust the ID3 tags before connecting your iPod and uploading the new movie. Here's how you do that:

  • Click once on the movie to highlight it.
  • Go to "File > Get Info.
  • Click on the Info tab.
  • Add information in the Name, Artist, and Comments fields. Choose "Video" for the Genre.
  • Click OK.

Now connect your iPod video and sync. If you'd like to see a sample movie created by this method, download a clip of Tim O'Reilly speaking at WWDC '05 (1:47, 9 MBs). The original clip was captured with a Casio Exilim EXP505 digital camera.

If you think about it, this is amazing technology we have. You can capture movies with your compact digital camera, rip them in the free iTunes application, then upload and playback on your iPod video. Wow!

Technorati Tags: , , ,

Canon 24-105mm L IS

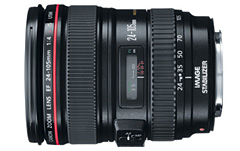
I've been shooting with the newish Canon EF 24-105mm f/4L IS USM for a couple months now and feel comfortable reporting on its performance in the field.

The 24-105 lens (18 elements in 13 groups) has a constant aperture of f-4 throughout the entire zooming range. The image stabilizer is Canon's latest generation, and it really does enable you to shoot at shutter speeds that are 2-3 stops longer than without the stabilizer. Since I prefer to shoot "existing light" style when working in bright interiors, the IS comes in very handy. For example, I'm normally apprehensive about hand held speeds that dip below 1/30th of a second. With this lens I've captured good shots at 1/8th of a second with no visible camera shake. Coupled with the fact that the lens performs well wide open at f-4, you can actually use this zoom for low light photography.

Additionally, all of this performance is squeezed into a package that is remarkably compact (3.3 in. x 4.2 in., 23.6 oz. / 83.5mm x 107mm, 670g). This lens feels much lighter and more balanced than the 24-70mm f-2.8 L lens (3.3" x 4.9", 2.1 lbs. / 83.2mm x 123.5mm, 950g). The mechanics and zooming feel solid (5-group helical zoom), as you'd expect with a Canon L lens. And the package includes both a lens hood and a soft leather-like pouch.

The front filter ring is 77mm. I recommend that you use the "thin" filters so you don't incur any vignetting at the wider focal lengths. Since the front glass element is large, you should probably factor in the price of a protective Sky 1A or filter of your choice to leave on at all times.

The USM zooming motor (inner focusing system with focusing cam) is ultra quiet and very responsive. I think Canon L lens are the quietest of any autofocus lenses I've tried.

As for the images the lens produces -- sharp, contrasty, and saturated throughout the zooming range. This is a lens that performs well on the Canon 5D, and if you don't mind the 1.6X magnification factor, is a good choice for the APS sensor cameras too such as the Digital Rebel XT. The only real optical tradeoff I've noticed is that the 24-105 can only close-focus to 1.48 feet (.45mm). So this is not a lens you would use for your close-up photography.

Is it worth the hefty $1,250 price tag? That depends. If you like having an all-around zoom that you can trust to cover most shooting situations, including some existing light, I think so. I like the IS functionality, constant aperture, and relatively light weight compared to other "L" zooms. I recommend this lens for serious shootings looking for an all purpose zoom.

Technorati Tags: , , ,

"Talking with the Shooters" - Podcast 19

Story Interviewing Ben Long

While on a recent Geek Cruise to Mexico, I had the opportunity to talk with other photographers about their approach to these excursions, including what equipment they used. I found these discussions fascinating, and I hope you will too.

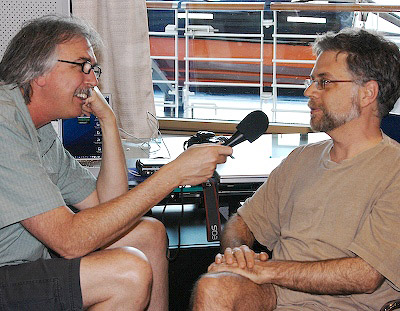
I start off the show by telling a story about one of my adventures in Puerto Vallarta. I then interview Lynn Lampert who had just purchased a Canon Digital Rebel XT. She talked about upgrading to a DSLR and trying to master it on location. Then, Don Tillman steps up to the mic and discusses his Kodak point and shoot. Don had some excellent traveler tips. He's been on four cruises. Then I had a nice chat with Ben Long, who is a friend of mine and who spent the day with me in Puerto Vallarta. Ben is a photographer and writer who contributes to Macworld Magazine and has authored some great books. The photo on this page is me interviewing Ben on the ship (That's Ben on the right).

One of the tools we talked about in the show was an image editor called Graphic Converter by Lemkesoft. I wanted to make sure you got the correct link to this cool app. You can download and try it for free. If you like Graphic Converter, it costs $30.

Listen to the Podcast

Now that I've piqued your curiosity, it's time to listen to today's audio show titled, "Talking to the Shooters." You can download the podcast here (48 minutes).

Technorati Tags: , , ,

Video Tour of Mexico

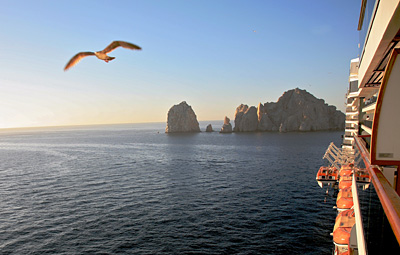
Cabo San Lucas Scene

There are so many different ways to present 50+ images from Western Mexico. Instead of a web page, I've opted for this video slideshow with music. You can watch it on your computer, and it's also iPod video compatible. To upload it to your iPod, all you have to do is add it to your iTunes library, then sync.

The video starts out with a series of images from Cabo San Lucas. I photographed them with a Canon Digital Rebel XT and either a 17-40mm L or 75-300mm IS lens. I worked both in town and on the outskirts. Everything shown in the first series was within walking distance of the port, although I did a lot of walking.

Then there's a transition with the gull shot (the one featured in this post) and a sunset. Now you'll find yourself in Mazatlan. This was my favorite destination, as you'll see from the sheer number of photos I shot during this day. Then another sunset shot, and you're in Puerto Vallarta watching a parasail being prepared for the first flight of the day. You might want to ready my story about The Night of the Iguana to help you understand the setting for the next series of shots. I then wrap up the show with a series from a couple villages I visited south of the city, then back to port at night.

To make this presentation, I first assembled the images and added the music in iPhoto 6 using the Slideshow function. I then exported the presentation to my Desktop. Next, I opened the video in QuickTime 7 and reviewed it to ensure it played back correctly. To make the presentation iPod compatible, I then exported out of QuickTime using the "Movie to iPod" setting (File > Export > Movie to iPod). Now the video can be played on both the computer and the iPod.

If you want to watch this travelog of Mexico, you can download the movie here (16 MBs, 4:14 minutes, fast start playback in your browser). The music title is "Montoya Malaguena" by Carlos Montoya. You can find more of his work in the iTunes Music Store by searching on "Carlos Montoya." Hope this provides you with a good introduction to an excellent photo excursion destination.

Technorati Tags: ,

Around the Next Corner

Mazatlan Mexico

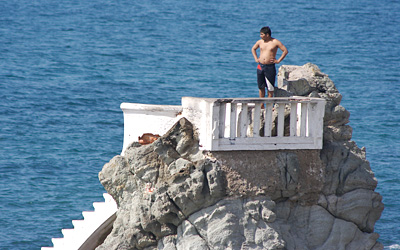
I had finished a morning's worth of exploration in Mazatlan and found I had wandered all the way to the beach. As I looked around, I noticed that a restaurant called the Shrimp Bucket was just a few hundred yards away. I had been told about this place, but doubted that I would ever find it. It was a good omen that I did.

I sat out in the patio that faced the shore. About half way through my first Pacifico, a couple whom I had met on the cruise ship entered the patio and invited me to their table. He was on the Geek Cruise faculty too, teaching Final Cut Pro. We had a great lunch and I was telling them about some of the sites they may want to go photograph. They said they might take a look, but I knew they were going to head back to the ship. Our restaurant was quite a distance from port.

At first I was going to head back too. But then I decided that I was going to "see what was just around the next corner." I was fairly sure it would be just more beach, but I wanted to see anyway. After just a few minutes of walking, I discovered some of these amazing rock structures. I spent the next two hours exploring the beach and photographing all sorts of interesting subjects.

I got back to the ship much later than I had planned. That night, while hanging out in the library, I saw the same couple with whom I had shared lunch. They asked to see my pictures and seemed to enjoy looking at the day's shoot. The woman asked my where I found this shot (and the others related to it). I said that they were just around the corner from where we had eaten. Funny how often that's true.

Technorati Tags: , , ,

Night of the Iguana

Puerto Vallarta

Puerto Vallarta was a quiet port town in the center of Banderas Bay, that is, until 1962 when director John Huston chose a piece of property on the southern end of town as the set for his Night of the Iguana. Thanks in part to Richard Burton and Liz Taylor having a torrid affair during this time, Puerto Vallarta suddenly became the center of Hollywood attention and regarded as a steamy tropical paradise destination.

I ventured out to where the movie was filmed with fellow photographer Ben Long. It's now an abandoned property that overlooks the bay. Apparently there were attempts to convert this location into a restaurant and resort. But, by the looks of the deteriorating buildings, those attempts failed.

This image is from a series I took while spending the morning there with Ben. We had the entire area to ourselves, which enabled me to quietly focus on shapes, color, lighting, and abstract compositions. We left the property on foot and walked through a few small villages before finding a resort hotel that had cabs back to town.

Technorati Tags:

Heard It All Before

Mazatlan Chat

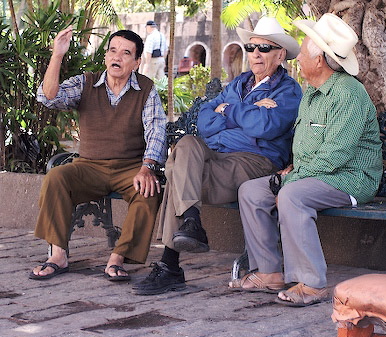
While I was hanging around in the Old Town Plaza in Mazatlan, I enjoyed watching this conversation among friends. The gentleman on the left launched into a long story that I'm certain the other two had heard more than once. The expressions say it all.

I've been using the Digital Rebel XT with only two lenses for my street shooting in Mexico: 17-40mm L and the 75-300 IS EF. So far I've been able to cover everything I need with this duo. This picture was recorded with the 17-40mm, wide open at f-4 at ISO 100. I'm shooting everything Raw on this trip and processing the images in Aperture.

Technorati Tags: ,

Cabo Street Sign

Cabo Street Sign

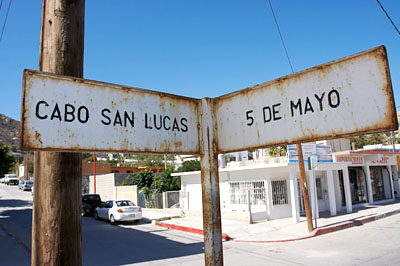
Just like any tourist destination, if you walk a bit farther than most people are willing to venture, you'll discover new and interesting things to photograph. I found this street sign after an hour or so of wandering about the outskirts of Cabo San Lucas. Much to my delight, I also found a great place to eat minutes later. Both the food and the sign were authentic.

Technorati Tags:

Program Mode

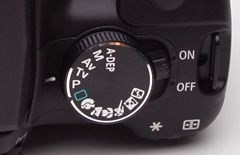
Don't get me wrong, I like program mode. I like my 24-85mm zoom lens too, but I don't want to use it for every shot I take. Sometimes I want a different look than what that lens can provide. The same goes for program mode.

In this week's podcast I discuss some of the situations where I prefer to use shutter priority, aperture priority, and manual exposure modes. Why? Because those modes give me a little more control in those situations so I can get exactly the shot I want. Here are a few examples.

Aperture Priority
This is a great mode for controlling depth of field. Aperture priority lets you set the f-stop, then the camera sets the corresponding shutter speed to make a good exposure. I like to use this mode for portraits with soft backgrounds (f-2, f-2.8) and for landscapes with extended depth of field (f-16, f-22).

Shutter Priority
When I need to freeze action, this is my choice. Shutter priority lets you set the shutter speed and the camera sets the correct aperture for you. I use shutter priority for outdoor sports (1/500, 1/1000, 1/2000) and to freeze moving water in its tracks (1/250, 1/500). If I want moving water to have a flowing, angel hair like appearance, then I slow the shutter speed way down (1 second, 2 seconds).

Manual Mode
This mode is the choice when I want complete control over both the shutter and aperture settings. My favorite use for manual mode is indoor flash photography at wedding receptions. I set the aperture to f-5.6 and the shutter speed to 1/30. This allows me to capture the ambient light in the surrounding environment so my subjects aren't illuminated against a black background.

Listen to the Podcast

Now that I've piqued your curiosity, it's time to listen to today's audio show titled, "Life Beyond Program Mode." You can download the podcast here (30 minutes).

Technorati Tags: , ,

Good Data In... Less Photoshop Out

Thanks to the wonders of satellite Internet, I can post tonight from somewhere off the shores of Mexico.

I spent all day today (Sunday) on the Geek Cruise working with Deke McClelland teaching Photoshop technique. If you're not familiar with Deke's work, he's in the Photoshop Hall of Fame and a very knowledgeable writer and speaker.

During the workshop I had a good reminder. We were spending lots of time correcting photos that had a variety of exposure, sharpness, and compositional problems. Eight hours, in fact, we were at it. And I realized that the teaching that I do here on TDS can help people avoid lots of this Photoshop pain.

The fact of the matter is, if you learn good camera technique and practice it, you can save yourself hours of computer work in post production. I'm not against Photoshop. In fact, I really like it. But I want to spend the bulk of my time wandering the streets of Cabo taking pictures, not on the boat correcting them.

Just a thought that crossed my mind out here in the middle of the ocean...

Technorati Tags: ,

On the High Seas

Cruise Ship

I'm off to San Diego this morning to board the Photoshop Fling Geek Cruise to the Mexican Riviera. During the week I will have Internet connectivity and will post the usual array of goodies on The Digital Story. I'll also post pictures from Cabo San Lucas, Mazaltlan, and Puerto Vallarta.

This week's podcast (published on Tuesday) will focus on "Life Beyond Program Mode," where I'll discuss situations where Aperture Priority, Shutter Priority, and Manual modes are better choices (and how to use them). While I'm on the ship, however, I'll also be gathering material for the following podcast on why photographers like (or don't like) photo vacations. I hope to have interviews and location spots for that one. So stay tuned!

Technorati Tags:

Grab Shot 15 - Beach Biker

Beach Biker

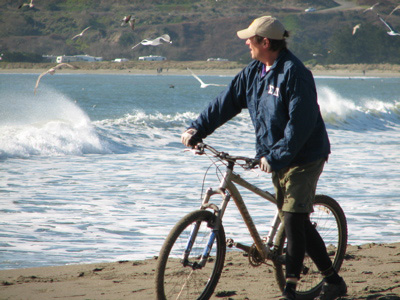
"This wonderfully brilliant January morning along the Sonoma Coast brought out the usual suspects - surfers, bodyboarders, beachcombers, families, dogs," said Francine Kunkel.

"And this gentleman! Notice the wetsuit under his shorts. He appeared suddenly and walked with determination and a constant eye on the rolling surf. I watched him walk his bike along the shoreline and disappear into the distance. I am not sure if this was his mode of transportation or if he planned to take the bike in the ocean."

Shot with a Canon PowerShot S2 IS on program mode (f4.0 @ 1/600, 72mm).

If you have an interesting candid you'd like to share, take a look at our Submissions page, then send us your Grab Shot. If we publish it, you'll receive an ultra cool custom carabineer keychain.

Technorati Tags: ,

HP 8700 Pro Printer

I've been looking closely at two professional printers for my studio: the HP Photosmart 8750 Professional Photo Printer ($499) and the Epson Stylus R2400 Photo Printer ($849). I had a chance to compare these excellent models at the recent Macworld SF Expo.

I was particularly interested in the B&W output. Why? Because I'm far enough along in my digital photography where I'm starting to miss having a chemical darkroom. I'm not missing it enough to set one up, but I would love to have a good B&W printer so I can begin making enlargements again.

The HP 8750 has nine print cartridges: cyan, magenta, yellow, light cyan, light magenta, blue, light gray, dark gray, black. The two gray and one black cartridges enable you to do B&W printing right out of the box without having to buy any special kits. It can print up to 13" x 19" enlargements, and there were some good paper choices available from HP. Connectivity includes USB 2.0 and Ethernet. It also has memory card slots so you can print directly from your media, although that isn't as big a concern for me with this type of fine art printer.

The Epson R2400 has eight individual cartridges: cyan, light cyan, magenta, light magenta, yellow, photo black or matte black, light black, and light-light black. Paper size can be as wide as 13" in either single sheet or roll. As with the HP 8750, making 11" x 14" enlargements with the R2400 are a snap, and Epson has some truly wonderful photo paper stocks to choose from. Connectivity includes both USB 2.0 and FireWire. One of the things that impressed me about the Epson is that I could download custom ICC printer profiles for the printer free of charge. Very nice. There are no media card slots however on this model.

So how did the prints look from these two units? Both did a great job with color output. Both provide archival quality. One thing I like at trade shows is you get to see the best prints possible in each respective booth. The B&W was also impressive with both printers. But I would give the nod to the Epson for B&W output. It was a close decision, however. One thing to note about the Epson is that you do have to swap out an ink cartridge for optimum B&W output.

There's a substantial price difference between the printers -- $350. So my bottom line is, if you have the budget for the Epson R2400, it would be my first choice because of the excellent B&W output and the ICC profiles. But the HP 8750 is a very tempting printer for $499. You can make big beautiful enlargements with it that rival the quality of the Epson's output. In this case, deciding between the two printers really comes down to how much money you have to spend.

Technorati Tags: , ,