October 2009 Archives

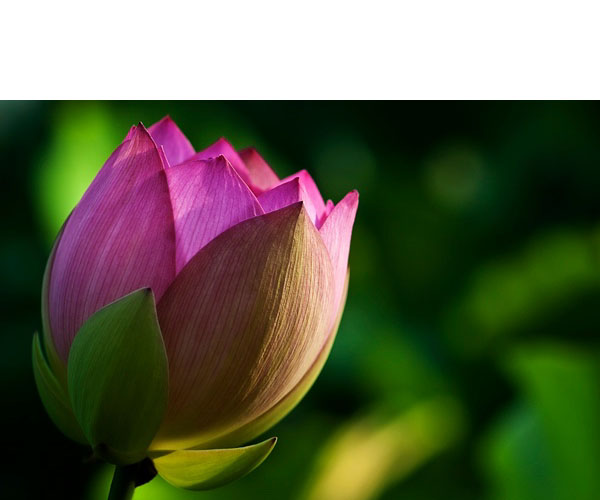
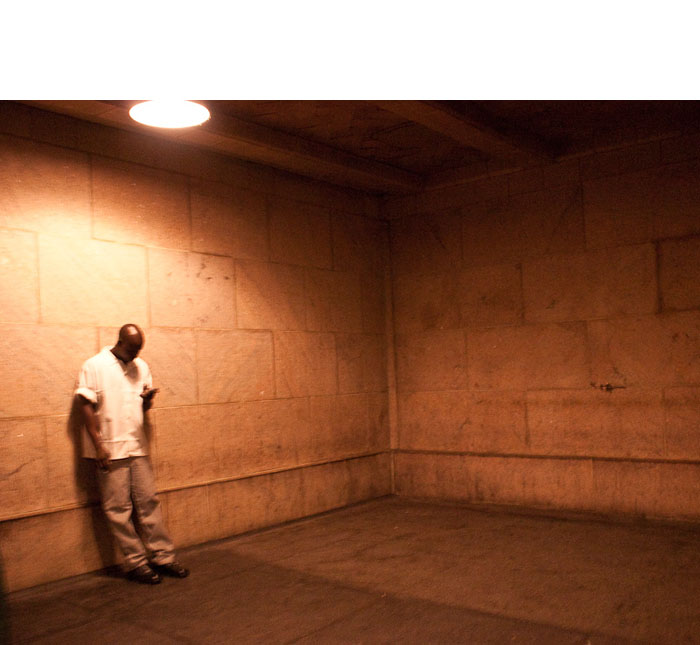
"Simple" is harder than you think, especially when composing a compelling photograph. But the Sept. 09 Photo Assignment participants created a stunning gallery of images that show how beautiful simple can be.

The November 2009 assignment is "Wrinkled." Start working on your contribution now. Details can be found on the Member Participation page. You can submit photo assignment pictures up to 600 pixels in the widest direction.

Please follow the instructions carefully for labeling the subject line of the email for your submission. It's easy to lose these in the pile of mail if not labeled correctly. For example, the subject line for next month's assignment should be: "Photo Assignment: November 2009." Also, if you can, please don't strip out the metadata. And feel free to add any IPTC data you wish (These fields in particular: Caption, Credit, Copyright, Byline), I use that for the caption info.

Photo by Gary Stiles. You can read more about how Gary captured this shot, plus see all of the other great images on the Sept. 09 Gallery page.

Good luck with your November assignment, and congratulations to all of the fine contributors for September. It's a great collection of images.


twitter.jpg Follow me on Twitter

-


Now Available! The Digital Photography Companion. The official guide for The Digital Story Virtual Camera Club.

  • 25 handy and informative tables for quick reference.
  • Metadata listings for every photo in the book
  • Dedicated chapter on making printing easy.
  • Photo management software guide.
  • Many, many inside tips gleaned from years of experience.
  • Comprehensive (214 pages), yet fits easily in camera bag.

Technorati Tags: , ,

Is the Canon S90 the New G11?

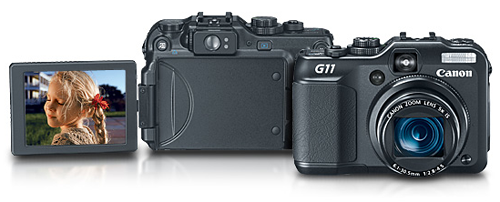
Canon PowerShot G11

When Canon brought back the Raw file format to the PowerShot G9 in 2007, I thought it ruled the roost of pro-capable compacts. Now, 2 years later, much has changed with the competition thanks to the Olympus E-P1, Panasonic GF1, and upcoming beauties from the likes of Leica and others. It's a whole different world that the new Canon PowerShot G11 must compete in. Is it still to "go-to" compact for serious shooters that it once was?

The folks over at Luminous Landscape were wondering the same thing. In their review of the G11, they noted improvements such as the 2.8-inch Vari-Angle LCD and the ISO 3200 capability. Their bottom line, however, at least as I read it, is that the G11 is a good value for $490, but it doesn't compete image quality wise with the more expensive micro four thirds systems.

The nice thing about the G11, and what I still like about my G9, is that you have everything in one compact package that fits in your coat pocket. Plus, for another $150 you can get a great underwater housing (I have one for the G9), that allows you to shoot Raw in just about any environment with a zoom lens... $650 for the whole set up.

From my perspective, I don't feel the need to upgrade my Canon G9 to the G11. I'm having too much fun shooting high quality images with the Olympus E-P1. My friend, James Duncan Davidson is having the same positive experience with his Panasonic GF1. But I'm happy that I have a camera such as the G9 available to me.

powershot_s90.png

But here's what occurred to me. I'm thinking that this high-end compact evolution will go more in the direction of Canon's new PowerShot S90. It's a little more affordable at $430, has a fast f/2.0 lens, shoots Raw, includes great features such as the control ring, and is very compact. The S90 could be the camera that you grab on your way out the door when even the micro four thirds systems are too big. In fact, the S90 might be Canon's high quality compact answer to the competition. I'm certainly more attracted to it than the G11.

Yes, a lot has changed in the last 2 years. The Canon PowerShot S90 is available on Amazon for $429. Very tempting.


twitter.jpg Follow me on Twitter

-


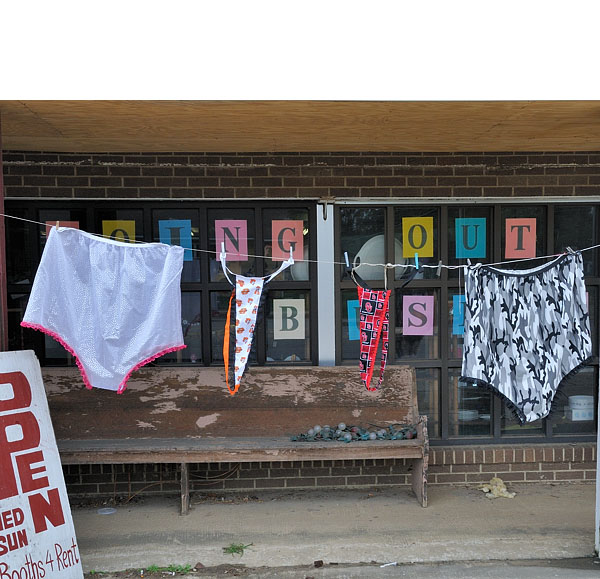
"Bloomers and Thongs" - Grab Shot 189

"Driving thru a small town in Oklahoma, my wife yells 'there's where you took the photo of the bloomers,'" writes John Badgerow. "I made a quick loop around the block, and shot the scene again with my Nikon D300. Times have changed. Now you can buy bloomers and thongs!

As John mentioned, he used a Nikon D300 with a 16-85mm Nikon lens. ISO was set to 400 in Aperture priority mode: 1/160th at f/10.

Photo by John Badgerow. Click on image to zoom to larger size.

If you have a candid you'd like to share, take a look at our Submissions page, then send us your Grab Shot. We'll try to get it published for you on The Digital Story.

And you can view more images from our virtual camera club in the Member Photo Gallery.


twitter.jpg Follow me on Twitter

-


Technorati Tags: , , ,

Have you thought about bundling up a batch of 35mm slides and having them scanned so they can live alongside your digital images? The problem is, who do you send them to?

I can give you a headstart on your research in my latest Macworld article titled, Outsource your photo scanning projects. For this piece, I sent a batch of 35mm slides, negatives, and 4x6 prints to three popular services: ScanCafe, DigMyPics, and ScanDigital. All three did a good job and were great at communication along the way. But there were some differences between them also.

As a bonus, the folks over at www.digmypics.com posted the scans they made from my test batch. At the time they did the job, they didn't know I was doing research for an article. You can take a look at the work they did here.

If you're thinking about testing one of these services, make sure you read this article.


twitter.jpg Follow me on Twitter

-


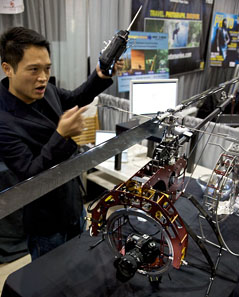
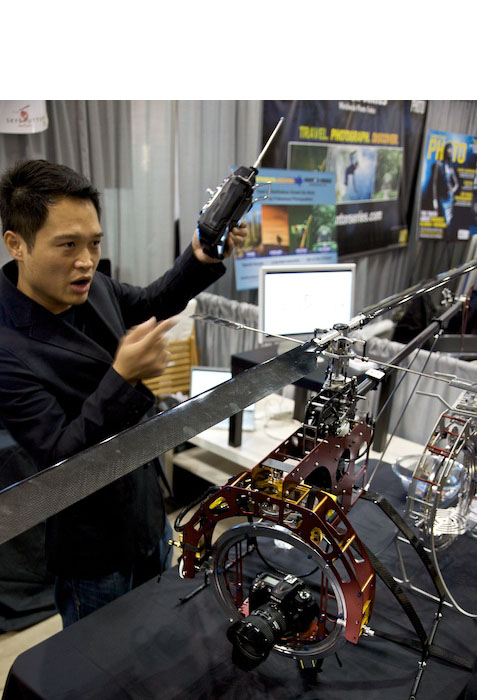
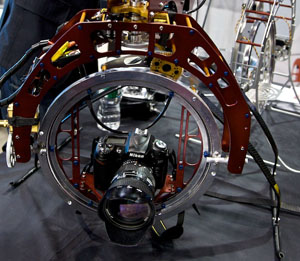
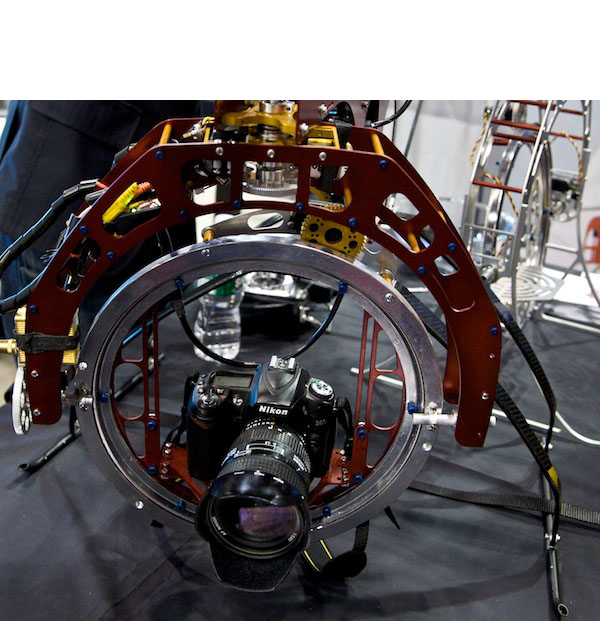
The SkyShutter AeriCam has a 3-axis camera mount built into a radio controlled helicopter. So you can fly your DSLR or videocam over the area that you want to cover, such as a car chase, and shoot it from angles that would be otherwise hard to achieve.

While I was at PhotoPlus Expo, Jason Lam from AeriCam had a SkyShutter set up. First, it's a beautiful piece of equipment to look at. It's constructed out of 7075 aluminum with custom anodizing. Even though it only weighs 3 pounds, it can carry a payload of 7 pounds. It has direct gear drive providing lots of power, and 360 degree pan, tilt, and roll to get great shots.

In my case, I would want it to come with a pilot too. Because the last thing I would want is to crash both helicopter and camera. You can find out more at AeriCam.com.


twitter.jpg Follow me on Twitter

-


Tom Hogarty, Lightroom senior product manager, talks about Lightroom beta 3 that was announced on the eve of PhotoPlus Expo in New York. What I wanted from this interview were aspects of this release that excited Tom. And he was more than happy to tell me. We recorded our chat in Javits Center the day after beta 3 had been posted. Lots of great insights here, and if you plan on trying this version, you need to hear what Tom has to say.

Lightroom 3 Public Beta is available now for download at the Adobe Labs site. You can compare notes with others via Adobe's community forum.

Listen to the Podcast

You can also download the podcast here (18 minutes). Or better yet, subscribe to the podcast in iTunes.

Monthly Photo Assignment

Feet is the Oct. 2009 Photo Assignment. Shoes, bare feet, paws, manmade objects, my gosh there are so many possibilities. You can read more about how to submit on our Member Participation page. Deadline for entry is Oct. 31, 2009.

More Ways to Participate

Want to share photos and talk with other members in our virtual camera club? Check out our Flickr Public Group. It's a blast!


twitter.jpg Follow me on Twitter

-


Podcast Sponsors

SiteGrinder lets you take ownership of your websites. Effortlessly output pages right from Photoshop.

Red River Paper -- Try the $7.99 Sample Kit.

Add Magic to Your Slideshows -- FotoMagico presentations are so amazing that your audience will be asking how you did it.


Technorati Tags: , , , , ,

For my recent New York trip, I brought two cameras: the Canon 5D Mark II and the Olympus E-P1. For the first three days, I shot exclusively with the 5D2. I was working at PhotoPlus Expo for Lowepro. I needed to take photos in the booth of photographer activities, and the 5D2 with the 24-105 zoom worked great.


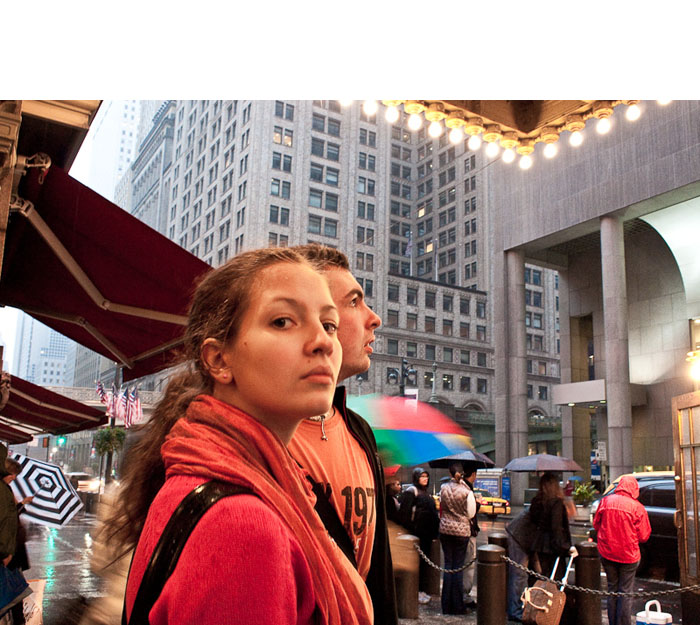
All images by Derrick Story, captured with an Olympus E-P1 with a 17mm f/2.8 lens. High ISOs were used for all pictures. You can see more at the Digital Story Flickr site. Click on images to enlarge.


But on the fourth day, after I had completed my assignment, it was time to hit the streets of Manhattan. And for that gig, I packed my Olympus E-P1 with a 17mm f/2.8 lens and a Jobo GorillaPod. That was it.

I like to go out a little before dusk. This was a problem in the past with compact cameras because they didn't perform well at high ISO settings. But the E-P1 shoots great at ISO 1600, and lately, I've even pushed it to 3200 with solid results. Because it was raining while I was on the street, I needed the speed even more to offset the cloud cover.

My technique is fairly simple. I turned off the LCD viewfinder and framed the shots with my eyes only. The E-P1 is usually hanging around my neck at chest level or positioned at some odd angle to get the shot. About every 15 minutes or so, I'll turn on the LCD, review the recent shots to make sure I'm not screwing up, then turn off the viewfinder and look for another place to photograph. Since the shutter is fairly quiet anyway (then add a little street noise), I don't draw much attention to myself -- certainly less the holding the 5D2 with big zoom lens up to my eyes.

Everything is recorded in Raw. This really helps when trying to control deep shadows and specular highlights. I process the images in Adobe Lightroom 2.5 because it provides excellent Raw decoding for the E-P1. And since the camera handles white balance and color so well, combined with Lightroom's excellent processing, most of my post production is limited to cropping and minor exposure tweaks. This enables me to quickly post the shots online after the shoot is over.

On that Saturday night in New York City, the rain showers gradually broke open into a downpour. By 8:30 pm, I was back in the room sorting my images on a MacBook, and by 10 pm they were online at my Flickr account.

What an enjoyable way to finish off a great trip!


twitter.jpg Follow me on Twitter

-


aperture_icon.png

As happy as Lightroom fans are about the announced posting of the Adobe Lightroom 3 beta, Aperture users are dismayed by Apple's silence. During my stay in New York, I've met with many photographers comparing notes about our shared community. One question seems to come up more than any other: What About Aperture?

Concerns seem focused on two issues. First, we've had Aperture 2 since Feb. 2008. That's a long time between releases in the hotly competitive field of advanced photography. And there's been no communication from Apple to photographers as to when they can expect an upgrade. During that same period, Aperture's primary competitor, Lightroom, has been very active and gaining market share. Many Aperture users are feeling left behind while their Lightroom counterparts are seeing their software move forward.

The second complaint centers on Raw file support. Many cameras are simply not supported. And the ones that are often see Raw updates long after the competition has released theirs. For example, the very popular Olympus E-P1 still is not supported in Aperture.

One photographer commented today, "I understand Apple controlling the message on new iPods, iPhones, and Macs. But when your professional software doesn't support the gear you want to use, we should at least hear what's going on with that."

Many shooters, myself included, had pegged PhotoPlus as the event for an announcement about Aperture 3. It seemed like the perfect time. New York is buzzing with top tier photographers. Nikon, Canon, and Adobe have muscled up their respective product lines. Photography news is getting lots of attention. And we don't have another major photo show in the US until PMA, which is having its own problems right now.

So, when I'm asked the question, "What about Aperture 3?" I have to say, I'm out of guesses. I put my money down on PPE, and the dealer has just swept it away. I know Aperture 3 is out there somewhere. But your guess is as good as mine as to when we will see it.


twitter.jpg Follow me on Twitter

-


Adobe Lightroom 3 beta Available

Adobe has put much work into the beta version of Lightroom 3. Now it's your turn. Lightroom 3 public beta is available now for download at the Adobe Labs site. This is your opportunity to test the next generation of Adobe's comprehensive photo management software.

Although there are plenty of new features in this beta release, a key focus is image processing. Adobe is striving for the best image quality possible and has once again paid lots of attention to the Develop module. You'll be able to see the difference with your own eyes because you can process a Raw file with either the older Lightroom 2 algorithms or the new beta 3 processing -- in the same application. This "processing versioning" is a first for Lightroom. They are retaining the version 2 processing for older images. Adobe doesn't want to change an image you've already adjusted. But you will have the option of reprocessing an older picture with beta 3 algorithms too. You'll be able to compare notes with others via Adobe's community forum. In the tests I've seen from Adobe, there's an improvement between Lightroom 2 processing and beta 3.


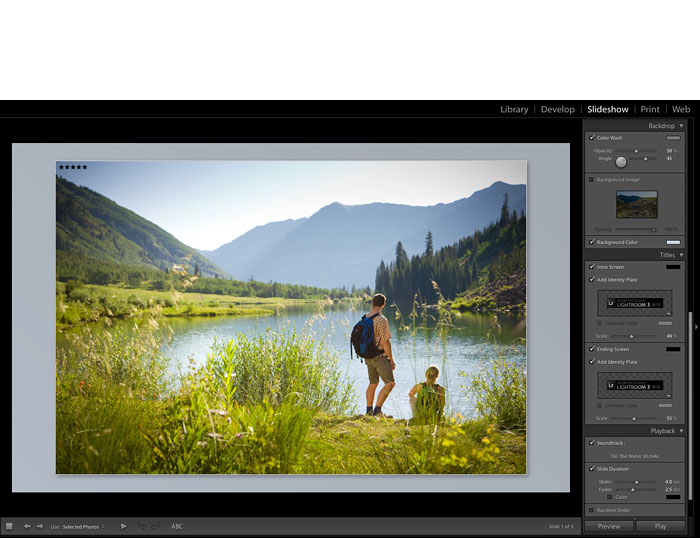
Screenshot 1 :You can now create HD slideshows with music... and export them as movies. Click to enlarge.


In terms of features, a few improvements that I really like include:

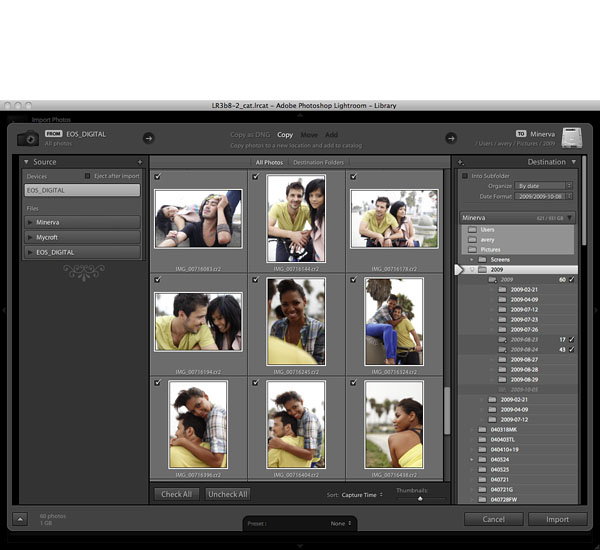
  • Image import interface redesigned. Instead of having the import dialog as a completely separate function as it was in Lightroom 2, it's now integrated into the main program interface. It's quite attractive and easy to use.
  • Slideshow authoring has also been improved, but what I really like is the ability to export your slideshows to movies using the H.264 codec. You can also include music in these HD beauties.
  • Major improvements to sharpening and noise reduction. From what I've seen, these built-in tools look as effective as third-party plug-ins.

Computer Requirements

Mac users will need to have an Intel processor running Mac OS X 10.5 or 10.6 to launch Lightroom 3. Windows users can use Windows 7 or most of the currently supported operating systems by Microsoft.


Screenshot 2: The import dialog has been integrated into the Lightroom interface. Click to enlarge.


You don't have to be a current registered Lightroom user to try beta 3. So if you've been curious about this application, here's your opportunity to see the latest version for free. The beta will be in English only. Adobe wants your feedback, so be sure to participate in the forums if you give this a try.

Remember, this is beta software. Keep your important Lightroom libraries in version 2 and create test libraries for this beta 3. You won't be able to import version 2 libraries into beta 3. I recommend that you grab a handful of duplicate Raw files and just play.


twitter.jpg Follow me on Twitter

-


halloween_pumpkins.jpg

Halloween can be a frightful experience with a compact camera. How do you get good shots under the most difficult photography conditions?

Your best friend, regardless of the camera you're using, is a setting called Nighttime Portrait or Party. You'll find one or both of these in your Scene modes. They are perfect for evening Halloween shoots, whether you're outside trick or treating, or inside at a spooky gathering.

In this podcast I tackle Halloween shooting and provide tips for every type of camera, from simple compact to DSLR.

Listen to the Podcast

You can also download the podcast here (28 minutes). Or better yet, subscribe to the podcast in iTunes.

Monthly Photo Assignment

Feet is the Oct. 2009 Photo Assignment. Shoes, bare feet, paws, manmade objects, my gosh there are so many possibilities. You can read more about how to submit on our Member Participation page. Deadline for entry is Oct. 31, 2009.

More Ways to Participate

Want to share photos and talk with other members in our virtual camera club? Check out our Flickr Public Group. It's a blast!


twitter.jpg Follow me on Twitter

-


Podcast Sponsors

SiteGrinder lets you take ownership of your websites. Effortlessly output pages right from Photoshop.

Red River Paper -- Try the $7.99 Sample Kit.

Add Magic to Your Slideshows -- FotoMagico presentations are so amazing that your audience will be asking how you did it.


Technorati Tags: , , , , ,

Like many others, I'll be flying out of San Francisco and heading east to PhotoPlus Expo in New York City. We've already seen some important announcements for the show: Nikon D3S, Canon 1D Mark IV, delay of the Leica S2, and more accessories than you can shake a monopod at.

But there's still more to come, and by the end of the week we should know where we stand both hardware and software wise. I'll be working at the show as the Lowepro Photography Evangelist. I'll post updates on both my Twitter page (which also appears on the home page of The Digital Story), and I'll be posting inside info on the Lowepro Twitter page too. If you follow both, you'll have a pretty good idea of what's happening.

So, I've got to go. I have a plane to catch...

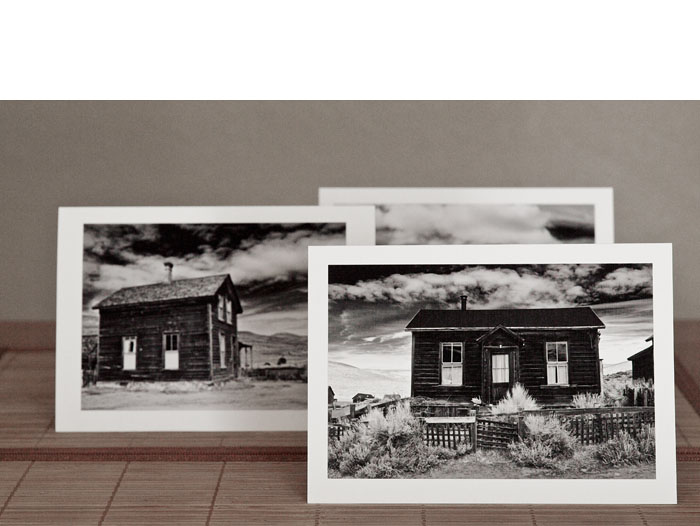
Fine art notecards are such a satisfying product to create. They are beautiful, functional, and affordable. When you hand someone a notecard that you made, they know you're an artist. More than once recipients have told me that they can't wait to get them in a frame.

Until recently, I was using Red River 60lb Premium Matte C2S for my matte surface cards. It's a beautiful stock that really shows off my images. But for this last print run, I tried the 60 lb. Paper Canvas because of the textured surface. And I love it.

First of all, I didn't have to change any of the print settings that I was using for my other matte notecards in the Epson R2400. I stuck with the Enhanced Matte Paper ICC profile, and the color and tone reproduced beautifully. Once out of the printer, the cards dried quickly and were easy to fold along the score. Personally, I like to use a roller to get a nice, crisp crease. The end product is a 5" x 7" fine art card that is textured on the outside, but is smooth on the inside for easy writing.

I also highly recommend the 5.25 x 7.25 Premium White Envelopes (Item#7163) for $12.59 for a box of 100. They're such a nice finishing touch.

If you want to know more about how I actually produce these notecards, be sure to read my article, Professional Photo Art Notecards Using Aperture and Red River Paper. I think once you produce a few of these beauties, you'll be just as thrilled with them as I have been.

To get free shipping, be sure to start at the Digital Story page on the Red River site. Red River Paper is a sponsor of The Digital Story, and we're thrilled to be working with them.


twitter.jpg Follow me on Twitter

-


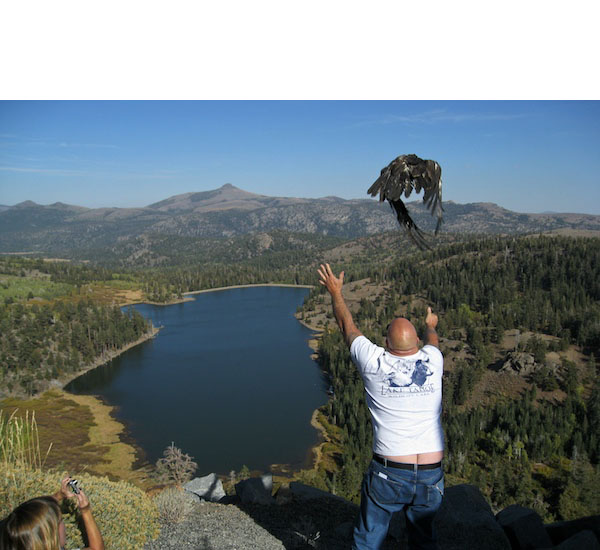
"I was out in California visiting my mother and sister, and we rode up from Roseville into the Sierras looking for fall scenery," writes TDS member Jim Stocking. "We came back through the Carson Pass, stopping just before the summit at the Red Lake Vista. To our astonishment, a car drove up with a young female eagle that they were releasing back to the wild. Armed with my wife's Canon SD850, which she let me use for the trip, I caught the shot of the bird making its way to freedom after being tossed into the air."

As Jim mentioned, he used a Canon PowerShot SD850 IS set to ISO 100 for this wonderful shot of the eagle being set free. The shutter speed was 1/400 and the aperture was f/8.

Photo by Jim Stocking. Click on image to zoom to larger size.

If you have a candid you'd like to share, take a look at our Submissions page, then send us your Grab Shot. We'll try to get it published for you on The Digital Story.

And you can view more images from our virtual camera club in the Member Photo Gallery.


twitter.jpg Follow me on Twitter

-


Technorati Tags: , , ,

Which Image is the Sharpest?

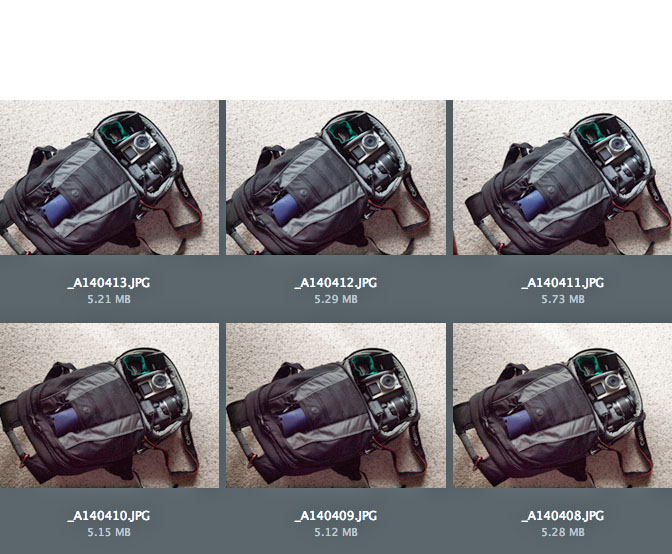
Here's a fun quiz: Which of these six images is most likely the sharpest? You'll need to click on the picture to zoom it out to see the real clue.

For those of you who have my Digital Photography Hacks book, the answer is actually one of the hacks. This is a trick that I've used for years when I have to turn around photos quickly and don't have time to examine each one of them at 100 percent magnification. Often, I'm just looking at thumbnails in Adobe Bridge, as described in my Photoshop CS4 Companion for Photographers, and I need to pick one quickly, process in Adobe Camera Raw, then send it on its way.

So, use this article's "Leave a Comment" to state which of these six thumbnails you think represents the sharpest image. I'll post my answer at the end of the day.


twitter.jpg Follow me on Twitter

-


Using only natural light for your portraits, you can produce absolutely stunning results. Or the pictures can be extremely unflattering. I have two videos, right here, that you can watch to help you prepare for this type of shoot.

The first movie is an introduction to my Natural Light Portrait Assignment on Lynda.com. Here I set up how this, and subsequent photo assignments, are structured.

Then in this second video, we go on the computer and analyze natural light for portraiture. Here I show you the difference between "good lighting" and "bad lighting," and the effects they have on your final images. This is a very instructional movie that I think you'll find useful.

These are the first two movies in the Natural Light Portrait Assignment. In the third movie, we go out into the field for the actual model shoot using a variety of techniques. Then, in the fourth video, I go back to the studio and analyze those images. Finally, I do the "call to action" where I encourage you to go shoot your own natural light portrait and share the results on our Flickr Natural Light Portrait public group page.

I have more photo assignments coming up. I'll keep you posted.


twitter.jpg Follow me on Twitter

-


Bottle Video Frame

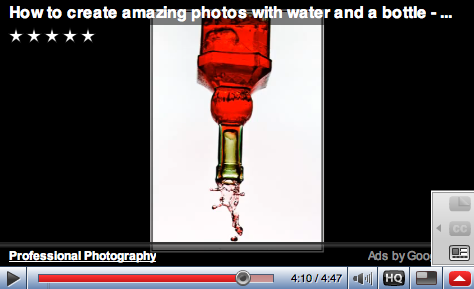
Ever wonder how those dramatic shots of water shooting up from a bottle are created? Take a look at this video by Gavin Hoey titled, How to Create Amazing Photos with Water and a Bottle. You don't need a specialized gear for this weekend project. A DSLR, a flash that can be triggered off camera, and of course, water in a bottle. When you're done, just rotate the image 180 degrees in Photoshop. It's a lot of fun.


twitter.jpg Follow me on Twitter

-


mobile_flickr_ds.jpg

Is social networking valuable to photographers? Do you need Twitter, Facebook, and Flickr to be successful? That depends upon your goals. Whether you're an avid amateur shooter or an aspiring professional, you need to at least have an opinion about social networking, and the better informed you are, the more intelligent your thoughts will be on this subject.

I'm going to discuss a little bit about what's worked for me. I believe in diversity. I like to have multiple revenue streams. I think photography and its related skills can be a great source of revenue in addition to being satisfying artistically.

The danger of course with these new communication tools, is that you become absorbed with social networking and you lose sight of your original goals. I've heard photographers remark that they didn't "get any work" done today because they lost so much time online. And do you have to blog about every activity or post every shot you take? Like so many things in life, moderation is most likely the key to successful social networking.

I'll discuss all of this and more during the show.

Listen to the Podcast

You can also download the podcast here (26 minutes). Or better yet, subscribe to the podcast in iTunes.

Monthly Photo Assignment

Feet is the Oct. 2009 Photo Assignment. Shoes, bare feet, paws, manmade objects, my gosh there are so many possibilities. You can read more about how to submit on our Member Participation page. Deadline for entry is Oct. 31, 2009.

More Ways to Participate

Want to share photos and talk with other members in our virtual camera club? Check out our Flickr Public Group. It's a blast!


twitter.jpg Follow me on Twitter

-


Podcast Sponsors

SiteGrinder lets you take ownership of your websites. Effortlessly output pages right from Photoshop.

Red River Paper -- Try the $7.99 Sample Kit.

Add Magic to Your Slideshows -- FotoMagico presentations are so amazing that your audience will be asking how you did it.


Technorati Tags: , , , , ,

Photoshop LIVE Comes to Washington DC

Photoshop Live Logo

Headlined by Photoshop super instructor Michael Ninness, Photoshop LIVE is coming to Washington DC on Nov. 2, 2009. If you want to improve your Photoshop skills, and have fun doing it, you need to take a look at this affordable, two-day conference. And in fact, I can sweeten the pot even more because I have 10 conference passes to give away. More on that in a minute.

I'm teaching two courses myself: How Adobe Camera Raw Made Me Love Photoshop (which is a class I just love teaching to photographers) and Five Things Photo Hobbyists Need to Know About Photoshop CS4. And there are other great courses too. Here's just a sampling:

  • Creative Black and White and Color Effects
  • How to Retouch Like a Pro
  • Get Smart: Smart Filters and Smart Objects
  • Photoshop Power Shortcuts

And a whole lot more.

Register Now and Save Big

You can register before Oct. 23 for only $125 if you use this discount code: DSPSLMM09 (case sensitive). After Oct. 23, the price is $295 for both days. The event will be held at the U.S. Navy Memorial Foundation and Naval Heritage Center, 701 Pennsylvania Ave, NW Washington, DC. I always love an excuse to visit DC, and in fact, I'm adding on a day so I can spend time as a tourist too.

The Free Passes

I have 10 free passes to give away. If you want one, all you have to do is be one of the first 10 people to post a comment to this article stating which session at the conference (mine excluded) that you're most excited about seeing. You can see the entire line-up here. Those first 10 comments (that have filled-in legitimate email addresses in the "Leave a Comment" box) will receive a code from me via email that can be used during online registration for free admission. When you see 10 comments to this article, then you know that all the passes have been given away. One free pass per person please!


twitter.jpg Follow me on Twitter

-


sunset_bridge.jpg

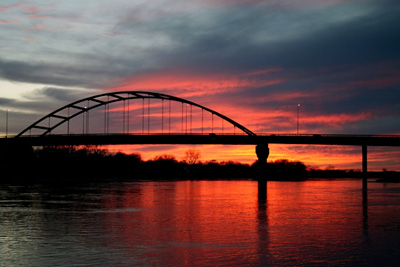
Silhouette images are an excellent way to bring simplicity with an artistic flare to your photographs. In his very helpful article, 7 Tips for Photographing Silhouettes, Steve Berardi shows you a handful of useful techniques that you might want to try on your next adventure.

I think a big part of being successful at this is training your eye to be on the lookout for potential silhouette compositions. Subjects that might be less than thrilling in midday light can be transformed into poignant images at sunset. For example, take a look at this Grab Shot by Thomas M. Loftus. During the day, it's just another bridge shot, but at sunset the colorful sky changes the entire feel.

We're always looking for ways to add drama to our photographic narrative. Silhouette compositions can help us do that.

Photo of Veteran's Memorial Bridge on the Missouri River by Thomas M. Loftus.


twitter.jpg Follow me on Twitter

-


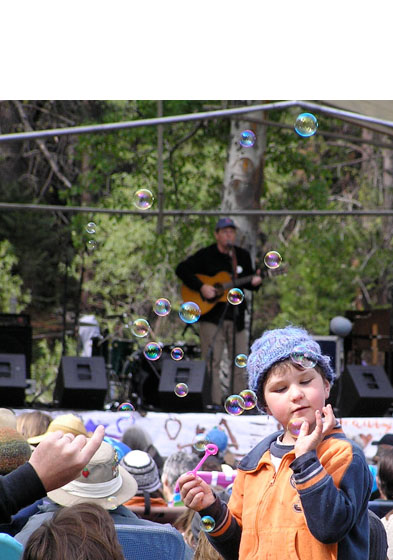
"I took this at Spring 2008 Strawberry Music Festival," writes Moira Haines. "We were enjoying a short reprieve from the rainy weekend. It seems that bubbles are more captivating than religion to some, and I enjoyed watching the innocent fascination on the boy's face."

Moira used her Olympus C 770UZ digital camera to capture this captivating scene.

Photo by Moira Haines. Click on image to zoom to larger size.

If you have a candid you'd like to share, take a look at our Submissions page, then send us your Grab Shot. We'll try to get it published for you on The Digital Story.

And you can view more images from our virtual camera club in the Member Photo Gallery.


twitter.jpg Follow me on Twitter

-


Technorati Tags: , , ,

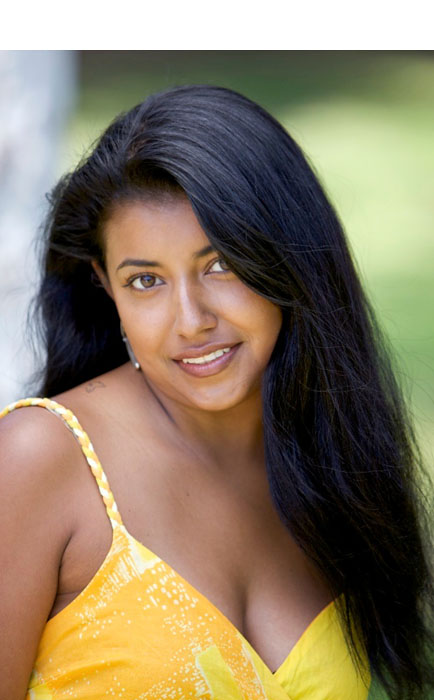
As I described in a recent podcast, The Simple Photo Shoot, I love grabbing my camera, going to the park, and shooting portraits. You'd be surprised at how well these images can look if you apply a few easy techniques.

In my new Lynda.com training, Photo Assignment: Natural Light Portraits, I take you on a photo shoot with me (and a lovely model) to illustrate some of my favorite natural light techniques. Once the shoot is over, we go back to the computer to analyze our images. Some techniques work better than others, but you get to see them all.

Photo by Derrick Story for the Natural Light Training Video. Canon 5D Mark II and 70-200mm f/2.8 IS L lens.

natural_light_portriats.png

Then here's the part I'm really excited about. I'm facilitating a Flickr Public Group page dedicated to sharing all of our images and ideas connected to natural light portraiture. The page just went live yesterday, and already we have lots of great stuff to look at, think about, and possible incorporate into our own bag of tricks.

This is the first of many photo assignment trainings that I'm doing for Lynda. If you want an easy way to learn new techniques, practice them, then share with others, I highly recommend both the Lynda.com training, and the participation on the Flickr page.


twitter.jpg Follow me on Twitter

-


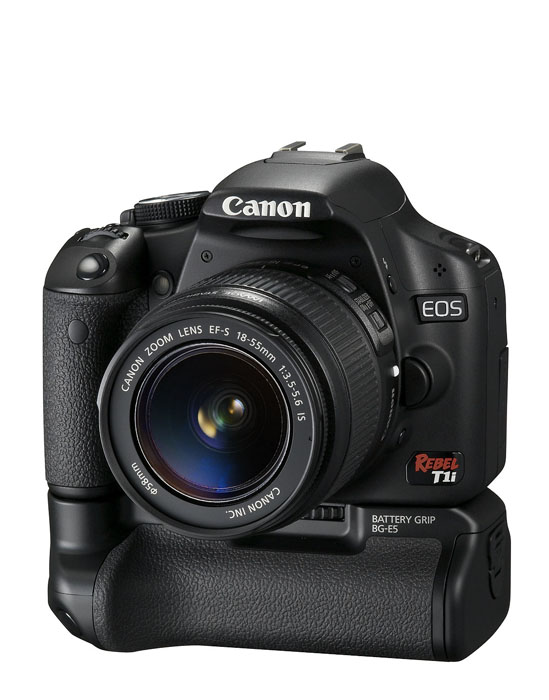
The Canon BG-E5 Battery Grip ($117) provides comfort for larger hands, gives you two battery options, and adds a vertical shutter release button. An interesting side benefit that isn't listed in the specs is that it also makes either the Rebel T1i or XSi a bit more chunky and professional looking.

When I'm on the road in outdoor settings, I load up the battery grip with 6 Sanyo Eneloop rechargable AA batteries. That way, if I'm away from power for extended periods, I can keep shooting as long as I have AAs on hand. You can also use two LP-E5 lithium batteries instead. This configuration is much lighter than AAs. You get inserts for each of the two configurations. So switching back and forth is easy.

The built-in control buttons for vertical shooting include shutter release, AE/FE lock, main dial, and aperture/exposure. So no matter which way you turn the camera, you have maximum comfort.

Unlike with bigger cameras, when you want to travel lighter, just remove the battery grip, insert a single LP-E5 lithium battery, and you're ready to go. The bottom battery door does need to be removed to use the grip. It's easy to snap on and off. Just make sure you don't lose it when it's not in use.

Other Posts on the Canon Rebel T1i

Canon Speedlite 270EX Review - Versatile, Compact Flash

Canon Digital Rebel T1i Field Test at Bodie State Park, California

Street Shooting with Canon 500D/T1i

"Hands On Review of the Canon T1i (500D) - Digital Photography Podcast 179


twitter.jpg Follow me on Twitter

-


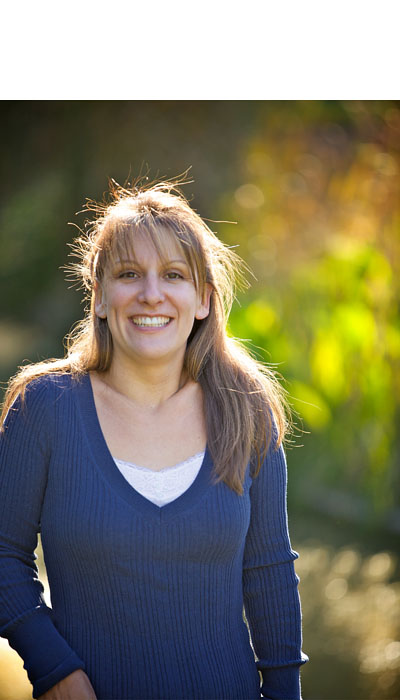
What is the simple photo shoot? I define it as one camera, one lens, and one accessory. That's all you take. The ginormous bag of lenses and modifiers stay home as you go "MacGyver" and improvise with the equipment that you have in hand.

In this week's show I discuss how important the simple photo shoot is, and detail my latest one, a portrait shoot with Bonnie at the park. My three pieces of equipment? 1) Canon 5D Mark II 2) Canon 70-200mm f/2.8 L IS zoom lens. 3) Canon 270EX compact flash. Listen to how I used these items during a relaxing photo session.

"Bonnie in the Park" by Derrick Story Captured with a Canon 5D Mark II and a 70-200mm f/2.8 lens. Click on image to zoom. See the entire gallery on The Digital Story Flickr page.

Listen to the Podcast

You can also download the podcast here (29 minutes). Or better yet, subscribe to the podcast in iTunes.

Monthly Photo Assignment

Feet is the Oct. 2009 Photo Assignment. Shoes, bare feet, paws, manmade objects, my gosh there are so many possibilities. You can read more about how to submit on our Member Participation page. Deadline for entry is Oct. 31, 2009.

More Ways to Participate

Want to share photos and talk with other members in our virtual camera club? Check out our Flickr Public Group. It's a blast!


twitter.jpg Follow me on Twitter

-


Podcast Sponsors

SiteGrinder lets you take ownership of your websites. Effortlessly output pages right from Photoshop.

Red River Paper -- Try the $7.99 Sample Kit.

Add Magic to Your Slideshows -- FotoMagico presentations are so amazing that your audience will be asking how you did it.


Technorati Tags: , , , , ,

lightroom_logo_sm.jpg

Lightroom's presets in the Develop module are one of the application's best features. Out of the box you get cool effects such as aged photo, antique light, selenium tone, punch, and much more. If you have the Navigator open, then you can mouse over the preset and see a sample of the effect applied to a thumbnail of your image. Great stuff. You can also create your own presets. So if you build an effect that you love, you can easily apply to future images.

Since presets are sharable documents, you can benefit from the creative experimentation of others. I found an excellent resource at Yanik's Photo School, Top Free Lightroom Presets that lists all sorts of terrific stuff. Yanik also shows you how to install LR presets, which I think is a helpful tip unto itself.

If you want the inside scoop on Lightroom, also keep an eye on the Lightroom Journal. It's info straight from the Adobe Lightroom team.


twitter.jpg Follow me on Twitter

-


Easy Geotagging with the Eye-Fi Geo

eye-fi_geo.jpg

In my latest Macworld Magazine article, a review of the Eye-Fi Geo, I show the ins and outs of the $60 SDHC card that provides wireless transfer of pictures to your Mac. Using WiFi to move images from camera to computer is nice, but the real beauty of this device is that it provides easy geotagging for urban shooters. And if you use iPhoto as your picture management software, the Eye-Fi Geo will send your images directly to the application. When you view your shots for the first time on the computer, they have already been tagged with location coordinates and places information. This is about as easy as capture geotagging gets.

This workflow is for Jpeg shooters. You can have all the images sent to iPhoto, or use the Protect key on your camera to mark the images your want transferred. During my tests, it took about 12 minutes to send 40 high rez Jpegs from a Canon T1i to a MacBook. When I opened up the pictures in iPhoto, all of the geodata was in place. So even though transfer takes longer than with a USB card reader, a lot of good stuff happens as a by product of the process.

Mac shooters who want a low-cost way to experiment with capturing geodata at capture might want to take a look at the Eye-Fi Geo. It's available exclusively at the Apple Store.

More Posts on Geotagging

Selective Transfer For Older Eye-Fi Cards Too

Copy and Paste Geodata in iPhoto 8.0.2 (iPhoto '09)

Macworld Magazine Article (by me): "Geotag your photos on-the-go"

A Quick Primer on Geotagging

"Introduction to Geotagging" - Digital Photography Podcast 165

Testing the Eye-Fi Explore Card at Home

Geotagging a Journey with photoGPS, iPhoto, and Flickr

iPhoto '09 as Your Geotagging Tool?

First Look at Jobo photoGPS Device and Software

Update to Geotagging Workflow, Including Jobo photoGPS

Finding a Reasonable Geotagging Workflow


twitter.jpg Follow me on Twitter

-


Technorati Tags: , , , , , ,

Editor's Note: Jim Garrett and I have exchanged emails about building a low cost photo workflow. I liked his thoughts and asked him if he would consider writing them up for publishing on The Digital Story. He agreed. So, here is his terrific article about building an efficient workflow. I think you're going to like what Jim has to say.

Diagraming Your Workflow

by Jim Garrett

After listening to I've Taken Great Pictures, Now What?, Podcast 176, I realized that I was using a lot of different software tools in my workflow, and I seemed to be jumping around a lot. I also realized that I was wasting time editing images that I had no intention of sharing -- just because I could. Although this improved my editing skills, I felt that if I could streamline the flow, it would mean spending less time on the computer and more behind the camera.

I am not a professional photographer. However, I am interested in making my pictures the best they can be. I do occasionally take family portraits for friends and family and have even taken pictures at wedding receptions for a nominal fee. I, like many enthusiasts, don't have the resources to purchase an all-in-one workflow solution like Lightroom or Aperture. I either use software that came with my camera, software that I got cheap or free with some piece of hardware, or freeware/shareware. This makes a workflow that moves from one program to another, since none of the cheap stuff does everything. For example, the software that came with my camera does a pretty good job processing my RAW images, but is slow and limited at image editing (removing red-eyes, cropping, repairing blemishes, etc.).
workflow_one.jpg

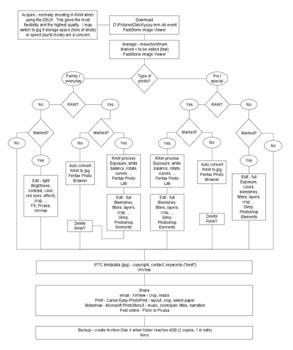
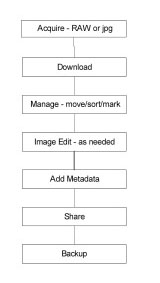
After listing to the podcast, I saw my workflow as a straight line, like this illustration.

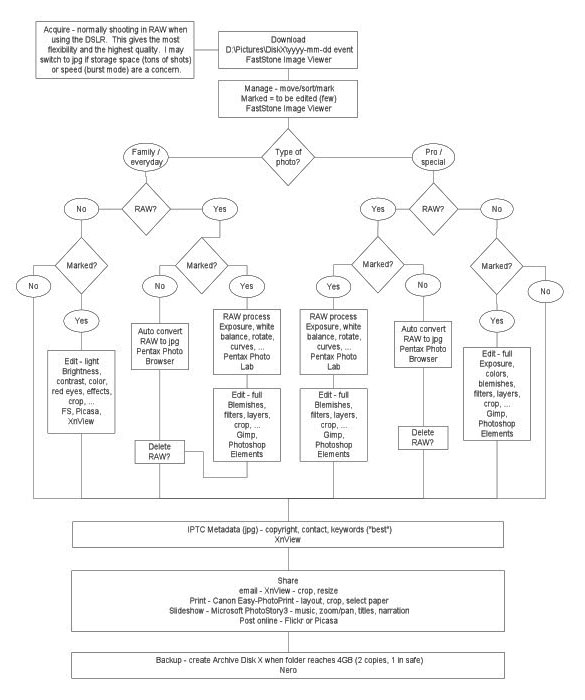
However, when I really looked at how and what I shoot, I realized that the path I take is not at all straight or simple. My workflow depends on 3 factors. First, it depends on what I am shooting. Most of my pictures are just family events like the kids playing sports, camping trips, or get-togethers. The vast majority of these images are fine right out of the camera. However, sometimes I am taking a family portrait (myself, friends, or paying customers), or shots at a wedding reception that I may share or sell. These images I want to treat differently. My workflow also depends on the format I captured my images in, RAW or Jpeg. Since storage for me is limited, I don't want to keep every image I ever shoot in RAW format. The last factor that determines my workflow is the quality of the shot, my personal rating. Images I really like and want to share/sell/publish, I will also treat differently.

Once I realized that my workflow is not a simple straight path, I decided to make a workflow diagram (see the second diagram). I did this using Microsoft Visio, but you could do it with any word processor, or even a pencil and paper.

Here's what building the diagram did for me. (Click on image to enlarge it.)

1. It made me take a hard look at what I am doing and why. I discovered that there was some rhyme behind my reasoning, some reasons why I was skipping around and opening so many different software tools after each download.

2. As I focused on each step of the workflow, this naturally led me to analyze each piece of software and compare its strengths to the others. With these discrete steps in the process, I was able to compare the tools in a much more meaningful way. For example, I had 5 ways to download my images from my camera. I decided what was most important to me about downloading (location and folder names on my hard drive, speed, and skipping duplicates), then I tested each one to see what worked best for me. I did the same thing with each step in the process. When 2 tools work about the same, I went with the one that was the same as the previous or next step in the workflow. This saves time changing programs.

3. I found that following my "optimized" workflow helped me get organized and stop wasting time on images that I don't need to spend a lot of time on. This frees me up to use my limited time working on what matters most.

In my current workflow diagram, (the one I have posted on my computer) I have the task, the most important subtasks and the software tool that best accomplishes them. This helps me to not forget any step, remember which tool to use, and what the major tasks are in each step.

After you make your diagram and decide on the tools that work best, post it on your computer and follow it religiously. If it doesn't work for you, change it. If it does work, use it all the time. It will improve your efficiency, make your work more consistent, and make you a better photographer.

About the Author

Jim Garrett, husband and father of three, is also a photo enthusiast. Jim shoots with a Pentax DSLR. He's a research engineer for a major tire manufacturer. Other hobbies include hiking, camping and cycling.

Tips for Creative Wedding Shots

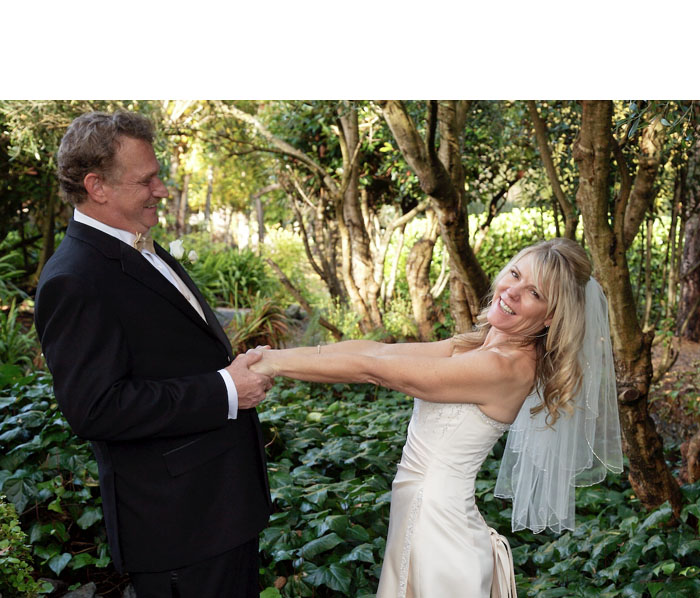
When you're not the primary photographer at an event, you have more freedom to experiment. I just read an article with good suggestions for adding creativity to your shoot, 7 Ways To Be More Creative At Your Next Wedding. I'll add one of my favorite tips too.
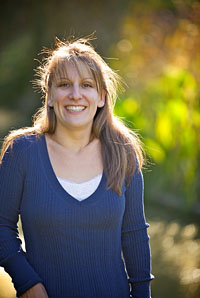
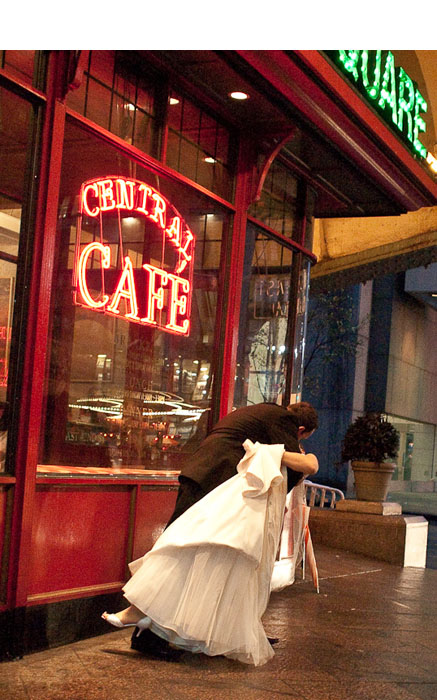
I like to get the bride and groom in a different setting nearby to change the look of the album. Sometimes I feel like the shots are all starting to look the same, so by finding a new context, I can jazz things up a bit. Once you have the couple isolated from the guests for a few minutes, encourage them to play. They're more likely to "let their hair down" if they don't have an audience staring at them.

Photo by Derrick Story, captured with a Canon 5D, ISO 400.


twitter.jpg Follow me on Twitter

-