Recently in Capture One Pro

  Page 8 of 8 in Capture One Pro  

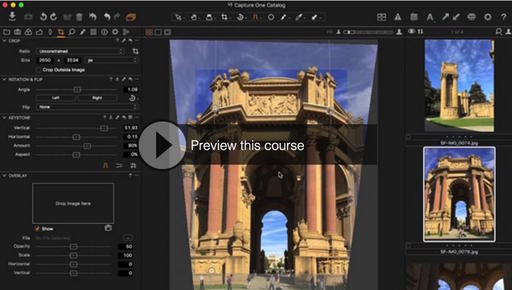
After months or research, testing, and practice, my 5+ hour video training Capture One Pro Essential Training is now available. Here's a taste of what's in store for you.

These movies are designed to show you the easiest ways to make the transition to Capture One. The techniques are straight-forward and uncomplicated. The focus is to get you up and running as quickly as possible, so you can be productive in your new photo management environment. This is a best practices approach.

CaptureOnePro-Promo 1024.jpg

These tutorials will be particularly helpful to former Aperture users looking for a new home, and for unhappy Lightroom photographers who want better RAW decoding and improved performance. I myself made the transition from Aperture to Capture One, and I show you how you can too.

After working with these movies, you might be surprised at just how easy it was to learn this application. Take a look. I think you'll be happy you did.

More Capture One Pro Tips and Techniques

Improve your skills by watching Capture One Pro Essential Training now available on lynda.com. More than 5 hours of tips, tricks, and techniques. Plus many free movies using advanced techniques.

Thinking About Making the Transition from Aperture or Lightroom? - Download my free eBook titled, Rocky Nook's Guide to Moving to Capture One Pro. I show you the steps to create a test library, then build the foundation for a smooth transition to Capture One Pro.

Want to Comment on this Post?

You can share your thoughts at the TDS Facebook page, where I'll post this story for discussion.

Among its many processing skills, Capture One Pro is an excellent B&W converter. And thanks to its built-in presets, you can create a beautiful monochrome in just 3 steps.

Step One - Choose a Preset

Choose your image and go to B&W in the Tool Tabs. It's the icon that's box with a diagonal line through it. The list of presets are listed in the B&W pane.

step1-choose-BW-preset.png

Mouse over the list to see how the various options affect your image. Choose your favorite.

Step 2 - Fine Tune Exposure, Clarity, and Grain

Once you've applied the preset, fine tune the image using the other tools in the B&W panel. I like the B&W sliders and Clarity. Exposure and Levels are usually helpful too.

step2-finetune-grain.png

Don't forget to add some grain. It's a wonderful effect and adds a little crispness to the image too.

Export to Your Desktop

Now all you have to do is go to File > Export Images > Variants, then set the parameters and click Export 1 Variant. Your B&W photo will be ready to share.

BW-Austin-1600.jpg

More Capture One Pro Tips

I've published a short tutorial for organizing the User Collections area of your library. Take a look at One Way to Set Up Your Capture One Library. Following those simple techniques will help you add the structure that you crave for your image library.

Capture One Pro Essential Training on lynda.com

Later this month, my new video training titled, Capture One Pro Essential Training will be live on lynda.com. Keep your eyes peeled for my announcement. More than 100 movies that show you the easiest way to master your library, edit files, and output them in a variety of ways.

Thinking About Making the Transition from Aperture or Lightroom? - Download my free eBook titled, Rocky Nook's Guide to Moving to Capture One Pro. I show you the steps to create a test library, then build the foundation for a smooth transition to Capture One Pro.

Want to Comment on this Post?

You can share your thoughts at the TDS Facebook page, where I'll post this story for discussion.

One of the best feelings a photographer can experience is to fire up the computer and quickly find an image from the past. Knowing that you are the master of your image library builds confidence and efficiency.

tina-library-organized.jpg

The first step in Capture One Pro is understanding the difference among the three major sections in the Library pane: Catalog Collections, User Collections, and Folders. Here's a brief explanation of each:

  • Catalog Collections - Controlled by the application using pre-defined filters such as All Images and Recent Imports. This is where your pictures enter the database when imported from a memory card.
  • User Collections - Controlled by you, providing the tools to build a library structure that's consistent with your sense of organization. You can create Groups (that act like folders in Aperture), Projects, and Albums.
  • Folders - Shows the location of your masters, whether they're in the C1 catalog container, or outside the application set up as a referenced catalog.

I've published a short tutorial for organizing the User Collections area of your library. Take a look at One Way to Set Up Your Capture One Library. Following those simple techniques will help you add the structure that you crave for your image library.

Capture One Pro Essential Training on lynda.com

Later this month, my new video training titled, Capture One Pro Essential Training will be live on lynda.com. Keep your eyes peeled for my announcement. More than 100 movies that show you the easiest way to master your library, edit files, and output them in a variety of ways.

Thinking About Making the Transition from Aperture or Lightroom? - Download my free eBook titled, Rocky Nook's Guide to Moving to Capture One Pro. I show you the steps to create a test library, then build the foundation for a smooth transition to Capture One Pro.

Want to Comment on this Post?

You can share your thoughts at the TDS Facebook page, where I'll post this story for discussion.