July 2009 Archives

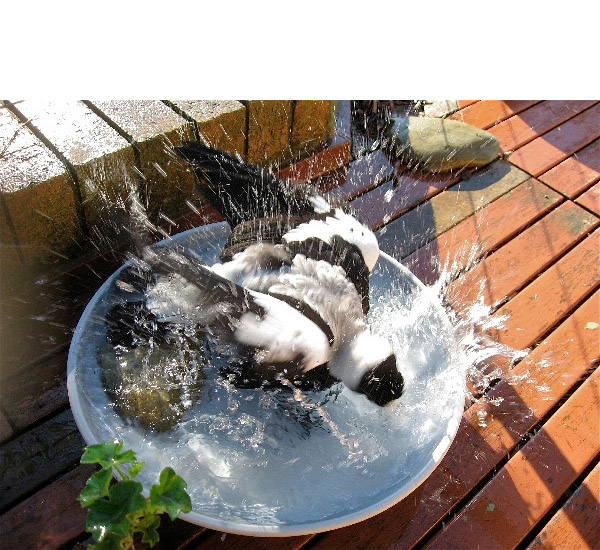
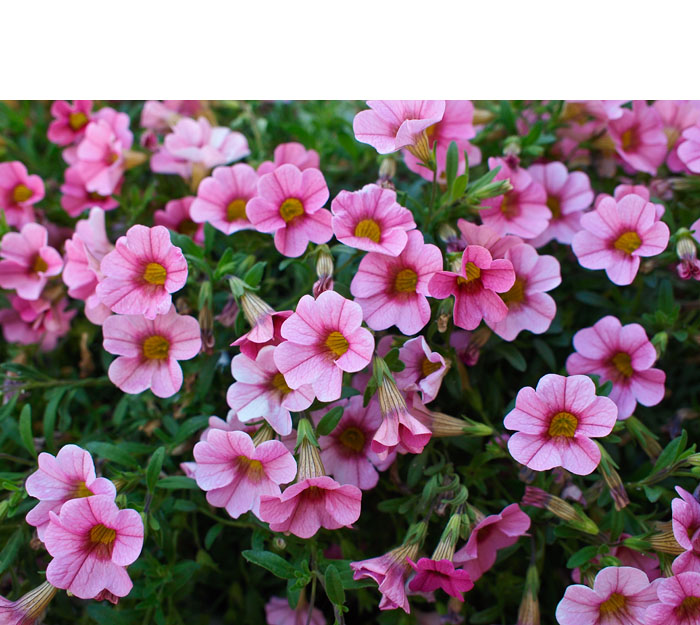
There are so many ways to make a splash. Entrants in the June 09 Photo Assignment provide us with a few excellent examples.

The August 2009 assignment is "Transport." Start working on your contribution now. Details can be found on the Member Participation page. You can submit photo assignment pictures up to 600 pixels in the widest direction.

Please follow the instructions carefully for labeling the subject line of the email for your submission. It's easy to lose these in the pile of mail if not labeled correctly. For example, the subject line for next month's assignment should be: "Photo Assignment: August 2009." Also, if you can, please don't strip out the metadata. And feel free to add any IPTC data you wish (These fields in particular: Caption, Credit, Copyright, Byline), I use that for the caption info.

Photo by Ruth Cooper.

Good luck with your August assignment, and congratulations to all of the fine contributors for June. It's a great collection of images.


twitter.jpg Follow me on Twitter

-


Now Available! The Digital Photography Companion. The official guide for The Digital Story Virtual Camera Club.

  • 25 handy and informative tables for quick reference.
  • Metadata listings for every photo in the book
  • Dedicated chapter on making printing easy.
  • Photo management software guide.
  • Many, many inside tips gleaned from years of experience.
  • Comprehensive (214 pages), yet fits easily in camera bag.

Technorati Tags: , ,

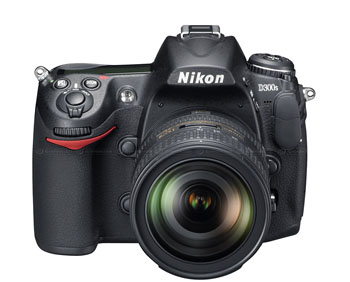
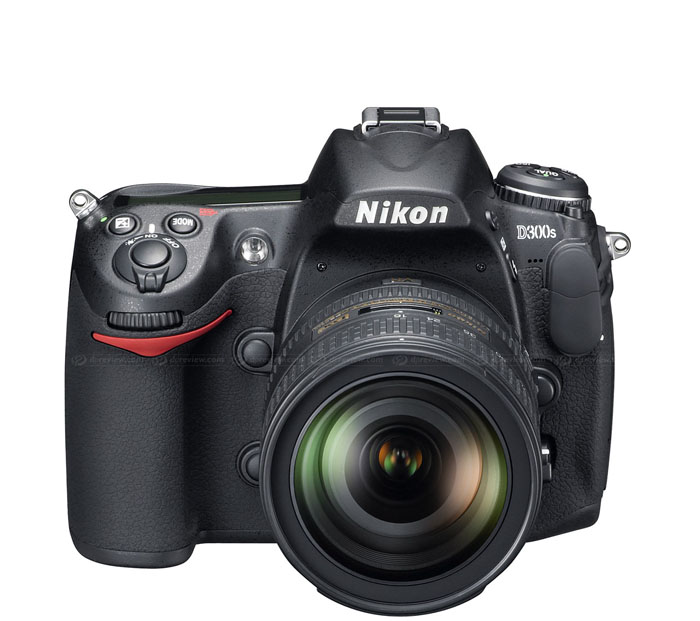
Nikon D300S Looks Strong

I know that's a weird headline, but when I look at the refreshed D300S, that's exactly what comes to mind. Nikon has taken a great camera and improved it in ways that are very instep with the times. If I were a boxer and was facing the D300S on the other side of the ring, I'd think, "Geez, that guy looks strong."

Aside from its solid build and great image capture, some of the features I like on this camera include:

  • Fast burst mode - 7 fps. That is fast enough for serious sports action. And combined with the image magnification from the cropped sensor, you have quite a rig with a 300mm lens attached.
  • 51-point autofocus - powered by a fast image processor gives you the ability to keep up with anything that's on the move.
  • Dual memory card slots - is a nice touch, and since we all have both SD and CF cards, we can put them to use here.
  • Excellent LCD - that's 3" and supports 920,000 dots.
  • External stereo sound input - for the 720p HD video capture. In my opinion, external audio is a must in a serious camera that captures HD

Overall, I think this is a terrific camera for any serious photographer owning Nikon glass. The list price is $1,799 US, and it's available for preorder now. There's more information about the camera on DP Review.


twitter.jpg Follow me on Twitter

-


Morning Light in Nagasaki

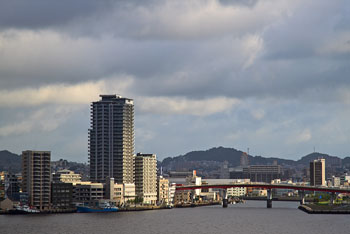
Nagasaki was a special visit for me on many levels. I knew it was going to be a great day when I saw the morning light...

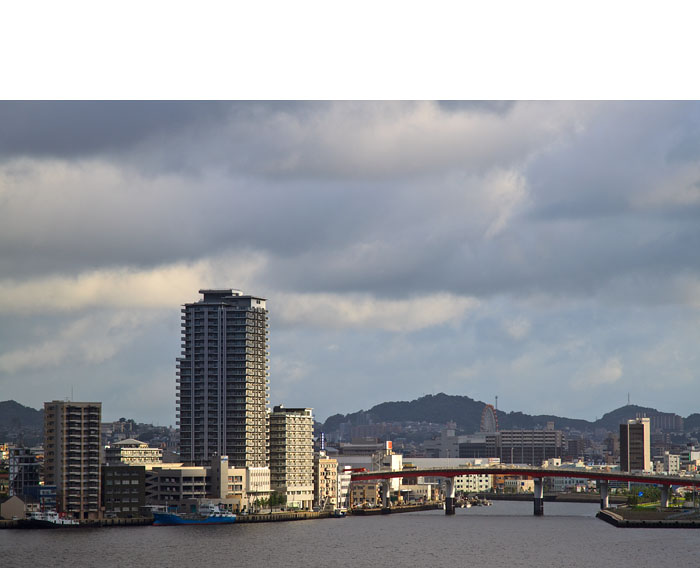
Just about the time I had resigned to no photography in the dense fog of the Sea of Japan, we emerged from the haze and arrived in Nagasaki. And with sunrise, everything changed. The morning sky was beautiful. Large cumulous clouds refashioned the landscape creating a light show that alternated from dark subtlety to bright celebration across the city.

I had my camera bag with me as I climbed the stairs to an early breakfast. I opted for a bowl of cold cereal, some fresh fruit, and a mug of dense, bitter coffee. I stood at a laminated wood bar on the soggy aft deck while I ate. All the seats were too wet for sitting. Just as I finished the cereal, a bank of clouds shifted allowing the sun to illuminate a corner of the sky.

I pulled back the flap on the camera bag to see that the 24-105 mm f/4 was mounted on the Canon T1i. I checked the ISO to make sure it was at 100 (plenty of light here) and began composing shots while leaning against the deck rail. The first image that caught my eye was a distant bridge with a tall building. A beam of light broke through a clouds spotlighting a part of the tallest building leaving its other sides in shadow. I thought the effect was striking and managed to shoot a couple frames before composition changed.


Photos by Derrick Story, using a Canon T1i DSLR with a Canon 24-105mm f4 L IS lens. You can view a catalog from the entire trip to Asia on the The Digital Story Flickr page.


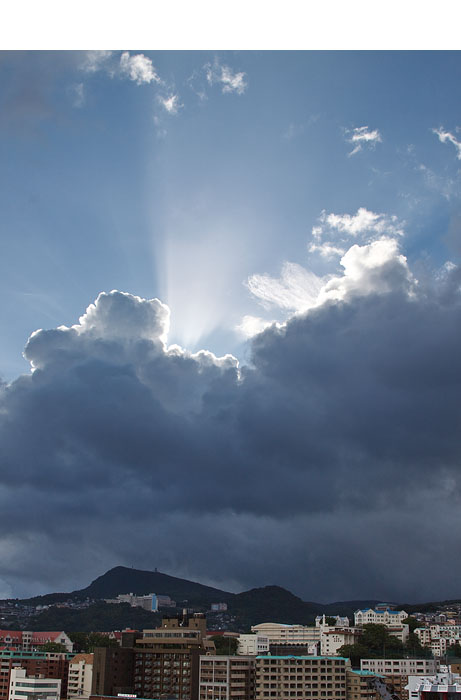
Then, to my right, I saw the light from the sun shoot upward from a dark bank of clouds creating a white rim on their edges accompanied by a bright shaft reaching upward. Below the light show, the city buildings were in shadow. The effect was wonderful, even though I knew the buildings would be too dark for my taste, I exposed for the shaft of light figuring that I could recover some shadow detail in post production. This is an advantage to shooting Raw.

Later, in Adobe Camera Raw, I used both the Fill Light slider and the Graduated Filter to better balance the buildings with the rest of the scene. I didn't want to make them too bright, since that would be unnatural. But I did want them to serve as an interesting foundation to the calamity unleashed above.

I then finished the bowl of fruit and prepared to explore the city. A light breeze help offset the warm, humid morning. I had the feeling that a good day lie ahead.

Previous Stops on Eastern Journey

Early Morning on the Beijing Streets

"Field Notes from Asia Shoot" - Digital Photography Podcast 185

If You Want a Boy, Visit Jeju and Touch Dol Hareubang

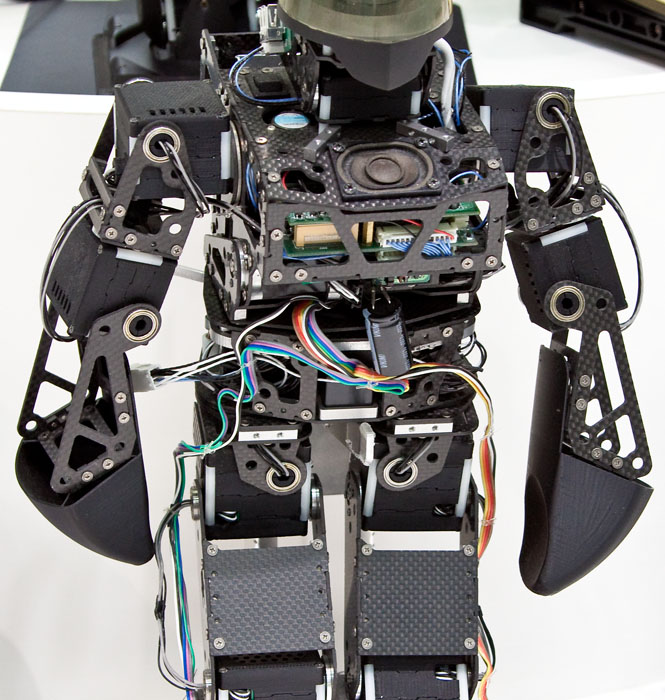
Robosquare: The Ultimate Robot Store in Fukuoka Japan


twitter.jpg Follow me on Twitter

-


It's time to start using the pictures we took before 1999. Many of us have two lives as photographers: The "slide and negative days" prior to 2000, and the digital age that followed. But what about all of those great images we captured prior to the digital age? Shouldn't we incorporate them into our Aperture, Lightroom, and iPhoto libraries? In this podcast I talk about strategies for digitizing our analog photographs.


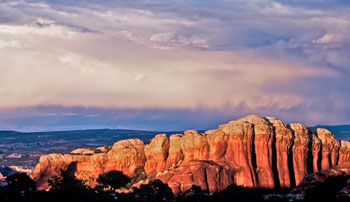
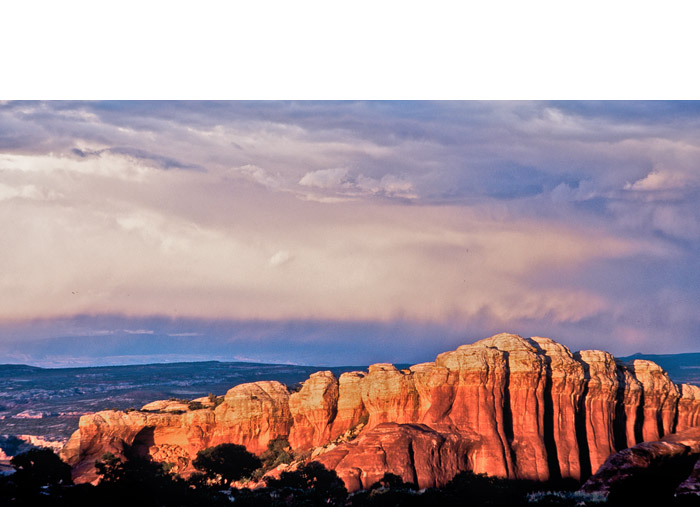
Image from Arches National Park in Utah captured with a Contax 35mm camera using a Zeiss 85mm lens on Fuji slide film. Slide was digitized using a Canon 5D Mark II with a slide duplicator attachment. You can read about the digitizing rig in this article: Canon 5D 35mm Slide Digitizer - DIY. Photo by Derrick Story.


Listen to the Podcast

You can also download the podcast here (31 minutes). Or better yet, subscribe to the podcast in iTunes.

Monthly Photo Assignment

Soft Background is the July 2009 Photo Assignment. You can create the effect when you shoot with a telephoto or wide aperture lens, or take care of it in post production with Photoshop. You can read more about how to submit on our Member Participation page. Deadline for entry is July 31, 2009.

More Ways to Participate

Want to share photos and talk with other members in our virtual camera club? Check out our Flickr Public Group. It's a blast!


twitter.jpg Follow me on Twitter

-


Podcast Sponsors

SiteGrinder lets you take ownership of your websites. Effortlessly output pages right from Photoshop.

Red River Paper -- Try the $7.99 Sample Kit.

Add Magic to Your Slideshows -- FotoMagico presentations are so amazing that your audience will be asking how you did it.


Technorati Tags: , , , , ,

I wanted to put the HD video capture of the Olympus PEN E-P1 to the test, so I took it to an AAU basketball tournament where I had to work under buzzing mercury vapor lights with fast moving boys.

I used the 14-42mm lens and hand held the camera. The ISO had been set to 1600 and the white balance to auto for the stills I had been shooting, so I just left those settings as is and moved the mode dial to Movie. (Make sure you have HD selected in the menu so you're capturing at the resolution you want.)

hd_video_e-p1

One of the first things you'll notice with the E-P1 is that you can zoom during video capture. But I suggest that you use restraint with this function and stick to "zooming out" because the camera doesn't automatically refocus when you change focal length. You can refocus using the AFL button, but it's not ideal because, well, it looks bad during recording.

The sensor-based image stabilization works great for video. Handheld capture will never be as steady as a tripod-mounted camera, of course, but because of the good stabilization, it works just fine for casual movie making. I also thought that the auto white balance was admirable in the artificial lighting -- the auto exposure was good too.

What you end up with is a 1280x720 AVI video file at 30 fps with 16-bit, 44.100 KHz stereo audio. I've posted a set of movies from the E-P1 on the TDS Flickr site. I didn't adjust them, and I'm not sure what Flickr does behind the scenes when I upload the movies. I wanted you to be able to see what comes out of the camera without any editing. The nice thing about 1280x720 resolution is that it's the preferred HD format for both Flickr and YouTube.

As for the audio, well, you have to live with the onboard stereo mics. They are what they are. I much prefer to have an external mic jack so I can move the audio capture device away from the recording unit, but very few cameras provide this. I will say, however, that for onboard recording, the stereo capture with the E-P1 is good. Just remember not to mumble to yourself while the red light is flashing.

A 30-second clip takes up 124 MBs worth of file space. Because of the AVI format, you have a 2 GB limit per recording, which should give you about 7 minutes in HD. In all honesty, the 7 minute limit doesn't bother me because I usually shoot scenes anyway, then stitch them together into a movie. But I do wish Olympus had gone with a MPEG-4 format that has more efficient compression.

Overall, I thought the HD video function adds a great dimension to the E-P1. Not everyone likes to shoot movies with their digital camera, but some events just translate better with moving pictures. And it adds value to the E-P1. Now you have a compact device that shoots great still photos and captures HD video too.

More Articles on the Olympus E-P1

If you're interested in the Olympus E-P1, check out my ISO Comparison post. I run at series of photos from the camera staring at ISO 100 all the way up to ISO 6400. I also have a podcast covering the features of the E-P1. I also have a First Look at the Olympus E-P1 article at Macworld Magazine. Another helpful tip is the Olympus E-P1 "Please Check the Status of Your Lens" Message. I have a nice collection of street shots with the E-P1 in the article, Early Morning on the Beijing Streets. If you're interested in the 17mm lens for the E-P1, take a look at A Closer Look at the Olympus 17mm f/2.8 Lens for the E-P1.


twitter.jpg Follow me on Twitter

-


Shrink Plastic Charms

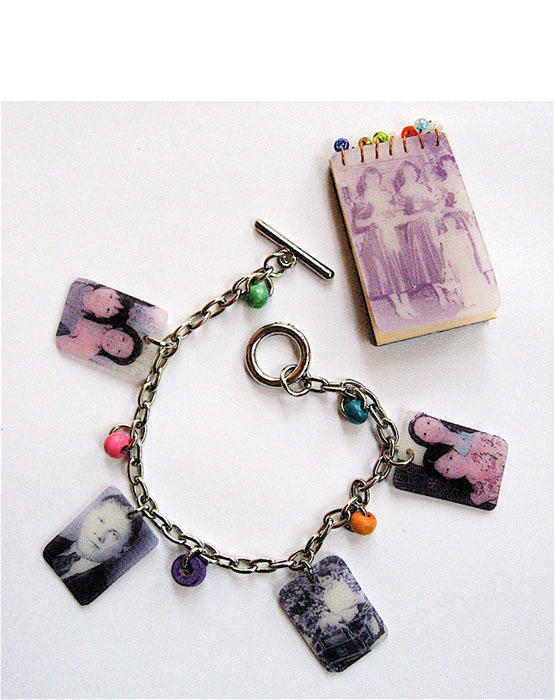
Remember the awe and amazement you had the first time you played with Shrinky Dinks? Watching a piece of plastic curl and shrink into a small, hard charm was like watching a magic show in the oven. Grafix makes it easy to relive those moments with their shrink plastic sheets.

The process is easy. Print your favorite pictures (don't forgot the old family photos) onto one of their sheets and cut around the designs. Lay the cut-outs onto a metal baking sheet and follow the manufacturer's heating instructions. Soon your images will be transformed into plastic pieces that are 20% of their original size. In no time you'll be making your own memory bracelets, mini art books, and more! It's a perfect product for any artist who's still a kid at heart.

Other Creative Output Projects with Stephanie

Stephanie has many more creative output projects waiting for you. Just visit our Creative Output section, right here on The Digital Story. Some examples are:

Stencil Art from Photos (Video Tutortial)

Make a Custom Notebook Using Your Images (Video Tutorial)

Make a Custom Photo Gift Bag (Video Tutorial)

Buckle-Up Frame Present for Dad on Father's Day

A Time to Remember - Make Your Own Photo Clock

Packing Tape Transparencies

Painting without a brush. Artist Tim Mancusi joins Stephanie Scheetz and demonstrates how you can transform your photographs into beautiful works of art. Tim begins with a photograph, then creates a stencil from it using a simple craft knife. He spray paints over the stencil on to art paper to render his unique portraits. It's a great technique for photographers who always wanted to paint, but never mastered working with a brush.

Tim shows you everything you need to know, step by step. Start with one of your photographs, cut out areas with a craft knife, tack the stencil to your blank paper, then spray paint. The finished product is truly artwork, and you are the sole creator of every element.

Other Creative Output Projects with Stephanie

Stephanie has many more creative output projects waiting for you. Just visit our Creative Output section, right here on The Digital Story. Some examples are:

Make a Custom Notebook Using Your Images (Video Tutorial)

Make a Custom Photo Gift Bag (Video Tutorial)

Buckle-Up Frame Present for Dad on Father's Day

A Time to Remember - Make Your Own Photo Clock

Packing Tape Transparencies

Technorati Tags: , , , , , , , , ,

"I took my Canon G9 on a recent trip to New York, my first in fact," writes Michael Cortina. "Even though the weather had been horrendous, I got off the tour bus and did some exploring on foot. That's when I spotted this curious laid-back cat and captured his pose with the G9."

Michael's G9 was set to ISO 200, with a shutter speed of 1/200 at f-4.5.

Photo by Michael Cortina. Click on image to zoom to larger size.

If you have a candid you'd like to share, take a look at our Submissions page, then send us your Grab Shot. We'll try to get it published for you on The Digital Story.

And you can view more images from our virtual camera club in the Member Photo Gallery.


twitter.jpg Follow me on Twitter

-


Technorati Tags: , , ,

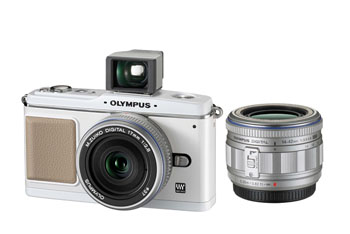
The Olympus 17mm f/2.8 micro four thirds lens is the first prime optic available for the new Olympus PEN E-P1 digital camera. When you first mount this "pancake" lens on the E-P1, it looks like a match made in heaven. Unlike the 14-42mm zoom that has a modern look, the 17mm is a blast from the past and finishes off the elegant retro feeling established by the E-P1 body.

Performance is good too. The lens focuses quickly in autofocus mode and has an accessible manual focus ring. Exposure was consistent with shots made by the 14-42mm lens in controlled lighting. Images were crisp with good contrast. Edge to edge sharpness is good, even at f/2.8, and I didn't detect any vignetting at any aperture.

Purchasing Considerations

If you buy the lens separately, it's listing for $299 on Amazon, plus another $99 for the VF-1 Optical Viewfinder. Personally, I strongly recommend buying the VF-1 viewfinder with the 17mm lens. It slides snugly into the E-P1 hot shoe and allows you to compose with the LCD turned off. It's effective in all lighting conditions, including bright sunlight -- perfect for photographers who don't like composing shots on an LCD screen. But you're looking at a $400 investment for this tandem that has the 35mm equivalent of a 34mm lens (you simply double the focal length of micro four thirds lens to get the 35mm equivalent.)

Another route to go is get the 17mm in the kit instead of the 14-42mm lens. The kit is listed for $899 on Amazon, which is $100 more than the 14-42mm kit and includes the VF-1 optical finder. You can buy the 14-42mm lens for $299 later if you want to start with the 17mm.


Uncropped image shot with Olympus E-P1 and 17mm lens set to f/4. You can see a catalog of images captured with the 17mm on the TDS Flickr page. Those images are direct from the camera with no editing. Photo by Derrick Story.


But as some point you will want the 14-42mm zoom too. As nice as the 17mm is, you can't tap the full potential of the E-P1 with just this lens. There will be situations where you want more breadth or reach. An alternative to the 14-42mm zoom, if you already have glass by Olympus, is the Olympus MMF-1 Four Thirds to Micro Four Thirds Adapter for $180. I tested it briefly with a handful of four thirds lenses, and it performed quite well. It's well-crafted too.

A Few Things to Note

If you want to shoot at f/2.8 with this lens, you're best off to switch to aperture priority mode and set it there yourself. In program mode, the E-P1 didn't open up more than f/3.5, even with a shutter speed as slow as 1/6 of a second. I checked my menu settings, and could not find a reason for this, so I suspect it will be corrected with a future firmware update -- unless I missed something, which is entirely possible with a new camera.

Also, a lens case is not provided for the lens or the viewfinder. This is a little surprising considering the price tag. So you'll have to dig around in your accessories box to find a couple pouches to protect these items when banging around in your camera bag.

And even though the the optical viewfinder fits snugly in the hot shoe, I would still prefer a thumbwheel to tighten it down. I could see the viewfinder getting accidently bumped and flying off the top of the camera. At $100 a pop, this is something to avoid.

The Bottom Line

The Olympus 17mm f.2.8 pancake optic is a handsome addition to the already classic good looks of the E-P1. Performance is solid, but you really need the VF-1 optical viewfinder to reap the full benefit of this lens. The tandem (lens and viewfinder) is a bit on the pricy side when purchased separately, so if you're really interested in them, consider the 17mm kit initially. You can later add the 14-42mm as a separate purchase. [Thanks to Rob-L for helping me with my math on the kits.]

More Articles on the Olympus E-P1

If you're interested in the Olympus E-P1, check out my ISO Comparison post. I run at series of photos from the camera staring at ISO 100 all the way up to ISO 6400. I also have a podcast covering the features of the E-P1. I also have a First Look at the Olympus E-P1 article at Macworld Magazine. Another helpful tip is the Olympus E-P1 "Please Check the Status of Your Lens" Message. I have a nice collection of street shots with the E-P1 in the article, Early Morning on the Beijing Streets.


twitter.jpg Follow me on Twitter

-


Face detection and recognition are two of the killer technologies incorporated into iPhoto '09. I've spent a lot of time working with these technologies, and I have some great resources to help you quickly become a power user.

faces_corkboard.jpg

7 tips for using Faces in iPhoto '09 provides a nice overview of how Faces works, then gives you a handful of power user techniques. This is a must-read for iPhoto '09 fans.

Back up iPhoto's Faces database tells you a bit about the Faces database in iPhoto '09, and how you can back it up to protect the work you've done.

iPhoto '09: 10 Things to Know About Faces is a 46-minute online training published by Lynda.com. The training is divided into 10 short QuickTime movies, two of which are absolutely free and you can watch right now. This is a terrific way to learn and master Faces technology in iPhoto '09.

"Face Recognition All Around You" - Digital Photography Podcast 169 -- In this podcast, I discuss face detection both on the capture side of the fence with digital cameras, and on the software side. I cover how this technology is being used, and some things to keep in mind if you decide to take advantage of it for your work.

More Articles About iPhoto '09

5 Semi Secret Editing Tips in iPhoto '09

"Faces and Places in iPhoto '09" - Digital Photography Podcast 166

Loss of Sharpness When Straightening in iPhoto '09

iPhoto '09 as Your Geotagging Tool?


twitter.jpg Follow me on Twitter

-


Technorati Tags: , , , , ,

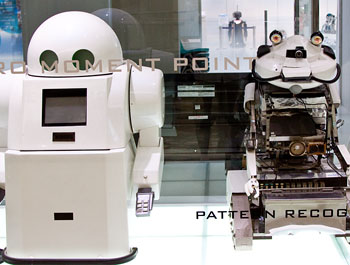
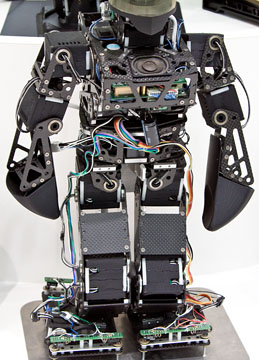
Inside what looks like a typical shopping mall, within walking distance of the Fukuoka Tower, is one of the most amazing retail establishments I've ever visited: Robosquare. It's a combination of tech museum, research facility, and toy store for geeks. In the spacious visitor area there are dozens of robots on display. Some are for sale; others are just to marvel at. Off to the side behind glass windows is an assembly and research area where you can watch technicians work on various robotic projects. Everywhere you turn, there is something to excite the senses.

It was a lucky find for me. I had been traveling on my own during this visit in Fukuoka. But there were times when I would end up at the same places as my shipmates. People would spot me, we'd compare notes on the day, then go our separate ways.

I had already been to the top of Fukuoka Tower, and I was hanging around downstairs contemplating where to go next. It was hot outside, so I wanted to make a good decision before leaving the comfortable air conditioned environment where I had just finished lunch. At that point I spotted a few of my comrades getting ready to go up the tower. They were part of an excursion. A few in the group hated heights and had asked for something else to do while the rest took the elevator to the top. The tour guide lived locally and suggested the Robosquare. As they were dashing off to see the robots, one of them mentioned the diversion to me. "Perfect," I thought. So I dashed off with them. The beauty of my situation, however, was that I could stay there as long as I wanted. They had to rejoin the tour 20 minutes later. It took me an hour to pull myself out of the store.

Part of what kept me engaged were the three demonstration areas that had robots in action. One in particular, the baby seal, was impressive. This robot had been developed to comfort the elderly who were in extended care facilities, often without companionship. The seal could locate people in the room, make eye contact, then interact with them. If the person pet the seal, it would really turn on the charm. The combination of movement and sound were very compelling, enhanced by the thick fur that felt so good to stroke. Within minutes, I felt better myself, and I was in great shape to begin with. What a truly marvelous invention.

Then, after I had looked over every display twice, I went to the shopping area where there were plenty of projects to take home and build. I opted for a couple car kits and a robotic pencil sharpener. They'll make great presents for a couple of boys back home. But there was plenty more, including Lego Mindstorms, robotic arms, and simple kits too.

As I walked out with my purchases, I was thinking that sometimes you just need to be in the right spot at the right time. Robosquare was definitely a good spot for me.

Photos by Derrick Story, captured with a Canon T1i DSLR. For more photography from Asia, visit the TDS Flickr page.

Previous Stops on Eastern Journey

Early Morning on the Beijing Streets

"Field Notes from Asia Shoot" - Digital Photography Podcast 185

If You Want a Boy, Visit Jeju and Touch Dol Hareubang


twitter.jpg Follow me on Twitter

-


Field work is the greatest teacher of all. That's where your preparation, knowledge, and ability to think on your feet come together to enable you to capture once in a lifetime images. I had many such moments on the recent visit to China, South Korea, and Japan. In this podcast I share anecdotes from working in Asia.

Equipment that I used on this trip included the Canon Digital Rebel T1i, battery grip with AAs, 70-200mm f/4 L, 24-105mm f/4 L IS, 18-55mm IS, and 50mm f/1.8. No external flash, but monopod with tripod ring for the 70-200mm. I also packed the Olympus E-P1 and the Olympus Stylus Tough 8000.

Many of my students had more equipment, and sometimes more expensive gear than my rig. But I was able to carry everything in needed in a shoulder bag that was always with me, even in the hot, humid Asian afternoons. This allowed me to get shots that others missed.

Listen to the Podcast

You can also download the podcast here (32 minutes). Or better yet, subscribe to the podcast in iTunes.

Monthly Photo Assignment

Soft Background is the July 2009 Photo Assignment. You can create the effect when you shoot with a telephoto or wide aperture lens, or take care of it in post production with Photoshop. You can read more about how to submit on our Member Participation page. Deadline for entry is July 31, 2009.

More Ways to Participate

Want to share photos and talk with other members in our virtual camera club? Check out our Flickr Public Group. It's a blast!

Photo by Derrick Story in South Korea with Canon Rebel T1i and 24-105 mm f/4 L Canon zoom. For more images from Asia, visit the TDS Flickr page.


twitter.jpg Follow me on Twitter

-


Podcast Sponsors

SiteGrinder lets you take ownership of your websites. Effortlessly output pages right from Photoshop.

Red River Paper -- Try the $7.99 Sample Kit.

Add Magic to Your Slideshows -- FotoMagico presentations are so amazing that your audience will be asking how you did it.


Technorati Tags: , , , , ,

I just returned from a trip to Asia, and I was pleasantly surprised how often I used my iPhone 3GS for photos and video capture. Because of its excellent connectivity, the iPhone works great with Flickr on the fly.

Flickr Essential Training

I cover a lot of these basics in my just-released Flickr Essential Training on Lynda.com. But one new feature that has surfaced since I recorded the title is worth sharing here.

Now you can send a photo from you iPhone directly to Flickr and create a Twitter post too. That's how I posted the image titled Nagasaki Streetcar Ride. It's really easy. All you have to do is read the FAQ, Can I post to Flickr and Twitter from my mobile?, then add your unique email address to your iPhone. When it's time to share, email the image from the iPhone using the mobile address, and you're set. It's a great way to add images to your Flicker account, and then tweet about them at the same time.

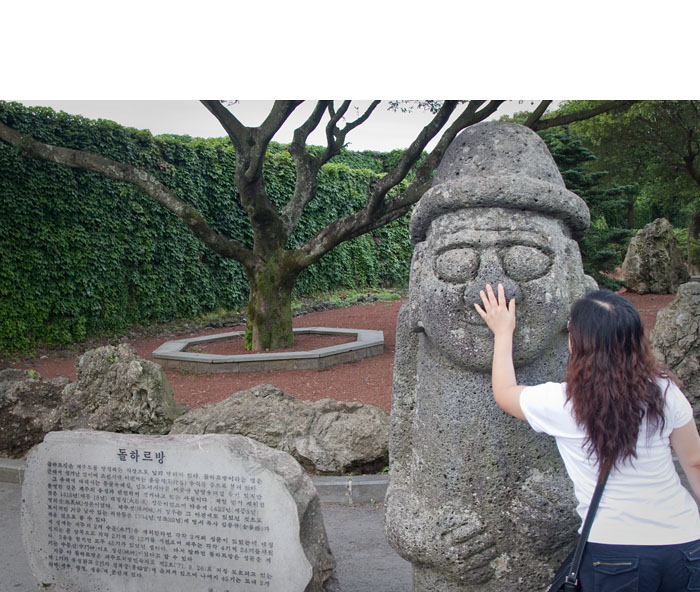
Jeju is an island off the southern tip of Korea. It's a popular vacation spot for Koreans, as well as Chinese and Japanese. It's particularly attractive to Korean newlyweds who enjoy the stunning landscape of the island, from shoreline to the dormant volcano crater.

Basalt stone is everywhere. It's used for buildings, statues, and fences. The most interesting use of the porous volcanic rock are for statues called Dol hareubang, often placed at entryways. They are known for offering protection and fertility.

But there's a lesser-known and fascinating tradition associated with these "stone grandfathers," as explained to me by a native Korean woman. She said that newly married women who wanted to conceive and have a boy, would rub the nose of the Dol hareubang. "That's an interesting anecdote to pass the time," I thought. "But it's probably not really practiced these days."

About 10 minutes later, as I was heading back to the car, I passed the Dol hareubang. And as if it were scripted in a movie, a Chinese woman walked up to him and deliberately rubbed his nose. I looked around for my Korean friend, but she was nowhere in sight.

Photo of woman rubbing nose of Dol hareubang captured by Derrick Story using a Canon Rebel T1i and Canon 24-105mm f/4 L IS lens. More pictures from the Asia trip are available at the TDS Flickr page.

Previous Stops on Eastern Journey

Early Morning on the Beijing Streets.


twitter.jpg Follow me on Twitter

-


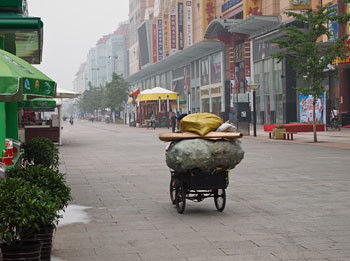
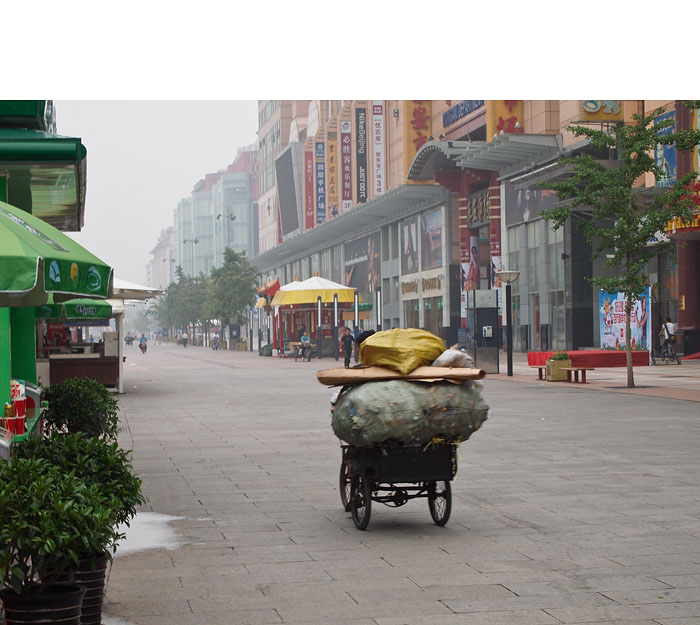
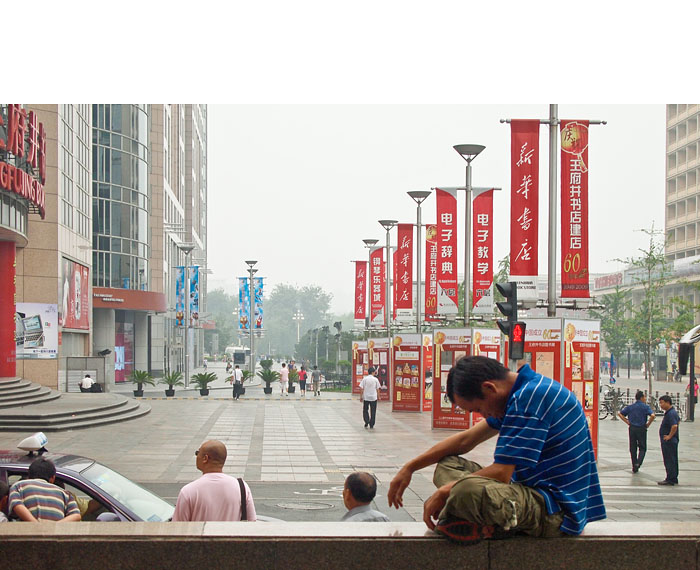
Because I had traveled from the West Coast of the US, my first morning in Beijing was an early one. I had awakened at 3:30 am. Since I was planning to be on the streets by 5, I got up, had a few sips of bottled water, and watched the city come to life outside my hotel window.

In the thick Beijing haze, there wasn't much light to work with. Colors were muted, and people seemed to vaporize as they trailed off in the distance. I decided to work with the Olympus E-P1 today. I didn't want to attract attention to myself when I wandered off into the alleys, and the E-P1 helped me look more like a lost tourist than a photographer. Plus, it's quiet when I shoot, so I can work closer to people without being noticed.

I wanted to capture shots that had an older feel to them, more like Alfred Stieglitz working the streets of New York. I set the ISO to 320 to give me just enough sensitivity to work handheld in the overcast lighting, but with a slow enough shutter to blur motion. I shot in Raw+Jpeg to cover my bets. The only Raw profile available right now for the E-P1 is with Olympus' own software. Since I tend to work more in Photoshop CS4 and Aperture, I wanted to have good quality Jpegs right now too. The shots I published with this note are Jpegs processed in Adobe Camera Raw. I haven't looked at the Raws yet.

The built-in image stabilization on the E-P1 is pretty good, and thank goodness, because the slowish f/3.5-5.6 14-42mm lens gave me shutter speeds between 1/8th and 1/30th of a second on the back streets in the hazy morning light. All of these variables did come together, however, in an earthy, street grit sort of way. The E-P1's built-in digital level helped me square up shots even when I was holding the camera at weird angles. And the quiet shutter never betrayed me, even when standing less than 10 feet from subjects.

I've posted a set of images on The Digital Story Flickr page. More stories to follow in the coming days, so please stay tuned.

Photos by Derrick Story, captured with an Olympus E-P1. You can view a catalog from the entire trip to Asia on the The Digital Story Flickr page.

More Articles on the Olympus E-P1

If you're interested in the Olympus E-P1, check out my ISO Comparison post. I run at series of photos from the camera staring at ISO 100 all the way up to ISO 6400. I also have a podcast covering the features of the E-P1. I also have a First Look at the Olympus E-P1 article at Macworld Magazine. Another helpful tip is the Olympus E-P1 "Please Check the Status of Your Lens" Message.


twitter.jpg Follow me on Twitter

-


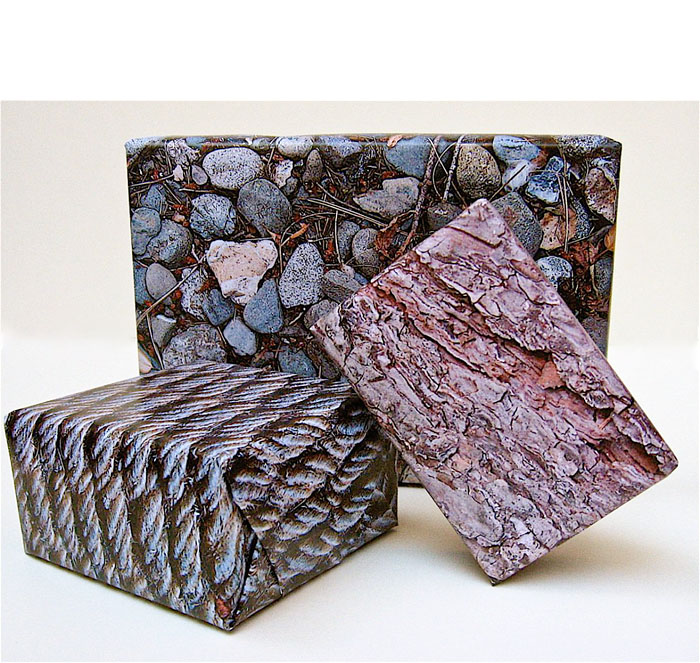
Make Your Own Gift Wrapping Paper

You put a lot of thought into finding that perfect present. So why not put a little extra time into how it's wrapped and really impress the recipient?

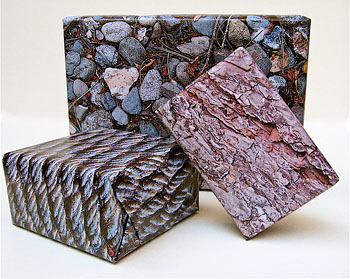
A great way to personalize gift wrap is to use a plain paper printout of one of your pictures. It could be a portrait, a sentimental vacation shot... just about anything that has special meaning. Another creative twist is to take close-up shots of textured surfaces. Now you can make your gifts purr with fur, or go rough and rugged with an image of tree bark.

The size of your finished gift wrap will be determined by the maximum paper size your printer can accommodate. Print the image so it fills the entire sheet of paper or just the center of it.

Imagine the surprised look on your friend's face when you give them your wonderfully wrapped gift... and that's before they even open it!

More Great Creative Output Projects

Stephanie has many more creative output projects waiting for you. Just visit our Creative Output section, right here on The Digital Story.

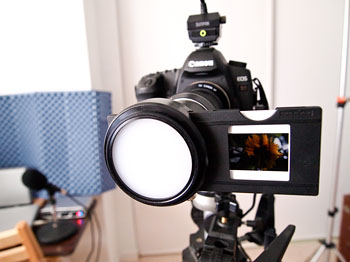
If you have a full frame DSLR, you can easily digitize your favorite 35mm slides at home. I'm using a Canon 5D, Sunpak 444D flash, and a 1980s slide copier. That's all you really need.

Like many long time photographers, I have a collection of 35mm slides. Some of these images are prized shots that I would love to have digitized. I tested a few outside services, but after viewing the results, really wanted to have more control over the process. So in about an hour, I rigged up the home slide digitizer using the following parts.


Photo of Canon 5D 35mm slide digitizer by Derrick Story. See complete set of images on the Digital Story Flickr page.


  • Canon 5D DSLR
  • Sunpak 444D flash in manual mode
  • Vintage 35mm slide copier attachment
  • Tripod
  • Photoflex arm to align the flash
  • Photoflex flash diffuser
  • Cable release

I had a Canon T-ring adapter for the slide copier so it would mount to the 5D. All exposure settings are manual. So I set the ISO to 100 and shutter speed to 1/60th. There's no aperture setting on the slide copier. Instead, you control exposure by how much light you output from the flash. That's why I dug out an old Sunpak 444D flash. It has manual exposure settings (1/16th through full), and I had an extension cord for it too. I set the flash on 1/8 power for dense slides, and 1/16 power for those a bit lighter. I position the flash a few feet from the front of the slide copier and align it so the light evenly illuminates the image.

One of the advantages of this approach is that I can shoot in Raw mode. So once I digitize the image, I can use Aperture, Lightroom, Adobe Camera Raw, or even iPhoto to tweak tone and color. With the 12MP 5D, the file resolution is 3929 x 2619. If I use the 5D Mark II, then I get 5616 x 3343, enough to make a 12" x 19" print at 290 ppi.

I wouldn't recommend this approach if you have hundreds of slides to scan -- an outside service makes more sense in those situations. But when you want to digitize a handful of your favorite images, this method works great. And for Canon shooters who have upgraded from the 5D to the 5D Mark II, you can put your old 5D to work and just leave the rig set up permanently in your studio. In fact, why not tether it to a laptop for a slick digitizing production rig?

I have sample images and lots of shots of the rig itself on the Digital Story Flickr page, including a comparison scan from DigMyPics and this method.

For more interesting home projects, be sure to check out the Photography DIY section on The Digital Story.


twitter.jpg Follow me on Twitter

-


The Olympus folks write: "This is the PEN Story in stop motion. We shot 60.000 pictures, developed 9.600 prints and shot over 1.800 pictures again. No post production! Thanks to all the stop motion artists who inspired us."

It's a terrific video celebrating the PEN history. And in my opinion, the tradition is going to continue with Olympus E-P1.

More Articles on the Olympus E-P1

If you're interested in the Olympus E-P1, check out my ISO Comparison post. I run at series of photos from the camera staring at ISO 100 all the way up to ISO 6400. I also have a podcast covering the features of the E-P1. I also have a First Look at the Olympus E-P1 article at Macworld Magazine. Another helpful tip is the Olympus E-P1 "Please Check the Status of Your Lens" Message. And finally, if you're interested in getting creative, take a look at Applying Olympus E-P1 Art Filters in Playback Mode.


twitter.jpg Follow me on Twitter

-


What goes in the camera bag this time? As I prepare for a return trip to Beijing, plus side visits to Japan and S. Korea, I want to travel light, yet have everything I need. I discuss the possibilities in this week's podcast.

Here's a hint for those of you who read these show notes. I'm leaning toward taking the Canon Digital Rebel T1i, battery grip with AAs, 70-200mm f/4 L, 24-105mm f/4 L IS, 18-55mm IS, and 50mm f/1.8. No external flash, but monopod with tripod ring for the 70-200mm. I'm also going to pack the Olympus E-P1 and the Olympus Stylus Tough 8000.

Interesting choices? I'll explain myself during the show.

Listen to the Podcast

You can also download the podcast here (26 minutes). Or better yet, subscribe to the podcast in iTunes.

Monthly Photo Assignment

Soft Background is the July 2009 Photo Assignment. You can create the effect when you shoot with a telephoto or wide aperture lens, or take care of it in post production with Photoshop. You can read more about how to submit on our Member Participation page. Deadline for entry is July 31, 2009.

More Ways to Participate

Want to share photos and talk with other members in our virtual camera club? Check out our Flickr Public Group. It's a blast!

Photo by Derrick Story at the Beijing Olympics in 2008.


twitter.jpg Follow me on Twitter

-


Podcast Sponsors

SiteGrinder lets you take ownership of your websites. Effortlessly output pages right from Photoshop.

Red River Paper -- Try the $7.99 Sample Kit.

Add Magic to Your Slideshows -- FotoMagico presentations are so amazing that your audience will be asking how you did it.


Technorati Tags: , , , , ,

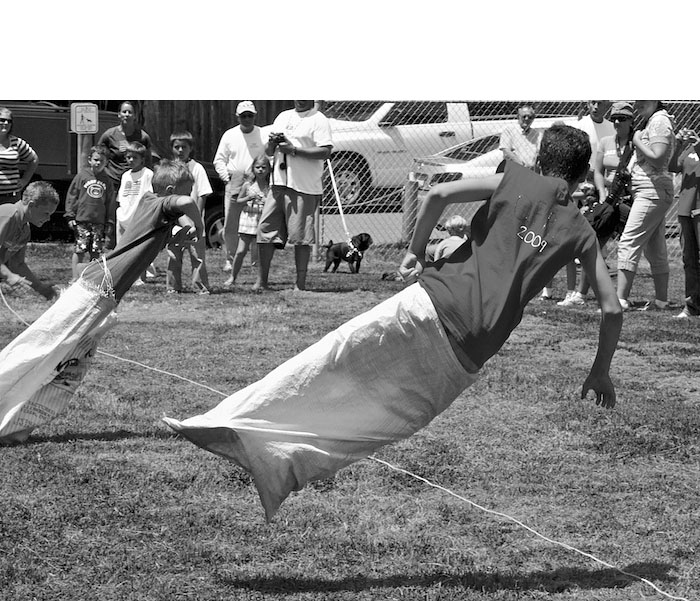
Beautiful 4th of July weather that's perfect for picnicking and fun for sports. When the sun is high overhead, however, your photographs will be very contrasty. Often, what I like to do in these situations is shoot in Raw, then convert the images to B&W in post production. My eye likes gritty, contrasty monochrome images, and there's no better light for that than a high sun on a summer day.

I used one of my favorite street shooting rigs, the Canon Digital Rebel T1i (500D) with the 70-200mm f/4 L zoom. This combo is light, nimble, and provides great image quality. I shot in Raw because I knew I would need all of my options available when I got to post.

Photo by Derrick Story. Canon Rebel T1i, Canon 70-200mm f/4 L zoom. ISO 200.

I processed the photos in Aperture, including the monochrome conversions. It's funny how mood influences the choices I make in post. Today, I felt like pushing the edges, so that's exactly what I did with these shots. I much prefer these to the color versions, which are nice, but just don't have the same tooth.

You can see more images from this series on the TDS Flickr site.


twitter.jpg Follow me on Twitter

-


Fireworks

Pyromaniacs all across the States are gearing up for their favorite day: The 4th of July. Technically, it's an American holiday to celebrate independence from England. But we all know its true popularity stems from great BBQ and dazzling fireworks displays. If you want to capture your own fiery composition, here are a few tips.

Let's start with the basics: turn off your flash. Yes, you're going to be shooting in a dark environment, and if your camera is set to auto flash, it's going to fire. This is the last thing you want, so turn it off.

Next, break out the tripod. You're going to be using long exposures. Use a cable or remote release if you have one. If not, just gently press the shutter button with your finger.

Resist the urge to increase your ISO setting. Keep it at 100 to help reduce image noise. You'll also have to switch to manual exposure. Auto exposure will overexpose your dark skies turning them to mushy gray. Start with a manual setting of 3 seconds at F-5.6 or F-8, and see what you get. Adjust accordingly from there.

If your camera captures in Raw, you may want to consider it for this event. You'll have an easier time recovering blow-out highlights and controlling the shadow areas of the image.

Finally, use a wide angle lens so you can capture as much of the sky as possible. If you know the display is going to peak in a certain area, you can zoom in a bit. Remember, since you're shooting at the highest resolution possible, you can always crop your image later.

These tips will ensure that you come away from your 4th of July celebration with more than a tummy full of hot dogs and beer. Have a great time!


About the Photo
Brian C Davenport went to Windsor,Canada to shoot the Freedom Festival fireworks over the Detroit skyline. Here's how he got the shot.

"It was a very long day but the last 30 min was outstanding," said Brian. "Getting there early in the day gave us a front row seat, right on the shoreline to set up our tripods. I shot about 200 images during the day, and the fireworks shots came out really nice. It was a little tricky as this was a show where there were very few single bursts so there was alot of light in the air most of the time. I settled on 18mm, ISO 100, f8 and 3-5 sec exposure. These settings gave some definition to the bursts without too much "blow-out" of the highlights."

Technorati Tags: , ,

The Olympus E-P1 digital camera supports six Art Filters that allow you to apply effects in-camera. You have a choice of Pop Art, Soft Focus, Pale & Light Color, Light Tone, Grainy Film, and Pin Hole. You can apply the filters to both still images and video. To see how these work, just switch to "Art" on the top mode dial of the E-P1.

Even though you can apply these filters in shooting mode, I prefer to capture in Raw on the E-P1, then do my creative work later in playback mode. Any of the six filters can be applied at that time. The original, untouched Raw file remains in the camera, but you also get a full size 4032 x 3024 Jpeg with the effect. You can apply as many filers as you want to each master file. My personal favorite Art Filters are Pop Art, Soft Focus, Grainy Film, and Pin Hole.

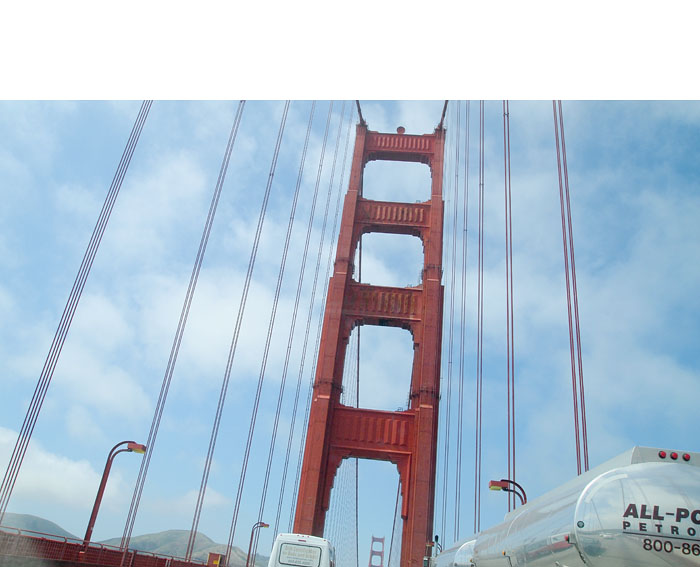
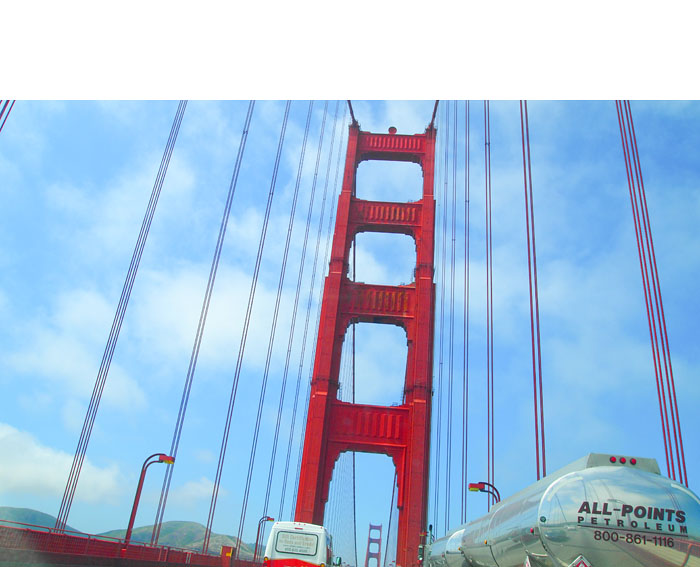
The top image was captured in Raw mode on the Olympus E-P1 (click on it to see larger view). Then later, I applied the Pop Art Art Filter in playback mode. It would have been difficult to capture with the Art Filter on since I was already shooting through a car window. Photo by Derrick Story. See more examples on my Flickr set titled Olympus E-P1 Art Filters.

Technique for Applying Art Filters in Playback Mode

  1. Turn on camera and switch mode dial to "Art".
  2. Choose the Art Filter you want to apply from the six options. Press the OK button.
  3. Go to Playback mode and navigate to the image you want to apply the filter to.
  4. Press the Menu button and navigate to the Playback settings, third category from the top.
  5. Select Edit from this menu.
  6. Click on SEL IMAGE.
  7. Press the OK button and choose RAW DATA EDIT.
  8. Click YES.

The E-P1 will process the image, and within a few seconds you're looking at a new version of the shot with the Art Filter applied. It might seem like a lot of steps to accomplish this when you read the list above, but it actually goes quite fast in practice. Plus, you have the benefit of retaining the Raw file, and working quickly during the shoot. Get the best shot you can on the spot, then get creative later in playback mode.

Of all of the Art Filters, I think Soft Focus is the most practical. It provides a nice amount of filtration without destroying the detail in the image. But I'm sure you'll have your own favorites. This is a great activity for on the plane after flying home from vacation. Just fire up the Olympus E-P1 and get creative. Then, when you get home, download the images to your computer and enjoy.

More Articles on the Olympus E-P1

If you're interested in the Olympus E-P1, check out my ISO Comparison post. I run at series of photos from the camera staring at ISO 100 all the way up to ISO 6400. I also have a podcast covering the features of the E-P1. I also have a First Look at the Olympus E-P1 article at Macworld Magazine. Another helpful tip is the Olympus E-P1 "Please Check the Status of Your Lens" Message.


twitter.jpg Follow me on Twitter

-