February 2010 Archives

Many of our photographers took a winterish approach for this assignment, "Slippery," but not everyone. Check out the Jan. 2010 Photo Assignment and see just how fun slippery can be.
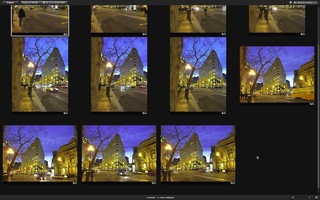
The Mar. 2010 assignment is "Flash." Start working on your contribution now. Details can be found on the Member Participation page. You can submit photo assignment pictures up to 600 pixels in the widest direction.

Please follow the instructions carefully for labeling the subject line of the email for your submission. It's easy to lose these in the pile of mail if not labeled correctly. For example, the subject line for next month's assignment should be: "Photo Assignment: March 2010." Also, if you can, please don't strip out the metadata. And feel free to add any IPTC data you wish (These fields in particular: Caption, Credit, Copyright, Byline), I use that for the caption info.


Photo by Nancy Bauman. You can read more about how Nancy captured this shot, plus see all of the other great images on the Jan. 2010 Gallery page.


Good luck with your March assignment, and congratulations to all of the fine contributors for January. It's a great collection of images.


twitter.jpg Follow me on Twitter

-


Now Available! The Digital Photography Companion. The official guide for The Digital Story Virtual Camera Club.

  • 25 handy and informative tables for quick reference.
  • Metadata listings for every photo in the book
  • Dedicated chapter on making printing easy.
  • Photo management software guide.
  • Many, many inside tips gleaned from years of experience.
  • Comprehensive (214 pages), yet fits easily in camera bag.

Technorati Tags: , ,

Advantages of Tethered Photography

There are times when it's more convenient to connect your DSLR directly to a laptop for capture. You have a much larger screen for viewing images than with the 3" display on the back of your camera. This is particularly helpful during portrait sessions when clients or art directors want to monitor the shoot.

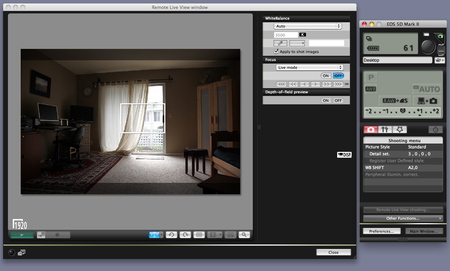
EOS Utility Software

Canon's EOS Utility comes bundled with their DSLR cameras, and provides excellent tools for tethered shooting. Click image to enlarge.

Product photography is another area where tethering makes sense. You can save a days worth of shooting directly to your computer's hard drive and not have to worry about changing memory cards. If you need to review fine details in the set up, that's much easier on a 17" monitor than on the back of a camera.

I also like tethered shooting for shy subjects, such as birds. If you set up a feeder outside the back window, you can position the camera for a "bird's eye view" and monitor the activity safely behind the curtains without disturbing your feathered visitors.

In my Macworld article, Shoot tethered to control your camera from your Mac, I cover a number of options for shooting tethered. I also mention in the article onOne Software's DSLR Camera Remote application for the iPhone. I have a separate article dedicated specifically to that workflow that you might like too: iPhone Remote Control with DSLR Camera Remote.

Regardless of your particular situation, shooting tethered is just plain fun. There's something cool about controlling your camera from a laptop. I guess any kind of remote control brings out the geek in all of us.


twitter.jpg Follow me on Twitter

-


In my previous post, Aperture 3.0.1 Fixes a Lot, but Not All, I raised the issue that the IPTC metadata I was entering in Aperture 3 was not appearing in the Photoshop CS4 "File Info" box after export from Aperture. Initially, I thought this was a bug in Aperture.

But after a little digging, I discovered that Bridge CS4 was displaying my metadata properly. What gives? Why would Bridge show it and Photoshop not?

It appears that we're in the middle of a standards transition. Looks like Aperture 3 is embracing the current specification, as is Bridge CS4. Photoshop CS4 seems to be following an older approach to displaying metadata.

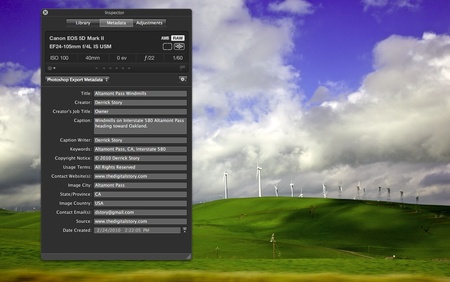
Now if you're feeling the urge to get riled up and start pointing fingers, please stay calm. The point of this post is to show Aperture 3 users an easy way to have their metadata appear correctly in Photoshop CS4. Let's start with how I entered the IPTC metadata in Aperture 3 using a custom template (click on image to enlarge view):

Data in Aperture 3

If you haven't created a custom metadata template in Aperture 3, it's easy. Just choose "Edit" from the popup metadata menu in the Metadata view.

I then exported a Jpeg as I normally would. But instead of opening it directly in Photoshop, I opened it in Bridge CS4 first. Nearly all of my IPTC data is there. Great! If I want this same data to appear in Photoshop, all I have to do is edit any of the fields. A one character edit will work, but I filled in the missing "Copyright Info URL" field. Then click on any other thumbnail, and Bridge will ask you if you want the metadata updated for the picture you were perviously viewing. Yes you do! So, click "Apply."

bridge_metadata.jpg

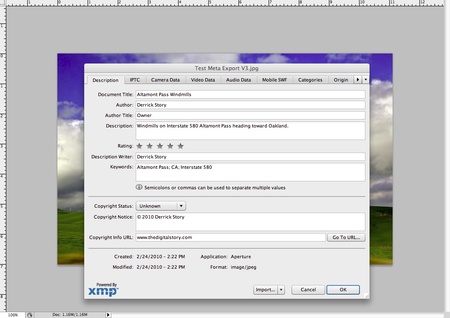
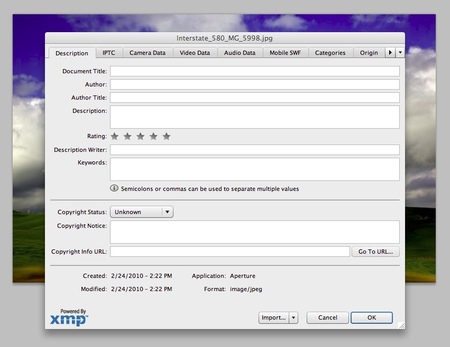
You're done! The metadata for the image has been updated with your Aperture IPTC fields. If you want to check your work, open the image in Photoshop, then go to File > File Info (click on image to enlarge):

Metadata Appears in Photoshop CS4

Yes, this is a workaround that involves an extra step. But it's easier than having to reenter all of your metadata in Photoshop. And it keeps your information consistent.

The bottom line is that Aperture 3 is exporting your metadata. And as other applications update to the current standards, this workaround should soon go away.

More Aperture Tips and Techniques

To learn more about Aperture 3, check out my Aperture 3 Essential Training on Lynda.com. Also, take a look at our Aperture 3 Focus Section. Tons of free content about how to get the most out of Aperture.


twitter.jpg Follow me on Twitter


Aperture 3.0.1 Fixes a Lot, but Not All

Aperture 3 users can download the 3.0.1 update that improves 15 called-out features including: upgrading older libraries, importing photos, memory management, face recognition processing, roundtripping, accessing libraries on a network volume, Places, and more. A lot of stuff! But it still doesn't address a couple of things on my list. One complaint I have is that exporting is slower on my MBP 2.5 GHz than it was before. But the problem that drives me crazy is that my IPTC metadata doesn't display properly in Photoshop after an export from Aperture.

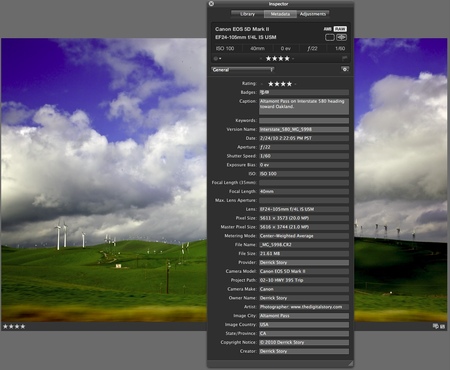
Here's the metadata that I entered in Aperture 3.0.1 (click on picture to enlarge):

Metadata Entered into Aperture 3.1

And here's what is displayed in Photoshop CS4 after I've exported from Aperture with the metadata box checked: (click to enlarge):

No Metadata in Photoshop CS4

Notice all of the blank fields...

So I'm happy to see an Aperture 3 update so quickly after its release. And I'm looking forward to future updates that will smooth things out even more... especially the metadata export.

More Aperture Tips and Techniques

To learn more about Aperture 3, check out my Aperture 3 Essential Training on Lynda.com. Also, take a look at our Aperture 3 Focus Section. Tons of free content about how to get the most out of Aperture.


twitter.jpg Follow me on Twitter

-


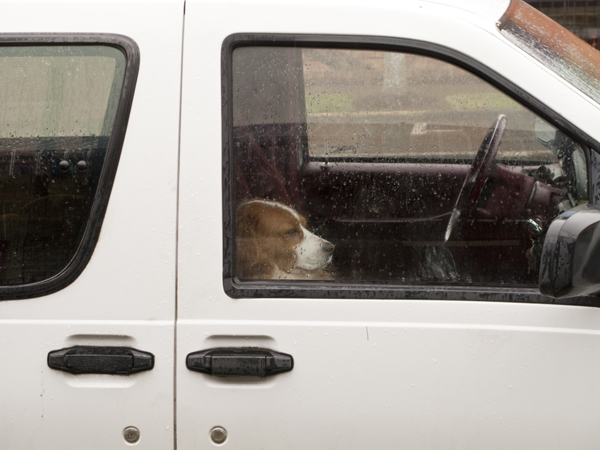
"Waiting Patiently" - Grab Shot 192

"While I was running a digital duplicator at work this morning," writes Jane Hamilton, "I saw this guy parked outside. I grabbed my G9 and shot right through the window. After I looked at the image, I spotted the keys still in the ignition."

As Jane mentioned, she captured the image with a Canon G9, ISO 100, f/4 at 1/100th.

Photo by Jane Hamilton. Click on image to zoom to larger size.

If you have a candid you'd like to share, take a look at our Submissions page, then send us your Grab Shot. We'll try to get it published for you on The Digital Story.

And you can view more images from our virtual camera club in the Member Photo Gallery.


twitter.jpg Follow me on Twitter

-


Technorati Tags: , , ,

lowepro_demo2.png

I've been recording quite a bit of video on location (link goes to YouTube movie sample) for Lowepro as part of my photo evangelist work. For the most part, things have gone well. That's only because I've been lucky. Today my luck ran out.

I'm plugging a lav mic directly into a Canon 5D Mark II and recording both audio and video at the same time. (Yes, I know I can record with separate devices, but I need to turn these projects around really fast.) The problem with 5D audio is that it employs Automatic Gain Control (AGC) that pumps up hiss, plus you have no visual or audio indication of what you're recording. This lack of feedback nailed me today when I didn't push the mic connector firmly and all the way into the audio jack on the 5D. Result: I recorded audio with the onboard mic instead of my external lav. It sounded like this:

Canon 5D Mark II Native Audio with Onboard Mic

When I got back to the room to process and upload the video, I was horrified. Kevin, one of my Lowepro comrades, had just told me about the Magic Lantern Firmware enhancement for the Canon 5D Mark II. It temporarily disables that nasty AGC, allows you to choose between internal or external mics, lets you set the audio levels manually, then provides visual meters so you can monitor your recording in real time. For added protection, enable the camera's A/V jack for audio monitoring with headphones. Needless to say, I was suddenly very interested.

I downloaded the firmware, copied it to a CF card with my card reader, and enabled it on the 5D Mk2 by going to Firmware on the menu and hitting OK. The enhancement is only temporary. Once you turn off the camera, it returns to its normal firmware. Very cool.

After installing, Kevin did an audio test for me with my lav mic and the Magic Lantern Firmware enabled. In the very same environment as the first recording, here's how the audio recorded:

Canon 5D Mark II Audio with Lav Mic and Magic Lantern Firmware

The Magic Lantern site does a great job of explaining all the ins and outs of this wonderful software. I encourage you to read everything, then watch the movie they have embedded on the site. It really explains what's going on. You can download for free, but you'll probably be inspired to hit the donation button after a few uses.

I'm going to reshoot the videos tomorrow that I botched today. With the Magic Lantern Firmware, I'm sure things will go much smoother.


twitter.jpg Follow me on Twitter

-


sony_m43rds_competition.jpg

Looking back, Canon may someday regret its decision not to attend PMA 2010.


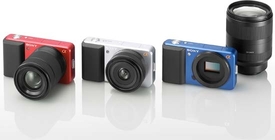
New concept cameras announced by Sony that will compete in the small DSLR market.


Why would I say that? Because suddenly there was more breathing space for those camera manufacturers trying to make a move in the market. And quite honestly, I'm seeing more traction than I had anticipated from the likes of Sony, Panasonic, Samsung, and Olympus. For example:

  • In addition to its thriving booth atmosphere, Sony announced today its competition to the micro four thirds mirrorless SLRs. Additionally, their flagship DSLR, the Alpha 900, was touted by a series of talks by top professionals such as Andy Katz, and the presentations were impressive. On top of that, Sony released plans for new Zeiss 500mm F4 and 24mm f2 lenses -- solid equipment backed by big marketing dollars. And thanks to a no-show Canon and scaled back Nikon presence, Sony became the star of the show.
  • Panasonic and Olympus aren't just sitting on their lens caps either. Panasonic continues to attract great interest in its Lumix DMC-GF1 and other micro four thirds bodies, plus keeps pushing forward on developing its lens lineup for these bodies. Olympus was showing off its latest entry, the E-PL1, which offers a great feature set, handsome looks, and runs $200 less than its previous micro four thirds offerings.
  • Samsung was also making a big push on the PMA show floor. There was interest in their new high-end compact, the TL500, that features a fast f-1.8 24-72mm zoom (f-1.8 at the wide end), a flip out screen, and Raw capability. Many view this as a competitor to the Canon S90 (although I much prefer the S90's look and feel).
    • I think it's going to be interesting to see how all of this plays out over the coming months. Surely Canon and Nikon will continue to hold their impressive market share. At the same time, however, I wouldn't take my foot off the gas if I were any of these competitors. Sony saw an opportunity with this tradeshow, and they are definitely seizing the moment.

      gorillapod_magnetic.jpg

      Plenty of Goodies Too

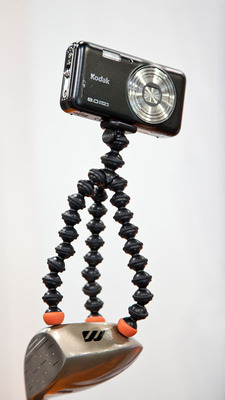
      Of course the floor wasn't just all serious hardware. Accessory companies such as Joby showed off their latest wares. I had fun with the Gorillapod Magnetic that features three neodymium magnets that really latch on to metal surfaces. Now you have a whole new way to steady your compact camera.


      The Joby Gorillapod Magnetic features serious gripping power on metal surfaces.


      Lowepro, Think Tank, and Tamrac each saw a lot of activity in their respective bag booths. Obviously I was focused on Lowepro (since I am their photography evangelist), and saw good reaction to the new SlingShot series that improves on the already popular design. The Pro Rollers were also getting a lot of attention today.

      In terms of what wasn't there, a very noticeable omission today was the lack of software of the show floor. In large part I think this was because Adobe chose not to attend the show. But in general, it felt like the trend this year was more about taking pictures than working with them on your computer.

      I'm sure other things will jump out at me over the coming days. But these were the standouts on my first walk through the expo. I think PMA is still relevant, and many who attended the event today would probably agree.


      twitter.jpg Follow me on Twitter

      -


The Long Way Home

Hwy_395_MG_5807.jpg

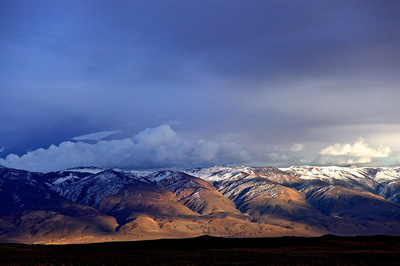
With back to back trade shows to attend (NANPA and PMA), I had two choices -- either fly to Reno, then catch another flight to Anaheim, or map out a road trip. Driving does take more time. I'm writing this post in Bishop, CA, about halfway between Nevada and S. California. I'll arrive at PMA tomorrow afternoon. On the other hand, I shot 200 images today at wonderful locations such as Convict Lake, Mono Lake, and scenics south of Mammoth Lakes. So sometimes the long way home is the more beautiful route. It sure was today.

Foothills above Bishop, CA on Highway 395. Captured with a Canon 5D Mark II with a 24-105mm L zoom lens. More photos from this road trip are viewable on The Digital Story Flickr page.


twitter.jpg Follow me on Twitter

-


As a Canon S90 shooter, I was thrilled to see this top notch compact listed in Aperture 3's Raw support list. I did a few preliminary tests, and I liked what I saw in Aperture. But then I started to wonder: How does Aperture's Raw processing compare to Canon's Digital Photo Professional? After all, there's lots going on behind the scenes here, including lens correction.


Top image processed in Aperture 3, bottom picture in Canon's Digital Photo Professional. Click on image to enlarge.


You may recall that I ran a similar test comparing DPP processing to ACR 5.6. In this current test, I tried to take advantage of the unique tools in each application to create the best image possible. I didn't add any sharpening after sampling down, as I normally would, because I wanted to keep the playing field level.

This shot was captured handheld at 28mm, f/5.6, ISO 100. I recorded the photo in Sparks, NV.

Aperture 3 Processing

The top image is processed in Aperture 3. I used the standard Aperture 3 Raw profile for the S90. I then used the following adjustments: Definition, Vibrancy, Levels, Edge Sharpen, and Vignette. You'll notice some distortion in the shot, best illustrated by the orange poll on the left side. Overall, I really liked how Aperture processed this image. It would be nice to have a tool to adjust the distortion in Aperture, but easier asked than programmed, right?

DPP Processing

The second image was processed in Canon's Digital Photo Professional. There aren't as many luminance and color controls as in Aperture, but I did have the Lens Aberration Correction control to counter some of the distortion in the image. Interestingly enough, DPP did not correct the distortion as part of the standard Raw processing. I had to enable the Aberration Correction control to straighten out the pole. And it was a bit odd having the Distortion slider hidden behind the Tune button for Aberration Correction. It does work nicely, however.

Bottom Line

Overall, I really like having all of the various image tools that are available in Aperture 3. But for certain S90 photos that require distortion control, I'll probably open them in DPP first, correct them, then save out as a Tiff for finishing off in Aperture 3 or Photoshop CS4. For everything else, however, I'm going to stick with Aperture 3.

More Aperture Tips and Techniques

To learn more about Aperture 3, check out my Aperture 3 Essential Training on Lynda.com. Also, take a look at our Aperture 3 Focus Section. Tons of free content about how to get the most out of Aperture.

More Articles About the Canon S90

Five Lesser Known (but very cool) Features on the Canon S90

Canon S90 Raw Processing Comparison: DPP vs ACR 5.6 RC

DigiScoping Pro Basketball with the Canon S90

Did Canon Really Improve Image Noise with the PowerShot S90?

"Compacts for Serious Shooters" - Digital Photography Podcast 201

Is the Canon S90 the New G11?


twitter.jpg Follow me on Twitter

-


Photoshop Is My Aperture 3 Video Editor

cs4_video_adj.jpg

Yes you can trim video in Aperture 3, but that's about it. What I needed was a tool for color and luminance adjustments. First I tried roundtripping to iMovie. Quite honestly, that was a disaster. Let's just say that I don't think Aperture and iMovie should see each other any more. I tried to apply filters on export in QuickTime 7. Just too clunky. I even explored some of the free video editors on the Web. Now I know why they are free.

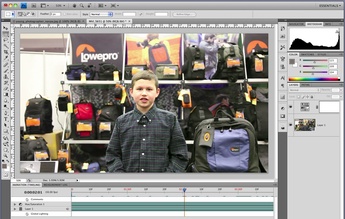
Then it dawned on me. I have Photoshop CS4... Extended. Up until now, having the Extended version didn't mean much to me. I'm not a scientist and I haven't delved into 3D yet. But I can import video, add adjustment layers to it, then render it out using the standard QuickTime export dialog box. This is exactly what I needed.

You can pick any frame in your video to view while you make your adjustments. I worked in layers, just as I would normally. But you don't have to. Then simply go to File > Export > Render Video, and save out the adjusted version. Your entire movie will have the luminance and color correction applied.

I still haven't perfected my workflow for managing videos in Aperture 3. Now that I have Photoshop CS4 for adjusting the movies, I might work like this:

  • Download video from camera to external hard drive that I use for all of my referenced files.
  • If they don't need any luminance or color adjustments, import them into Aperture as referenced files.
  • If they do need adjustment, correct in Photoshop CS4, render out, then import the corrected movies into Aperture 3 as referenced files.
  • Apply metadata, organize, etc. in Aperture 3.

At that point, I would probably copy the uncorrected master movies on to my Drobo and remove them from my referenced hard drive. I'm sure I'll tweak this workflow some more. But for now, I have deadlines to meet.

You might be wondering if you can roundtrip to Photoshop CS4 by choosing it for videos in your Aperture 3 preferences. Well, yes and no. Aperture does send the video to Photoshop and it opens correctly. But, you can't use the Save command to roundtrip back. So you have to Export > Render and new file anyway. So, in my opinion, this workflow isn't ready for primetime yet. And from what I've read, you can use Photoshop CS3 Extended for this, but you can't listen to the audio. But it's still preserved.

All of that being said, I am thrilled to have a way to adjust my videos while still using Aperture 3 as the manager. I'll report more as I discover it.

More Aperture Tips and Techniques

To learn more about Aperture 3, check out my Aperture 3 Essential Training on Lynda.com. Also, take a look at our Aperture 3 Focus Section. Tons of free content about how to get the most out of Aperture.


twitter.jpg Follow me on Twitter

-


NANPA_Lowepro.jpg

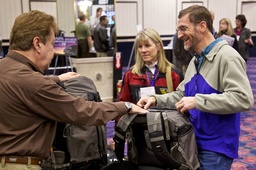
The exhibit hall opened on Tuesday night at NANPA, where Canon, Nikon, Lowepro, and many others displayed their wares. I was working in the Lowepro booth, talking with photographers, taking pictures, and answering questions. As you might suspect in a room of nature photographers, the most popular bag was the Lowepro Pro Trekker 600 AW. As one shooter said, "I need a bag that can hold my camera gear and my personal items when I'm working in the field.

Here's a short video of the Lowepro booth and a photographer giving the Pro Trekker the once over.

twitter.jpg Follow me on Twitter

-

After 2 years of waiting, we have Aperture 3. And it's beautiful! In this podcast I cover the highlights of this new release, then have 10 tips to help you get started.

Listen to the Podcast

You can also download the podcast here (30 minutes). Or better yet, subscribe to the podcast in iTunes.

More Aperture Tips and Techniques

To learn more about Aperture 3, check out my Aperture 3 Essential Training on Lynda.com. Also, take a look at our Aperture 3 Focus Section. Tons of free content about how to get the most out of Aperture.

Monthly Photo Assignment
Red is the Feb. 2010 Photo Assignment. You can read more about how to submit on our Member Participation page. Deadline for entry is Feb. 28, 2010.

TDS Workshops Update

The TDS Hot Air Balloon Photography Workshop in June 2010 has lost its hot air. The organizers cancelled the event for this year. Ack! So I'm working on a different event in the same time slot. Stay tuned for more information. If you'd like to get on the waiting list for upcoming workshops, please send me email with the subject line: "TDS Workshops." Those virtual camera club members who are on the waiting list get first opportunity to register for newly announced workshops. Attendance is limited to 6 for each TDS Workshop to ensure a personalized experience.

More Ways to Participate

Want to share photos and talk with other members in our virtual camera club? Check out our Flickr Public Group. It's a blast!


twitter.jpg Follow me on Twitter

-


Podcast Sponsors

Red River Paper -- Try the $7.99 Sample Kit.

Make Your Photos Sizzle with Color! -- SizzlPix is like High Definition TV for your photography.


Technorati Tags: , , , , ,

nanpa_logo.png

The car is packed, and I'll be heading up to the Nature Photography Summit in Reno, NV. This is the start of an exciting road trip that includes the NANPA event, then head down Highway 395 past some of my favorite sites in California (Mono Lake, June Lake, Mammoth Lakes, Bishop, Lone Pine), and arriving in Anaheim for the PMA Show.

At the shows, I'll be working in the Lowepro booth, meeting photographers, talking about gear, and recording short interviews. I'll post many of these conversations, so stay tuned. It's always great to hear what other shooters have to say. And if you're attending either of these events, be sure to come by the Lowepro booth to say hi.

Then, while on the road, I'll be taking pictures and posting anecdotes about the places I see and the people I meet. I have a lot of experience traveling Highway 395, and the one thing I know for sure is that I have no idea what I'll encounter. So , we'll all find out together.

Be sure to keep an eye on my Twitter feed, here at The Digital Story, and via the Lowepro Facebook Fan page.

photo_presenter.jpg

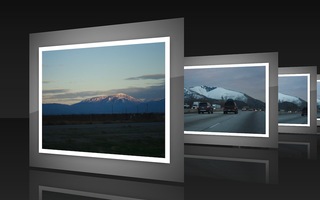
Sometimes all you want to do is select a bunch of images and show them off quickly... and beautifully. Slideshows on the fly provide the one-two punch of your great photos plus clever presentation. The problem is, you usually have to spend more time than you want creating these presentations before sharing them. What if you could author a something gorgeous by just selecting the images and hitting the play button? Thanks to PhotoPresenter 4, just released at Macworld by Boinx Software, you can ride this fast lane to your audience.

To select which images you want to show off, point PhotoPresenter to a folder on your computer, your iPhoto library, Aperture library, or even Flickr to gather the content. Then choose a theme (there are more than 30), hit the play button, and you are suddenly watching a full screen presentation on your Mac. It's literally one of those tools that allows you to say, "Here, let me show you those pictures right now." Once you're done watching the show, you can export it to a standalone player that plays on any Mac, or to a variety of formats including iPhone, Apple TV, iDVD, or customize it yourself via QuickTime settings.

If you already own FotoMagico Pro, then your license works also with PhotoPresenter. Or you can download PhotoPresenter as a standalone app for $29. If you want to see a live demo of this cool program, sign up for the live webinar on Feb. 22.


twitter.jpg Follow me on Twitter

-


Switching Aperture to 32-Bit Mode

aperture_32bit.jpg

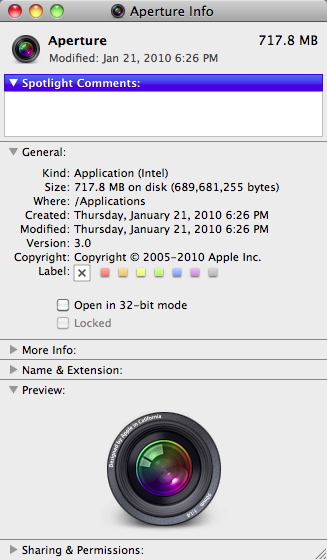
If you have to switch to 32-bit mode in Aperture to run your plug-ins, which are all 32-bits, you can do so via the Get Info box (File > Get Info). With the application closed, check the "Open in 32-bit mode" box, then relaunch Aperture. All of your current Aperture plug-ins should be available to you then.

More Aperture Tips and Techniques

To learn more about Aperture 3, check out my Aperture 3 Essential Training on Lynda.com. Also, take a look at our Aperture 3 Focus Section. Tons of free content about how to get the most out of Aperture.


twitter.jpg Follow me on Twitter


Full Screen Browser in Aperture 3

a3_full_screen_mode.jpg

One of the pleasant surprises in Aperture 3 is the new Full Screen Browser. To access it from the normal browser view in Aperture, all you have to do is hit the F key. This lets you dedicate every inch of your monitor to your pictures. This feature is a blessing while I'm using my 17" MBP on the road.

If you want to edit one of the images, just double-click on the thumbnail in the Browser to bring it to full screen, then hit the H key to bring up the Adjustments Inspector. At this point, you can work as normal. Another nice touch is, if you hold down the Shift key while moving any of the sliders in the Adjustments Inspector, the Inspector interface disappears except for the slider you're using. Again, this lets you see more of your image with less of the interface.

When you're done editing your picture, just double click it to return to the full screen Browser. Hit the F key to return to the normal Aperture 3 interface. Very nice.

Oh, and one other thing. Those images in the illustration... they are Raw files from my Canon S90. Aperture 3 decodes them wonderfully. I've also talked with LX3 shooters, and they too can decode their Raw files in A3.

More Aperture Tips and Techniques

To learn more about Aperture 3, check out my Aperture 3 Essential Training on Lynda.com. Also, take a look at our Aperture 3 Focus Section. Tons of free content about how to get the most out of Aperture.


twitter.jpg Follow me on Twitter


Canon T1i Video Edited in Aperture 3

When Apple enabled video trimming in Aperture 3, my guess is they wanted to enhance the Slideshow module. And that they did. You can now combine still images, video, and separate audio tracks to create beautiful productions.

After playing with this module for a few hours, however, my message to Apple is that I would prefer even more video functionality (yeah, I know). But quite honestly, the task I often have at hand is to shoot video, cut it, then upload to YouTube -- as quickly as possible. Incorporating still images and soundtracks are fun, but not the normal project.

This short movie, "Mission St., SF" was captured with a Canon T1i, then imported directly into Aperture 3 for production and export. Click through to YouTube for the HD version.

So if you have your hopes up that there's a mini Final Cut Pro inside of Aperture, you might want to lower your expectations. The video tools are extremely basic. What you can do, however, is useful.

  • Add and manage DSLR video clips in the Aperture library. And thanks to the improved Import dialog box, you can choose which types of files you want to upload.
  • Select the video clips you want to work with, then go to New > Slideshow where you can organize their sequence, add a soundtrack, add title slides, and choose some basic parameters for your presentation.
  • Trim video clips by double clicking on them. This is very important because the one thing that all videos need is editing.
  • Export your production using one of the 5 presets or custom export settings. I used the HD 720 preset for this short movie.

I know it seems odd to use the Slideshow module for your video editing. But I think that's due to Apple's original concept for video management in Aperture. I wouldn't be surprised if up the road we see a dedicated module for handling movies. In the meantime, however, this is a huge addition to Aperture 3. And it will make my life more efficient and productive.

More Aperture Tips and Techniques

To learn more about Aperture 3, check out my Aperture 3 Essential Training on Lynda.com. Also, take a look at our Aperture 3 Focus Section. Tons of free content about how to get the most out of Aperture.


twitter.jpg Follow me on Twitter


Photo bags are like your cameras: you want the right tool for the job. Often this means having a couple different types of bags to meet the different situations you face as a photographer. In this podcast I help you get your bags together.

Listen to the Podcast

You can also download the podcast here (25 minutes). Or better yet, subscribe to the podcast in iTunes.

Monthly Photo Assignment
Red is the Feb. 2010 Photo Assignment. You can read more about how to submit on our Member Participation page. Deadline for entry is Feb. 28, 2010.

TDS Workshops Update

The TDS Hot Air Balloon Photography Workshop in June 2010 has lost its hot air. The organizers cancelled the event for this year. Ack! So I'm working on a different event in the same time slot. Stay tuned for more information. If you'd like to get on the waiting list for upcoming workshops, please send me email with the subject line: "TDS Workshops." Those virtual camera club members who are on the waiting list get first opportunity to register for newly announced workshops. Attendance is limited to 6 for each TDS Workshop to ensure a personalized experience.

More Ways to Participate

Want to share photos and talk with other members in our virtual camera club? Check out our Flickr Public Group. It's a blast!


twitter.jpg Follow me on Twitter

-


Podcast Sponsors

Red River Paper -- Try the $7.99 Sample Kit.

Make Your Photos Sizzle with Color! -- SizzlPix is like High Definition TV for your photography.


Technorati Tags: , , , , ,

Aperture 3 Hits the Streets

Apple announces the long awaited Aperture 3 professional photo management application with 200 new features. You can read a nice overview on Macworld, then spend some time on the Apple site that does a good job of showing off the new feature set.

Over the coming weeks, we'll be delving into all the fun nooks and crannies here, including managing HD video, audio, new image editing presets, and much more. Stay tuned!

More Aperture Tips and Techniques

To learn more about Aperture 3, check out my Aperture 3 Essential Training on Lynda.com. Also, take a look at our Aperture 3 Focus Section. Tons of free content about how to get the most out of Aperture.


twitter.jpg Follow me on Twitter


pro_runner_inside.jpg

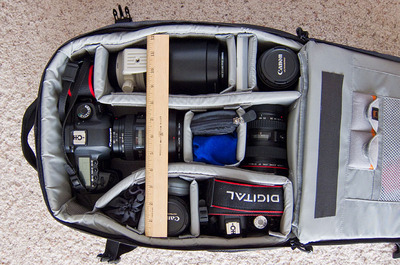
The Lowepro Pro Runner 300 AW is a photo backpack that holds the essential gear I need while working in the field, but it has a slim profile enabling me to work less obtrusively in urban environments. Yet, the Pro Runner has all of the features I need for shooting in the rugged outdoors.

As the photography evangelist for Lowepro, I get to test a variety of bags. In my last review, I put the Lowepro Fastpack 250 through its paces. The Fastpack remains one of my favorite combination backpacks (laptop and photo gear), especially for light jobs that require air travel.

pro_runner_300_measure.jpg

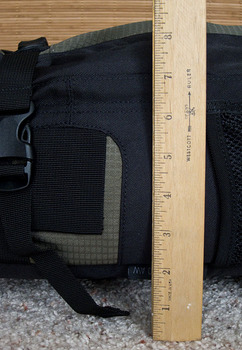
The Pro Runner 300 AW fills a different need. It holds primarily photo gear (although the iPad may change that) and is used for more intensive photography jobs, or for situations when I can take two bags -- one for photo gear and another for computer stuff. Above all, what I really like about the Pro Runner 300 AW is its slim profile that allows me to tote it just about anywhere, even on a crowded city bus.

Right now I'm preparing for a busy month of travel in February, going to Macworld, NANPA, and PMA. I'll be shooting in a variety of conditions, from urban streets to Eastern Sierra trails. Here's what I have packed in my Pro Runner for the trip:

  • Canon 5D Mark II and Canon T1i DSLR bodies
  • 5 lenses: 70-200mm f/4, 24-105mm f/4, 17-40mm f/4, 85mm f/1.8, 18-55mm T1i kit lens and 1.4X Canon tele extender
  • Canon 270EX flash
  • Polarizing filters, ExpoDisc, batteries, and memory cards
  • 24" PhotoDisc
  • Monopod in the outside tripod holder
  • Model releases, pens, small personal items

The backpack has a sturdy handle on top making it easy to pick up or grab out of a storage compartment. The harness system is very comfortable, capable of day-long treks, but it isn't bulky. I think this is a big deal, especially when working in the city. For example, I like having the belly band when I'm hiking, but it often gets in the way for street work. With the Pro Runner 300 AW, I can stash the belly band in the bottom AW compartment so it isn't visible at all. If I need it for a longer haul, it's easy to pull out and use.

Speaking of the All Weather cover, it adds an extra level of moisture protection in rain and snow. Other Pro Runner niceties include two side mesh pockets, outside tripod harness system, and sliplock sleeves.

The backpack is available in both black and pine green with black accents. I prefer the pine green model. It's quite handsome. The Lowepro Pro Runner 300 AW is available for $149.95 US. If you need to carry a lot of gear, but want to be nimble, take a look at it.

tds_flickr.jpg

I'm a huge fan of Flickr. I use it to publish galleries of images to augment my articles on The Digital Story, and to share photos just for the pleasure of showing them to other people.

Discover Your Best Shot

But I've discovered another benefit too. Flickr helps me determine the best image in any given group of shots. And often, it's not the photo that I would have picked. I think this perspective is wildly helpful because as photographers, we often decide that one image or another is our best based on information that the viewer doesn't have. And therefore we don't often feature our best images, as the world sees them.

For example: just because you climb to the top of a mountain and endure hardship to get a particular shot, that doesn't mean it's your best picture from the trip. Yet, because of these factors, it might be the one that you promote.

Viewer Statistics vs Your Feelings

What Flickr does is give you actual viewing numbers for each shot in a set of images, and almost every time, one picture will rise above the rest. And for me, it's often a surprise. Keep in mind that you see the viewing numbers if you're logged in, but visitors don't. So they're not being influenced by the pack (although sometimes a site will link to a photo and that will jack up its numbers).

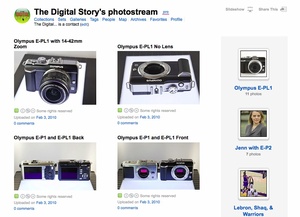
In my Olympus E-PL1 gallery, one image is far and away the most popular. Can you guess which one? (You can share your guess in the comments area of this article. After a few days, I'll post the answer.)

Flickr Favorites in Practical Use

I've began using this "Flickr feedback" when I decide which photos to share with clients or to publicize. By way of example, if you're going to Macworld, you'll see an image of mine from New York in the entry hall gallery. I offered that photo of The Kiss (along with others) in part based on its popularity on Flickr. Sure enough, that's what the selection committee at Macworld chose to feature.

My point here is that we're often not the best judges of our own work. Using services such as Flickr provides valuable feedback to help us see our photos though the viewers' eyes without being tainted by our own personal experiences.

Flicker Essential Training on Lynda.com

If you want to learn more about the benefits of Flickr, and how to get better at using it, take a look at my Flickr Essential Training on Lynda.com. It's easy, fun, and comprehensive.


twitter.jpg Follow me on Twitter

-


macworld_2010_logo.png

Right around the corner is my 2-day workshop at Macworld 2010 titled, Professional Photography Adventure with Aperture. The dates are Feb. 9 & 10 at Moscone Center in San Francisco. There's still time to sign up.

Because Aperture 2 has been around for a couple years now, we've had plenty of time to experiment with the application to see what it can do. I'm going to incorporate some of these discoveries into this year's workshop:

  • A reference library approach that allows you to point Aperture, iPhoto, Lightroom and Adobe Bridge to the same set of master images, without altering the masters in any way.
  • Tethered shooting with Canon DSLRs and iPhones. Will cover Nikon and Olympus too.
  • Custom fine art notecards using the book layout tool.
  • How to create the infrared effect using the Adjustments panel in Aperture 2.

And, as they say, lots more. So yes, we will cover the basics on the first day, but on the second day we'll delve more into these advanced techniques. And if Apple announces Aperture 3, we'll cover that too.

More Digital Photography at Macworld

On Wednesday night, Feb. 10, at 6:30 pm we head to the Apple Store in San Francisco for the talk, Expert Photo Tips from Real Experts. I'll be joined by digital photography legend, Stephen Johnson, with Mikkel Aaland and Ben Long. After our initial chat about the iPad and all things photography, we'll take lots of questions from the audience. This is a free event, so I hope to see you there.

On Thursday, Feb. 11 at 3pm, I head back to Moscone Center for the panel discussion, The State of the Art of Digital Photography. We did this last year, and it was a great hit. For the talk, I'll have lots of goodies on hand including the new Olympus E-PL1 digital camera. Olympus isn't showing at Macworld, so this will be your chance to get your hands on this very cool camera. I also have a few other state-of-the-art goodies to share. So make sure you attend this talk.


twitter.jpg Follow me on Twitter

-


Review of Olympus E-PL1 DSLR

How ironic that the most affordable PEN, the brand new E-PL1, is also my favorite. That never happens! Olympus just announced that its third digital PEN will retail for $599.99, that includes a 12-megapixel camera body with the 14-42mm lens. This latest PEN features:

  • Live Guide: Easily see and adjust your settings on the LCD before you take the shot. At first this doesn't sound like much. But once I used it, I felt like it was a breakthrough in camera UI. There are a series of adjustments -- saturation, color, brightness, blur background, and express motions -- that you fine tune by moving a slider up and down and seeing the results in real time on the LCD before you take the picture. Very cool.
  • Built-in flash: It's mounted atop a clever arm system that gives it some height above the lens. Yaay. I like it!
  • Faster autofocus with the new 9-18mm and 14-150mm lenses:  I tested the 9-18mm zoom, and its performance was snappy.
  • Direct Movie Button for HD Videos: It's red and you can't miss it. And if you want to shoot HD video in a hurry, it's terrific. One touch recording.
  • New Gentle Sepia Art Filter that now makes a total of six in-camera creative filters
  • Share: Just connect the camera to an HDTV with an optional HDMI cable and use your TV remote to control playback functions and navigate the camera's menus from the comfort of your chair.
  • Continuous Autofocus (C-AF) Tracking and Autofocus (AF) Target Registration locks your subject into focus and constantly adjusts focus and brightness.
  • 2.7" LCD provides a wide viewing angle of 176 degrees. Unfortunately it's still only 230,000 dots.
  • Accessory Port (like the one on the E-P2) for connecting the optional VF-2 electronic viewfinder, or the new optional SEMA-1 external microphone adapter set (which includes the EMA-1 adapter, the ME-51S stereo microphone and a cord). Works with any microphone that has a 3.5mm plug.
  • Optional PT-EP01 underwater case that has been specially customized for the Olympus E-PL1, and is waterproof to a depth of 40 meters (approximately 130 feet).

My Favorite PEN

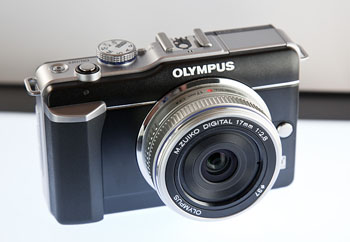
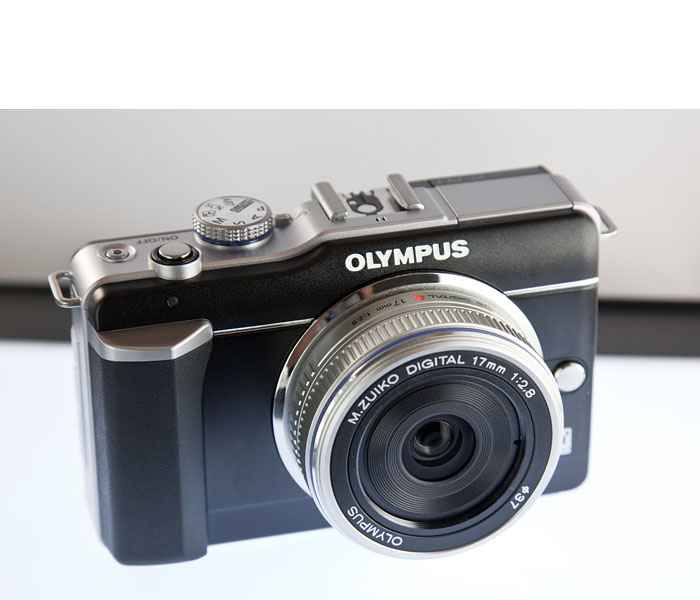
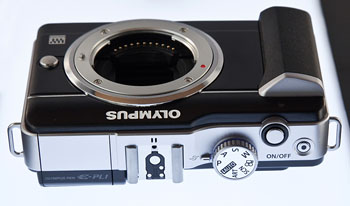
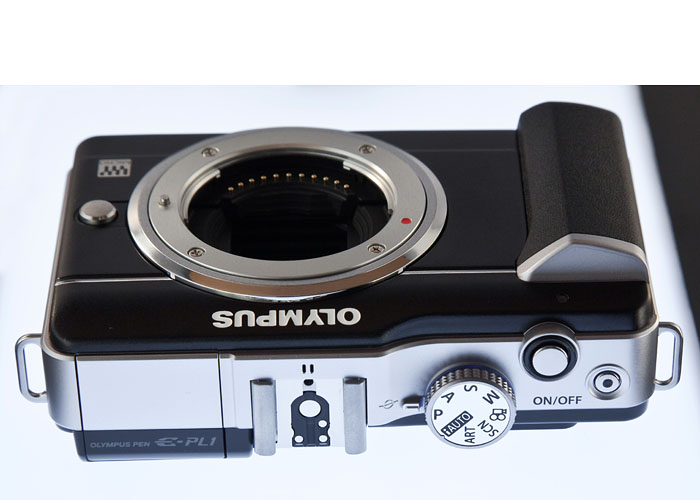
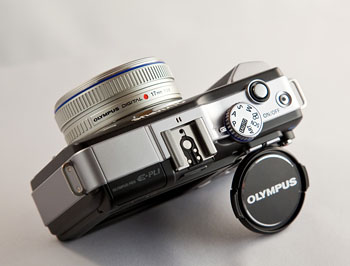
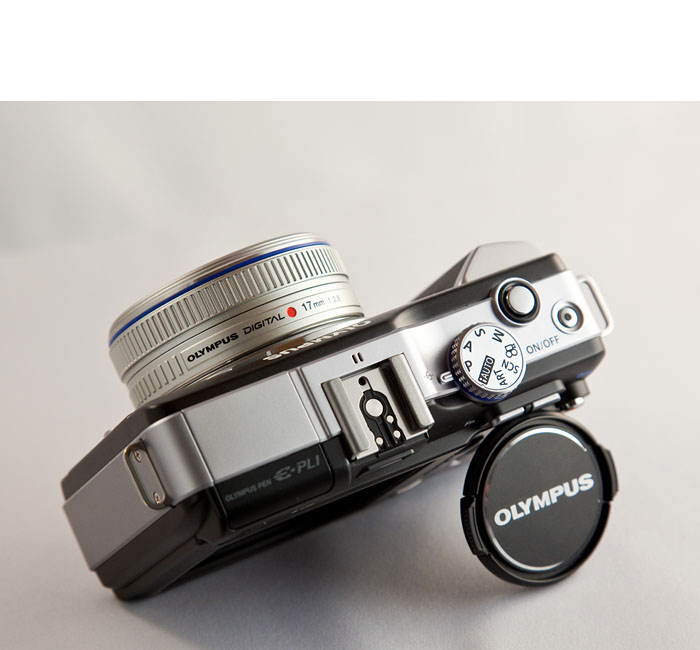
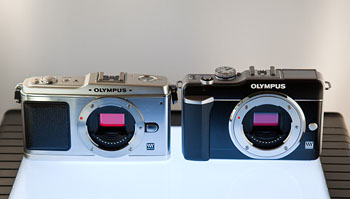
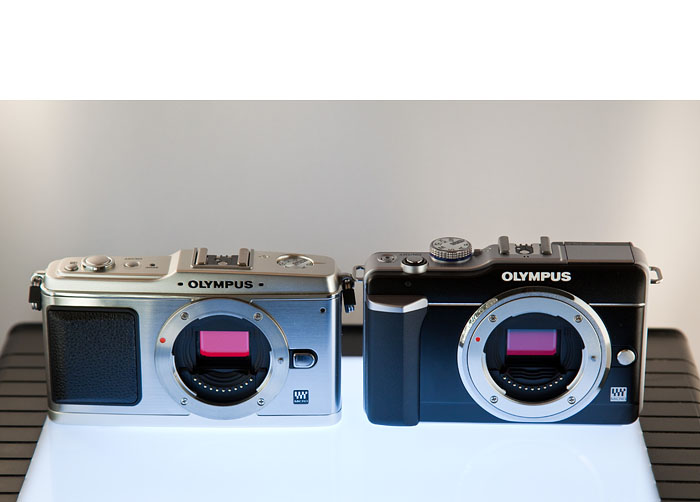
Aside from all of its features, I think this is a beautiful camera, especially the black and silver model I've photographed for this article. I really like metal mode dial on the top deck, raised buttons, right-side hand grip, and overall solid feel.

I also appreciate getting a proven 12MP sensor, HD video recording, and accessory port for less than any of the other PENs. I really like this camera, and I'm going to hate sending it back. I will, however, have it with me at Macworld. So if you want to see it in person, be sure to look me up.

When Will It Be Available?

The Olympus E-PL1 will be available in March 2010. It includes the E-PL1 Body, M. ZUIKO DIGITAL ED 14-42mm f3.5/5.6 Zoom, USB Cable, Video Cable, Li-Ion Battery Pack (BLS-1), Li-Ion Battery Charger (BCS-1), Shoulder Strap, Olympus software CD-ROM, Manuals, and Registration card. If you like what you see, however, you can preorder the Olympus PEN E-PL1 right now on Amazon for $599.

More Olympus E-PL1 Images (click to enlarge)


Photos of the E-PL1 PEN copyright 2010 Derrick Story. For a complete set of E-PL1 images at full resolution, visit the TDS Flickr Page.


The CHA Show had a number of hidden gems that I found interesting. In this podcast, Stephanie joins me at the mic to review our favorite goodies from the event. Some of these discoveries are very useful!

Favorite Finds from the CHA Show

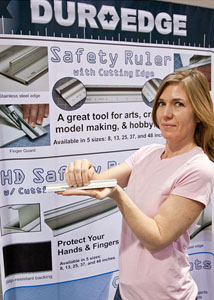
In the top photo, Stephanie Scheetz (our own TDS Creative Output editor) poses in the DuroEdge booth holding one of the stainless steel rulers. If you click on the image to reveal an enlargement, you can actually read the features of this handy workroom tool. I instantly wanted it, and will be ordering one soon. You can get the 13.5" model for $14.70.

Also shown here is Joanne Prior of Serif Software. Joanne gave us a detailed tour of Digital Scrapbook Artist 2, and I was impressed with how powerful this application is, and for less money ($49.99) than Photoshop Elements, which I consider one of the best bargains in photography. The point we make in the podcast is that you can use Scrapbook Artist for much more than scrapbooking. It's like having a total creative environment for your photographs. It is Windows only, however.

Listen to the Podcast

You can also download the podcast here (25 minutes). Or better yet, subscribe to the podcast in iTunes.

Monthly Photo Assignment
Red is the Feb. 2010 Photo Assignment. You can read more about how to submit on our Member Participation page. Deadline for entry is Feb. 28, 2010.

TDS Workshops Update

The TDS Hot Air Balloon Photography Workshop in June 2010 has lost its hot air. The organizers cancelled the event for this year. Ack! So I'm working on a different event in the same time slot. Stay tuned for more information. If you'd like to get on the waiting list for upcoming workshops, please send me email with the subject line: "TDS Workshops." Those virtual camera club members who are on the waiting list get first opportunity to register for newly announced workshops. Attendance is limited to 6 for each TDS Workshop to ensure a personalized experience.

More Ways to Participate

Want to share photos and talk with other members in our virtual camera club? Check out our Flickr Public Group. It's a blast!


twitter.jpg Follow me on Twitter

-


Podcast Sponsors

Red River Paper -- Try the $7.99 Sample Kit.

Make Your Photos Sizzle with Color! -- SizzlPix is like High Definition TV for your photography.


Technorati Tags: , , , , ,

dslr_camera_remote.jpg

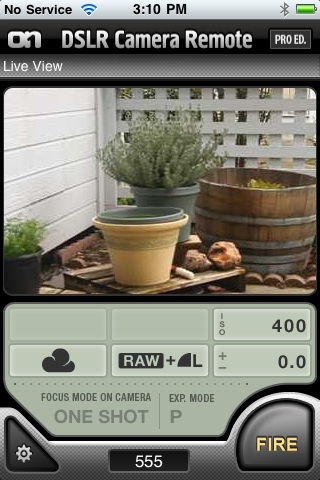
Control your Canon or Nikon DSLR remotely with your iPhone.

I knew there would be a good reason to hang on to my 1st gen iPhone after I had upgraded to the 3GS. Among other handy tasks, it is now my remote control for both the Canon 5D Mark II and a Canon Rebel T1i.

Using DSLR Camera Remote by onOne software, I can literally see through my camera lens on the iPhone with its Live View function and fire the shutter at any time. Plus, I can change the ISO, white balance, file format, and exposure compensation directly from my iPhone. I don't even have to be in the same room as the camera to control it. All I need is a WiFi network that my iPhone can log on to, and a Mac computer with the Canon connected via its USB cable. The entire setup takes about 15 minutes.

I like to use this rig for bird watching. I have a makeshift birdbath on my back patio. The birds love it, but they are shy and don't like it when I stand at the sliding glass door with my camera. So I plugged a DSLR into a MacBook running the DSLR Remote Server software (that's a free download from the onOne site), and monitor the bird activity on my old iPhone 1st gen while working away at my desk -- far away from the slider. When I see something I like, I hit the "Fire" button on my iPhone, and the DSLR takes a picture. I still have my new iPhone to take calls and use for other activity.

There are two versions of the iPhone app: Pro ($19.99) and Lite ($1.99). The Lite version allows you to trip the shutter and see a preview of the shot you've just captured. Very basic, but also very handy for only a couple bucks. The Pro version enables all of the functions I mentioned above, plus it includes an intervalometer, auto bracketing, and burst mode controls.

I tested DSLR Camera Remote with both the 5D Mark II and the T1i. It worked flawlessly with both cameras. I highly recommend it.


twitter.jpg Follow me on Twitter

-