February 2016 Archives

This is The Digital Story Podcast #521, March 1, 2016. Today's theme is "Good Photos Under Bad Conditions." I'm Derrick Story.

Opening Monologue

In the movie, "Bridge of Spies," James Donovan asks accused Russian spy Rudolf Abel, "Aren't you worried?" Able calmly replies, "Would that help?" That was clearly one of the best lines in movies last year, delivered by Mark Rylance who earned an Oscar for Best Supporting Actor. In the end, both Donovan and Abel survived their challenges.

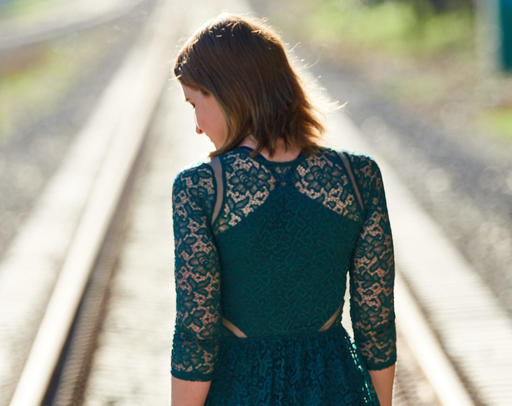
Every line of work has its obstacles. You don't have to be a Russian spy to face adversity. This week's show focuses on challenges that photographers encounter, and some suggestions for overcoming them and returning home with great images.

Good Photos Under Bad Conditions

rainy-bridge-crossing.jpg

Here are 6 basic challenges that we all might face at one time or another.

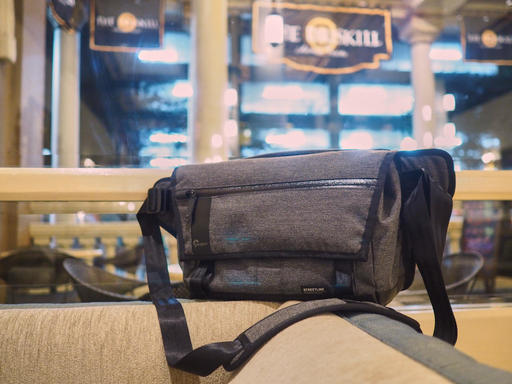
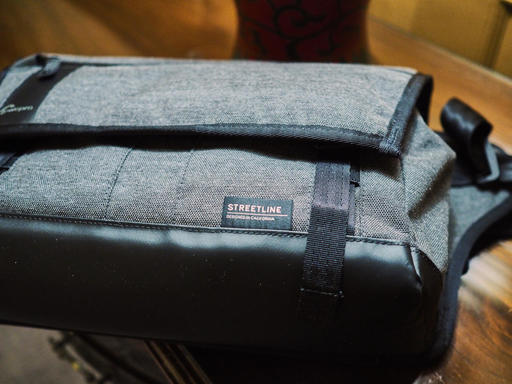
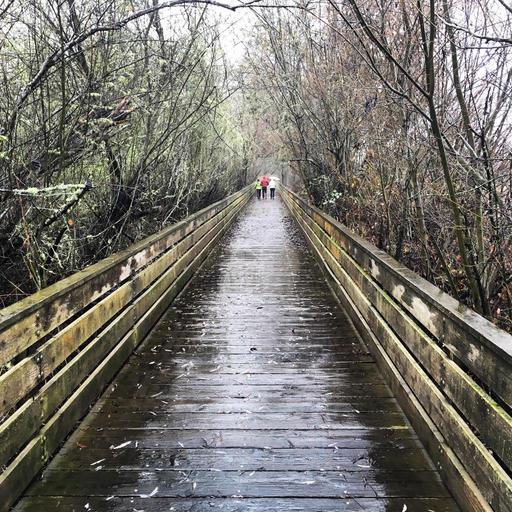
  • Inclement Weather. Which by the way, sometimes makes for great photographs. The one item I want in snow or rain is a lens hood to keep the droplets off the front of my optics. A good camera bag is helpful too. But I don't waste a lot of time with plastic bags and stuff. A compact umbrella is helpful to create a temporary workspace. Other than that, a protection filter, lens hood, good camera bag, and I'm ready to roll.
  • Law Enforcement and Security Officers. You're going to get a lot of different opinions on this, but mine is still to not be confrontational. I'd rather talk my way out of the situation than be carried away. I draw the line at anyone touching me or my gear. In those situations I move along. And if appropriate, file a complaint afterward.
  • Family Vacation. You have to be creative to get good travel images while vacationing with family. First, call shotgun. If you're not driving, you're in position to take pictures. Second, get up before everyone else, go shoot, then rejoin them for breakfast. Try to avoid dinner at twilight. Be willing to negotiate shooting time in exchange for activities they want to do.
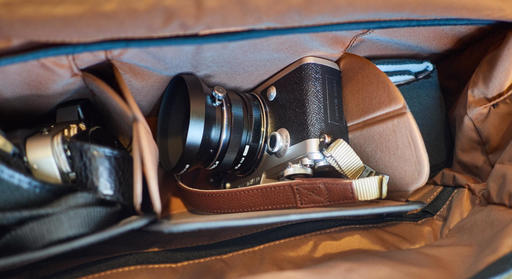
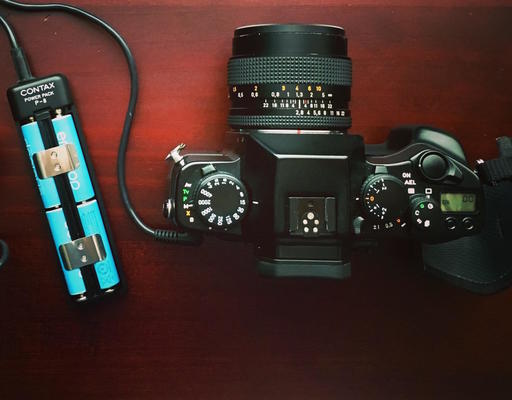
  • Malfunctioning Equipment. Even though I travel light, I still like to have one layer of redundancy. A spare body in a soft pouch covers so many bases. I think the GM5 or the OM-D E-M10 make great safety nets. Put a body cap lens on them, or use the venerable 17mm f/2.8.
  • Threat of Violence or Theft. This is my least favorite of the bunch. Especially when we have incidents such as TIME photojournalist Christopher Morris being apparently choke-slammed to the ground today during a Donald Trump rally in Redford, Virginia, by a US Secret Service agent. But there are many other situations too, and you have to maintain your street sense while working. It's good to fall into the zone as a photographer, but maybe not so in hostile environments. Also, we have the luxury of not taking our best camera into uncertain conditions. Sometimes a backup camera is the way to go. And one last note on this: watch for cars and buses.
  • Fatigue and Apathy. This is the constant personal battle. One leads to the other IMHO. If you feel like you're not seeing any good images, take a break. Have a coffee. Browse the web on your phone. Take a nap. Find little ways to recharge the batteries and get your shooting mojo back.

0659265617.jpg

In the News

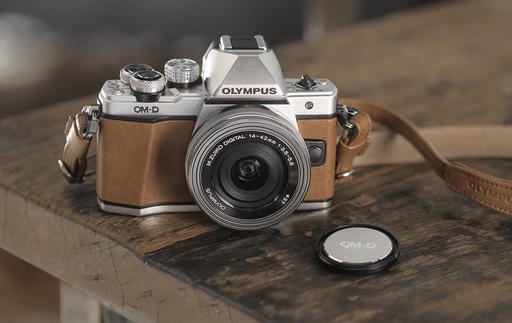
Olympus Fox Brown limited edition OM-D E-M10 II launched worldwide - covered by DP Review

A brown and chrome version of the OM-D E-M10 II compact system camera, first announced in January, has been launched worldwide by Olympus. The new version is a limited edition, of which only 3500 will be made and distributed, and Olympus hopes the unique coloration and grained texture of the finish will attract collectors.
The camera is the same as the standard OM-D E-M10 II, but comes with a brown leather-effect cover, a premium leather strap and a silver-colored lens cap. It will only be available in a kit with the company's 14-42mm F3.5-5.6 EZ Pancake standard zoom lens.

The Olympus OM-D E-M10 II Fox Brown costs $899 with lens and is available to order now.

Springtime Cleaning Note from MacPaw

Clean up space on your Mac for new photo shoots with CleanMyMac 3 by MacPaw. It's an easy way to brush away extra files and retrieve precious disk space. CleanMyMac 3 also accelerates your Mac and instantly frees up RAM. Top features include:

  • Cleaning hard drive
  • Speeding up system
  • Removing caches from Photos app
  • Uninstalling apps and add-ons

Get 30 percent off by visiting our landing page at macaw.com/tds.

Member Quotes of the Week

Intelligent comments culled from The Digital Story Facebook page.

In regard to last week's Facebook Post: "The Reluctant Portrait Photographer" we had some terrific comments, and I want to share one with you now.

Matthew wrote: "The Reluctant Photographer was a great segment. Besides the "don't be creepy" advice, I appreciated the be professional tip. Such a simple thing that makes a world of difference."
Tillie wrote: "Hey Derrick, thanks for your comments and insights about portrait photography in The Reluctant Photographer. . I just had to laugh - "don't be creepy". Seriously, it's so important to make a genuine connection with clients and keep the conversation going. Be authentic."
Joe added: "Really useful advice in The Reluctant Portrait Photographer. I am prone to geek out on cool lighting effects so it's good to be reminded that rapport with the people is what really counts with portraits."

Post your thoughts on our Facebook page. Believe me, I read them. Also, we have a question going on Facebook right now: "If you had to pick one film camera from the past, that you craved, but couldn't afford, what would it be?"

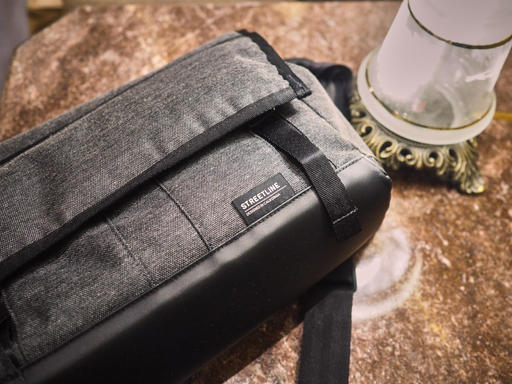
Cool Accessory: Tamrac Goblin Body Pouch

Tamrac Goblin Body Pouch 1.4 - Part of an entire family of handy, affordable stash bags for your gear. Great idea! You can check them out here.

  • Easy Cinch-to-Shut Drawstring
  • Fused Quilted Interior
  • Ripstop Nylon Exterior
  • 3 colors: Kiwi, Ocean, and Pumpkin

Prices start at $13. The one I like, the Goblin 1.4 has interior dimensions of 4.2 x 5.0 x 3.5" and sells for $18.95. There's also a slimmer, longer model, the 1.0 with dimensions of 4.0 x 6.2 x 2.2" and sells for $16.95

Updates and Such

Pt. Reyes Photography Workshop - We have one room open at the Pt. Reyes Photography Workshop, Aug. 19-21 2016. If you want to hang out with us at Straus Ranch House and explore some of the most beautiful coastline in the world, visit the TDS Workshops page and put yourself on the reserve list.

Out of Chicago Update - The debut of The Nimble Photographer Workshop sold out on Friday, June 24. Because there is a wait list, we've added a second workshop on Thursday June 23. I hope you can join me in Chicago this coming June. There's still time for Early Bird pricing.

And finally, be sure to visit our friends at Red River Paper for all of your inkjet supply needs.

See you next week!

More Ways to Participate

Want to share photos and talk with other members in our virtual camera club? Check out our Flickr Public Group. And from those images, I choose the TDS Member Photo of the Day.

Podcast Sponsors

Red River Paper - Keep up with the world of inkjet printing, and win free paper, by liking Red River Paper on Facebook.

ImageFramer Take your photos to the next level with ImageFramer. Visit www.apparentsoft.com today.

MacPaw Creators of CleanMyMac 3 and other great software for Apple computers. Visit www.macpaw.com today.

The Nimbleosity Report

Do you want to keep up with the best content from The Digital Story and The Nimble Photographer? Sign up for The Nimbleosity Report, and receive highlights twice-a-month in a single page newsletter. Be a part of our community!

Want to Comment on this Post?

You can share your thoughts at the TDS Facebook page, where I'll post this story for discussion.

What Film Camera Would You Buy Today?

Film cameras are far more affordable today than in their heyday. You can purchase now what you only dreamed of in the past.

IMG_0807.jpg

In my case, I craved the Contax G1 with the Zeiss 28mm, 45mm, and 90mm primes when it was released. I was working for a newspaper then, so that camera was far out of reach. But today, you can buy a G1 for about $150, then shop around for lenses. I finally get to shoot with my dream camera of the past. And it was worth the wait. I'm having a blast with it.

So, my question to you is: what would you buy today? What is that camera from the past that you would have loved to own? If you want to chime in, go to our TDS Facebook page and comment on this story. Or you can send me a tweet @Derrick_Story.

Either way, let me know. I'm going to share the results on next week's TDS Photography Podcast.

Want to Comment on this Post?

You can share your thoughts at the TDS Facebook page, where I'll post this story for discussion.

Among its many processing skills, Capture One Pro is an excellent B&W converter. And thanks to its built-in presets, you can create a beautiful monochrome in just 3 steps.

Step One - Choose a Preset

Choose your image and go to B&W in the Tool Tabs. It's the icon that's box with a diagonal line through it. The list of presets are listed in the B&W pane.

step1-choose-BW-preset.png

Mouse over the list to see how the various options affect your image. Choose your favorite.

Step 2 - Fine Tune Exposure, Clarity, and Grain

Once you've applied the preset, fine tune the image using the other tools in the B&W panel. I like the B&W sliders and Clarity. Exposure and Levels are usually helpful too.

step2-finetune-grain.png

Don't forget to add some grain. It's a wonderful effect and adds a little crispness to the image too.

Export to Your Desktop

Now all you have to do is go to File > Export Images > Variants, then set the parameters and click Export 1 Variant. Your B&W photo will be ready to share.

BW-Austin-1600.jpg

More Capture One Pro Tips

I've published a short tutorial for organizing the User Collections area of your library. Take a look at One Way to Set Up Your Capture One Library. Following those simple techniques will help you add the structure that you crave for your image library.

Capture One Pro Essential Training on lynda.com

Later this month, my new video training titled, Capture One Pro Essential Training will be live on lynda.com. Keep your eyes peeled for my announcement. More than 100 movies that show you the easiest way to master your library, edit files, and output them in a variety of ways.

Thinking About Making the Transition from Aperture or Lightroom? - Download my free eBook titled, Rocky Nook's Guide to Moving to Capture One Pro. I show you the steps to create a test library, then build the foundation for a smooth transition to Capture One Pro.

Want to Comment on this Post?

You can share your thoughts at the TDS Facebook page, where I'll post this story for discussion.

Sigma just announced its first mirrorless body, the Sigma sd Quattro H Mirrorless Digital Camera.

Sigma sd Quattro H Mirrorless.jpg

The specs are rather impressive for the high resolution model (there will also be a standard resolution version).

  • 45MP APS-H Foveon X3 Quattro CMOS Sensor
  • Dual TRUE III Imaging Processing Engine
  • Sigma SA Lens Mount
  • 2.36m-Dot Electronic Viewfinder
  • 3.0" 1.62m-Dot Main LCD & Sub Monitor
  • Phase & Contrast-Detect Hybrid AF System
  • Super-Fine Detail Exposure Mode
  • ISO 6400 and 3.8 fps Continuous Shooting
  • Quick Set Button; Lock Switch
  • Focus Peaking; Lossless Compressed Raw

The thing that really jumps out at me is that you can use the entire Sigma SA line of lenses with the Quattro H (specs above) and the entry level Quattro. Given that the optics they've been producing lately are so good, this could be a stunning, compact package. No release date or price yet, but I'll be following the story.

The Nimbleosity Report

Do you want to keep up with the best content from The Digital Story and The Nimble Photographer? Sign up for The Nimbleosity Report, and receive highlights twice-a-month in a single page newsletter. Be a part of our community!

Want to Comment on this Post?

You can share your thoughts at the TDS Facebook page, where I'll post this story for discussion.

This is The Digital Story Podcast #520, Feb. 23, 2016. Today's theme is "The Reluctant Portrait Photographer." I'm Derrick Story.

Opening Monologue

As the world sees it, every photographer is a portrait photographer. You can tell people that you only shoot landscapes or pets, and they will nod their heads, then ask you to shoot their daughter's wedding. That's just the way it is. So in that spirit, I'm dedicating today's show to all of those reluctant portrait photographers out there. I will not only help you survive, but thrive the next time you're pressed into duty to photograph a friend, family member, or coworker.

The Reluctant Portrait Photographer

Portrait photography is about comfort, both for you and the subject. The path to that goal for you is having a clear idea on how you're going to photograph your subject, and for them to believe that you know what you're doing. Here's how to achieve that.

Crystal-300mm-P2160828.jpg

  • Keep it simple. I recommend outdoor shoots in the morning of late afternoon hours. This eliminates many of the headaches associated with indoor sessions.
  • Scout your location ahead of time. Have a clear idea of specific spots that have favorable light the time of day that you're there. Look for restrooms and other facilities that might come in handy. Know where to park, if there are any fees, and if you need a permit. It's like practicing law; you don't want any surprises.
  • Line up an assistant. It can be a friend of yours or the subject's. But you want an extra set of hands and eyes. The hands to hold reflectors, and the eyes to spot wardrobe malfunctions and stray hair. Plus it makes conversation easier.
  • Use fill light. I prefer reflectors, but have fill flash ready too. Practice your settings. Be comfortable with your lighting schemes.
  • Keep the conversation going. Don't clam up on the person. Nobody likes the silent treatment, especially photo subjects. It's lonely in front of the camera.
  • Show them a good picture as soon as possible. Once you have a shot that is flattering, show it to the subject on the back of the camera's LCD. They will immediately relax.
  • Don't be creepy. I think complements are great during a shoot, but know where the line is. Keep your praise confined to pretty eyes, shining hair, and attractive wardrobe. Do not head south of the neck for your comments.
  • Work quickly. If you're constantly fiddling with your camera and equipment, you'll convey a sense of incompetence. The shoot will go downhill from there.
  • Be professional. You know what that means. Do it.

In the News

Tamron releases stabilized 85mm F1.8 and 90mm F2.8 macro full-frame lenses - covered by DP Review

Third party lens-maker Tamron has released a pair of new full-frame, stabilized primes.
First is an 85mm F1.8 Di VC USD which has LD and XLD elements to reduce flare and ghosting, 9 circular aperture blades for 'attractive' bokeh, a fluorine coating to keep moisture and fingerprints off of the front element and 3.5 stops of shake reduction (tested to CIPA standards). It uses a ring-type ultrasonic motor that Tamron says will be precise and responsive. Pricing and availability have not been announced.
Lens number two is a 90mm F2.8 Di VC USD 1:1 Macro, which is an updated version of a lens of the same name from 2012. It too has LD and XLD lenses, a 9-blade aperture, fluorine coating, and USM motor. It can take life-size close-ups at a minimum distance of 13.9cm/5.5in and a 'quick-shift' feature lets the photographer take over focusing without having to press a button. The 90mm macro will begin shipping in March for $649.
Both lenses are weather-sealed and support Tamron's new TAP-in Console. They'll be available for Canon, Nikon and (eventually) Sony Alpha mounts.

Foam Can Coolers Make Excellent Lens Cases

If you like to travel lightly with just a shoulder bag, you can keep your spare lenses in closed-cell can coolers. They're light, about the right size, and offer excellent protection.

Member Quotes of the Week

Intelligent comments culled from The Digital Story Facebook page.

In regard to last week's Facebook Post: "Become the Master of Your Capture One Library" we had some terrific comments, and I want to share one with you now.

Michel wrote: "I feel really fortunate that I can follow along as you make the transition from Aperture to Capture One. I'm hoping this is the last transition I have to make. To that end do you know what percentage of business C1 represents for Phase One? I feel that if it's significant it's less likely to abandon it (as was the case for Apple/Aperture)."

Post your thoughts on our Facebook page. Believe me, I read them.

Report on the Olympus 300mm f/4.0 Telephoto

I spent a week with this lens and loved it. I go into detail about it during this segment of the show.

Updates and Such

Pt. Reyes Photography Workshop - We have two rooms open at the Pt. Reyes Photography Workshop, Aug. 19-21 2016. If you want to hang out with us at Straus Ranch House and explore some of the most beautiful coastline in the world, visit the TDS Workshops page and put yourself on the reserve list.

Out of Chicago Update - The debut of The Nimble Photographer Workshop sold out on Friday, June 24. Because there is a wait list, we've added a second workshop on Thursday June 23. I hope you can join me in Chicago this coming June. There's still time for Early Bird pricing.

And finally, be sure to visit our friends at Red River Paper for all of your inkjet supply needs.

See you next week!

More Ways to Participate

Want to share photos and talk with other members in our virtual camera club? Check out our Flickr Public Group. And from those images, I choose the TDS Member Photo of the Day.

Podcast Sponsors

Red River Paper - Keep up with the world of inkjet printing, and win free paper, by liking Red River Paper on Facebook.

ImageFramer Take your photos to the next level with ImageFramer. Visit www.apparentsoft.com today.

MacPaw Creators of CleanMyMac 3 and other great software for Apple computers. Visit www.macpaw.com today.

The Nimbleosity Report

Do you want to keep up with the best content from The Digital Story and The Nimble Photographer? Sign up for The Nimbleosity Report, and receive highlights twice-a-month in a single page newsletter. Be a part of our community!

Want to Comment on this Post?

You can share your thoughts at the TDS Facebook page, where I'll post this story for discussion.

After having spent a week reviewing all of the editing extensions for Photos for OS X, I have a clear favorite: Tonality by Macphun.

tonality-extension.jpg

I bought my version from the Mac App Store for $19.99, which includes the standalone version. But I only use it as an editing extension for Photos for OS X. Personality, I like the integrated workflow.

This app combines two things that appeal to me: an extensive selection of high quality presets, with plenty of controls to fine tune the final image. The preset categories include: Basic, Architecture, Portrait, Dramatic, Outdoor, Street, Vintage, Film Emulation, Toning, and HDR, each with many options within. And for the most part, you could stop right there. However, if you like to tinker, take a look at the tools in the right side adjustments panel.

tonality-adjustments-web.jpg

Once you've finished working with the shot in Tonality, click on Save Changes to return to Photos for OS X. You can press the M key to see the original shot, even though you've left Tonality, and even Revert to Original if you wish.

Chances are, however, that you'll want to share the edited picture using any of Photos extensive publishing tools. Bottom line here: I think Tonality helps me be more creative in my post production work.

Master Photos for OS X

(It's More Powerful than You Think)

For hands-on tutorials, be sure to take a look at Photos for OS X Essential Training on lynda.com. I cover everything you need to know to get the most from this surprisingly powerful image management application.

More Help and Insights on Photos for OS X

Don't forget about the Photos for OS X Special Feature Section on The Digital Story. It's a roundup of tutorials, videos, and articles focused on helping you master Apple's latest photo management software. You can also find it under Photography in the top nav bar.

Want to Comment on this Post?

You can share your thoughts at the TDS Facebook page, where I'll post this story for discussion.

External Editors is one of the most affordable, and exciting, editing extensions for Photos for OS X. It's available in the Mac App Store for 99 cents.

external-editors-photos.jpg

It allows you to connect practically any image editor to your Photos library. I tested it with two of my favorites: Photoshop CC and Alien Skin Exposure X. It worked perfectly on both counts.

The workflow is simple. Open your image in Edit mode in Photos for OS X. Choose External Editors from the list of editing extensions you have loaded. Editors will open your image and present you with all the available editing apps on your Mac. Choose the one you want, then it takes you there for adjustments. After you've finished working on it, just click Save.

You're back in the External Editors interface. Choose Save Changes and your edited image is returned to Photos for OS X. And here's the kicker, if you press the M key, you can see the original version of your shot. And if you want, you can Revert to Original.

As some readers have pointed out, this workflow doesn't work when you send RAW files to Photoshop. So this doesn't sound like a solution for RAW shooters, or for artists who add layers while in Photoshop. So if you fall into these categories, then you might want to save your 99 cents. (Thanks John for the heads up!)

But for Jpeg shooters, this workflow is far better than the old style of roundtripping, because even though you're using an outside app, the workflow remains non-destructive. And in that case, I can't think of a better way to spend a buck.

Master Photos for OS X

(It's More Powerful than You Think)

For hands-on tutorials, be sure to take a look at Photos for OS X Essential Training on lynda.com. I cover everything you need to know to get the most from this surprisingly powerful image management application.

More Help and Insights on Photos for OS X

Don't forget about the Photos for OS X Special Feature Section on The Digital Story. It's a roundup of tutorials, videos, and articles focused on helping you master Apple's latest photo management software. You can also find it under Photography in the top nav bar.

Want to Comment on this Post?

You can share your thoughts at the TDS Facebook page, where I'll post this story for discussion.

One of the best feelings a photographer can experience is to fire up the computer and quickly find an image from the past. Knowing that you are the master of your image library builds confidence and efficiency.

tina-library-organized.jpg

The first step in Capture One Pro is understanding the difference among the three major sections in the Library pane: Catalog Collections, User Collections, and Folders. Here's a brief explanation of each:

  • Catalog Collections - Controlled by the application using pre-defined filters such as All Images and Recent Imports. This is where your pictures enter the database when imported from a memory card.
  • User Collections - Controlled by you, providing the tools to build a library structure that's consistent with your sense of organization. You can create Groups (that act like folders in Aperture), Projects, and Albums.
  • Folders - Shows the location of your masters, whether they're in the C1 catalog container, or outside the application set up as a referenced catalog.

I've published a short tutorial for organizing the User Collections area of your library. Take a look at One Way to Set Up Your Capture One Library. Following those simple techniques will help you add the structure that you crave for your image library.

Capture One Pro Essential Training on lynda.com

Later this month, my new video training titled, Capture One Pro Essential Training will be live on lynda.com. Keep your eyes peeled for my announcement. More than 100 movies that show you the easiest way to master your library, edit files, and output them in a variety of ways.

Thinking About Making the Transition from Aperture or Lightroom? - Download my free eBook titled, Rocky Nook's Guide to Moving to Capture One Pro. I show you the steps to create a test library, then build the foundation for a smooth transition to Capture One Pro.

Want to Comment on this Post?

You can share your thoughts at the TDS Facebook page, where I'll post this story for discussion.

Olympus 300mm f/4 IS PRO Lens Review

The Olympus 300mm f/4 IS PRO telephoto does ship with a tripod collar. But after shooting with it for a week, I can tell you that you don't need it. Thanks to its incredible dual image stabilization system, you can handhold this super tele at shutter speeds never before dreamed of at this magnification.

Olympus-300mm.jpg

Before I get into my shooting experience with the 300mm PRO, here are the highlight features:

  • Micro Four Thirds mount (Olympus and Pansonic mirrorless)
  • 35mm equivalent of 600mm
  • Lens IS and in-body stabilization for select MFT cameras, such as the OM-D E-M1 and E-M5 Mark II, offering sync IS technology to provide an astounding 6 stops of shake compensation
  • Minimum focus distance: 4.6'
  • Splash, dust, and freeze-proof construction
  • Manual focus clutch and L-Fn button
  • ZERO Coating to minimize flare, ghosting, and reflections
  • Compatible with OM-D Silent Shutter setting for discreet telephoto shooting
  • Supplied decoration ring can be used in place of tripod collar to maintain clean, svelte form factor for dedicated handheld shooting.

Crystal-300mm-P2160965-web.jpg Crystal in Green Dress. Olympus E-M5 Mark II with 300mm PRO, ISO 200, 1/320th, f/4.0, handheld. Photos by Derrick Story. Model is Crystal McMullen (she's on Model Mayhem).

Crystal-300mm-P2160934-web.jpg

Camera Body and Firmware

The 300mm PRO will work with all Micro Four Thirds bodies, but it is particularly well-suited for the OM-D E-M1 and E-M5 Mark II with the latest firmware. When paired with these cameras, you can take advantage of the amazing sync IS technology that provides 6 stops of stabilization. And it works. I captured sharp portraits at 1/60th handheld.

Shooting Experience

The lens is remarkably light (52 ounces) for such powerful magnification at a wide aperture of f/4.0. I removed the tripod collar and used the included decoration ring for my handheld work. I did notice some compositional drift during sequences. My fault, not the lens. But it does take some practice shooting with an effective focal length of 600mms.

Crystal-300mm-P2160765-web.jpg

On the left side of the barrel there's the function button, IS switch, and distant settings (to speed up focus). The ergonomics are comfortable. Focusing is very fast and accurate. I held the lens barrel in my left hand and the E-M5 Mark II in my right. I didn't experience any fatigue during hours of shooting.

Image Quality

You can download full sized Jpegs from my Flickr photostream that will be better for evaluating the images than here in the blog. I actually pulled down the clarity for all the shots because there was too much detail in the skin.

The lens handled all types of lighting very well, including strong backlight as illustrated in the portrait above. Color rendition, sharpness, and background softness are excellent with this optic.

Bottom Line

The Olympus 300mm f/4 IS PRO telephoto lists for $2,499, and I think that's a superb value. Its professional build, ergonomics, performance, image quality, and outstanding image stabilization technology rivals DSLR competitors that cost considerably more. And to be honest, I don't think you'll find this level of image stabilization on any lens at any price. Highly recommended.

Want to Comment on this Post?

You can share your thoughts at the TDS Facebook page, where I'll post this story for discussion.

This is The Digital Story Podcast #519, Feb. 16, 2016. Today's theme is "Just 5 Frames." I'm Derrick Story.

Opening Monologue

One of the interesting things that's emerged from The Film Project is the idea of shooting fewer pictures for any given subject. For a roll of 36 exposures, for example, I usually like to have 7 different topics. So I've been limiting myself to 5 frames at a time. I decided to move this concept over to digital too, and it's interesting the effect it's having on my photography. And that's the topic for today's show.

Just 5 Frames

When I get a roll of film back from the lab, one of the things I'm looking for is variety. What I don't want to see is an entire contact shoot of variations of the same subject. 35 frames of the same subject is something that I can easily do with my digital camera. And I don't think I always shot that way.

just-5-frames.jpg

So, over the last few weeks, I've decided that for some of my subjects, I'll limit myself to 5 frames. Obviously this won't work for everything. But quite honestly, I sometimes just take too many pictures. I explore this idea in today's top story.

In the News

Ricoh celebrates 80th anniversary with limited edition silver GR II - covered by DP Review

If the stealth-black GR II isn't quite showy enough for you, then you may be interested in Ricoh's new 'Silver Edition' camera, which it created to celebrate its 80th anniversary. In addition to its new color, Ricoh has also diamond-engraved the lens' specs onto its front ring, added a custom on/off 'termination' screen and bundled a leather carrying case. Only 3200 of the Silver Edition GR II cameras will be sold worldwide, so get your order in soon. The compact GR II features a 16MP APS-C-size CMOS sensor, 28mm equivalent F2.8 lens, 1080/30p video and Wi-Fi with NFC. The GR II Silver Edition is priced at $699.

Night Photography Tip

I often switch my white balance setting to Tungsten for urban night photography to help offset the overly warm city lights. I can do this during capture, or play with the white balance during post. By doing so, I've discovered some wonderful shades of blue that look great and feel more appropriate for these subjects.

Member Quotes of the Week

Intelligent comments culled from The Digital Story Facebook page.

In regard to last week's Facebook Post: "Going from Lightroom or Aperture to Capture One Pro" we had some terrific comments that I want to share it with you now.

Michael wrote: "This podcast is (once again!) a model of clarity on a complex topic, thanks Derrick! It's hard to imagine how you could have done more to facilitate the transition for Aperture users.Do you have any thoughts on the stability or longevity of Capture One or its owner Phase One? While making predictions is dangerous (especially about the future, as Oscar Wilde warned us), it seems worth considering this before making the significant investment of time and energy that this transition will require. Keep up the great work."

And Mac added: "Another great show. I switched to Capture One in december. Since I usually run annual catalogues in Lightroom, it was easy. Just setup a new catalogue in Capture One, and done. The info you provided about importing old libraries to C1 is invaluable. Since I started with C1, it's a learning adventure. It works a little different than LR, which I had since v1. So I stumble through it. I can't wait for your Lynda.com course on it!!!"
And then I had to add this fun tweet from E74 Photo: "When is your Capture 1 course coming out? Assuming installer doesn't delete root folders..."

Post your thoughts on our Facebook page. Believe me, I read them.

Updates and Such

I'm testing the Olympus 300mm f/4 PRO lens this week, and I have to tell you, this thing is insane. It uses both optical image stabilization and sensor based at the same time. I shot a series of couples portraits at 1/60th outside, and they are sharp. The equivalent of 600mms at 1/60th. Think about it! More to report next week.

Pt. Reyes Photography Workshop - We have two rooms open at the Pt. Reyes Photography Workshop, Aug. 19-21 2016. If you want to hang out with us at Straus Ranch House and explore some of the most beautiful coastline in the world, visit the TDS Workshops page and put yourself on the reserve list.

Out of Chicago Update - The debut of The Nimble Photographer Workshop sold out on Friday, June 24. Because there is a wait list, we've added a second workshop on Thursday June 23. I hope you can join me in Chicago this coming June. There's still time for Early Bird pricing.

Gemini, the Duplicate Finder by MacPaw - Gemini's simple, fast, and safe to use, so make sure you give it a try. It's available at macpaw.com/gemini.

And finally, be sure to visit our friends at Red River Paper for all of your inkjet supply needs. And a big thanks ImageFramer for also supporting this podcast.

See you next week!

More Ways to Participate

Want to share photos and talk with other members in our virtual camera club? Check out our Flickr Public Group. And from those images, I choose the TDS Member Photo of the Day.

Podcast Sponsors

Red River Paper - Keep up with the world of inkjet printing, and win free paper, by liking Red River Paper on Facebook.

ImageFramer Take your photos to the next level with ImageFramer. Visit www.apparentsoft.com today.

MacPaw Creators of CleanMyMac 3 and other great software for Apple computers. Visit www.macpaw.com today.

The Nimbleosity Report

Do you want to keep up with the best content from The Digital Story and The Nimble Photographer? Sign up for The Nimbleosity Report, and receive highlights twice-a-month in a single page newsletter. Be a part of our community!

Want to Comment on this Post?

You can share your thoughts at the TDS Facebook page, where I'll post this story for discussion.

This is from a guy who previously would only use Silver Efex Pro for his black and white work, but I've come to appreciate the B&W Adjustment in Photos for OS X, and the optional plugin, Tonality by Macphun.

dibs-in-bw-3.jpg

Here's a shot that I'm using for my upcoming book on Photos for OS X. I made some exposure tweaks with the Light Adjustments, then finished it off with the B&W converter. If you're not familiar with what the four sliders do in B&W, this will help you:

bw-controls.jpg

  • Intensity - If you think about how saturation works for color, that's what the intensity slider does for B&W. As you move the marker to the right, Photos intensifies the tones in the image. If one cube of sugar makes your coffee sweet, two cubes makes it even sweeter. That's what intensity does.
  • Neutrals - This slider affects the gray areas of the image by lightening or darkening them. For this image, I thought that darkening the gray areas helped create a nice separation from the white markings of the cat, including her whiskers.
  • Tone - This adjustment could really be called contrast, because that's what it does. Moving the marker to the right increases contrast, and to the left flattens it.
  • Grain - To complete the film-like B&W effect, we can also add grain. Not only does this provide an analog feel to the image, it can make it appear a bit more crunchy.

Tip: Even though we're applying monochrome effects to our picture, it's still color inside. For example, you can still tweak the tones in your B&W by using the temperature and tint sliders in the White Balance panel. Try it. Photos provides an amazing amount of control for your B&W pictures.

For hands-on tutorials, be sure to take a look at Photos for OS X Essential Training on lynda.com. I cover everything you need to know to get the most from this surprisingly powerful image management application.

More Help and Insights on Photos for OS X

Don't forget about the Photos for OS X Special Feature Section on The Digital Story. It's a roundup of tutorials, videos, and articles focused on helping you master Apple's latest photo management software. You can also find it under Photography in the top nav bar.

Want to Comment on this Post?

You can share your thoughts at the TDS Facebook page, where I'll post this story for discussion.

One of my ToDo tasks was to update the firmware for my Olympus OM-D E-M5 Mark II to version 2.2, so it would be compatible with an Olympus lenses that have the built-in image stabilizing function. (Yes, I'm testing the new Olympus 300mm f4.0 PRO Lens. More on that later next week.)

First, I had to download the latest version of OLYMPUS Digital Camera Updater (V 1.2.1). Then connect my camera and follow the prompts. The updating instructions are here; I recommend reading them first.

firmware-update.jpg

Everything went smoothly. So since I had the updating set-up ready to go, I thought I would check my other cameras and lenses. To my surprise, I needed to update a total of 3 cameras and 5 lenses! Wow. And there were some solid fixes and upgrades in those updates.

So my question to you is... when is the last time you checked the firmware version on our mirrorless camera? You might want to brew a cup of coffee and take a look.

The Nimbleosity Report

Do you want to keep up with the best content from The Digital Story and The Nimble Photographer? Sign up for The Nimbleosity Report, and receive highlights twice-a-month in a single page newsletter. Be a part of our community!

Want to Comment on this Post?

You can share your thoughts at the TDS Facebook page, where I'll post this story for discussion.

In the Summer of 2000, Olympus released one of the most intriguing digital cameras of all time: the Olympus Camedia C-211 Zoom.

TFP007-P2090459-Olympus-c211 1.jpg

Not only did it include a 3X optical zoom, 2" LCD, and 2 megapixels of resolution, the C-211 had a built-in Polaroid printer that accepted Type 500 film. It was the best of both worlds. High quality digital files with the option to make a print at any time.

TFP007-P2090463-Olympus-c211 1.jpg

When you pressed the green print button on the back of the camera, it would think for just a second, then gears would grind and a print would emerge from the top of the camera. They weren't the most beautiful prints in the world, but they were cool.

We don't think of cameras from this era being particularly high quality. But take a look at this image of Dibs that I recorded today in macro mode with the C-211. It's not bad.

Dibs-C211-P2090020-Dibs-c211.jpg

Don't get me wrong... it's still a vintage digital camera. The LCD is practically unusable in bright daylight, the C-211 operates at a casual pace, and they don't even make the SmartMedia cards that it uses for memory. (Fortunately, I hung on to the USB card reader that allows me to upload the images to my Mac.)

But, those awful Polaroid prints just ooze with nostalgia. And the digital images can be quite good. So, I don't think I'll be getting rid of my C-211 anytime soon.


twitter.jpg Follow me on Twitter


Over the last year we've been talking about photo management software and how to cope with change. One question that comes up is "can I move my existing work to a new application?" It's a good question, and I have some helpful information for Lightroom and Aperture users contemplating a transition to Capture One Pro. And that will be the top story on today's show.

How to Move to Capture One

If you decide to try a different photo management app, or are forced to, how much of your previous library do you have to leave behind? To some degree, that depends on the amount of work that you want to invest in the project.

import-lightroom.png

To help you make that decision, I'm going to outline the steps in today's podcast. At this point, you can just listen and think about what I'm saying. Because if you decide to make the move, I have a free eBook for you, titled: Moving to Capture One Pro. It has dedicated sections for both Lightroom and Aperture users, and it delves into the details of this type of transition.

So, for now, just sit back and listen. Then decide what's the best path for you to follow.

In the News

Instagram Finally Lets You Log Into Multiple Accounts - covered by PetaPixel.

If you have two or more Instagram accounts -- perhaps one for personal and one for business - Instagram has some great news for you this week: the company is finally rolling out multi-account support, which lets you log into multiple accounts in one app and quickly switch between them. This official announcement comes just weeks after some Android and iOS users began seeing the feature in their apps.

There are step-by-step instructions over on the Instagram Help page. And the Petapixel page features a short video that shows how easy it is to switch between accounts.

Oh Those Embarrassing Moments

I'm guessing that you may know that I have a journal on TheNimblePhotographer.com. So I thought I'd read you an entry today to give you a feel for what goes on over there. Today's story is an awkward incident from my trip to Austin, Texas.

Member Quotes of the Week

Intelligent comments culled from The Digital Story Facebook page.

In regard to last week's Facebook Post: "What is the Fascination with Retro>" we had some terrific comments, and I want to share one with you now.

Andrew wrote: "My recent interest in film cameras probably started more from a collector stand point. I started rebutting some of my camera history mostly for nostalgic reasons. Once you get these cameras back in your hands, they feel so good you just want to use them. I don' t think I would go back though - I like what digital photography gives me. It's just like I wouldn't relinquish word-processing for a typewriter - my brain is now rewired for digital. It doesn't mean I don't enjoy the occasional analogue "holiday". In fact, I am planning to make one day a month in 2016 as an analogue only day.

I don't think an interest in film is predicated on nostalgia. My son is of the "digital native" generation and he asked for a film camera for his birthday. He had been enjoying using OM lenses on his A7s and wanted the full OM experience.

Post your thoughts on our Facebook page. Believe me, I read them.

Updates and Such

The Digital Story Podcast is Coming to Google Play Music - Google has just published the last 15 TDS shows on its new Google Play Music Podcast service for Android devices. If you're a new listener turning in... welcome! More info at https://play.google.com/music/listen

Out of Chicago Update - The debut of The Nimble Photographer Workshop sold out on Friday, June 24. Because there is a wait list, we've added a second workshop on Thursday June 23. I hope you can join me in Chicago this coming June.

Gemini, the Duplicate Finder by MacPaw - Gemini's simple, fast, and safe to use, so make sure you give it a try. It's available at macpaw.com/gemini.

Are you using PROMO code: STORY to save 25 percent. You can apply that toward any wood print at www.inkdot.com.

And finally, be sure to visit our friends at Red River Paper for all of your inkjet supply needs. And a big thanks ImageFramer for also supporting this podcast.

See you next week!

More Ways to Participate

Want to share photos and talk with other members in our virtual camera club? Check out our Flickr Public Group. And from those images, I choose the TDS Member Photo of the Day.

Podcast Sponsors

Inkdot.com - Specializing in wood prints and other artistic treatments of your imagery - visit www.inkdot.com.

Red River Paper - Keep up with the world of inkjet printing, and win free paper, by liking Red River Paper on Facebook.

ImageFramer Take your photos to the next level with ImageFramer. Visit www.apparentsoft.com today.

MacPaw Creators of CleanMyMac 3 and other great software for Apple computers. Visit www.macpaw.com today.

The Nimbleosity Report

Do you want to keep up with the best content from The Digital Story and The Nimble Photographer? Sign up for The Nimbleosity Report, and receive highlights twice-a-month in a single page newsletter. Be a part of our community!

Want to Comment on this Post?

You can share your thoughts at the TDS Facebook page, where I'll post this story for discussion.

Oddly enough, White Balance isn't part of the default set that appears in the Edit menu in Photos for OS X. And I say "oddly," because it's such a necessary tool, and the Photos version of it is very good.

To make sure it always shows up, open an image in Edit mode, click on Adjust in the righthand sidebar, click on Add, and choose White Balance from the popup menu. Then go back to Add and select "Save as Default." It will now automatically appear in your Adjust panel.

add-wb-1024.jpg

The adjustment itself is quite powerful and very much like the version we had in Aperture. Here's a short video on how to use it.

And for other hands-on tutorials, be sure to take a look at Photos for OS X Essential Training on lynda.com. I cover everything you need to know to get the most from this surprisingly powerful image management application.

More Help and Insights on Photos for OS X

Don't forget about the Photos for OS X Special Feature Section on The Digital Story. It's a roundup of tutorials, videos, and articles focused on helping you master Apple's latest photo management software. You can also find it under Photography in the top nav bar.

Want to Comment on this Post?

You can share your thoughts at the TDS Facebook page, where I'll post this story for discussion.

Of all the bags I've tested over the years, I've never had so many people approach me with complements as I have with the Lowepro StreetLine 140.

Austin-EM5-P1270409-streetline-1280px.jpg

"That looks really nice. Is it a camera bag, or did you modify it yourself?"

"Where did you get that? Does it hold camera gear too?"

Yes, it is a camera bag. It doesn't look like one, does it? And don't get wrong, but it certainly doesn't look like a Lowepro bag. Shouldn't it be, well, more foamy or something?

It is a Lowepro bag, and after using it on assignment in Austin, it's now my favorite Lowepro. The Streetline 140 can be worn as a sling or a shoulder bag, holds two mirrorless cameras plus spare lens and personal items, plus accommodates a laptop and/or a tablet. The specs state an 11" laptop, but my MacBook Pro 13" (non-optical drive model) fits like a glove in the dedicated sleeve (that keeps your laptop separate from other items inside).

Austin-EM5-P1270408-streetline-1280px.jpg

In Austin, I carried an Olympus OM-D E-M5 Mark II with 14-42mm EZ zoom and the new Olympus PEN-F with a 17mm f/1.8, plus the 75mm f/1.8, 9mm body cap fisheye, iPad mini, gloves, snacks, and shades. And I still had room for extra batteries, cards, and whatnot.

gear-P1250342-streetline-1280px.jpg

And here's the interesting part: the Streetline kept its slim profile and extreme comfort, even with all this gear inside. I used it mostly as a sling, keeping it secure against my back while walking, then swinging it around to work out of when shooting. It's very easy and fast to operate. There's a zippered pocket on the front flap (all external zippers are weatherproof) for quick items, another zippered storage area under the flap.

Then there's the main compartment. Here's where we get to a slick Lowepro innovation. The collapsable, interior FlexPockets are super space-efficient, yet protect the cameras. So I no longer have to endure wasted storage because of foam inserts. When I'm packing a camera, I pull a FlexPocket out, and when I'm just using the Streetline as a regular commuter bag, I collapse the FlexPocket to open up the entire interior of the carryall. It's clever, efficient, and works great.

Austin-EM5-P1270413-streetline-1280px.jpg

The strap and high-tech back panel are very comfortable, there's a handy top handle, and one of my personal favorites, a multi-function trolly sleeve. You can use it as a spare pocket when on foot, then separate the top and bottom velcro fasteners, and slide the bag over your rolling suitcase handle.

Austin-EM5-P1280416-streetline-1280px.jpg

Or, if you want, you can stash the Streetline 140 in your suitcase and use a bigger carryon for the flight. Thanks to the FlexPockets, the sling compresses quite flat, making it easy to stow with shirts and pants. When you arrive at your destination, load up the Streetline with your gear, and go explore.

I wore the bag all day, in rain, wind, and even some sun. It maintained its handsome looks regardless of the weather conditions. My gear remained safe and dry. Most observers would never guess it's camera bag. But it is, and a darn good one.

Austin-EM5-P1270404-streetline-1280px.jpg


Nimble Photographer Logo

The Lowepro StreetLine 140 ($149) has a high Nimbleosity Rating. What does that mean? You can learn about Nimbleosity and more by visiting TheNimblePhotographer.com.

lexar-microsd-package.jpg

I've been testing the Lexar 64GB Pro 1800X Micro SDXC card in my Olympus OM-D E-M5 Mark II with terrific results.

"What?" you say. "The OM-D uses regular SD cards, not micros."

And you are right. But the Lexar kit includes a matching pass-through SD card adapter, so I can take advantage of the 1800X card, and just as importantly, its tiny high-performance card reader that takes up virtually no room in my bag.

The bundled card reader is the frosting that makes this cake so sweet. By using it, instead of a regular memory card inserted into my Mac's SD port, I can maximize performance.

lexar-microsd-kit.jpg

For example, yesterday I recorded 1.15 GBs of video with the OM-D using the Lexar 1800X. When I transferred the files via the bundled thumbnail-sized reader, it took 5.16 seconds to copy them to my Mac. Like I said, speedy.

When the microSD isn't in the reader, I keep it in the SD card adapter so I don't lose it. And if I ever need that size for a smaller device, all I have to do is reformat the card, and I'm ready to go.

The Lexar 64GB Pro 1800X Micro SDXC card kit is now available at B&H for $102.84. If you need high performance both at capture and copy, it's worth a look.

The Nimbleosity Report

Do you want to keep up with the best content from The Digital Story and The Nimble Photographer? Sign up for The Nimbleosity Report, and receive highlights twice-a-month in a single page newsletter. Be a part of our community!

Want to Comment on this Post?

You can share your thoughts at the TDS Facebook page, where I'll post this story for discussion.

Now that digital cameras have reached a basic plateau of capability, I find myself buying "behind the curve" more often. What does that mean? Well, it's a bit like car shopping. Last year's model with a few thousand miles on it can be purchased at tremendous savings. And I'm finding the same is true with cameras. I'll explore this in greater depth in today's top story.

Gently Used, Please

My current favorite camera is the Olympus OM-D E-M5 Mark II. I bought it last January with the half grip for $1,229. A year later I'm as pleased with it as the day I bought it. But it I were to purchase the exact same body right now, I could buy it new for $899 and used for $799. And I wouldn't feel one bit behind the times.

used-contax.jpg

More and more, I find myself waiting for prices to drop or buying gently used equipment. I can do this because the technology itself has stabilized. So there isn't that much difference between current offerings and last year's models.

I shop used on Amazon, B&H, Adorama, Craigslist, eBay, and Etsy. And I've heard photographers talk about other sites too. In today's top story, I share some tips for buying used, and why you may want to consider doing so also.

In the News

Nikon apologizes for awarding prize to digitally altered photo - covered by DP Review

Last week, Nikon Singapore awarded a prize to an image that had been digitally altered, given away by the highly visible white square around an inserted plane's silhouette. As a result, Nikon has released this statement:

"We have heard your comments and feedback on this, and you are right - we should not compromise standards even for a casual photo contest. We have dialogued internally, with the community and with our loyal fans, and the photographer has also posted his own views on this issue. We have made an honest mistake and the rousing response from the community today is a reminder to us that the true spirit of photography is very much alive. Moving forward, we will tighten our image review process to avoid similar situations in the future. Thank you once again for all your responses today - for your humor and most of all, your candor and honesty. We hope not to disappoint you in the future and to continue to have your support."

Wood Prints Feel Like Art as Well as Look the Part

Print any photo from Instagram, phone or computer directly on wood. Blending the natural material wood with our professional print techniques every print is unique. Attention is given to every detail of our wood prints. From the crafted coved back, to the slotted hanging system allowing for simple hanging. Your print comes finished and ready to hang no frame is needed.

Wood Type: Baltic Birch
Thickness: 5/8"
Quality: Archival Quality Printing
Care: Moisture & UV Resistant

8"x8" is normally priced at $32. But you can get one for $24 using PROMO code: STORY. And in fact, you can get 25% off any wood print with that code at www.inkdot.com.

Member Quotes of the Week

Intelligent comments culled from The Digital Story Facebook page.

In regard to last week's Facebook Post: "A New Direction, The Olympus PEN-F" we had some terrific comments that I want to share it with you now.

Roger wrote: You've often made the point that in camera processing (jpeg and even special effects, art filters) have gotten to be really high quality and worth trying, and of course the raw is always there. I think it's worth also making the point that in camera processing, using it while you are shooting, changes your thought process while you're shooting. It's like putting on a prime lens instead of a zoom. The black and white film filters in this camera look like a lot of fun.

And Mike added: Great Podcast Derrick. It is an amazing camera and I can tell you for a fact that anyone interested in the San Francisco workshop should know I will have at least one there with me. The more you shoot the more creative you get is what I found over the last 3 months with it. It's hard to put down for me when I shoot in the streets.

Post your thoughts on our Facebook page. Believe me, I read them.

Updates and Such

Big News for the SF Street Shooting Workshop - Olympus has agreed to provide us with PEN-F kits for testing and Lowepro is kicking in a street shooting bag that each participant can bring home. As a result, I'm going to reopen the previously sold out workshop to one more person. If you want to attend, please send email to derrick@thedigitalstory.com. First come, first served.

Out of Chicago Update - The debut of The Nimble Photographer Workshop sold out on Friday, June 24. Because there is a wait list, we've added a second workshop on Thursday June 23. I hope you can join me in Chicago this coming June. There's still time for Early Bird pricing.

Gemini, the Duplicate Finder by MacPaw - Gemini's simple, fast, and safe to use, so make sure you give it a try. It's available at macpaw.com/gemini.

And finally, be sure to visit our friends at Red River Paper for all of your inkjet supply needs. And a big thanks ImageFramer for also supporting this podcast.

See you next week!

More Ways to Participate

Want to share photos and talk with other members in our virtual camera club? Check out our Flickr Public Group. And from those images, I choose the TDS Member Photo of the Day.

Podcast Sponsors

Inkdot.com - Specializing in wood prints and other artistic treatments of your imagery - visit www.inkdot.com.

Red River Paper - Keep up with the world of inkjet printing, and win free paper, by liking Red River Paper on Facebook.

ImageFramer Take your photos to the next level with ImageFramer. Visit www.apparentsoft.com today.

MacPaw Creators of CleanMyMac 3 and other great software for Apple computers. Visit www.macpaw.com today.

The Nimbleosity Report

Do you want to keep up with the best content from The Digital Story and The Nimble Photographer? Sign up for The Nimbleosity Report, and receive highlights twice-a-month in a single page newsletter. Be a part of our community!

Want to Comment on this Post?

You can share your thoughts at the TDS Facebook page, where I'll post this story for discussion.