July 2016 Archives

Photos for macOS can do so much more than many photographers realize. And to show you just how powerful it can be, I've just published Photos for OS X: Extensions for Local Adjustments.

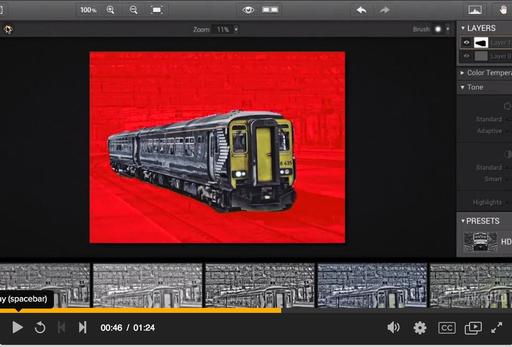
clean-up-extension.jpg

In this title, I take a deep dive into six editing extensions that provide local adjustments, letting you work on just part of the photo (in addition to easy to use presets and other goodies they include). The extensions I feature are: Color Filters, Filters for Photos, Tonality, Snapheal, and BeFunky. Plus, I fire up External Editors and roundtrip with Photoshop and Exposure X, all from within Photos for macOS, and all totally non-destructive.

localized-adjustments-1.jpg

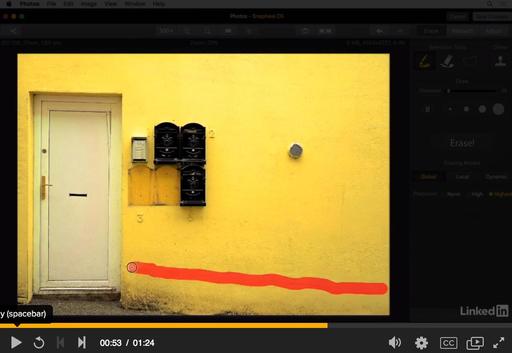
If you're a Photos user, or if you want to see the real potential of this image management app for Mac users, then take a look at the free welcome movie that provides an overview of the course.

Master Photos for OS X

(It's More Powerful than You Think)

For hands-on tutorials, be sure to take a look at Photos for OS X Essential Training on lynda.com. I cover everything you need to know to get the most from this surprisingly powerful image management application.

The Apple Photos Book for Photographers

For photographers who are more than just casual snapshooters, or who are making the transition from Aperture or iPhoto, The Apple Photos Book for Photographers shines a light on the sophistication of this app and the ecosystem it taps into. Available as an eBook now, and coming to print later this year.

Get it for $15 using checkout code APPLE15!

Want to Comment on this Post?

You can share your thoughts at the TDS Facebook page, where I'll post this story for discussion.

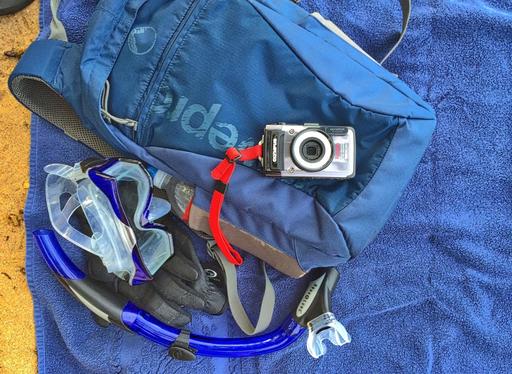
As I talked about in this week's TDS podcast, the Olympus TG-4 is my favorite tough camera. It captures wonderful images in all conditions, including underwater, captures in RAW, and has built-in WiFi and GPS. The geotagging is what I want to cover today.

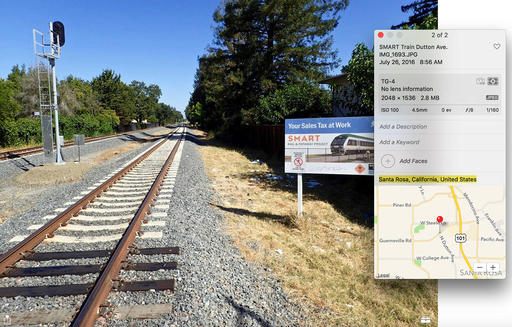
photos-gps.jpg

The GPS function in the TG-4 works quite well. It requires less than a minute to acknowledge a new location so it can add it to an image. My experience has been that if I pull it out of my pocket, turn it on, and start taking pictures, the first image might not be geotagged, but the subsequent pictures are.

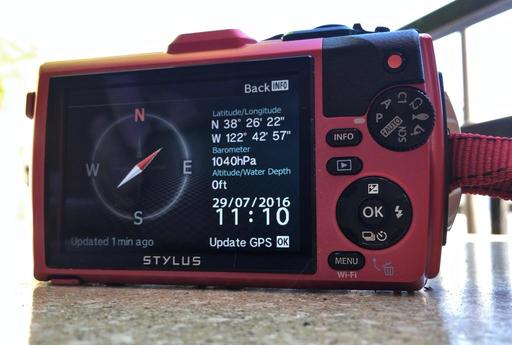
update-gps.jpg

An easy way to check the status of the GPS is to press the Info button a couple times to bring up the readouts. If you see the GPS coordinates in the upper right, as in the illustration above, then you're probably in good shape. If not, you can tell the TG-4 to update by pressing the OK button.

I upload the Jpegs via WiFi to my iPhone 6S or iPad mini (I can get the RAWs later if I need them.) I like using O.I. Share for this. Plus it lets me know if there are geotags for the images via a cute little satellite icon. Those files are automatically added to my iCloud library, which means they are now on all of my Apple devices, including Photos for macOS on the MacBook laptop.

TG-4_Geotagged.jpg

From this point, I can build Smart Albums for the geotagged images, view them on a map by using Get Info for a single image, or by clicking on the general location name in the Moments view to see where an entire group of shots are plotted. Thanks to geotagging by the TG-4, I don't have to rely on my memory to recall where I took a particular shot. And when I'm traveling, this is a wonderful benefit.

Sidenote: a terrific iOS app for viewing and adjusting metadata for tagged images is Metapho in the App Store.

Master Photos for OS X

(It's More Powerful than You Think)

For hands-on tutorials, be sure to take a look at Photos for OS X Essential Training on lynda.com. I cover everything you need to know to get the most from this surprisingly powerful image management application.

The Apple Photos Book for Photographers

For photographers who are more than just casual snapshooters, or who are making the transition from Aperture or iPhoto, The Apple Photos Book for Photographers shines a light on the sophistication of this app and the ecosystem it taps into. Available as an eBook now, and coming to print later this year.

Get it for $15 using checkout code APPLE15!

Want to Comment on this Post?

You can share your thoughts at the TDS Facebook page, where I'll post this story for discussion.

If you're not an Apple developer, but would like a first look at the new features in macOS Sierra, the public beta is now available. You can also help Apple fine-tune the OS for its final release this coming Fall.

macOS-public-beta.jpg

The usual rules apply here. You need to enroll in the program, backup your computer, and install the software. You don't want to use a mission critical machine for testing the beta OS.

That being said, this program is terrific for folks like me who need to start exploring parts of the OS for writing and projects. I'm going to be looking closely at the next version of Photos (lots of exciting new goodies in there). And if you'd rather not go beta, stay tuned here. I'll be reporting on bits and bobs that I discover during my testing.

The Nimbleosity Report

Do you want to keep up with the best content from The Digital Story and The Nimble Photographer? Sign up for The Nimbleosity Report, and receive highlights twice-a-month in a single page newsletter. Be a part of our community!

Want to Comment on this Post?

You can share your thoughts at the TDS Facebook page, where I'll post this story for discussion.

This is The Digital Story Podcast #542, July 26, 2016. Today's theme is "The Cameras of Summer." I'm Derrick Story.

Opening Monologue

Life is much different during the summer months compared to the rest of the year. I don't wear proper shoes most of the time. Long pants are reserved for business meetings and going out to dinner. And my wardrobe of camera gear definitely changes too. And that's the focus of today's photography podcast.

The Cameras of Summer

I'm pretty darn active this time of year. Most of my errands are on bike. I go hiking on the weekends. And any chance I get, I'm in the water.

As much as I love my E-M5 Mark II, it doesn't come with me on many of these adventures. My summer wardrobe consists of a tube of sunblock and the Olympus TG-4 16 MP Tough Camera. Let's take a closer look at it.

summer-camera-maui-web.jpg

  • 4X wide-angle optical zoom with fast f2.0 high speed lens
  • Waterproof to depths of 50 feet, Freeze proof to 14 degrees F, Shockproof to 7 feet, Crushproof to 220 lb.
  • RAW capture, Live Composite, Underwater modes with Underwater HDR
  • Wi-Fi / GPS / e. Compass - serves as my watch and compass too
  • 1080P HD video
  • USB charging for on-the-go
  • Earned a DP Review Gold Award in August 2015

I go into more detail about the virtues of tough cameras in the first story of today's podcast.

In the News

Flickr ownership changes hands as Verizon acquires Yahoo via DP Review.

Telecom giant Verizon will acquire Yahoo and its web properties, including Flickr and photo blogging site Tumblr, for $4.83 billion. It seemed possible that Yahoo might sell its photo-sharing sites separately, as the company announced in March that it was accepting bids for its web properties. Today's announcement confirms that both Flickr and Tumblr will remain a part of Yahoo as it changes hands to Verizon.

Verizon owns AOL and Huffington Post, a point that Yahoo CEO Marissa Mayer spins as a positive for her company's outlook. In a statement published on Yahoo today, Mayer emphasized that joining forces with AOL could help strengthen Yahoo's mobile offerings.

The Third Episode of Nimble Photographer Podcast will be Live this coming Friday

In the third episode, "Busted" that will soon be available for our Patreon members, I explore my untimely introduction to being a southpaw, and how that affected my nimbleosity.

Ultra Fast Nikon Tele

Petapixel just posted Nikon 105mm f/1.4 Lens Leaked, To Be World's Fastest 105mm saying that a new Nikon AF-S Nikkor 105mm f/1.4E ED lens has been leaked early, offering us a glimpse at the soon-to-be world's fastest 105mm prime lens. The full-frame prime N (Nano Crystal Coat) lens will have a gold ring and won't have Vibration Reduction (VR). Nikon's existing 105mm has VR but is slower at f/2.8. Digicame-info says the new 105mm will have an emphasis on bokeh quality.

Updates and Such

TheFlimCameraShop on Etsy

As part of the Film Project I've been working on since December, I shoot with a variety of SLRs so I can talk about the various experiences that I've had with them. Those cameras have been cleaned, tested, and seen at least one roll of film. Once I've completed what I needed to do for the book, I put many of them up for sale in TheFilmCameraShop on Etsy. If you haven't been over there for a look, I think you'll enjoy it. I have a tile on The Digital Story that will take you directly to the shop.

And finally, be sure to visit our friends at Red River Paper for all of your inkjet supply needs.

See you next week!

More Ways to Participate

Want to share photos and talk with other members in our virtual camera club? Check out our Flickr Public Group. And from those images, I choose the TDS Member Photo of the Day.

Podcast Sponsors

Red River Paper - Keep up with the world of inkjet printing, and win free paper, by liking Red River Paper on Facebook.

MacPaw Creators of CleanMyMac 3 and other great software for Apple computers. Visit www.macpaw.com today.

Hedge for Mac - The fast solution for moving photos and videos from memory cards to drives, or drives to drives for that matter. Learn more at Hedge for Mac.

The Nimbleosity Report

Do you want to keep up with the best content from The Digital Story and The Nimble Photographer? Sign up for The Nimbleosity Report, and receive highlights twice-a-month in a single page newsletter. Be a part of our community!

Want to Comment on this Post?

You can share your thoughts at the TDS Facebook page, where I'll post this story for discussion.

One of the primary reasons that I moved from Aperture to Capture One Pro was that I felt comfortable with its organization tools. Yes, I like my catalog neat and tidy, and here's how I do that.

groups-and-projects.jpg

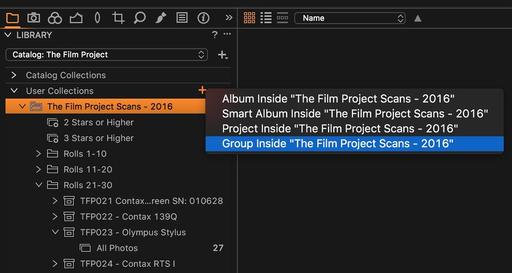
It's all about the hierarchy. At the top are Groups, which is Capture One terminology for what we typically call folders. I create my top level Group by navigating to User Collections, then clicking on the + icon. I then choose Group Inside...

For my catalog, this is usually a year, such as 2016. Moving forward, I keep my images in Projects, which look like little file boxes. Click on your Group once to highlight it, then click on the + and choose Project Inside... to create a new Project inside of that Group.

Projects need Albums to contain the actual image files. Click on your newly-created Project to highlight it, then click on the + icon, and choose Album Inside... from the popup menu. You are now setup to put images inside your User Collection.

When your images first are copied to the Catalog, usually from a memory card, by default they arrive in Catalog Collections > Recent Imports. Select all of those thumbnails from the last import, and drag them to the Album you created inside of the Project in the User Collections area. You have now successfully organized your first shoot.

Now all you have to do is continue down this path, creating nested Groups as necessary. You might want to add a Smart Album or two at the top of the list in the Group. You can click and drag these elements to place them in any order you want.

So the hierarchy looks something like this:

  • User Collections
  • Top Level Group
  • Nested Group
  • Project
  • Album

I like a clean workspace. I feel like I'm more productive in an organized environment, and the tools in Capture One Pro make that easy.

More Capture One Pro Tips and Techniques

Improve your skills by watching Capture One Pro Essential Training now available on lynda.com. More than 5 hours of tips, tricks, and techniques. Plus many free movies using advanced techniques.

I've also created a dedicated Capture One Pro Training page on The Digital Story. You can follow all of the tips and techniques that I publish in one convenient spot.

Thinking About Making the Transition from Aperture or Lightroom? - Download my free eBook titled, Rocky Nook's Guide to Moving to Capture One Pro. I show you the steps to create a test library, then build the foundation for a smooth transition to Capture One Pro.

Want to Comment on this Post?

You can share your thoughts at the TDS Facebook page, where I'll post this story for discussion.

Photo sharing is great, as long as you're not showing any more than you're comfortable with. A quick trip to the Privacy and Safety settings in Flickr Mobile insures that your posts are handled in a manner that you're comfortable with.

flickr-privacy.jpg

In the following video, I review settings for Default Post Privacy, Location Privacy, Photo Safety Level, and the Safe Search Filter, for both iOS and Android devices. These establish the experience that's appropriate for you, both sharing and viewing.

These adjustments only take a few minutes. And I highly recommend that you review them today on your mobile device running Flickr.

More Flickr Tips and Techniques

If you want to master Flickr on your mobile device, check out Flickr Mobile: Photo Sharing Anywhere. Desktop users might be interested in Sharing Photos with Flickr. Of course the platforms work well together too, and I discuss how you can integrate all of your devices to create a seamless photography workflow.

Want to Comment on this Post?

You can share your thoughts at the TDS Facebook page, where I'll post this story for discussion.

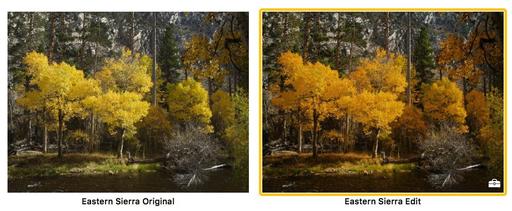
Sometimes when I look at a shot, I think to myself: "I like it, but it needs something." If I'm working in Photos for macOS, that something can be Intensify by Macphun.

intensify-macphun-web.jpg

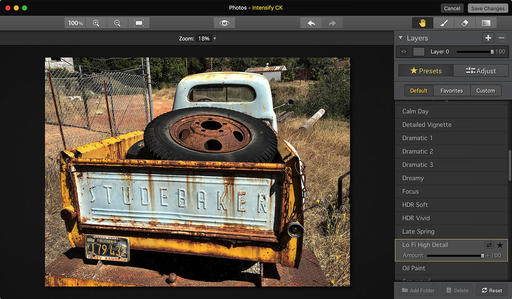
The reason why I like Intensify is because it's a different approach to image enhancement than HDR. Intensify uses a combination of pro contrast, structure, and detail boost to "bring the image forward." The best way to start is to peruse the presets listed on the right side of the interface, then fine tune your selection with the Adjust tools.

You also have options for working in layers and localized work. Once you've tuned the shot, click on the Save Changes button, and you're returned to Photos. The process is totally non-destructive. You can revert to original at any time, or view the previous version by pressing the M key while in Edit mode.

I've found that Intensify helps me find that little extra juice that I know I want, but am not always sure how to create. It's one of my secret weapons in my Photos for macOS bag of tricks. (Well, I guess not so secret anymore...)

Master Photos for OS X

(It's More Powerful than You Think)

For hands-on tutorials, be sure to take a look at Photos for OS X Essential Training on lynda.com. I cover everything you need to know to get the most from this surprisingly powerful image management application.

The Apple Photos Book for Photographers

For photographers who are more than just casual snapshooters, or who are making the transition from Aperture or iPhoto, The Apple Photos Book for Photographers shines a light on the sophistication of this app and the ecosystem it taps into. Available as an eBook now, and coming to print later this year.

Get it for $15 using checkout code APPLE15!

Want to Comment on this Post?

You can share your thoughts at the TDS Facebook page, where I'll post this story for discussion.

This is The Digital Story Podcast #541, July 17, 2016. Today's theme is "Moose Peterson Coffee Break." I'm Derrick Story.

Opening Monologue

If someone asked you, "What would you rather do this morning... tackle that big writing project you've been procrastinating on, or have Moose Peterson stop by to shoot the breeze?" Well, I can tell you what my answer was... and I turned on the recorder to share the conversation with you. Listen in on today's TDS podcast.

Moose Peterson Coffee Break

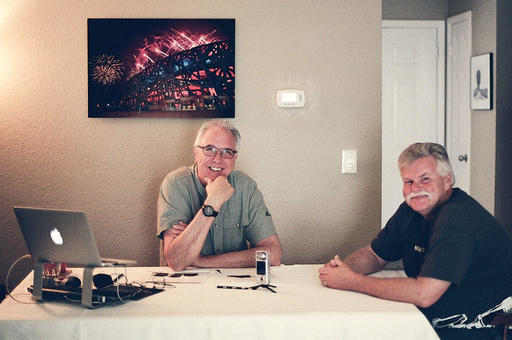
When Brad Pitt has a new movie out, chances are good that he'll make an appearance with Jimmy Fallon on the Tonight Show. And when Moose Peterson is in town putting the finishing touches on his new MP Backpack Series for MindShift Gear, the odds are I can get him to come by my studio for a morning chat. After all, I'm only about 5 minutes away from Think Tank Photo headquarters.

Derrick-Moose.jpg Derrick Story and Moose Peterson, photo by Sharon Peterson.

So sure enough, both Moose and his wife Sharon joined me for coffee recently. We sat around the big table here at the studio, and I fired up the audio recorder and just set it in the middle of all of us. I wanted you to be able to listen in just like you were here with us.

Moose has this terrific new backpack that's a collaboration between the Petersons and MindShift Gear. It was just announced yesterday, so I thought you might enjoy hearing about it directly from the Moose's mouth. So here we go.

In the News

Lightroom Mobile 2.4 is Wildly Impressive via The Digital Story.

The other exciting recent announcement, in my opinion, was Lightroom Mobile 2.4 for both iOS and Android. The releases are a bit different, and on the iOS side, we now get RAW editing and localized adjustments.

So I put this new version through its paces, and share my impressions with you.

The Second Episode of Nimble Photographer Podcast is Now Live

One of my favorite shows of the first season, "Baggage" is now live for our Patreon members. In this episode, I read and discuss four different stories that relate to our camera bags. And thanks to all of our new Patreon supporters who signed up this week.

Real Camera Stores

I've started this series on theAnalogstory.com called Real Camera Stores. If you haven't read any of them yet, you might want to click on the link. But more importantly, if you have a real camera store that you want to share with the world, I'd love to hear about it. Just send me the scoop, with a photo if you can, to theAnalogstory@gmail.com.

Updates and Such

Just Released!: The Apple Photos Book for Photographers

You can get your eBook copy of The Apple Photos Book for Photographers for $15 by using the checkout coupon: APPLE15. That saves your 5$ off the price.

And finally, be sure to visit our friends at Red River Paper for all of your inkjet supply needs.

See you next week!

More Ways to Participate

Want to share photos and talk with other members in our virtual camera club? Check out our Flickr Public Group. And from those images, I choose the TDS Member Photo of the Day.

Podcast Sponsors

Red River Paper - Keep up with the world of inkjet printing, and win free paper, by liking Red River Paper on Facebook.

MacPaw Creators of CleanMyMac 3 and other great software for Apple computers. Visit www.macpaw.com today.

Hedge for Mac - The fast solution for moving photos and videos from memory cards to drives, or drives to drives for that matter. Learn more at Hedge for Mac.

The Nimbleosity Report

Do you want to keep up with the best content from The Digital Story and The Nimble Photographer? Sign up for The Nimbleosity Report, and receive highlights twice-a-month in a single page newsletter. Be a part of our community!

Want to Comment on this Post?

You can share your thoughts at the TDS Facebook page, where I'll post this story for discussion.

I don't think a lot of photographers realize just how easy it is to digitize their film negatives. I'm going to show you the few basic steps that I use with Capture One Pro. My method was inspired by the excellent article, How to Convert Negatives to Positives Using Capture One by Quentin Decaillet.

negative-scanning-web.jpg

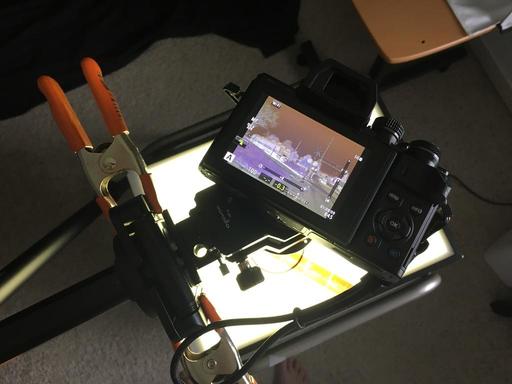
First you have to take a picture of your negative and save it as a RAW file. I have a simple setup where I use a macro lens on my Olympus OM-D to photograph a negative on a lightbox. I use a large skylight filter to keep the neg flat while I shoot it. Works great.

scanning-the-neg.jpg

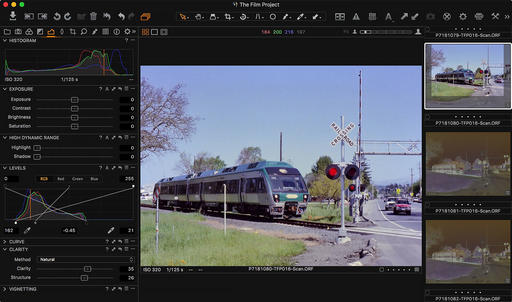
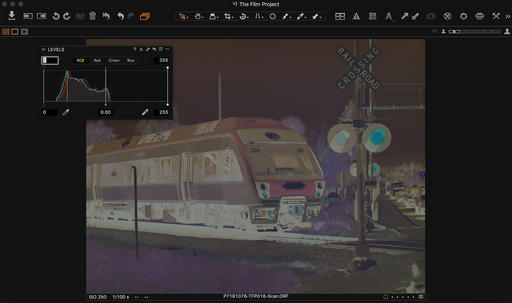
Then I load the RAW file into Capture One Pro. Select the Levels adjuster and invert the dark and light values. It's simple: in the bottom boxes below the graph, enter 255 where 0 is, then enter 0 where 255 was. Save this as a preset. You now have a positive.

levels-adj-web.jpg

At this point, I typically just adjust the luminosity to taste, add a little clarity and sharpening, and call it a day. I tend not to mess with color much because I like the film look supplied by the negatives themselves.

P7181076-TFP016-Scan.jpg SMART Train Dry Run, Santa Rosa, CA - Contax 137 MA in Aperture Priority Mode at f/16. Yashica 42-75mm zoom. Fujicolor Superia 400 expired film. Photos by Derrick Story.

The point is, you can put film negatives to work right away for social and general web publishing. Take a picture, invert the levels, and enjoy.

More Capture One Pro Tips and Techniques

Improve your skills by watching Capture One Pro Essential Training now available on lynda.com. More than 5 hours of tips, tricks, and techniques. Plus many free movies using advanced techniques.

I've also created a dedicated Capture One Pro Training page on The Digital Story. You can follow all of the tips and techniques that I publish in one convenient spot.

Thinking About Making the Transition from Aperture or Lightroom? - Download my free eBook titled, Rocky Nook's Guide to Moving to Capture One Pro. I show you the steps to create a test library, then build the foundation for a smooth transition to Capture One Pro.

Want to Comment on this Post?

You can share your thoughts at the TDS Facebook page, where I'll post this story for discussion.

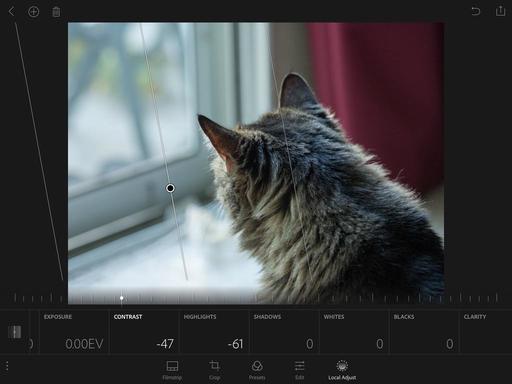
When I heard the news that Adobe had released Lightroom Mobile 2.4 for iOS and Android, I couldn't wait to test it on my aging iPad mini 2. I figured if it could process RAW files and add local adjustments on that device, Adobe has really created something special. And fortunately, they did not disappoint.

local-adjust-LR-mobile.jpg Applying a local adjustment in Lightroom Mobile 2.4 on my iPad mini 2

I started with a fresh memory card in my Olympus OM-D E-M5 Mark II and set the file format to RAW only. I then snapped a few pictures and put the memory card in the Apple Lightning Card Reader, then imported two files via Photos to my iPad mini 2. I opened one of the images in Lightroom Mobile 2.4.

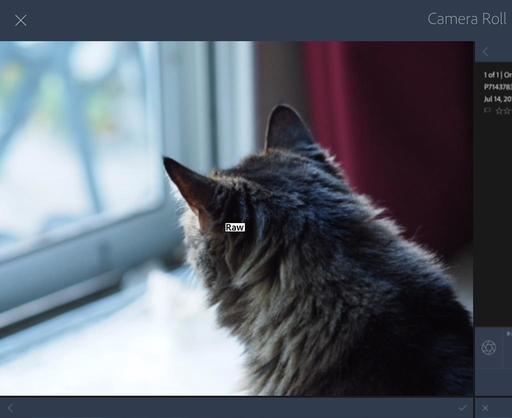
show-raw.jpg The RAW badge confirms that I'm working on a RAW file.

The first thing I noticed when reviewing the Camera Roll in LR Mobile was the RAW badge over the image that I had just imported into the iPad. So right away I got confirmation that I was indeed working in the format that I wanted.

I then began testing highlight and shadow recovery. For me, that's the quickest way to distinguish editing a RAW from a Jpeg. And indeed the recovery was elegant in both areas, just like working with RAWs on my Mac.

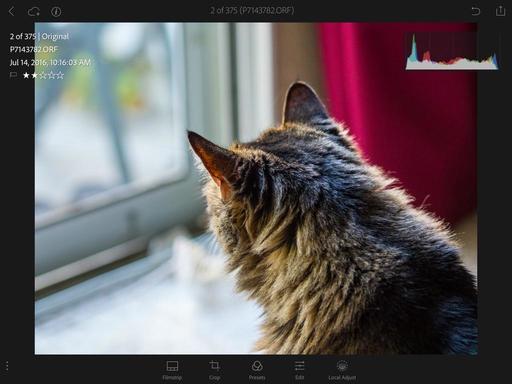
adjusted-image.jpg The editing tools worked smoothly and as expected, providing the results that I wanted.

After a few color adjustments, I applied a gradient screen in the lower left corner to tone down those highlights, then finished off with a dash of clarity. Even on an iPad mini 2, the work flowed smoothly and the results were as one would expect on a computer. This was truly impressive.

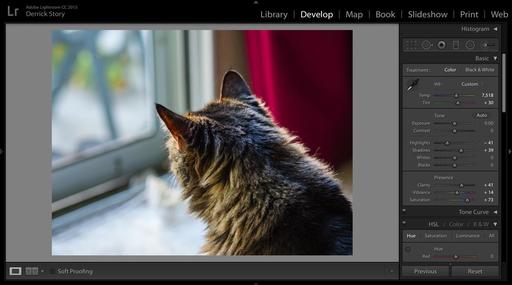
I then opened Lightroom CC on my MacBook and inspected the shot I had edited on the iPad. It looked the same as on my iPad. (Yes, it automatically synced and was waiting for me.) The image was a full-sized RAW file complete with all of the adjustments I had made in Lightroom Mobile.

lightroom-cc-version.jpg All of my iPad edits display properly in Lightroom CC on my Mac.

For all of these features, you'll need a Creative Cloud account, which I've been maintaining for sometime now to stay current with Photoshop and Lightroom. And now Lightroom Mobile 2.4 elevates my nimble cloud-based workflow to new heights. And the fact that it works on a humble iPad mini 2 is even more impressive. Well done, Adobe!


Nimble Photographer Logo

Lightroom Mobile 2.4 has a very high Nimbleosity Rating. What does that mean? You can learn about Nimbleosity and more by visiting TheNimblePhotographer.com.

After publishing today's TDS podcast titled, Nimble HQ Video, I received some requests for the actual settings that I use on my Olympus OM-D E-M5 Mark II. I'll share those here, keeping in mind that these will work on most other cameras too.

The Fn1 Button and 1-2 Lever

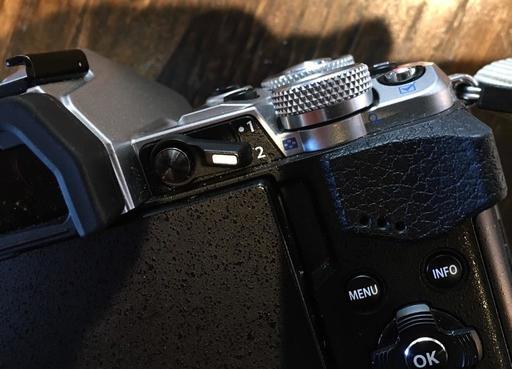
The first thing I recommend it programming the lever that's next to the Fn1 button and positioned just to the right of the viewfinder. By setting up "1" for your still photography and "2" for video work, you can quickly go from one mode to the other knowing that you have the right settings for each.

To program this lever, go to Menu > Gear Submenu > Gear B > Button/Dial/Lever > Lever Function and choose mode 6. With Mode 6 selected, you've programmed the lever to use position 1 for still photography and position 2 for video.

short-cut-lever.jpg

The Movie Menu

Everyone is a bit different when it comes to specific camera settings, but I'll give you an overview of what I use, and you can take it from there. Start by going to Menu > Gear Submenu > Gear I, then follow along.

  • Mode: Manual ("M") - In my opinion, unless you're in run and gun mode, why would you use anything else. Set the shutter speed to 30 and the aperture for the look you want.
  • Movie Mic - "On"
  • Recording Volume - I use an external mic, and with my rig the gain is set to +2. Test for your particular mic.
  • Volume Limiter - I go back and forth on this. Currently I have it on to protect against clipping the highs.
  • Wind Noise Reduction - I keep it off unless I'm in breezy conditions. Even then, I'll use a dead cat over the mic, because it's more effective.
  • Plug-in Power - Off. My mic doesn't require it. Hopefully yours won't either.
  • PCM Recorder Link - I don't use it.
  • Headphone Volume - I'm usually around 7. My headphones are plugged into the Olympus HLD-8G External Grip.
  • Time Code Settings - Non-DF (Does not adjust for time difference vs. actual recording time.)
  • Movie Specification Settings - I use FHD-F and FHD-SF. For shorter pieces I'll switch to SuperFine. For longer recordings Fine is great.
  • Movie+Photo Mode - Mode 1 - Movie is given priority.
  • Shutter Function - Mode 1 - Shutter button is for photos, and movie button is for recording.
  • Noise Filter - Standard
  • Picture Mode - Off

My recording format is FHD Fine 30fps MOV 1920x1080. ISO can be anything I need, usually between 400 and 1600. I use S-AF for focusing mode because I don't want the camera hunting for focus while I'm recording.

Once you have these set to your liking, the camera will remember them. Now, when shooting still photos, have the lever in position 1. When it's time for movies, go to position 2, and make some magic!

The Nimbleosity Report

Do you want to keep up with the best content from The Digital Story and The Nimble Photographer? Sign up for The Nimbleosity Report, and receive highlights twice-a-month in a single page newsletter. Be a part of our community!

Want to Comment on this Post?

You can share your thoughts at the TDS Facebook page, where I'll post this story for discussion.

This is The Digital Story Podcast #540, July 12, 2016. Today's theme is "Nimble HQ Video." I'm Derrick Story.

Opening Monologue

Video isn't so bad. If you didn't have to worry about loads of equipment, frame rate, humongous files, crappy audio, a plethora of formats, or compression algorithms, it would be a piece of cake. I might not be able to help you with everything on this list, but I can share with you my nimble video kit that will lighten your load. It's what I use for commercial interviews.

Nimble HQ Video

Back when I was designing this recording kit, I wanted the same nimbleosity rating for my movie gear that I enjoy for still photography. Thanks to some careful selection, and advances in technology, I have a kit that produces professional results and won't break the bank, or your back.

Frederick-Video.jpg

In the News

Elevating X-Trans? Fuji film X-T2 First Impressions Review via DP Review.

The Fujifilm X-T2 is an updated version of the company's top-level DSLR-shaped APS-C camera. It's built around the same 24MP X-Trans sensor as the X-Pro2 but ends up being much more than an X-T1 with more pixels. Instead, the X-T2 is a camera that does much to address the X-System's remaining weaknesses, which can only broaden its already considerable appeal.

Key features include:

  • 24MP X-Trans CMOS III sensor
  • 325 AF points (169 of which offer phase detection)
  • AF point selection joystick
  • 2.36M-dot OLED EVF with 0.005 sec refresh time (60 fps or 100 fps in boost mode)
  • 3" 1.04M-dot articulating LCD
  • 4K UHD video at up to 30 fps for up to 10 min (30 min with booster grip)
  • F-Log flat profile and 4K out over HDMI
  • 8 fps continuous shooting with AF (11 fps with booster grip)
  • 5 fps continuous shooting with live view updates between capture
  • Dual SD card slots (UHS-II compatible)
  • USB 3.0 socket

The camera is expected in Sept. 2016 for $1,599.

The Nimble Photographer Podcast and Patreon

I've set up a Patreon account to support The Digital Story, The Nimble Photographer, and theAnalogstory. For patrons who pledge $5 a month or more (all handled seamlessly by Patreon), they will receive access to Season 1 of The Nimble Photographer Podcast.

The first episode is waiting for you right now. The second show goes live this coming Friday, July 15. It's title, "Baggage."

I hope you become a patron of The Digital Story, and I look forward to hearing what you think of The Nimble Photographer Podcast. The URL is: www.patreon.com/thedigitalstory

Do You Have an Analog Story to Share?

If so, please send the text and up to 6 pictures to theanalogstory@gmail.com.

Updates and Such

Just Released!: The Apple Photos Book for Photographers

You can get your eBook copy of The Apple Photos Book for Photographers for $15 by using the checkout coupon: APPLE15. That saves your 5$ off the price.

And finally, be sure to visit our friends at Red River Paper for all of your inkjet supply needs.

See you next week!

More Ways to Participate

Want to share photos and talk with other members in our virtual camera club? Check out our Flickr Public Group. And from those images, I choose the TDS Member Photo of the Day.

Podcast Sponsors

Red River Paper - Keep up with the world of inkjet printing, and win free paper, by liking Red River Paper on Facebook.

MacPaw Creators of CleanMyMac 3 and other great software for Apple computers. Visit www.macpaw.com today.

Hedge for Mac - The fast solution for moving photos and videos from memory cards to drives, or drives to drives for that matter. Learn more at Hedge for Mac.

inkdot Metal Prints Brilliant, affordable, and archival. Visit ink dot.com/metal-prints today.

The Nimbleosity Report

Do you want to keep up with the best content from The Digital Story and The Nimble Photographer? Sign up for The Nimbleosity Report, and receive highlights twice-a-month in a single page newsletter. Be a part of our community!

Want to Comment on this Post?

You can share your thoughts at the TDS Facebook page, where I'll post this story for discussion.

I've been working with the Priime Styles editing extension for Photos for macOS. I've applied its filters to my iPhone Jpegs and RAWs from my Micro Four Thirds cameras, and I've had some excellent results.

BTW: Priime Styles works for Lightroom users too. So if you're not into Photos, then still read on...

The iPhone workflow is straightforward. You open the image in Priime, choose from their vast array of professional filters, and save. But in order to get the most out of the RAW workflow, I have a few tips.

edit-raw-first.jpg Duplicate your RAW file in Photos, then edit it using native tools first. Images by Derrick Story.

Duplicate Your RAW and Edit First

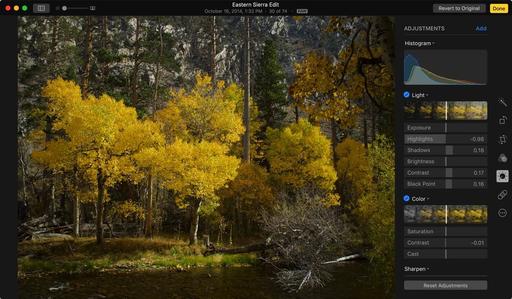
Priime Styles can import your RAW file, but it returns a Jpeg to your Photos library. My recommendation is to duplicate the RAW in Photos, then apply your basic adjustments while it's still in the RAW state. This gives you much better control over recovering highlights and opening up shadows.

Send Edited RAW to Priime Styles

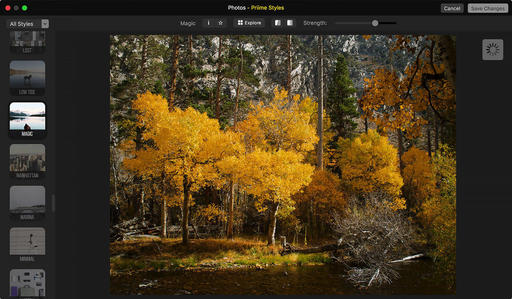
Once your RAW has received its basic adjustments, you can send it over to Priime Styles for finishing. There are lots of filters to choose from. And this part of the process is really fun. All you have to do is click on the thumbnail to apply a filter.

apply-filter-social-version.jpg Load the edited RAW file into Priime Styles and apply your favorite filter.

Now click the Save Changes button, and a Jpeg will be returned to your Photos library, right next to the original RAW. You have all of the standard options at this point, such as viewing the master (press the M key) or reverting to the original RAW file.

sidebyside-photos.jpg

When working in Priime Styles, I like to start with the Explore button to view thumbnails of all the possibilities for my image. Once I choose a filter, I generally use the strength slider to adjust the intensity. You have two different comparison buttons so you can really get a feel for the before and after. This editing extension is very easy to use, and it provides a wealth of options for your pictures.

Master Photos for OS X

(It's More Powerful than You Think)

For hands-on tutorials, be sure to take a look at Photos for OS X Essential Training on lynda.com. I cover everything you need to know to get the most from this surprisingly powerful image management application.

For photographers who are more than just casual snapshooters, or who are making the transition from Aperture or iPhoto, The Apple Photos Book for Photographers shines a light on the sophistication of this app and the ecosystem it taps into. Available as an eBook now, and coming to print later this year.

Get it for $15 using checkout code APPLE15!

More Help and Insights on Photos for OS X

Don't forget about the Photos for OS X Special Feature Section on The Digital Story. It's a roundup of tutorials, videos, and articles focused on helping you master Apple's latest photo management software. You can also find it under Photography in the top nav bar.

Want to Comment on this Post?

You can share your thoughts at the TDS Facebook page, where I'll post this story for discussion.

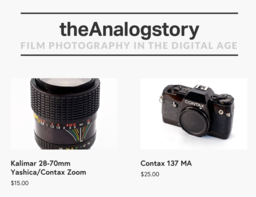
A big part of The Film Project has been learning about used photo gear and testing various cameras and films. In order to keep items moving through our shop, we've created two stores offering exceptional value to anyone interested in purchasing classic SLRs and lenses.

TheFilmCameraShop on Etsy

theFilmCameraShop.png

Our TheFilmCameraShop on Etsy offers cameras, lenses, and accessories that have been inspected and cleaned in our shop at theAnalogstory.com. Every camera has been film tested at least once, as well as the lenses that go with them.

We chose Etsy as the location for TheFilmCameraShop because of their high standards, excellent customer service, and interesting array of goods offered. At the moment we're featuring Pentax, Contax, and Yashica brands. We're in the process of adding a line of Minolta products too.

These are great cameras and optics. And the images produced by them will be featured in my book on analog photography.

The Outlet Store for Used Gear

outlet-store.png

Not every item we buy for testing passes muster for the Etsy store. And we've accumulated a number of accessories that came with camera packages that weren't necessarily something that we wanted to feature in TheFilmCameraShop.

So we did what any respectable retailer would do. We created the Outlet Store for Used Gear. Here you'll find an array of odds and ends at rock bottom prices with super cheap shipping.

Think of the Outlet Store for Used Gear as an online garage sale that only sells photo stuff. There are no returns or refunds on these items. But at these prices, who cares!

If you have a few moments, you may want to check out both stores. It's window shopping for photographers.

Do You Like Film?

Take a look at theAnalogstory - Film Photography in the Digital Age. We cover great 35mm cameras, personal stories from film photographers, quick tips, and even a camera shop. Stop by, won't you?

Want to Comment on this Post?

You can share your thoughts at the TDS Facebook page, where I'll post this story for discussion.

This is The Digital Story Podcast #539, July 5, 2016. Today's theme is "Other People's Photos." I'm Derrick Story.

Opening Monologue

I was writing a post the other day about Flickr and looking at photos in my Friends feed. I started thinking about all of the photography I consume, and the role those pictures play in my own work. I explore this idea in today's show.

Other People's Photos

When I was in college, I tutored others in English. Many of my students were engineering and science majors, hoping to pass the written skills tests required to complete their curriculum. I noticed that those who read novels and literature frequently had an easier time improving their writing skills. It seemed that reading good stuff added the meter and syntax of the language to their consciousness. I think this is true for photography also.

Photography can be a very inwardly focused endeavor. We obsess over the details of our equipment, pixel peeping post processing, and perfect alignment of composition. Yet many great artists eschew much of this and produce great images anyway. What is their secret? Maybe we can unravel it by looking more closely at their images.

Here are a few suggestions that I have to add the language of photography to our consciousness.

  • Study Books Published by Great Photographers - A trip to the used book store can provide a wealth of photographic inspiration. The thing images in books, compared to an Instagram feed, is that they are curated. People thought long and hard about which images to include, and which to leave out.
  • Take In a Daily Dose of Explore on Flickr - The interesting thing about Explore, compared to traditional photo books, is that it's contemporary. Here are the trends that are valued today, whether they be by computer algorithm, or hand picked by editors who are most likely young. It's worth knowing and studying these images.
  • Follow Your Friends - The advantage of friendship photography is that you have an open channel to that person. If he or she produces something that you find inspiring, you can ask them about it, pick their brain, and learn from them.

  • Make_2nd_Print_D_Story.jpg

  • Visit Galleries and Museums - The test thing about studying art in college was that we'd learn about the works in the classroom, then see them in real life in museums. I can't describe how shockingly different a painting affected me in real life compared to print.
  • Print Your Own Work - You can learn from your own photography if you print it. Much in the same way that art changes when you see it in a museum, your work is different on the wall then viewed on a smartphone. You'd be surprised at the things you can learn from your own pictures if you give them a chance to teach you.

In the News

Eye-Fi to cease support for Pro X2 and earlier generation cards via DP Review.

Eye-Fi will soon end support for its X2 and older wireless memory cards, services and apps, according to a notice sent to customers today. Citing security concerns, the company will complete the 'end of life' stage on September 16, 2016 by ending server support. The cards will still function at that point, and certain wireless transfer modes may still work, but their associated apps and services won't offer full functionality. Eye-Fi is offering to move customer data to its newer Cloud service, and will sell affected customers new cards at a discount. Mobi, Mobi Pro and EyeFi Cloud are all unaffected.

The Nimble Photographer Podcast and Patreon

This is something that I'm really excited about. You may recall that about this time last year, I mentioned that I was working on a project with Frederick Van Johnson. That project was The Nimble Photographer Podcast. As it turned out, we could never quite get the logistics worked out. But I had recorded 4 shows, and written a half dozen others. So I've been sitting on these episodes trying to figure out what to do. And now I have the answer.

Enter Patreon - I've set up a Patreon account to support The Digital Story, The Nimble Photographer, and theAnalogstory. For patrons who pledge $5 a month or more (all handled seamlessly by Patreon), they will receive access to Season 1 of The Nimble Photographer Podcast.

The first episode is waiting for you right now, with the balance of the shows to appear every two weeks following. When you commit your pledge on Patreon, you'll receive the URL and password for the season pass to The Nimble Photographer Podcast.

These shows are different than this one, much in the same way that the Nimble Photographer is different than The Digital Story. Here's the opening from show 1.

I hope you become a patron of The Digital Story, and I look forward to hearing what you think of The Nimble Photographer Podcast. The URL is: www.patreon.com/thedigitalstory.

New lynda Title

We've just released, Flickr Mobile: Sharing Photos Anywhere. I had so much fun recording these movies, working only with my iPhone, iPad and Android tablet. It was a true nimble-rush. And I think you'd enjoy watching this training.

Updates and Such

Just Released!: The Apple Photos Book for Photographers

You can get your eBook copy of The Apple Photos Book for Photographers for $15 by using the checkout coupon: APPLE15. That saves your 5$ off the price.

And finally, be sure to visit our friends at Red River Paper for all of your inkjet supply needs.

See you next week!

More Ways to Participate

Want to share photos and talk with other members in our virtual camera club? Check out our Flickr Public Group. And from those images, I choose the TDS Member Photo of the Day.

Podcast Sponsors

Red River Paper - Keep up with the world of inkjet printing, and win free paper, by liking Red River Paper on Facebook.

MacPaw Creators of CleanMyMac 3 and other great software for Apple computers. Visit www.macpaw.com today.

Hedge for Mac - The fast solution for moving photos and videos from memory cards to drives, or drives to drives for that matter. Learn more at Hedge for Mac.

inkdot Metal Prints Brilliant, affordable, and archival. Visit ink dot.com/metal-prints today.

The Nimbleosity Report

Do you want to keep up with the best content from The Digital Story and The Nimble Photographer? Sign up for The Nimbleosity Report, and receive highlights twice-a-month in a single page newsletter. Be a part of our community!

Want to Comment on this Post?

You can share your thoughts at the TDS Facebook page, where I'll post this story for discussion.
flickr-friends.jpg

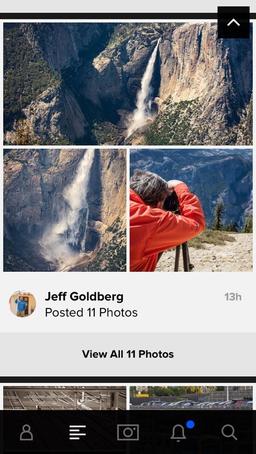
The quality images that flow through my Friends feed is outstanding. But to be honest, I sometimes opt for scrolling through Instagram instead, primarily because it just seems easier. (I know, lazy me.)

I think the real issue was when my Flickr friends posted multiple shots in one session. One one hand, I like seeing the different aspects of a particular subject. Those images tell a more complete story.

But when viewing them on my iPhone 6s, as I do 90 percent of the time, groups of images are less immersive. That is, until Flickr updated their mobile app to be 3D Touch compatible. Now I can just press and hold on any shot in the group, and I get a full screen version, complete with title and name overlay. It's really cool. When I'm done viewing the larger size, I just lift my finger off the screen. Here's a short video about it.

camera-metadata.jpg

It's such a simple thing, but this approach keeps me in the flow of the photo stream. And that makes all the difference when casually browsing pictures.

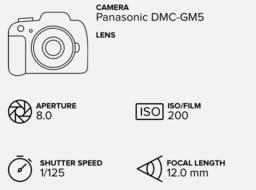
You can favor the shot by double-tapping on it. If you want to see the metadata or comment, tap once on the image to make it full screen, then use the tool bar at the bottom. BTW: viewing camera metadata is one of the things that I really like about Flickr mobile compared to other apps. Seeing how the photographer got the shot, the settings that he or she used, is interesting to me.

Once I started taking advantage of the tools that were available to me in Flickr Mobile, I started using it more. And as a result, I am seeing more great photography than ever.

More Flickr Tips and Techniques

If you want to master Flickr on your mobile device, check out Flickr Mobile: Photo Sharing Anywhere. Desktop users might be interested in Sharing Photos with Flickr. Of course the platforms work well together too, and I discuss how you can integrate all of your devices to create a seamless photography workflow.

Want to Comment on this Post?

You can share your thoughts at the TDS Facebook page, where I'll post this story for discussion.