This is The Digital Story Podcast #758, Sept. 29, 2020. Today's theme is "The Glass I Love and the Glass I Use." I'm Derrick Story.
Opening Monologue
No doubt, one of the best investments any artist can make is in quality photography lenses. And I do have some beauties. But what's fascinating to me, is that I have lenses that I absolutely love and would be reluctant to let go of, and then I have those optics I use on a daily basis. And the two aren't always the same. I'll explain on today's TDS Photography Podcast.
The Glass I Love and the Glass I Use
One of the lenses that I owned for the longest time, I mean decades, was the Canon EF 85mm f/1.8. I bought it new when I was shooting weddings with a Canon EOS Elan 35mm film camera.
I loved that short tele because it was fast (f/1.8), light, quiet focus, handsome, and it took great pictures. In fact, one of the metal prints that I have hanging in the studio was captured with that lens on a Canon 5D in Washington D.C.
As much as I loved that lens, I didn't shoot with it that often. Normally I would have a zoom on the camera body, something like the EF 24mm-105mm f/4. A perfectly good lens that I used daily, but I did not love it. In fact, I hadn't even thought about it until preparing for this podcast. Yet, I still think about the 85mm all the time.
I thought you might be interested to know other optics that fall into one of these two categories, and map them to your own favorites. So here's what we're going to do. I'm going to describe 5 lenses that I currently own, but I'm not going to say which category they fall into until the end of the segment.
As I describe them, as straight as I can, guess which category that each one belongs in: a lens that I love, or a lens that I use. And one of them will be both. Let's get started.
- Olympus Digital ED 14-42mm f/3.5-5.6 EZ ($224) - Distinguished by its slim pancake form factor, the black M.Zuiko Digital ED 14-42mm f/3.5-5.6 EZ from Olympus is a versatile 28-84mm equivalent zoom designed for Micro Four Thirds mirrorless cameras. Despite its compact profile, this lens includes an advanced optical design, which includes aspherical, low dispersion, and high refractive index elements to achieve a high degree of sharpness and clarity throughout the zoom range. A ZERO coating has also been applied to individual elements to suppress flare and ghosting for high contrast, color-accurate imagery. In addition to the optical design and small size, the lens is also characterized by its Electronic Zoom mechanism, for smooth and constant zoom movements, and a Movie & Still Compatible (MSC) AF system that is quick, quiet, and precise to suit both video and photo applications. (Love It or Use It?)
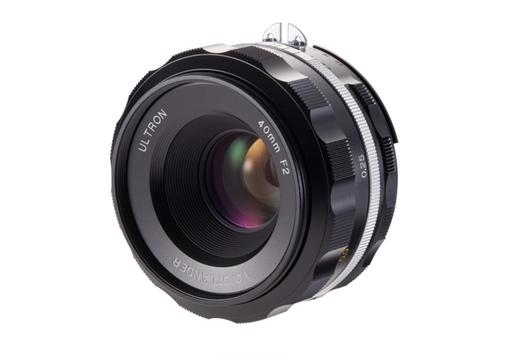
- Voigtlander Ultron 40mm f/2 SL IIS Aspherical Lens for Nikon F ($419) - Featuring a slender profile and a slightly wider-than-normal focal length, the black-rimmed Ultron 40mm f/2 SL IIS Aspherical from Voigtlander is a versatile prime well-suited to everyday shooting. The double Gauss optical design employs a single aspherical element, as well as ultra-high refractive index glass, to produce well-controlled, sharp imagery void of spherical aberrations. Its slightly wide focal length pairs with the bright f/2 maximum aperture to benefit making shallow depth of field imagery as well as working in low-light conditions. The smooth manual focus operation also contributes to controlling focus position, and both depth of field and focus distance scales are featured on the metal lens barrel to aid in pre-focusing or setting hyperfocal distance. This lens' physical design also features a scalloped focus ring to recall classic lens designs of the 1960s as well as afford more secure handling during use. Mixing the classic-inspired design with contemporary usage, the lens also sports an AI-S type CPU to permit in-camera adjustment of the aperture setting for faster, more intuitive exposure control.(Love It or Use It?)
- Pentax HD Pentax DA 70mm f/2.4 Limited Lens ($479) - The black HD Pentax DA 70mm f/2.4 Limited Lens from Pentax is a prime portrait-length lens providing a 35mm-equivalent focal length of 105mm. This short-telephoto 23 degree angle of view is well-suited to portrait and landscape shooting as well as general long lens applications. A high-grade multi-layer HD coating has been applied to lens elements to help minimize flare and ghosting for enhanced contrast, clarity, and color fidelity and a nine-blade diaphragm contributes to an aesthetic out-of-focus quality to benefit shallow depth of field imagery. Additionally, an SP Protect coating has also been applied to the front lens element to effectively protect it from dirt, oil, and finger prints. (Love It or Use It?)
- Olympus Digital 17mm f/1.8 Lens ($399) - A flexible lens for general shooting, the silver M.Zuiko Digital 17mm f/1.8 from Olympus is a 34mm equivalent wide-angle prime for Micro Four Thirds mirrorless cameras. The wide field of view pairs with the bright f/1.8 maximum aperture to benefit working in difficult lighting conditions, and it also offers increased control over depth of field for working with selective focusing techniques. The optical design makes use of aspherical and high refractive index glass elements to control spherical aberrations and distortion throughout the aperture range for increased sharpness and clarity. Additionally, a Movie & Still Compatible (MSC) autofocus system is employed to deliver quick and quiet focusing performance and a manual focus clutch can be used for more intuitive adjustment and control over focus. (Love It or Use It?)
- Olympus Digital ED 75mm f/1.8 Lens ($799) - Characterized by its telephoto design and bright maximum aperture, the black M.Zuiko Digital ED 75mm f/1.8 from Olympus is a 150mm equivalent prime for Micro Four Thirds mirrorless cameras. Coupled with the reach and visual compression of the focal length, the bright f/1.8 maximum aperture enables extensive control over depth of field to make this lens ideal for portraiture applications. Its optical design incorporates three extra-low dispersion elements and two high refractive index elements to reduce a variety of aberrations and color fringing for sharp, clear, and color accurate imagery. A ZERO coating has also been applied to individual elements to suppress surface reflections and flare for greater contrast and color fidelity in a variety of lighting conditions. Additionally, a Movie & Still Compatible (MSC) autofocus system is employed to deliver quick, quiet, and precise focusing performance to suit both video and photo applications.
OK, so are you ready for the answers? Here we go.
Newspaper Navigator Lets You Search 1.56M Newspaper Photos Throughout History
You can read the entire article here on PetaPixel.
The Library of Congress has created something really cool. It's called the Newspaper Navigator, and it's an AI-powered image search that lets you browse through over 1.5 million newspaper photos from over 16 million pages worth of digitized newspapers published between 1900 and 1963.
The Newspaper Navigator project is the brainchild of Computer Science PhD student Benjamin Charles Germain Lee, who is a part of the Library of Congress' 2020 Innovator in Residence Program.
The project is essentially a machine learning-based search engine built on top of the LoC's Chronicling America project; Chronicling America already allows you to search old newspaper photos by text using Optical Character Recognition (OCR), but Lee's Newspaper Navigator takes that to the next level by allowing you to search this same archive by image.
He achieved this by training a machine learning model using thousands of manual annotations created by real people as part of the Library of Congress' "Beyond Words" initiative. That data helped the computer "learn" the difference between image categories like Cartoons, Illustrations, Maps, and Photographs, as well as identifying key content within each image. This allowed him to automatically tag the photos and make the database searchable.
The New Donation Kit for Carefree Shipping of Found Film Cameras
We have more time around the house than ever. And you finally dove into that bedroom closet that's been begging for some organization.
If you found a film camera that you're no longer using, our new Donation Kit makes it easy to pack and ship. Just visit the Contact Form on thenimblephotographer.com, click the box next to Donating a Film Camera, and let me know what you have. In your note, be sure to include your shipping address.
If it's a camera we can use for the shop, I'll send you a Donation Kit that includes a USPS Priority Mail shipping box and prepaid label. All you have to do is tape it up, insert the camera, and add the label. USPS will pick up your shipment from the front door of your house during their regular mail delivery. It's that simple!
Your donation help get analog gear in the hands of aspiring fine art photographers, and the proceeds help support this podcast.
The Online Eastern Sierra Photography Workshop
I'm thrilled to announce the Online Eastern Sierra Photography Workshop on November 6-7, 2020.
This event will be unlike others that you may have read about or even attended yourself. We are taking the popular components of the TDS physical workshops and digitizing them. Here are a few examples.
- The Opportunity to Share Your Photos with Me and the Class - Even though the live event begins on Friday, Nov. 6, You will receive lesson tutorials on Oct. 21 and 28, then have time to go outside and practice these techniques. If you wish, you can share your favorite images from the practice sessions to be incorporated in the workshop.
- Small Group for a More Personal Experience - Even though it's an online event, class size is limited to 15 to ensure you have ample opportunities to get your questions answered (by me and other class members).
- Ongoing Conversations Beyond the Event Itself - I'm setting up a page online that will feature content from our event with the ability for ongoing conversations among class members.
Even though I'm using the Eastern Sierra as a backdrop for my tutorials, your photography and contributions to this workshop could be from anywhere in the world. In other words, it's all about the photography, not the specific location.
Since this is our first online event of this type, the tuition is only $150. Seats are limited and available on a first come, first served basis. Sign up today by visiting the Online Eastern Sierra Photography Workshop page at theNimblePhotographer.com.
Updates and Such
Inner Circle Members: A big thanks to those who support our podcast and our efforts!
B&H and Amazon tiles on www.thedigitalstory. If you click on them first, you're helping to support this podcast. (The Digital Story is supported by its audience. When you purchase through links on our site, we may earn an affiliate commission.) And speaking of supporting this show, and big thanks to our Patreon Inner Circle members:
Affiliate Links - The links to some products in this podcast contain an affiliate code that credits The Digital Story for any purchases made from B&H Photo and Amazon via that click-through. Depending on the purchase, we may receive some financial compensation.
And finally, be sure to visit our friends at Red River Paper for all of your inkjet supply needs.
See you next week!
Product Links and Comments
There are product links in this article that contain affiliate tags. In some cases, depending on the product, The Digital Story may receive compensation if you purchase a product via one of those links. There is no additional cost to you.
You can share your thoughts at the TDS Facebook page, where I'll post this story for discussion.
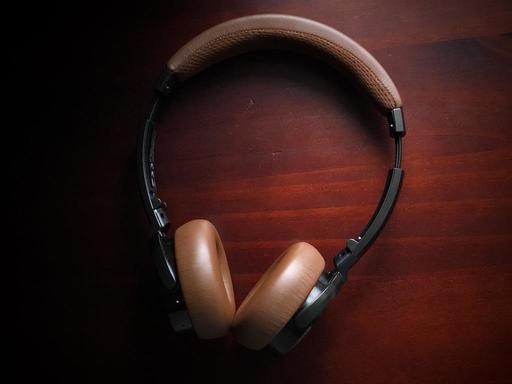
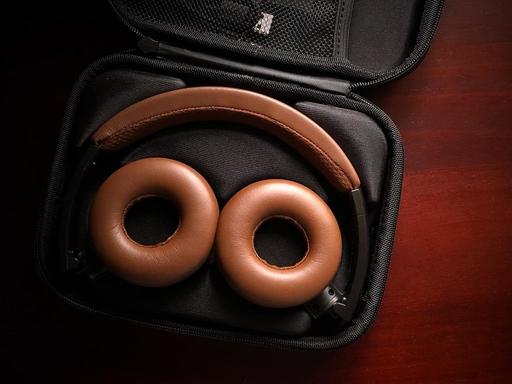
 Once the headphones were paired with the iPad mini, they appeared in the Battery Widget along with readouts for the Apple Pencil and the iPad itself.