April 2013 Archives

In Camera Raw Processing Olympus OM-D

Photographers who shoot Raw often don't realize their camera might have a powerful image processing function that creates Jpeg variations of those Raw files in camera. There are many advantages to this capability.

For mobile shooters, it eliminates the need to capture in Raw + Jpeg. You can shoot in Raw, convert the images you like to Jpeg in-camera, then send those pictures to your iPad or iPhone for sharing. This approach saves space on the memory card and allows the camera to empty the buffer faster.

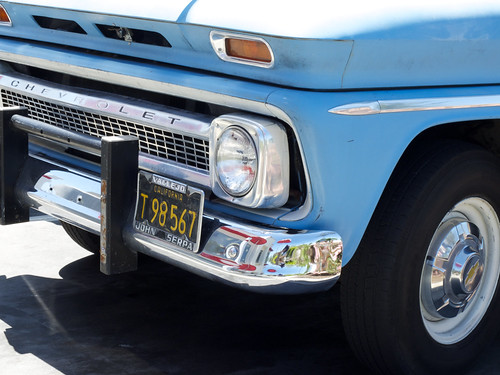
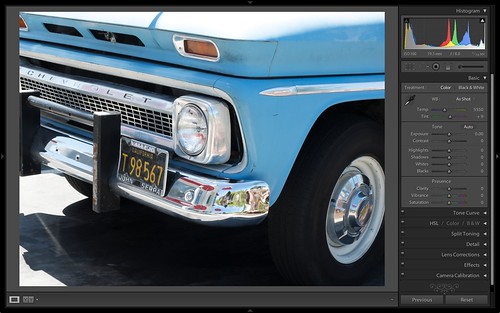
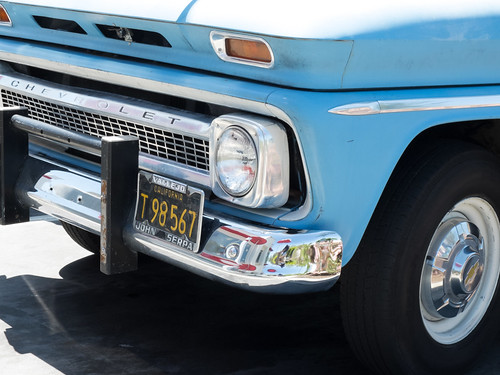
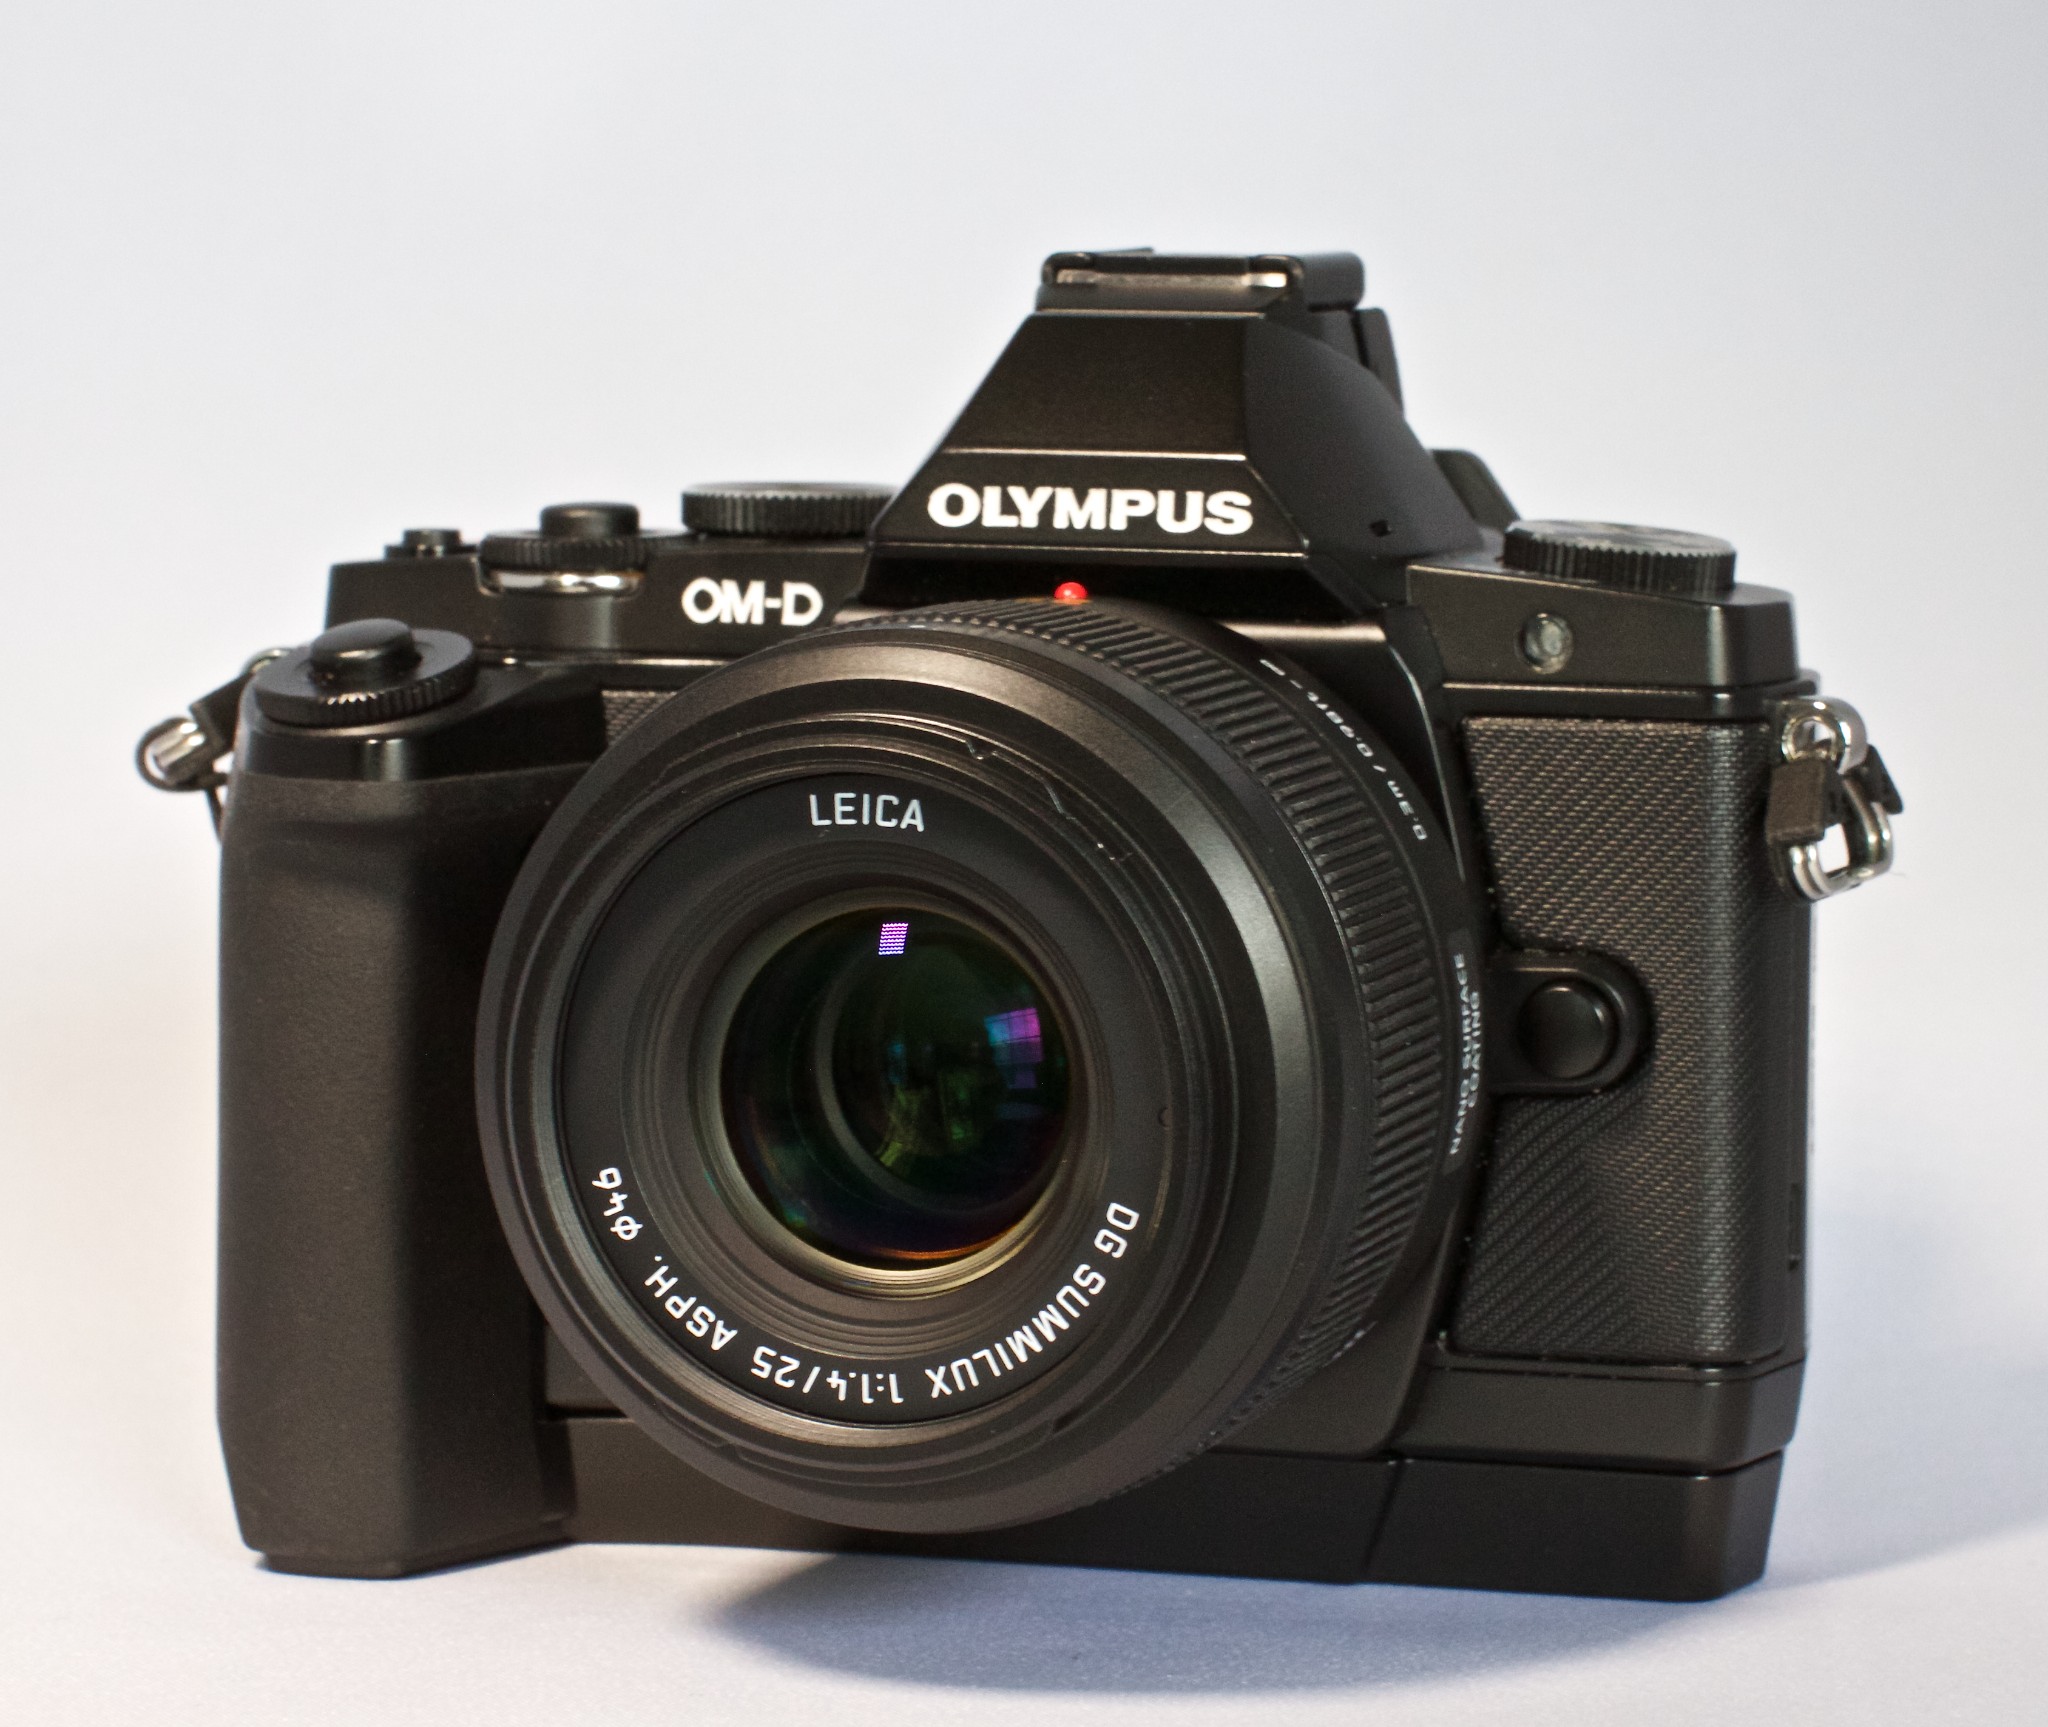
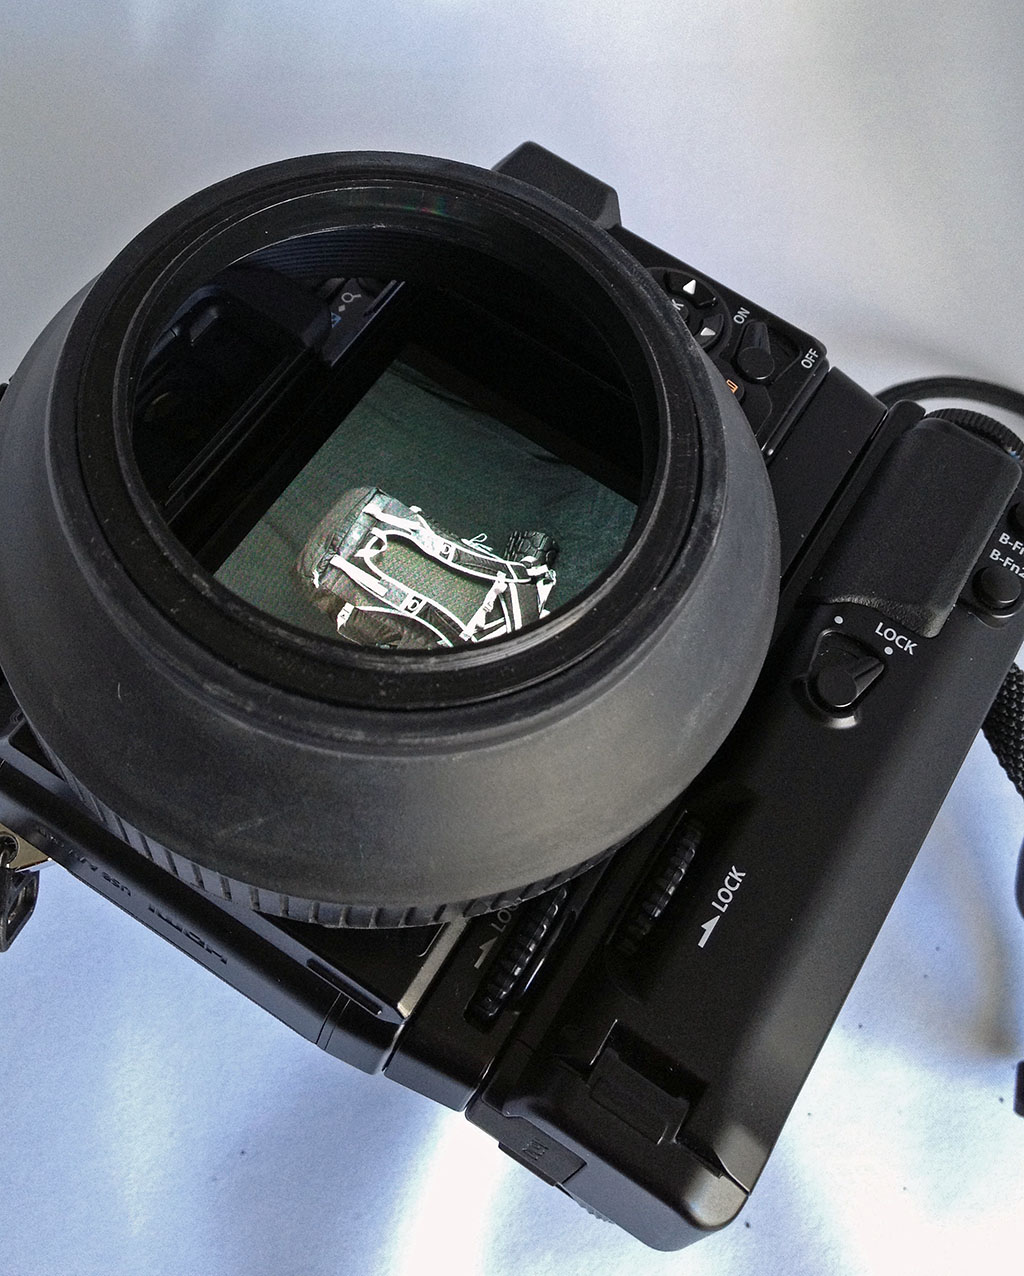
Creative photographers have lots to play with here too. Most cameras that support Raw processing (such as the Olympus OM-D and Fuji X20) allow you to add effects during conversion. The sample image in this article is a Raw file converted to Jpeg in an Olympus OM-D using the Key Line Art Filter. I still have the original Raw that I can process normally on my Mac at a later date.

The trick is to learn how your camera handles Raw processing. It's usually an option in the Playback menu. On the OM-D, for example, you press the OK button while viewing a photo. An option appears labeled JPEG Edit. Press OK again and the camera will convert the Raw file to Jpeg and add it to your memory card.

The secret with the OM-D is understanding that the file will be processed with the current camera settings. So if you want to apply an Art Filter, for example, then set that up before you process the Raw file. The result will be a Jpeg with the Art Filter settings applied.

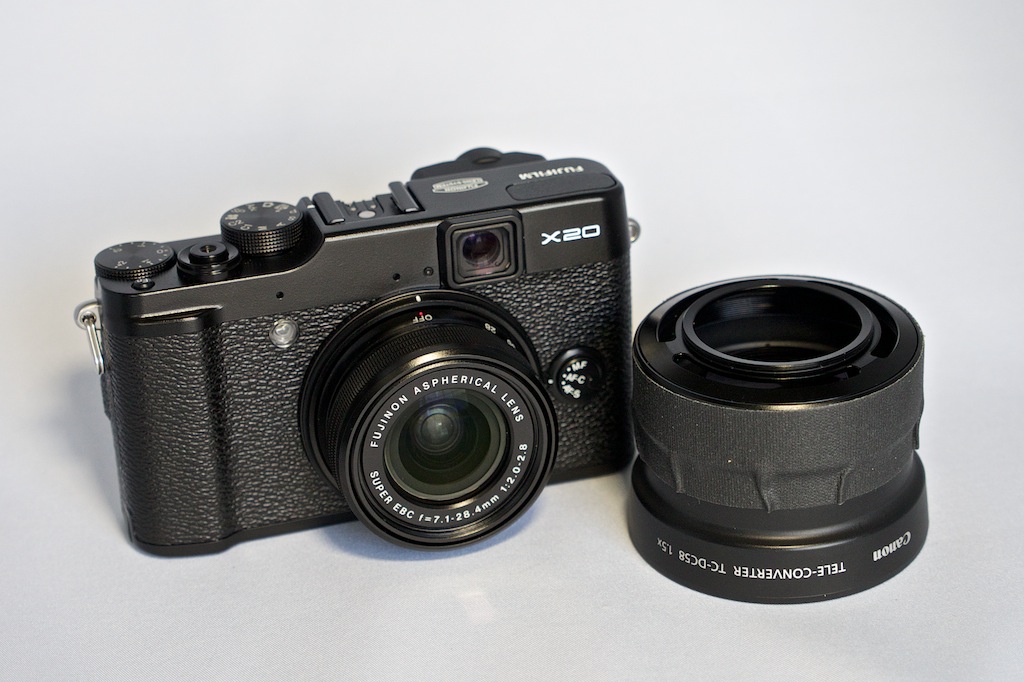
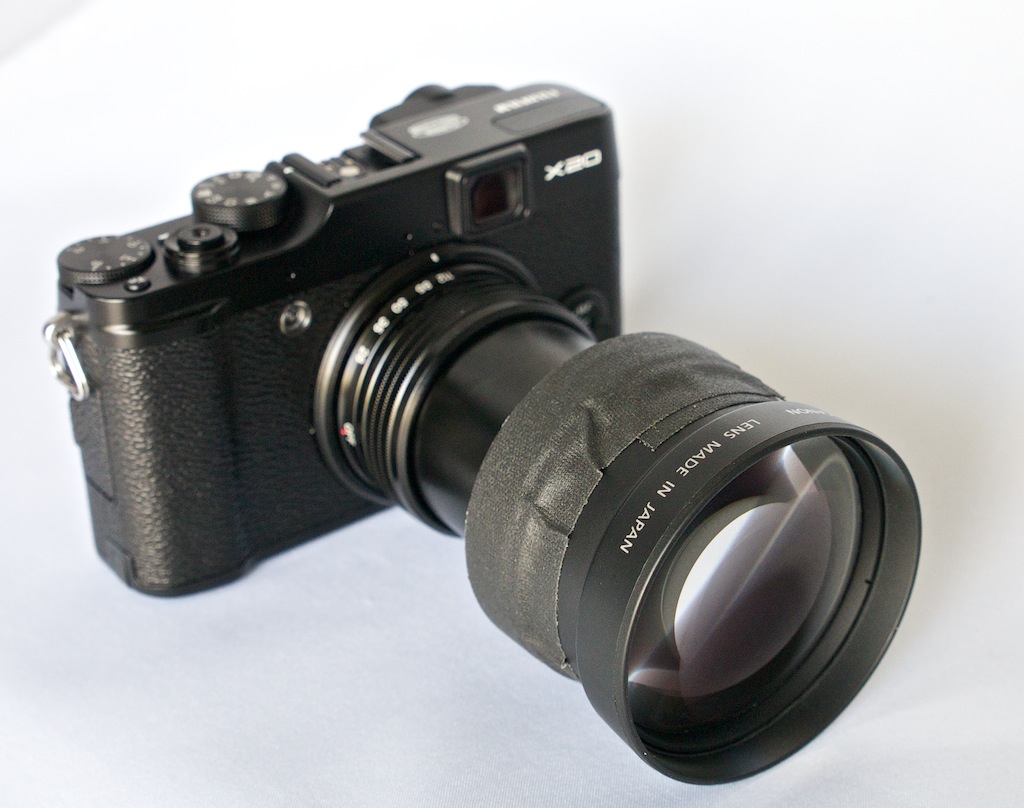
On the Fujifilm X20, the options are presented to you when you choose Raw Conversion from the Playback menu. You have options for Film Simulation (my favorite!), color, exposure, noise reduction, and even push/pull processing. Check your camera's manual for its approach to Raw processing.

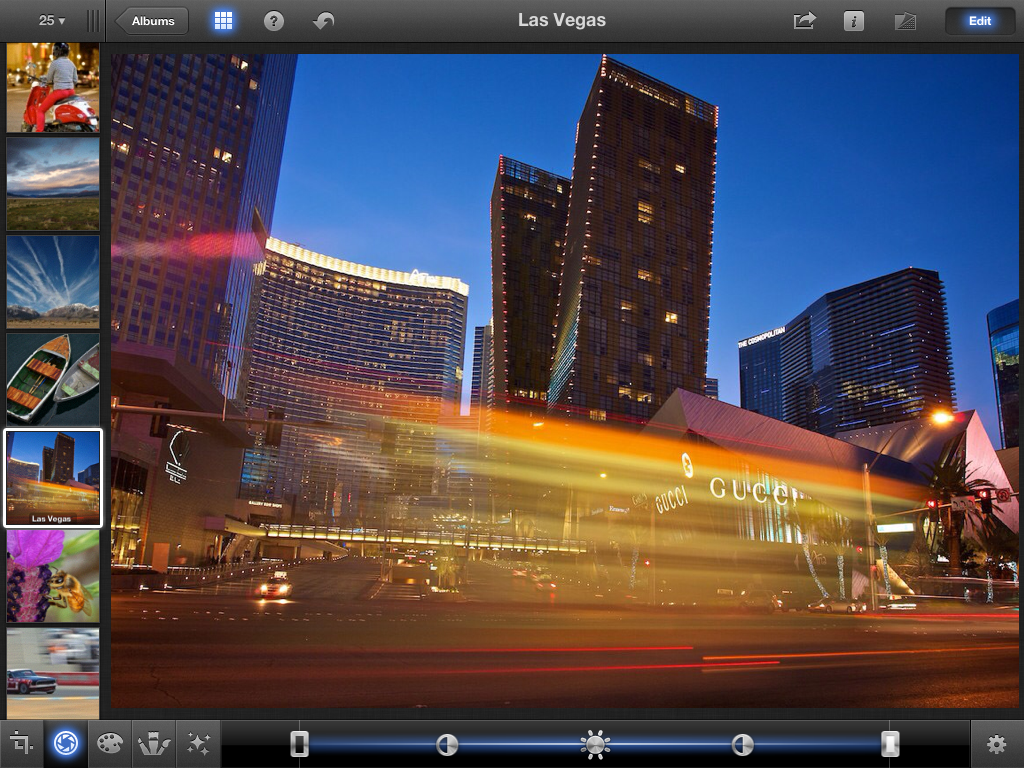
Once I convert the Raw file to Jpeg, I can send it directly to my iPad via the Toshiba Flash Air Card using Olympus Image Share iOS app that ignores Raw files on the card and shows me only the Jpegs.

Bottom line, if you love to shoot Raw, but sometimes need Jpegs, in-camera Raw processing might be the perfect workflow for you.


iPad for Digital Photographers

This is the kind of stuff I write about in iPad for Digital Photographers-- now available in print, Kindle, and iBooks format.

You can share your thoughts at the TDS Facebook page, where I'll post this story for discussion.

Female Portrait Sigma 35mm Lens

This week on The Digital Story: The gorgeous Sigma 35mm f/1.4 Art lens, creating a Frankenzoom, release of iPad for Digital Photographers, and SizzlPix winners!

Story #1 - The Sigma 35mm f/1.4 DG HSM Lens - I've been testing this beautiful chunk of glass on the Canon 5D Mark II, and I have to say, I love this lens. It's sharp and soft, all at the same time. What do I mean? Well, where you put the focus the image is crisp, but when shooting wide open the tail-off to softness is just beautiful. Take a look at the Lady Victoria portrait captured with the Sigma 35mm at f/1.4 on the Canon 5D Mark II, and see for yourself.

Story #2 - Frankenzoom - By now, you know that I hang on to optics, even if the camera they are designed for no longer works. When I needed to extend the optical reach of the zoom lens on the Fujifilm X20 compact camera for a recent NBA game (as a spectator), I found a 1.5X Canon teleconverter and mounted it on the X20. By doing so, I was able to extend the zoom from 112mm at f/2.8 to 168mm with no light loss.

Story #3 - iPad for Digital Photographers is now shipping. I just received my print copy today, and it looks great. Please help support our virtual camera club and order yours today. It's $14.73 on Amazon.com. It makes a great gift too!

Story #4 - SizzlPix Pick of the Month! Congratulations to Mark Steven Houser, Kevin Ned Miller, and Phil Fisher, our recent SizzlPix Pick of the Month for Long Exposure, Self Timer, and Furry Friends Photo Assignment. Please send me mail, and we'll get your SizzlPix in the works.

Listen to the Podcast

You can also download the podcast here (26 minutes). Or better yet, subscribe to the podcast in iTunes. You can support this podcast by purchasing the TDS iPhone App for only $2.99 from the Apple App Store.

Monthly Photo Assignment

The April 2013 photo assignment is Architecture.

More Ways to Participate

Want to share photos and talk with other members in our virtual camera club? Check out our Flickr Public Group. And from those images, I choose the TDS Member Photo of the Day.

Podcast Sponsors

Red River Paper -- Keep up with the world of inkjet printing, and win free paper, by liking Red River Paper on Facebook.

Make Your Photos Sizzle with Color! -- SizzlPix is like High Definition TV for your photography. SizzlPix Spring Sale - 25% Discount! Offer good on orders placed by April 30. Again, "TDS" or "The Digital Story" in the comments space. Of course, they will honor the discount for all TDS listeners and readers, including those who've received SizzlPix samples.

Need a New Photo Bag? Check out the Lowepro Specialty Store on The Digital Story and use discount code LP20 to save 20% at check out.

Want to Comment on this Post?

You can share your thoughts at the TDS Facebook page, where I'll post this story for discussion.

Fujifilm X20 Tele Extender

My goal at game 3 of the Warriors vs Nuggets NBA playoff was to have a good time. (And boy did I!) But I also wanted to capture a few memories from the event with my compact camera. And I knew I was going to need a bit more reach than the 112mm zoom the Fjuifilm X20 provided. So I created a Frankenzoom

The key components were a Fujifilm adapter/lens hood for the X20 and an old Canon 1.5X tele extender that I had for my G2. I used gaffer's tape to connect the lens hood to the tele extender, then screwed the device into the front of the camera.

Fujifilm X20 Tele Extender

I was able to extend my reach from 112mm at f/2.8 to 168mm with virtually no light loss. This made it much easier to capture candids during the exciting game, and even capture a shot or two of the action on the floor.

protect-defend-battle-unite.jpg

I rarely let go of old glass, even if I'm not using the camera anymore. Because when I go into my lab filled with optics, adapters, and gaffer's tape, I never know exactly what's going to emerge.


iPad for Digital Photographers

If you love mobile photography like I do, then you'll enjoy iPad for Digital Photographers-- now available in print, Kindle, and iBooks versions.

Want to Comment on this Post?

You can share your thoughts at the TDS Facebook page, where I'll post this story for discussion.

iPad for Digital Photographers Book

Photographers: Do you really want to lug your computer everywhere? My camera bag has become so much lighter since I started carrying an iPad when I travel. And yes, you can organize, edit, and share your pictures, just as easily, if not easier, than before.

In my new book, iPad for Digital Photographers ($13.45),I explain the workflows I've developed to upload, organize, edit, and share images while working virtually anywhere in the world.

Using inexpensive, but powerful software on the iPad, plus the latest in wireless technology and cloud services, you can create and publish beautiful images. And it doesn't stop there. I explain how to run your entire photography business using the iPad.

iPhoto for iOS

And yes, you can integrate all of these accomplishments with your Mac or Windows computer. Nothing will ever get lost or out of place. You'll have a workflow that streams from camera to iPad to your computer back home.

Sound too good to be true? It isn't. The tools are here now.

iPad for Digital Photographers is available as a paperback book or Kindle Edition from Amazon, or in the iBooks Bookstore for the iPad.

Get more out of your iPad than you ever imagined possible.

Want to Comment on this Post?

You can share your thoughts at the TDS Facebook page, where I'll post this story for discussion.

Which of the popular smartphones have the best camera for you? In the article, Super Shootout: Samsung Galaxy S4 vs HTC One vs Apple iPhone 5 vs Nokia Lumia 920 on DP Connect, they put these top four models through basic image testing.

Glif Tripod Adapter for iPhone 4 The iPhone 4S was a big photography story, sporting improved optics and an 8MP sensor housed in a very mobile device. Is the iPhone 5 better? How does it compare to the other top models?

Is there a clear winner? Well, not really. My take away was that if you're already shooting with any of these models, you have a pretty good mobile camera. But if you're debating among the group as part of a new purchase, you might want to look at the test results to see which phone best compliments your shooting style.


iPad for Digital Photographers

This is the kind of stuff I write about in iPad for Digital Photographers-- now available at a special pre-order price.

Want to Comment on this Post?

You can share your thoughts at the TDS Facebook page, where I'll post this story for discussion.

After uploading a fresh set of images, you probably want to start playing with them. Most photographers aren't interested (at that point anyway) in organizing, adding metadata, and other housekeeping tasks. Thanks to the tools available in Aperture's import dialog box, you can let the app do that heavy lifting during the actual transfer. Then you can enjoy the fruits of your efforts right away.

Aperture Import Pro Technique Digital Photographers Female Portrait Model

In my latest Macworld article, Import Like a Pro in Aperture, I explain how to separate Raw+Jpeg pairs so you can filter out one set or the other, add effects during import to improve the appearance of the photos, and take advantage of simple AppleScripts to automatically organize images within albums.

Then, once the import is finished, you can start enjoying your latest shoot instead of wrangling with it.

Aperture Tips and Techniques

To learn more about Aperture, check out my Aperture 3.3 Essential Training (2012) on lynda.com. Also, take a look at our Aperture 3 Learning Center. Tons of free content about how to get the most out of Aperture.

Want to Comment on this Post?

You can share your thoughts at the TDS Facebook page, where I'll post this story for discussion.

This week on The Digital Story: Photography Mashup, Episode 1, with the hosts from Improve Photography and the Digital Photo Experience.

Via Skype, I'm joining Jim and Dustin from Improve Photography and Juan from Digital Photo Experience for a photography mashup hosted by Improve Photography.

We talk about business and photography mistakes we've made, and the lessons we've learned from them.

You can also download the podcast here (70 minutes). Or better yet, subscribe to the podcast in iTunes. You can support this podcast by purchasing the TDS iPhone App for only $2.99 from the Apple App Store.

Monthly Photo Assignment

The April 2013 photo assignment is Architecture.

More Ways to Participate

Want to share photos and talk with other members in our virtual camera club? Check out our Flickr Public Group. And from those images, I choose the TDS Member Photo of the Day.

Podcast Sponsors

Red River Paper -- Keep up with the world of inkjet printing, and win free paper, by liking Red River Paper on Facebook.

Make Your Photos Sizzle with Color! -- SizzlPix is like High Definition TV for your photography. SizzlPix Spring Sale - 25% Discount! Offer good on orders placed by April 30. Again, "TDS" or "The Digital Story" in the comments space. Of course, they will honor the discount for all TDS listeners and readers, including those who've received SizzlPix samples.

Need a New Photo Bag? Check out the Lowepro Specialty Store on The Digital Story and use discount code LP20 to save 20% at check out.

Want to Comment on this Post?

You can share your thoughts at the TDS Facebook page, where I'll post this story for discussion.

focustwist iPhone

If you want to experience refocusing a picture after you've made the exposure, take a look at FocusTwist, available for $1.99 in the iTunes App Store.

Once you've made an exposure, as explained in the graphic here, you can tap on different areas of the image do determine where the focus should be set. It's an engaging way to experience Lytro-like refocusing with a device you already have.


iPad for Digital Photographers

This is the kind of stuff I write about in iPad for Digital Photographers-- now available at a special pre-order price.

Want to Comment on this Post?

You can share your thoughts at the TDS Facebook page, where I'll post this story for discussion.

Well done and entertaining! Here's an animated video showing the history of photography created for TED Education. Worth a watch!

Want to Comment on this Post?

You can share your thoughts at the TDS Facebook page, where I'll post this story for discussion.

Here's our crew hard at work on their iPads at Cafe Noto in Windsor, CA during the iPad for Digital Photographers Workshop. Great day to be out and about! TDS iPad for Photographers Workshop

Adobe made a little noise with the release of Lightroom 4.4 and its working closely with Fufifilm to provide top notch decoding of .RAF files from Fujifilm X-Pro1, X-E1, X100S, and X-20 cameras. This lead to some speculation that Apple would be left out in the cold with Raw decoding for X-Trans sensors.

Well, apparently not. Apple today released Raw Compatibility Update v4.05 with support for these very same cameras. So how do these two applications stack up for Fujifilm camera owners?

Aperture 3.4 RAF Decoding for Fujifilm X-20 Camera

Aperture Display of X-20 Raw File Screenshot of unedited .RAF file in Aperture 3.4 with RAW Update 4.05

Aperture Full Rez Export A full resolution Jpeg export from a decoded RAF file in Aperture 3.4.

Lightroom 4.4 RAF Decoding for Fujifilm X-20 Camera

Lightroom Display of X-20 File Screenshot of unedited .RAF file in Lightroom 4.4.

Lightroom Full Rez Export A full resolution Jpeg export from a decoded RAF file in Lightroom 4.4.

No image editing was enabled in either application. Files were saved out at the highest export settings. So what you see here is essentially how each application decoded the .RAF files from a Fujifilm X-20 camera. (Imagine how the Raw files from the X100S look!)

In my opinion, both applications do an excellent job of handling .RAF files. And the fact that both Apple and Adobe had the RAW updates so quickly after the release of the new X-Trans cameras (X-20 & X100S), says that both are taking these cameras seriously. Well done.

Aperture Tips and Techniques

To learn more about Aperture, check out my Aperture 3.3 Essential Training (2012) on lynda.com. Also, take a look at our Aperture 3 Learning Center. Tons of free content about how to get the most out of Aperture.

Want to Comment on this Post?

You can share your thoughts at the TDS Facebook page, where I'll post this story for discussion.

Rouge FlashBender Flag Bounce Card

The solution to dealing with strong, directional light that's determined to cause flare in your photograph may already be sitting in your camera bag. If you have a RougeFlag Bounce Cardthat you typically use for bounce flash, you can adapt it to serve as a robust lens shade too.

This particular FlashBender includes a black cloth "flag" that attaches over the white reflective surface. I tend to leave my flag attached so I don't lose it. When I'm using the RougeFlag for bounce flash, I remove the black cloth and store it in my bag.

But, if I want serious flare protection for my lens, I leave the black cloth on and attach the FlashBender to my lens using the adjustable strap. In this photo I'm using it with a Canon 24-105mm f/4 L zoom on a 5D Mark II. Unlike a traditional lens hood, the FlashBender can be positioned exactly as needed to block the sun from striking the front of your lens.

I love multi-use. This $29 bounce flash accessoryhas already paid for itself many times over. The fact that it can help me fight flare too is just a sweet bonus.

Want to Comment on this Post?

You can share your thoughts at the TDS Facebook page, where I'll post this story for discussion.

Some pictures just look better in Black and White. And even though there are plug-ins and specialized programs to help you create B&W images, you can produce great stuff using the built-in tools in Aperture and iPhoto.

In this 3-minute movie that I created for my latest lynda.com title, Using iPhoto and Aperture Together, I compare the B&W conversion techniques in both iPhoto and Aperture, and add a few tips too.

Take a look, then make your B&W masterpiece tonight!

More Aperture/iPhoto Tips and Techniques

To learn more about using Aperture and iPhoto together, visit my Using iPhoto and Aperture Together on lynda.com. Also, take a look at our Aperture 3 Learning Center. Tons of free content about how to get the most out of Aperture.

Want to Comment on this Post?

You can share your thoughts at the TDS Facebook page, where I'll post this story for discussion.

This week on The Digital Story: Lightroom 5 public beta is now available for download, Fujifilm X20 deluxe compact camera begins shipping, and the imminent release of iPad for Digital Photographers. All of this... and more!

Story #1 - Lightroom 5 public beta - Just a little over a year since the final release of Lightroom 4, Adobe has reloaded its image editing guns and fired off the first public beta of Lightroom 5. You now need Windows 7 or Mac OS X 10.7 to run Lightroom 5. Key features for testing include Smart Previews, Advanced Healing Brush, a Radial Gradient tool, and more. I take a closer look at the top three features in the first story of this week's show.

Radial Gradient tool - You can draw a circle or oval around an area in the photo, then apply effects to the area out side the selection. Typical uses would be exposure or color adjustments, but there are other sliders too.

Advanced Healing Brush - Great for cloning or healing odd shaped objects that you want to eliminate from your composition. This capacity is probably what has sent many Lightroom users to Photoshop in the past.

Smart Previews - Allows you to set up your Lightroom catalog to edit images, even when the originals are offline on another hard drive that isn't plugged in to your computer. Adobe pulls this off by using the lossy DNG format. Catalogs set up with Smart Previews can save a great deal of space, around 1/6 the size of a catalog with original RAW files connected. The edits you make in Smart Preview mode will be synced up with the originals when you reconnect the hard drive.

Story #2 - The Fujifilm X20 compact camera is now available.

Features include the 12MP 2/3" X-Trans CMOS II Sensor (RAW files can be processed in Lightroom 4.4), Fujinon 28-112mm f/2-2.8 zoom lens, amazing optical viewfinder that zooms and has a data overlay, a variety of intelligent features such as film simulation and pro focus, and looks great with its die-cast magnesium body construction and machined metal knobs. Currently sells for $599. I cover some of its pros and cons in the second segment of the show.

Story #3 - iPad for Digital Photographers will be released in just two weeks. The pre-order price is only $13.45. Not only do you get the book, but you'll gain access to a brand new, secure area on TDS called the Book Owners Lounge. I provide more details in the third story. There's a link for the book at the bottom of every TDS page.

Listen to the Podcast

You can also download the podcast here (32 minutes). Or better yet, subscribe to the podcast in iTunes. You can support this podcast by purchasing the TDS iPhone App for only $2.99 from the Apple App Store.

Monthly Photo Assignment

The April 2013 photo assignment is Architecture.

More Ways to Participate

Want to share photos and talk with other members in our virtual camera club? Check out our Flickr Public Group. And from those images, I choose the TDS Member Photo of the Day.

Podcast Sponsors

Red River Paper -- Keep up with the world of inkjet printing, and win free paper, by liking Red River Paper on Facebook.

Make Your Photos Sizzle with Color! -- SizzlPix is like High Definition TV for your photography. SizzlPix Spring Sale - 25% Discount! Offer good on orders placed by April 30. Again, "TDS" or "The Digital Story" in the comments space. Of course, they will honor the discount for all TDS listeners and readers, including those who've received SizzlPix samples.

Need a New Photo Bag? Check out the Lowepro Specialty Store on The Digital Story and use discount code LP20 to save 20% at check out.

Want to Comment on this Post?

You can share your thoughts at the TDS Facebook page, where I'll post this story for discussion.

I like to write my podcast notes when ideas come to me, regardless of which device I'm using at the moment. That's why I use iA Writer for Mac and iOS. Thanks to iCloud synchronization, I can start my notes on an iPad 3, add to them on my MacBook Pro, then read them off my iPad mini during the show recording.

iPad mini, Insanely Great Holder iPad mini displaying show notes for the TDS podcast in my recording studio.

My biggest problem with this workflow had been finding a high-quality iPad mini stand that was light enough to set on my MacBook Pro 17" during recording, and adjustable enough to get just the right viewing angle.

Fortunately, I discovered the the FrameShift Mini stand for the iPad mini and iPhone 5. Assembled by hand, using anodized aircraft grade aluminum with abrasion-resistant rubber padding and stainless steel hardware, the FrameShift Mini can be adjusted to just about any angle, then folds up for easy transport. It's just as handy in the studio as it is on a fold-out tray table while flying.

Frame Shift Mini Stand The FrameShift Mini that I use to position my iPad mini to help me in the recording studio.

Of course, it's the iPad mini that pulls this all together. In addition to all of the other things it does so well, the mini is a terrific note-taking device, and my favorite PDF reference. I keep all of my owners' and technical manuals on the iPad. It's my own personal library availabe anywhere I happen to be.

Want to Comment on this Post?

You can share your thoughts at the TDS Facebook page, where I'll post this story for discussion.

Even though it only has a 2/3" sensor (smaller than Micro Four Thirds and APS-C), the Fujifilm X20 compact camera has the ability to soften backgrounds for portraits. Take a look at this comparison.

Soft Background Portrait, Fujifilm X20, Female, Theresa Ann Story Soft background portrait with Fujifilm X20 compact camera in Pro Focus mode in the ADV settings menu. Photos by Derrick Story.

Female Portrait without Background Softening Normal portrait without Pro Focus mode enabled on Fujifilm X20.

Fujifilm engineers created a clever Pro Focus mode (in the ADV menu) that captures two frames to create a softened background without compromising the image quality of the subject. I've tested it a handful of times, each time rendering excellent results.

There are three softening options, from mild to strong. You do have to compose on the LCD in ADV mode instead of the optical viewfinder. And the final capture is a JPEG -- RAW isn't available in this mode. But the compromises are worth the final output, for sure.

For professional work, large image sensors provide the most flexibility and best quality. No doubt. But you don't necessarily want to take your 5D Mark III with 70-200mm f/2.8 zoom on a date. For those occasions, it's fun to have a compact that can deliver artistic results.

Want to Comment on this Post?

You can share your thoughts at the TDS Facebook page, where I'll post this story for discussion.


Join me on my Instagram site as I explore the world of mobile photography.

RAW files from Fujifilm's new X-Trans CMOS II sensor can be processed in Lightroom 4.4 with excellent results. Adobe and Fujifilm have been working together to enable Lightroom to get the most out of the X Series cameras.

Fujifilm X20 Camera Processed Lightroom 4 Halftime show photographed with a Fujifilm X20 and RAW file processed in Lightroom 4.4. Click on image for a closer look.

Last night, I packed a Fujifilm X20 for the Warriors game at Oracle Arena and recorded in RAW. This image was captured at ISO 800, 1/420th at f/2.8 in Aperture Priority mode.

I then processed the photo in Lightroom 4.4, adjusting both color and exposure (but not much!). The .RAF file responded well to all of the adjustment sliders in Lightroom 4.4.

If you're shooting with one of these new X-Trans CMOS sensors, Lightroom can definitely help you get the most out of these files. I did notice, however, the fans coming on for my MacBook Pro 15" Retina Display laptop while working on the X20 library. Must be some heavy lifting going on under the hood.

Want to Comment on this Post?

You can share your thoughts at the TDS Facebook page, where I'll post this story for discussion.


Join me on my Instagram site as I explore the world of mobile photography.

Close Up Photography at Twilight

We tend to think of sunsets and big landscapes at twilight, but it's also my favorite time to shoot close-ups. Subjects that are unremarkable in midday light take on a surreal glow at day's edge.

Lichen on Rock Pextax K-5 Derrick Story Lichen on Rock by Derrick Story. Click on image for larger version.

This image of lichen on rock was captured at 7:40 pm with a Pentax K-5 at ISO 800 using a Pentax 18-55mm zoom set to f/4.5.

The next time you're out photographing a sunset, maybe look down at your feet too. There might be another world there waiting to be captured.

Want to Comment on this Post?

You can share your thoughts at the TDS Facebook page, where I'll post this story for discussion.


Join me on my Instagram site as I explore the world of mobile photography.

Panoramas are a great way to document an area that you're visiting. But it's interesting how different the same place can look, depending on how you make the image. I have have two panoramas here, one captured with a Canon S90 and stitched together in Photoshop CS6. And the other recorded with an iPhone 4S in panorama mode.

Canon S90 Panorama

Marin County Panorama Canon S90 Photoshop CS6

With the S90, I was able to zoom in a bit to better show the body of water below. I captured 3 frames and used Photomerge in Photoshop to assemble the final image. Click on image for larger version.

iPhone 4S Panorama

Marin County Panorama iPhone

The iPhone version is much wider and has less magnification. They almost look like two different locations.

So a panorama is not just a panorama. Like all types of photography, the decisions you make at capture have a tremendous impact on the final outcome.

Want to Comment on this Post?

You can share your thoughts at the TDS Facebook page, where I'll post this story for discussion.

Leica 25mm on OM-D

The amazing Olympus OM-D can do just about anything. Figuring out how to program it is another matter all together.

Fortunately, seasoned Micro Four Thirds veteran, Rohith Thumati, has written an excellent "set-up" guide to help you get started. In his post, Setting Up an Olympus OM-D E-M5, he takes you inside the menu system and explains how to activate the Super Control Panel, take control of autofocus, program the buttons, configure the Electronic Viewfinder, and a whole lot more. OM-D owners are going to want to bookmark his post.

A Few Additional Tips

In the year that I've been loving the OM-D, I have a few additional thoughts to share with prospective owners.

Protect the LCD - The touch LCD on the back of the OM-D is beautiful. I recommend that when you first get the camera, buy a quality protector for the LCD. That way you won't have to worry about surface scratches during use. I've used a crystal clear overlay without any problems at all.

Invest in the Power Grip - It's hard to pony up the additional $299 for the Power Battery Holder HLD-6, but it makes such a big difference in performance (two batteries now instead of one) and comfort. When traveling light, you can leave the grip at home. But the rest of the time I leave the grip on and love it. Also, there's an option to tell the OM-D to use the battery in the grip first. That makes changing batteries much easier.

Explore Lens Adapters - It's easy and fun to manual focus via the EVF, and I've had a blast repurposing my Zeiss prime lenses from the old Contax SLR. There are a ton of adapters available. I'm sure there's one that will allow you to repurpose some quality glass that you have stashed in the closet.


Take a look at the Olympus Micro Four Thirds Gear Guide for an overview of cameras, lenses, and accessories.

Want to Comment on this Post?

You can share your thoughts at the TDS Facebook page, where I'll post this story for discussion.

This week on The Digital Story: Are off-brands worth the risk? Backpacking is different for photographers. DIY Home Portrait Studio, Part 2. All of this... and more!

Story #1 - Are off-brands worth the risk? As I'm getting ready for an important assignment, it dawned on me that I'm packing a Pentax K-5 instead of a Canon or Nikon DSLR. Next week I'll be testing a Fujifilm X20. I regularly use Olympus and Panasonic cameras and lenses.

When I say "off-brand," I'm not referring to knock-offs, which should definitely be avoided. I'm talking about investing in brands other than the traditional photography titans: Canon and Nikon.

Is it wise to invest your assets in a Sony system, Pentax, Samsung, Olympus, Panasonic? Will you regret your decision later?

Story #2 - Backpacking photographer - I'm testing a new outdoor pack from Lowepro that's designed for overnight trips. It's my belief that backpacking photographers need to carry even less camping gear than other hikers because we have photography equipment too. In this segment, I share 5 tips for lightening your load on overnight excursions into the backcountry.

Story #3 - DIY Home Portrait Studio, Part 2.This week I'm focusing on lighting. For continuous lights, I recommend the Lowel Ego Digital Imaging Fluorescent 2 Light Kit (108 watts) for $215. Then add 3 light stands, such as the Manfrotto 1004BAC-3 QSS Air Cushioned Light Stand 3-Pack for $260. You'll need 3 Manfrotto 026 Swivel Umbrella Adapters ($28 each) to go with those light stands. With these basic tools that don't take up much room, you can use your electronic flashes with umbrellas, or the Lowel Ego lights, for your portrait and product work.

Listen to the Podcast

You can also download the podcast here (32 minutes). Or better yet, subscribe to the podcast in iTunes. You can support this podcast by purchasing the TDS iPhone App for only $2.99 from the Apple App Store.

Monthly Photo Assignment

The April 2013 photo assignment is Architecture.

More Ways to Participate

Want to share photos and talk with other members in our virtual camera club? Check out our Flickr Public Group. And from those images, I choose the TDS Member Photo of the Day.

Podcast Sponsors

Red River Paper -- Keep up with the world of inkjet printing, and win free paper, by liking Red River Paper on Facebook.

Make Your Photos Sizzle with Color! -- SizzlPix is like High Definition TV for your photography. SizzlPix Spring Sale - 25% Discount! Offer good on orders placed by April 30. Again, "TDS" or "The Digital Story" in the comments space. Of course, they will honor the discount for all TDS listeners and readers, including those who've received SizzlPix samples.

Need a New Photo Bag? Check out the Lowepro Specialty Store on The Digital Story and use discount code LP20 to save 20% at check out.

Want to Comment on this Post?

You can share your thoughts at the TDS Facebook page, where I'll post this story for discussion.

Our eyes have this wonderful ability to render sky and foreground at the same time. Our cameras need a little help. If you like sunrise and sunset photos, and are tired of having the foreground go to black, here are three options that should improve your composition.

Bridgeport at Twilight Bridgeport at Twilight by Derrick Story

The Graduated Filter

The Bridgeport at Twilight image was captured using a Cokin Grad Density filter. Yes, it's the old fashioned way to balance sky and foreground. But it has the advantage of getting the image right in-camera, saving you computer time once you return home.

You can get set up fairly affordably with kits such as the Cokin H250 P-Series ND Grad Kitfor $82 that includes the holder that mounts on the front of your lens and the filters that go in it. Just slide the graduated filter up and down until you get the effect you want, then take the picture.

Pentax K-5 Pentax K-5 with Cokin Graduated Filter. Photo by Derrick Story. Click on image for larger size.

Merge Two Exposures in Photoshop

Another approach is to mount your camera on a tripod and take two pictures: one exposed for the sky, and the second exposed for the foreground. Then you can merge the best areas of the two exposures in Photoshop.

Photographer Steve Berardi has posted a helpful tutorial explaining this technique on his site. Take a look at How To Merge Two Exposures. You'll need to have some familiarity with Photoshop to apply these steps. But if you do, the process is straightforward.

I think it's a good idea to shoot a bracketed series of important landscape shots anyway, regardless of the technique you're planning on using. Those bracketed exposures can come in handy once your return home. Who knows, you might want to try an HDR composite...

High Dynamic Range (HDR)

While your camera is still on the tripod, take 3 or 5 bracketed exposures. You can set this up in the menu of your camera. I usually make the exposures 1 f/stop apart. Something like -1, 0, +1 or -2, -1, 0, +1, +2. But you may find that 2/3 of a stop works better. It depends on your gear and aesthetics, and it's worth playing with.

Once you have your sequence, then you can create an HDR merge in Photoshop or a specialized HDR application. Photographer Colin Smith has published a helpful tutorial titled What is HDR and why do we need it?. It will help you get started with this technique.

Bottom Line

Sunrise and sunset pictures are favorites, for sure. And you can take your twilight shots to the next level by trying one of these techniques. A little bit of foreground can make the sky all that much better.

Want to Comment on this Post?

You can share your thoughts at the TDS Facebook page, where I'll post this story for discussion.


Join me on my Instagram site as I explore the world of mobile photography.

You can control which application opens when you double-click a shared Aperture/iPhoto library. (All current Aperture and iPhoto libraries are "shared" by default.) This is a handy trick because many photographers open libraries from the Finder instead of from within the application. Here's how to control whether iPhoto or Aperture opens when you double-click on the shared library icon.

Specifying which application opens the library by default

More Aperture/iPhoto Tips and Techniques

To learn more about using Aperture and iPhoto together, visit my Using iPhoto and Aperture Together on lynda.com. Also, take a look at our Aperture 3 Learning Center. Tons of free content about how to get the most out of Aperture.

Want to Comment on this Post?

You can share your thoughts at the TDS Facebook page, where I'll post this story for discussion.

LED Flashlight DIY Lightwand Ice Light

On a tip from our friends at Imaging Resource, we learned about Simon Ellingworth's DIY Ice Light project.

In about 20 minutes, you can build your own light wand that's handy for portraiture and general photo projects. Simon uses a compact, but powerful LED flashlight and a length of white PVC pipe as the basic components for his homemade Ice Light.

It's a clever, easy to assemble project that could prove to be very useful in the home studio. Take a look.

Want to Comment on this Post?

You can share your thoughts at the TDS Facebook page, where I'll post this story for discussion.

We'll be covering the Sonoma County Hot Air Balloon Classic as our project for the Movie Making for Photographers workshop on June 15 and 16, 2013.

Final Cut Pro X Balloon Festival

Joined by two professional filmmakers, Louis Ekrem of Laughing Cat Films and Eric Michael Perez of Clicker Video, you will learn how to tap the movie making functionality of your DSLR. This workshop is for photographers who want to learn how to use their existing gear to create short, impactful video for publishing.

The focus of our class project will be the beautiful Sonoma County Hot Air Balloon Classic. We'll be on site capturing footage, then learning how to maximize its impact using Final Cut X and iMovie applications.

Class size will be limited to six participants. Tuition is $495, that includes two full workshop days, breakfasts and lunches, comfortable working environment, and swag. Registration is open now. Use the "Send Me Info" form located on the TDS Workshops page. I will get you complete details about the event, including the registration form.

This is going to be an immersive, exciting weekend where you can focus solely on your photography.

About the Instructors

Louis Ekrem is the founder of Laughing Cat Films, based in Santa Rosa, California. His full service video production company provides high quality media services for business professionals, non-profit organizations, corporations, professional athletes and performing artists. Some of Northern California's finest businesses have put their faith in LCF to bring their timely and important messages to the world. Past LCF clients include: Bar Association of San Francisco, Center For Innovation and Resources, Creator's Art Productions, Ultramarathon Runner Dean Karnazes, FuzeMeeting.com, Kaiser Permanente, Leukemia & Lymphoma Society and Sonoma County Thunder to name a few.

Eric Michael Perez has been filming and creating still photos starting in the early 1970's when him and his friend would create skateboarding films shot on his dads 8mm movie camera. He was an early adopter using water housings to film water sports in the 1990's as both a top competitor and shooter of wake boarding, both for ESPN and his own productions. More recently Eric has been creating marketing pieces for wineries and small product manufacturers. Eric has been using DSLR cameras for his video productions since 2008. He currently uses a Canon 7D and a Lumix GH17

Derrick Story is a professional photographer, writer, teacher, and photography evangelist for Lowepro. He's authored several digital media books, including The Digital Photography Companion (O'Reilly Media) and iPad for Digital Photographers (Wiley & Sons). Derrick is a Senior Contributor for Macworld magazine where he writes a digital photography column, and he's a regular presenter on the popular training site, lynda.com featuring video titles on Aperture, iPhoto, Flickr, and photo technique.

Want to Comment on this Post?

You can share your thoughts at the TDS Facebook page, where I'll post this story for discussion.

This week on The Digital Story: DIY home portrait studio, model releases, lens hood as an LCD shade, all of this... and more!

Story #1 - DIY Home Portrait Studio. We'll cover this over the course of a few installments. Today, I'm going to to discuss the space itself. Most enthusiast photographers don't have the luxury of setting up a dedicated room for a portrait studio. There might be multi-use space available. So quick set up and breakdown become important.

Attributes to look for include: natural lighting, at least 10' x 12' floor space, minimum 8' ceilings (higher is better), temperature control, closet space to store equipment when not in use, and nearby bathroom to serve as changing room.

Story #2 - Model Releases. For every set-up portrait you arrange, you want to secure a model release. This document includes text granting permission by the subject for you to use the photo in a variety of ways. I get model releases for hired subjects, friends, and even family.

Story #3 - Lens Hood as LCD Shade Trick - Reviewing your photos on the camera's LCD screen in bright sunlight can be very discouraging. You can help minimize glare by placing a lens hood over the LCD and looking through that.

Listen to the Podcast

You can also download the podcast here (29 minutes). Or better yet, subscribe to the podcast in iTunes. You can support this podcast by purchasing the TDS iPhone App for only $2.99 from the Apple App Store.

Monthly Photo Assignment

The April 2013 photo assignment is Architecture.

More Ways to Participate

Want to share photos and talk with other members in our virtual camera club? Check out our Flickr Public Group. And from those images, I choose the TDS Member Photo of the Day.

Podcast Sponsors

Red River Paper -- Keep up with the world of inkjet printing, and win free paper, by liking Red River Paper on Facebook.

Make Your Photos Sizzle with Color! -- SizzlPix is like High Definition TV for your photography. Take the SizzlPix Challenge - See how your photo will Sizzl by getting a free 5x7 section of an uploaded image. Just put TDS or The Digital Story in the comments to get your free SizzlPix section.

Need a New Photo Bag? Check out the Lowepro Specialty Store on The Digital Story and use discount code LP20 to save 20% at check out.

Want to Comment on this Post?

You can share your thoughts at the TDS Facebook page, where I'll post this story for discussion.

It's tough to view photos on camera LCD screens in bright outdoor conditions. You can help improve this situation by using an accessory that you probably already have in your camera bag: a lens hood.

Lens Hood LCD Shade Olympus OM-D Digital Camera photography

I carry a couple collapsable rubber lens hoods because their depth when mounted on the front of the lens helps prevent flare in contrasty conditions. They occupy about the same amount of space as a filter, yet can serve double duty. When not on the front of the lens, hoods are helpful on the back of the camera, improving the contrast of the LCD screen.

Another favorite of mine is the deep plastic lens hood that came with my Leica 25mm f/1.4 prime lens that I use on the OM-D. Its rectangular shape is a nice match for the LCD screen on the back of the camera.

I bet if you dig around a bit, you can find a double-duty lens hood that could justify its space in your camera bag. In bright sun, every little bit helps.

Want to Comment on this Post?

You can share your thoughts at the TDS Facebook page, where I'll post this story for discussion.


Join me on my Instagram site as I explore the world of mobile photography.