November 2015 Archives

This is The Digital Story Podcast #508, Dec. 1, 2015. Today's theme is "Top 5 Nimble Cameras of 2015." I'm Derrick Story.

Opening Monologue

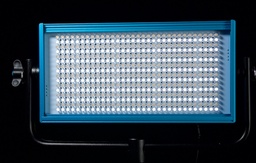
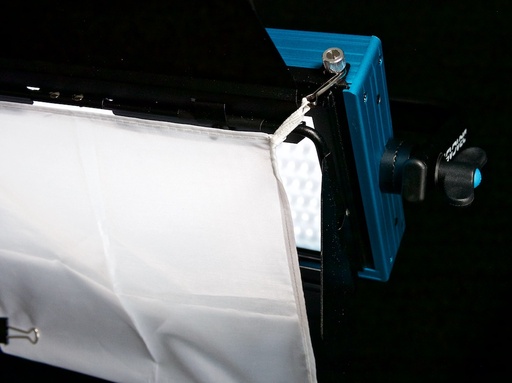
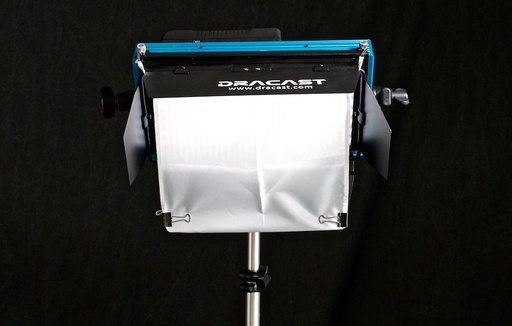
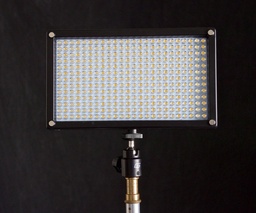
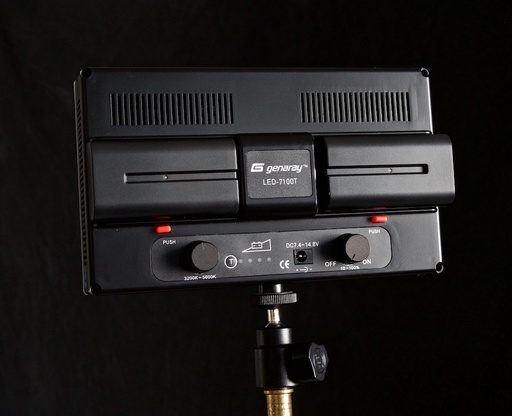
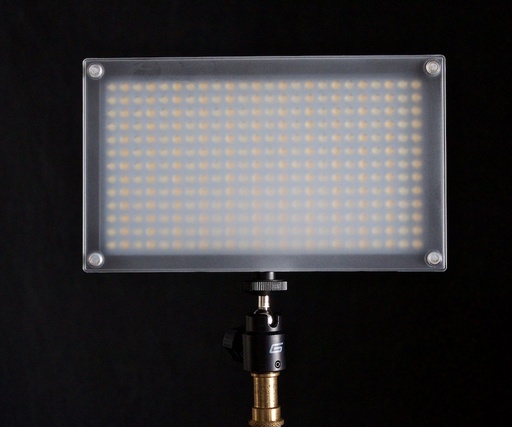
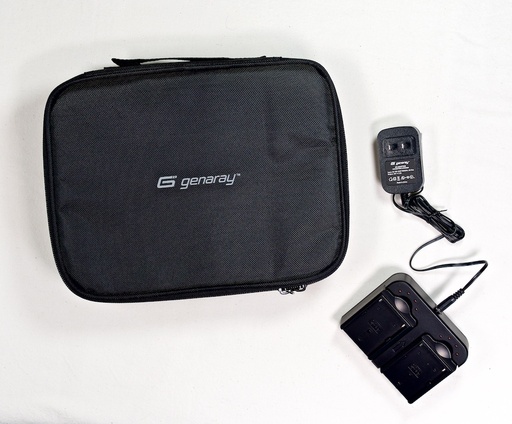
What a great year in photography it's been. I think aside from some terrific new cameras, which I'm going to talk about in the next segment, I've been most excited by LED lighting for my studio and on location.

I'm particularly impressed by the bicolor lights that allow me to precisely adjust color output from 3200K to 5600K. This solves a huge problem on location in particular, where office lighting often pollutes the background. Now I just match the ambient color temperature with my LEDs, then correct the entire image in post. It's wonderful!

Top 5 Nimble Cameras of 2015

Wow! Some great cameras were released this year. Here are my five favorite nimble models.

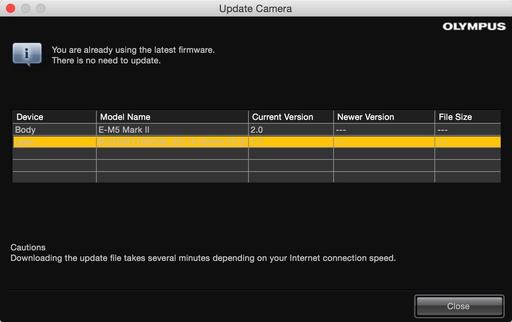
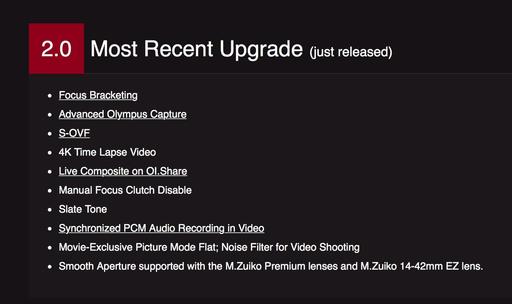
Olympus OM-D E-M5 Mark II - A superbly crafted, technology-packed Micro Four Thirds body that is a pleasure to shoot with. When I have to get the shot, and get it right, I reach for the E-M5 Mark II.

fujifilm-x-t10-front.jpg

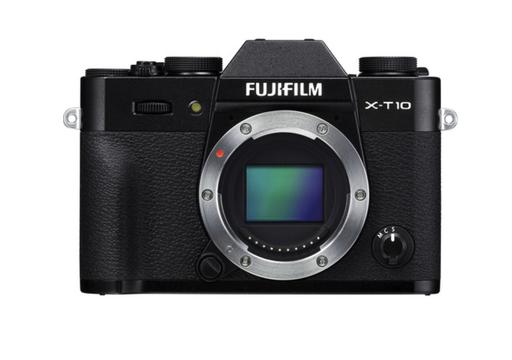
Fujifilm X-T10 - Revolving around the 16.3 MP APS-C-sized X-Trans CMOS II sensor and EXR Processor II, the X-T10 is capable of up to 8 fps continuous shooting and full HD 1080p/60 video recording, and features an expandable sensitivity range from ISO 100-51200. You get most of the benefits of its larger brother, the X-T1, but in a smaller package and at an affordable price.

Sony Cyber-shot DSC-RX100 IV - World's first1 20.1 MP 1" Exmor RS stacked back illuminated CMOS, High resolution 4K movie recording with direct pixel readout and no pixel binning, Super slow-motion movie3 HFR (High frame rate) up to 960 fps (40x), and if that wasn't enough, a bright F1.8- F2.8 ZEISS Vario-Sonar T* lens (24-70mm) and electronic viewfinder in this palm-sized beauty.

Canon PowerShot G5 X - Features a 1.0-inch, 20.2 Megapixel* High-Sensitivity CMOS sensor combined with Canon's powerful DIGIC 6 Image Processor creates the Canon HS SYSTEM for outstanding low-light performance up to ISO 12800. Plus EVF and fast f/1.8-2.8 zoom lens. It looks great, and Canon nailed it with this compact.

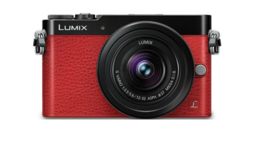
Panasonic LUMIX DMC-GX8 - Unique, in-body stabilization in combination with select optically stabilized lenses work together for class-leading Dual Image Stabilization results, 4K video recording, and a breakthrough 20MP Micro Four Thirds sensor.

In the News

Phase One Capture One Pro 9 brings updates to image editing algorithms - DPReview

"Phase One has launched Capture One Pro 9, the latest iteration of its tethering and image editing software. Capture One Pro 9 offers a 'completely updated contrast engine,' additional brushes, color editor masks and new keyword tools, among other features. Phase One also now offers three activations of the software for each standard license a photographer purchases. Also on the list of updates is the ability to apply curves locally, the addition of a Luma option to the curve tool palette and a battery status icon for the tool bar to view tethered camera battery life."

"Capture One Pro 9 is available now for Mac and Windows for $299 / €279 to new customers. Capture One Pro 7 and 8 customers can upgrade for $99 / €99. Anyone who purchased Capture One Pro 8 after October 30, 2015 will be exempt from the upgrade fee."

Clean Out the Cruft

I've been testing CleanMyMac 3, and I have to tell you, I love this app. Using the Smart Clean feature, I removed 20GBs of cruft from my MacBook Pro. Here's an overview of how it works:

  • One-click Smart cleanup to do all the cleaning automatically.
  • An Uninstaller to remove apps completely, leaving no parts behind
  • Large & Old Files finder to dig out heavy files you've forgotten about
  • A set of Maintenance tools to make your system work smooth again
  • Cleans Faces Cache (Photos for OS X)
  • Cleans local Photos app Cache (Photos for OS X)
  • Cleans iCloud local copies (with user's permission)
  • Replaces RAWs with JPEGs (with user's permission)
  • CleanMyMac also continues to support iPhoto library cleaning.

And for one week, TDS listeners can save 30% (URL is: http://macpaw.com/tds) and get this essential app for $27.97 (instead of the normal $39.95). Start out the New Year with a clean, lean Mac, and leave the cruft behind.

Street Photography Book Winners

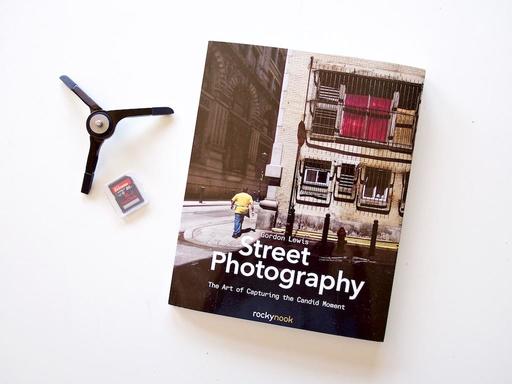
Congratulations to Evelyn Rude and Dennis Moon for being randomly selected to receive Street Photography by Gordon Lewis. They were selected from the subscriber list of The Nimbleosity Report, a twice a month newsletter with inside scoops and discounted deals. (Next Edition comes out Wed., Dec. 2nd.)

This week's giveaway is two copies of How Do I Do That in Lightroom by Scott Kelby. Everyone on the subscriber list for The Nimbleosity Report is eligible. If you haven't signed up, the link is in the show notes. The next drawing is Monday, Dec. 7, 2015.

Member Quote of the Week

Intelligent comments culled from The Digital Story Facebook page.

In regard to last week's podcast question: Cameras at the Dinner Table - Terry Doner writes: "Cameras at the dinner table. OK. Run by your people first. I have decades of photos from the dinner table. It is a nice piece of family history." And Fred counters: "I'm against cameras at dinner. You'll be concentrating on getting a good shot instead of participating with your family. The other people will be self-conscious because they'll never know when you're going to take a picture. Wait until everyone is relaxing and the camera won't be intrusive (especially if you use a flash)."

Post your thoughts on our Facebook page. Believe me, I read them.

Palo Duro SoftGloss Rag Sheets Available

Red River Paper reports: Made from 100% cotton rag and featuring a lightly textured soft gloss surface, Palo Duro SoftGloss Rag surpasses the saturation, tonal range, and depth of classic darkroom printing. Reminder: This paper is very heavy and thick. Do not use if your printer only feeds paper from the front!

Found in the Bottom of the Bag

Wood Prints from inkdot.com - They are 5/8" thick and printed on Baltic Birch. They are archival, moisture, and UV resistant. They take two days for printing, then of course ship time. Sizes range from 6" x 6" to 24" x 36". And they make a crazy attractive gift.

Registration is open for The 2016 Street Photography Workshop in San Francisco. And I've posted the full preliminary itinerary on the Workshops page.

And if you plan on ordering through B&H Photo or Amazon, please stop by the TDS site first, click on their respective ad tile, then place your order. That extra step helps support the site.

See you next week!

More Ways to Participate

Want to share photos and talk with other members in our virtual camera club? Check out our Flickr Public Group. And from those images, I choose the TDS Member Photo of the Day.

Podcast Sponsors

lynda.com - Learn lighting, portraiture, Photoshop skills, and more from expert-taught videos at lynda.com/thedigitalstory.

Red River Paper -- Keep up with the world of inkjet printing, and win free paper, by liking Red River Paper on Facebook.

inkdot Innovative printing output and accessories for the creative photographer. Visit www.inkdot.com today.

MacPaw Creators of CleanMyMac 3 and other great software for Apple computers. Visit www.macpaw.com today.

The Nimbleosity Report

Do you want to keep up with the best content from The Digital Story and The Nimble Photographer? Sign up for The Nimbleosity Report, and receive highlights twice-a-month in a single page newsletter. Be a part of our community!

Want to Comment on this Post?

You can share your thoughts at the TDS Facebook page, where I'll post this story for discussion.

I do a lot of product shots, close ups, and "need to shoot it quick" photography at my studio. The Koolertron Folding Pan & Tilt head ($49) has proven to be a terrific accessory.

pan-and-tilt.jpg

This "Z-folding" aluminum alloy stand can be used independently or mounted on a tripod. I tend to use it by itself. I've added a Manfrotto 323 RC2 Quick Release Adapter ($29) to make it easier to attach and remove my Olympus OM-D E-M5 camera.

What's interesting, however, is that I rarely remove the Koolertron from the camera. When I'm handholding the E-M5, I simply fold up the stand and use it as a bottom grip. When I need a quick product shot or long exposure, I fold out the stand, position the camera, and take the shot. It's amazingly handy.

The device comes with an hex wrench for quick adjusting of the tension joints. I've done so once, when I first unpacked the device, and that's been it. Mount the camera so the lens is facing the back of the "Z" shape (or facing the "K" in Koolertron). If the lens is pointed upward, lower the "Z" for proper balance. When shooting downward, as with macro shots, expand the "Z" upward. You'll get the knack of the device quickly, and it's remarkably stable in use.

Because of its weight (1 lb), I don't recommend the Koolertron for field work. I think it's a bit heavy for a portable device, although fine if you're carrying a large tripod. But for around the house or studio, it's a terrific and clever aid for stabilizing your camera.

The Nimbleosity Report

Do you want to keep up with the best content from The Digital Story and The Nimble Photographer? Sign up for The Nimbleosity Report, and receive highlights twice-a-month in a single page newsletter. Be a part of our community!

Want to Comment on this Post?

You can share your thoughts at the TDS Facebook page, where I'll post this story for discussion.

The day after Thanksgiving seemed like a good opportunity for updating the firmware on my OM-D E-M5 Mark II. And as it turned out, I did need more time than I expected. But like they say on the Upgrade page: you're downloading a whole new camera.

omd-firmware-update.jpg

The first step is to launch the OLYMPUS Digital Camera Updater app that came with your camera (Mac or PC). You can also download it from the Olympus site. Connect the OM-D via its USB cable, and let the application walk you through the steps. Be sure to pay close attention to the prompts, and do not turn off your camera until you see the OK message on the LCD.

There are a few lenses that you might want to update at the same time. The Updater app reads the firmware for both camera and attached optic. In my case, I also needed to update the 60mm f/2.8 macro, 40-150mm f/2.8 PRO zoom, 12-40mm f/2.8 PRO zoom, and the 14-42mm EX pancake zoom. Each of these take a few minutes to update, so make yourself comfortable as you perform the operation on each one.

Once body and optics are up to speed, you'll need to reconfigure your menu settings. I reprogrammed my function buttons, added my copyright information, turned off Quick Sleep Mode (Hate that one! Gear Menu K > Quick Sleep Mode), and made sure my Jpegs were recording in SuperFine, not fine. This process takes another 15-30 minutes.

firmware2-details.jpg

But now you get to enjoy the fruits of your efforts. As you can see by the above list, there are plenty of new goodies to play with. I reprogrammed Fn1 to enable the Simulated Optical Viewfinder (S-OVF), so I can now toggle between that view and the standard EVF rendering.

I'm also able to use Focus Bracketing (Shooting Menu 2 > Bracketing > Focus BKT ) to automatically record a series of images at different focusing points that can be composited into one sharp image in post production. I recommend the Olympus 60mm f/2.8 for this task.

4K Time Lapse Video output is also available. You can find that setting in Shooting Menu 1 > time lapse (bottom of the menu)> Time Lapse Settings > Movie Settings. This allows you to save your time lapse masterpieces in full 4K glory.

And finally, for those of you who have been befuddled by accidentally sliding your PRO lens into manual focus, you can now prevent that from happening by turning on Manual Focus Clutch Disable via Gear Menu A > MF Clutch > Inoperative.

These are my favorite improvements, but as you can see from the list, I still have more to experiment with. It does feel like a whole new camera...

The Nimbleosity Report

Do you want to keep up with the best content from The Digital Story and The Nimble Photographer? Sign up for The Nimbleosity Report, and receive highlights twice-a-month in a single page newsletter. Be a part of our community!

Want to Comment on this Post?

You can share your thoughts at the TDS Facebook page, where I'll post this story for discussion.

The annual Nimble Store Sale starts now and runs through CyberMonday, Nov. 30th. Some of our most popular items are deeply discounted. Plus, there's free shipping for everything using discount code: FreeShip2015.

nimble-store-items.png Just a few of the items on sale in The Nimble Store.

The discount code is only valid through Nov. 30th, 2015, as are the sale prices. Some of the goodies that you might want to browse include the Nimble Fingerless Gloves ($8.99), the Walking Man Flask Set ($24.95), and the Walking Man Cap ($19.95).

Quantities limited on all of these items. When they're gone, they're gone. There are no rain checks for sold out items. We ship to U.S. addresses only.

It's turkey and Black Friday and Cyber Monday all rolled up into one event. Take a look for yourself. And Happy Holidays!

The Nimbleosity Report

Do you want to keep up with the best content from The Digital Story and The Nimble Photographer? Sign up for The Nimbleosity Report, and receive highlights twice-a-month in a single page newsletter. Be a part of our community!

Want to Comment on this Post?

You can share your thoughts at the TDS Facebook page, where I'll post this story for discussion.

This is The Digital Story Podcast #507, Nov. 24, 2015. Today's theme is "When Manual is Actually Easier." I'm Derrick Story.

Opening Monologue

During the holidays, should you bring your camera to the table? This is a discussion we had the other night, at of all places, the dinner table.

My initial feeling is, that if you demonstrate some common sense and respect for others, then it's OK to bring your smartphone or digital camera to the dinner table during the holidays. Other folks believe that we should stay in the moment and leave our digital devices elsewhere.

I can see both sides to the story. How do you feel about it? Post your comment on the TheDigitalStory Facebook page, and I'll read one from each side next week.

When Manual is Actually Easier

Open with the anecdote with a booth visitor in Texas.

My default settings, before I turn off the camera are Program Exposure Mode, Auto ISO, and Auto White Balance. I do that because if a great photo op presents itself, I want to be able to capture the image quickly, and have a reasonable file to work with.

But I do switch to Manual Exposure and Manual Flash regularly. Not because that's how real photographers shoot, but because it's actually easier sometimes.

My favorite scenario for this approach is for portraits when I want to balance ambient lighting with the flash. Here's how I do it. First I use Manual Exposure for the ambient lighting. I make sure the shutter speed stays below flash sync. Then I manually adjust the flash output for the subject. Now I can enjoy wildly consistent exposures knowing that a false TTL reading won't fool the camera. More on this during today's feature story.

The Screening Room

This week's Screening Room selection is Using Wacom Tablets with Photoshop with Kevin Stohlmeyer. In this course, Adobe Certified Instructor Kevin Stohlmeyer shows how to optimize your Wacom tablet for use with Photoshop. He reviews each component of the tablet and Grip Pen and shows how to adjust preferences and customize your tablet to work best with Photoshop. Plus, he helps you experiment with Photoshop's default brushes, natural tips brushes, erodible brushes, and Mixer Brush.

In the News

Alien Skin Exposure X 'nondestructive' photo editor to launch by year's end - DPReview - "Exposure X won't use a catalog file in an effort to keep things simple and fast. For this reason, the application doesn't require photos to be imported, instead it uses any folder the user selects to access photos and save image edits. In a new post published today, the company detailed how new brushing and layers features will work. The software will be available as a standalone application or as a plug-in. Additionally, Exposure X supports file management, including renaming and moving images, and offers organization tools like star ratings, flags, and colors." No price yet.

IMG_0382.jpg

Wood Prints

When Leah was at work the other day, and I was at home, I got this text from her: "O my gosh, is hat really a photo somehow miraculously pressed onto wood? It's gorgeous!" I replied, "Yes, indeed. It's a Wood Print by inkdot. And I think it's really cool too.

They are 5/8" thick and printed on Baltic Birch. They are archival, moisture, and UV resistant. They take two days for printing, then of course ship time. Sizes range from 6" x 6" to 24" x 36". The 12"x12" print I have of mother and daughter zebras runs $58.

Inkdot makes a variety of cool stuff, and you'll be hearing more about that on future shows. But for the holidays, you definitely should consider the wood prints. Learn more at www.inkdot.com.

Essence of Photography Book Winners

Congratulations to Linda Sullivan and Harold Mancusi-Ungaro for being randomly selected to receive The Essence of Photography by Bruce Barnbaum. They were selected from the subscriber list of The Nimbleosity Report, a twice a month newsletter with inside scoops and discounted deals. Adorama is coming onboard and will be offering a special item at a super discount for each edition.

street-photography-book.jpg

This week's giveaway is two copies of Street Photography - The Art of Capturing the Candid Moment by Gordon Lewis. Everyone on the subscriber kist for The Nimbleosity Report is eligible. If you haven't signed up, the link is in the show notes. The next drawing is Monday, Nov. 30.

Member Quote of the Week

Intelligent comments culled from The Digital Story Facebook page.

In regard to last week's podcast, Top 10 Gifts for Photographers, Fred Brundick comments about The Tile: "The Tile wouldn't help me because I'm always misplacing my iPhone ;-) I've used Find My iPhone a few times when I couldn't find my phone in my condo."

Post your thoughts on our Facebook page. Believe me, I read them.

Eight Printing Tips for Greeting Cards

Here are Eight Card Printing Tips complements of Red River Paper. The first one is "Create a Custom Paper Size in your Printer Properties" and they show you how. Then go on from there. Check out all eight and make some wonderful gifts this holiday season.

Found in the Bottom of the Bag

Registration is open for The 2016 Street Photography Workshop in San Francisco. And I've posted the full preliminary itinerary on the Workshops page. And if you plan on ordering through B&H Photo or Amazon, please stop by the TDS site first, click on their respective ad tile, then place your order. That extra step helps support the site.

See you next week!

More Ways to Participate

Want to share photos and talk with other members in our virtual camera club? Check out our Flickr Public Group. And from those images, I choose the TDS Member Photo of the Day.

Podcast Sponsors

lynda.com - Learn lighting, portraiture, Photoshop skills, and more from expert-taught videos at lynda.com/thedigitalstory.

Red River Paper -- Keep up with the world of inkjet printing, and win free paper, by liking Red River Paper on Facebook.

inkdot Innovative printing output and accessories for the creative photographer. Visit www.inkdot.com today.

The Nimbleosity Report

Do you want to keep up with the best content from The Digital Story and The Nimble Photographer? Sign up for The Nimbleosity Report, and receive highlights twice-a-month in a single page newsletter. Be a part of our community!

Want to Comment on this Post?

You can share your thoughts at the TDS Facebook page, where I'll post this story for discussion.

PB212930.jpg

Sometimes your lighting has to move as quickly as your subjects. My FlashPole rig is a variation on a setup I saw a wedding photographer use on location in San Francisco. It requires an assistant, and the results are terrific.

My kit includes the Manfrotto Compact Xtreme 2-in-1 Monopod & Pole, flash mounted on a bracket, wireless trigger, and a 27" photo umbrella. The lighting is attached on the "selfie end" of the Manfrotto pole (or the ground end of the monopod) so your assistant has a solid grip for holding the rig.

PB212927.jpg

The pole can be extended for when the lighting needs to be at a high angle, and collapsed for low angle positioning. Thanks to the excellent design of the Manfrotto Xtreme, the rig is very balanced and easy to hold for long periods of time. When the shoot is finished, the entire kit collapses into a highly totable bundle.

PB212932.jpg

As for the results, it's studio lighting in an outdoor setting. Standard light stands are too cumbersome for these types of assignments, plus any puff of wind will blow them over. And young subjects just don't have the patience for you to fiddle with your gear.

PB212876.jpg Family portrait captured with the FlashPole rig. OM-D E-M5 Mark II with Panasonic 12-35mm f/2.8 zoom. All Photos by Derrick Story.

I prefer to set my lighting manually and use manual exposure on the camera. That way I can lock-in the mix of ambient lighting with just the right amount of output from the flash, and not worry about random TTL readings that might provide inconsistent results. Plus this approach allows me to use inexpensive strobes and triggers.

The FlashPole rig works well for event coverage, weddings, and outdoor portraits. It's inexpensive, and very easy to use. I also use the Manfrotto Xtreme for high angle photography. Check out the article, Aerial Photography Without a Drone.


Nimble Photographer Logo

The FlashPole has a high Nimbleosity Rating. What does that mean? You can learn about Nimbleosity and more by visiting TheNimblePhotographer.com.

Want to Comment on this Post?

You can share your thoughts at the TDS Facebook page, where I'll post this story for discussion.

panasonic-gm5.png

I've been waiting for this price drop for some time. The highly rated Panasonic Lumix DMC-GM5 with 12-32mm lens is now half price at $469. That's a deal.

Consider that the 12-32mm image stabilized zoom runs $299 by itself. I've wanted that lens because it's wider (12mm) than my Olympus 14-42mm pancake zoom (that I also love!). Subtract the zoom from the kit, and essentially you're getting the camera for $170. The same Micro Four Thirds compact that earned a Silver Award from DP Review and includes a built-in electronic viewfinder.

The kit is available in both red and black. Either way, you can't miss with this one.

The Nimbleosity Report

Do you want to keep up with the best content from The Digital Story and The Nimble Photographer? Sign up for The Nimbleosity Report, and receive highlights twice-a-month in a single page newsletter. Be a part of our community!

Want to Comment on this Post?

You can share your thoughts at the TDS Facebook page, where I'll post this story for discussion.

LED Panels - Great, but Diffuse Them

PA150344-led-diffusion.jpg

LED panels for photo work have many advantages over previous light sources. They are cool to the touch, easily adjusted for output, and we can even tweak the color temperature. One thing that LEDs do share with their predecessors, however, is the need to be diffused.

Take a look at the example below. The image on the left was captured with a simple diffusion panel over the light. The photo on the right had a Rosco frosted gel over the lights, but nothing more. As a result, the highlights are quite bright and the shadows are intense.

glove-lighting-comparison.jpg

The product shot on the left used an additional diffusion panel; the image on the right had just a basic frosted gel.

Granted, this is a difficult subject with its dark color and reflective surface. But we have to photograph these types of objects all the time.

For my lights, I've added a fabric diffusion panel made from the same material as our traditional soft boxes. By doing so, I've tamed the light when needed, making it easier for both product shots and portraits.

PB170595-led-diffusion.jpg Diffusion panel added to the LED light to soften the contrast.

This doesn't mean that I won't use strobes and soft boxes when the job demands it. I will. But for quick product shots and basic portraits, this system works great.

PB170589-led-diffusion.jpg

Note: The light illustrated in this article is the Dracast LED500 Pro Bi-Color LED Light with V-Mount Battery Plate outfitted with the optional Barndoors kit.

The Nimbleosity Report

Do you want to keep up with the best content from The Digital Story and The Nimble Photographer? Sign up for The Nimbleosity Report, and receive highlights twice-a-month in a single page newsletter. Be a part of our community!

Want to Comment on this Post?

You can share your thoughts at the TDS Facebook page, where I'll post this story for discussion.

This is The Digital Story Podcast #506, Nov. 17, 2015. Today's theme is "Top 10 Gifts for Photographers." I'm Derrick Story.

Opening Monologue

I'm so jazzed because I just finished and published the itinerary for the SF Street Photography Workshop. This 3-day event takes us to the coolest locations throughout the City, and even on a ferry to Sausalito (one of the best ferry rides around). Signups are already underway, so please don't procrastinate if you plan on attending.

Photographer's Top Ten Gift Guide

Here are 10 gift ideas that should surprise and delight the photographer in your life.

  • The ikan Micro Spot On-Camera Light $69.95 - This lightweight, cool-to-the touch, daylight-balanced, on-camera LED about the size of a small flashlight. The front of the light incorporates a lens system that creates a 30° beam angle providing a directional light well suited for on-camera use or also as a kicker light. The unit features a discrete on/off switch and is dimmable from 100 to 10% on using an integrated thumb wheel on the side. You can read more about in my article, Super Nimble LED Lighting Kit for Photogs on the Go.
  • folding-head.jpg

  • The Koolertron Pan and Tilt Flex Head $39 is a foldable, Z-shaped tripod head or standalone support. It's constructed of high quality aluminum, folds flat for easy transport, and can be used by itself or mounted on a tripod. It weights only 1 pound, but can hold a camera up to 6 pounds. When folded flat, it only measures 4.7" x 2.4" x 1.2". Note: If you want it by Christmas be sure to choose Expedited Shipping. It';s $15, increasing the total price to $54.
  • PB160579.jpg

  • The RavPower All-in-1 Filehub $45.99 - is a 5.4 ounce device that measures a mere 3.82 x 1.06 x 2.13 inches is WiFi enabled with a USB port on one end and a SD card reader on the other. Using the free iOS or Android FileHub Plus app, travelers can copy files from the SD card to an USB Flash drive for backup. There are many more functions available with the RavPower, but this one in particular is vital to mobile photographers. You can read more about it in my article, RavPower All-in-1 Filehub for Super Nimble Backup.
  • The Manfrotto Compact Xtreme $44.88 boasts 4-section tubes made of a combination of Adapto and aluminum and can hold a payload up to 1 kg. It features a 1/4 thread both on top and underneath, allowing a rapid change in the product's configuration in just a few easy steps.
  • havana-bag.jpg

  • The Vanguard Havana 21 Shoulder Bag $39 - Whether you're going on a desert safari or an urban one, the tan Havana 21 Shoulder Bag from Vanguard will hold and protect your DSLR or Mirrorless camera with attached lens, 1-2 extra lenses, flash unit, accessories and a 7" tablet. The bag features a zippered main compartment with a removable, padded insert. Simply remove the insert to free up space for everyday excursions which don't involve photography. Within the shoulder bag next to the insert is a slip-in pocket with a touch-fastening tab for storing your 7" tablet.
  • The Tile (Gen 2) - Phone Finder. Key Finder. Item Finder $25 is a great way to keep track of keys and camera gear. The Tile works with its free companion iOS or Android app to log the last time the device was "seen," and you can instruct it to chime when in range. I keep one on my key ring, and drop my keyring into my messenger bag when on the go for double protection.
  • The Olympus 9mm f8.0 Fisheye Body Cap Lens $89 is one of the coolest optics for Micro Four Thirds camera bodies. About the size of an Oreo cookie, this little wonder provides amazingly sharp, gloriously wide views of the world. Easy on both the pocketbook and camera bag.
  • PB160557.jpg

  • The Cooperative of Photography Original Photo Glove 139 Euros are possibly the nicest gloves I've ever used for photography. Made from super soft leather with silicon logo imprints on the palm side for better grip, these gloves are as fashionable as they are functional. The index finger on each hand is specially designed for precision control of camera buttons and dials, plus works with touchscreen devices. So you can operate all of your devices while keeping your hands warm in the gloves. European customers can order in sizes ranging from Small to XXL from the COOPH online store. I recommend that you purchase one size larger than you normally wear. U.S. customers can buy the Original Photo Gloves from these U.S. dealers.
  • The Canon EF-S 24mm f/2.8 STM lens $149 is a wonderful optic for street photographers providing a versatile 38mm focal length on APS-C bodies (lens does not work on full frame Canons). With its slim design that only measures 1" thick, plus 7 blade aperture for smooth bokeh effects, not to mention the relatively fast f/2.8 maximum aperture, this optic is light enough to take anywhere, yet provides pro results everywhere.
  • essence-of-photography.jpg

  • The The Essence of Photography $29 by Bruce Barnbaum demonstrates that photographic seeing and creativity can be taught, learned, and improved. This book expands on the ideas that are central to Bruce's method of teaching photography, which he has used in workshops for the past 41 years. 196 pages, soft cover, 10" x 10".

And I have two copies of Bruce's book to give away this week. All you have to do to enter is sign up for The Nimbleosity Report before Monday, Nov. 23. You'll receive twice-a-month highlights from The Nimble Photographer and The Digital Story, plus be eligible for a free copy of the book. I'll announce the recipients on next week's show.

Get Your Training On

This week's lynda recommendation is iPhone and iPad Photography with iOS 9 with Sean Duggan. We have these powerful devices with us practically everywhere we go. Here's how to get the most out of them as imaging tools.

Software Download

iWatermark +. The Essential Watermarking App for Professional and Beginning Photographers. Watermarks, once added to a photo or video, display that it was created and is owned by you. Easily, secure and protect your photos by signing them with 9 visible and 2 invisible = 11 watermark types. These days any unique photo can suddenly go viral and lose all connection to it's owner/creator. A watermark subtly displays, no matter where your photo goes, that it's your property and can provide a link to your website. $3.99 - available for iOS, Android, Mac OS X, and Windows.

Cash In on Greeting Cards

Red River Paper posts in their blog: "The Greeting Card Association estimates that more than 7 billion paper cards were sold last year at prices ranging from $2 to $10 and that women accounted for 80% of the sales. Despite the e-card phenomenon, nine out of ten people still prefer receiving (and keeping) a card they can display- on a desk, bedside table, or taped to the fridge." Red River Paper is the longest running sponsor of The Digital Story.

See you next week!

Download the Show

In addition to subscribing in iTunes, you can also download the podcast file here (33 minutes). You can support this podcast by purchasing the TDS iPhone App for only $2.99 from the Apple App Store.

More Ways to Participate

Want to share photos and talk with other members in our virtual camera club? Check out our Flickr Public Group. And from those images, I choose the TDS Member Photo of the Day.

Podcast Sponsors

lynda.com - Learn lighting, portraiture, Photoshop skills, and more from expert-taught videos at lynda.com/thedigitalstory.

Red River Paper -- Keep up with the world of inkjet printing, and win free paper, by liking Red River Paper on Facebook.

Zenfolio If you want your site to look as good as your photos, visit www.zenfolio.com today.

SizzlPix! - New 5k Ultra High Definition SizzlPix output for your photography. You've never seen your imagery look so good. SizzlPix.com.

The Nimbleosity Report

Do you want to keep up with the best content from The Digital Story and The Nimble Photographer? Sign up for The Nimbleosity Report, and receive highlights twice-a-month in a single page newsletter. Be a part of our community!

Want to Comment on this Post?

You can share your thoughts at the TDS Facebook page, where I'll post this story for discussion.

The San Francisco Street Photography Workshop is SOLD OUT for 2016. Please see our other events on the TDS Workshops page.

mike-boening-sf.jpg

From the colorful shops in Chinatown to the haunting ruins at Fort Point, the SF Photography Workshop puts you on the ground in one of the most interesting urban centers in the U.S.

Our headquarters is based in the Union Square area of the city, at the historic Cartwright Hotel. All you have to do is walk out the front door to capture great shots. But we'll push even farther to locations that are sure to fill up your memory cards. It's Nimble Photographer meets Urban Explorer.


Photo from 2015 workshop by Mike Boening


We begin Friday morning, April 15, 2016 in our private conference room (yes, with coffee and tea service). Your leaders are Derrick Story and Olympus Visionary Mike Boening, and together they will provide a mix of classroom instruction and hands-on shooting in the streets of San Francisco. Here's the preliminary itinerary.

Itinerary for San Francisco Photo Workshop

Friday, April 15

  • 8:15 am - Doors open in the conference room
  • 8:30 am - Welcome and introductions
  • 9:00 am - Street Shooting Etiquette - Derrick and Mike
  • 9:30 am - Break with gear preparation
  • 10:00 am - Depart for North Beach
  • 10:30 am - North Beach Street Shooting
  • 11:30 pm - Lunch on Your Own
  • 12:30 pm - Depart for Palace of the Fine Arts
  • 1:00 pm - Palace of the Fine Arts Shoot
  • 2:00 pm - Depart for Fort Point
  • 2:30 pm - Fort Point Shoot
  • 4:00 pm - Depart for Chrissy Field
  • 4:30 pm - Light meal at Chrissy Field (Part of Workshop)
  • 5:30 pm - Class on Twilight Shooting - Mike Boening
  • 6:15 pm - Twilight Shoot at Chrissy Field
  • 7:30 pm - Day 1 Concludes
  • Sat., April 16

  • 8:15 am - Doors open in the conference room
  • 8:30 am - Preparations for Sausalito Shoot
  • 9:00 am - Depart for Ferry Building
  • 10:40 am - Ferry Ride to Sausalito
  • 11:15 am - Orientation Meeting
  • 11:30 am - Lunch on your own
  • 12:30 pm - Sausalito Street Shooting
  • 3:50 pm - Depart Sausalito
  • 4:20 pm - Arrive SF Ferry Building
  • 4:30 pm - Orientation Meeting
  • 5:00 pm - Street Shooting on the Embarcadero
  • 6:30 pm - Optional Twilight shoot
  • Sunday., April 17

  • 9:15 am - Doors open in the conference room
  • 9:30 am - The Nimble Photographer - Derrick Story
  • 10:00 am - Chinatown Street Shoot
  • 11:30 am - Group Lunch in Chinatown (Part of Workshop)
  • 1:00 pm - Lab Session with Post Production Tips
  • 3:00 pm - Class Presentation of Favorite Images
  • 5:00 pm - Workshop Concludes

workshop-crew.jpg Can you spot the workshop photographers in this image from the 2015 event? There are four... Photo by Derrick Story.

Price for all three days is only $695. Plus you'll get special $169 room rates at the Cartwright Hotel, coordinated by us. To reserve your spot, simply pay the workshop tuition, and you're set. Group size is limited to 8 participants, and registrations are already underway (so don't wait too long). Once your spot is reserved, we'll contact you for the follow up details.

For questions and more information, just send email to:

I hope you can join us for this 3rd Annual Photo Workshop in San Francisco. It is an amazing good time.

The Nimbleosity Report

Do you want to keep up with the best content from The Digital Story and The Nimble Photographer? Sign up for The Nimbleosity Report, and receive highlights twice-a-month in a single page newsletter. Be a part of our community!

Want to Comment on this Post?

You can share your thoughts at the TDS Facebook page, where I'll post this story for discussion.

PB130536-genaray-led.jpg

Once you've used a flicker-free, variable-color LED light panel, it's hard to go back to the single temperature models. Thankfully, as prices come down, you don't have to.

Case in point is the Genaray 7100T Variable-Color LED panel that's currently available for $189. Its feature set includes:

  • 3200-5600K Adjustable Color Temperature
  • Up to 1400 Lux Brightness at 3 feet
  • 100-10 percent Flicker Free Brightness Dimmer
  • Smooth, Stepless Color/Brightness Dial
  • Dual Sony L Series Battery Mount (NP-F550 type)
  • Two Batteries, Charger, AC Adapter included in the kit
  • Magnetic, Snap-On Diffuser
  • Ball Head and Carry Case

The maximum output from the 312 LED bulbs is 1400 Lux at 3 feet - plenty bright for most indoor applications. The case is made of plastic, so you will have to be somewhat careful when transporting it and using it on location.

PB130523-genaray-led.jpg

The back panel controls are good and work well. There's the color temp knob on the left that allows for adjustment from 3200 K to 5600K. The battery status can be checked by pressing the raised "T" button. And the rotating luminance dial is adjustable from 10-100 percent.

I like the dual battery configuration, which allows for smaller units that are balanced on both side of the Genaray. The bulbs will power with just one battery, and you can swap out either one without have to power down. This seems particularly handy during long shoots and video recording when you need to leave the light on.

PB130533-genaray-led.jpg

Another clever design feature is the diffusion panel that attaches with magnetic contacts. It locks into place snugly and stays secure during use, but it's easily removed when necessary. There's a secure pocket inside the top flap of the case to store the panel when not in use.

The best part is, however, variable color adjustment. I'm getting to the point where I can eyeball the color temperature I want. I love the control of being able to dial the control a little cooler for techy product shots, then warm things up for portraits. When used in tandem with my Dracast LED500 Pro Bi-Color LED Light, I have tremendous control over configuring both the luminance and the color for a scene.

My only real nits have to do with the mounting. The 1/4" threaded socket in the bottom of the unit doesn't feel that solid. It's not confidence inspiring, if you know what I mean. So far, there haven't been any problems, but I could see it breaking away from the case during an accidental tumble. And the cheapo ball head that's included could certainly use an upgrade.

PB130541-genaray-led.jpg

Aside from the mounting complaints, the Genaray 7100T Variable-Color LED panel is a handy, versatile lighting unit that includes lots of accessories and is a good value at $189.

The Nimbleosity Report

Do you want to keep up with the best content from The Digital Story and The Nimble Photographer? Sign up for The Nimbleosity Report, and receive highlights twice-a-month in a single page newsletter. Be a part of our community!

Want to Comment on this Post?

You can share your thoughts at the TDS Facebook page, where I'll post this story for discussion.

Photographers wishing to leave their laptops at home, but still wanting backup and image sharing on the road, may find the answer in the RavPower All-in-1 Filehub that's currently on sale for $45.99.

PB120440-ravpower.jpg The RavPower with a USB Flash drive at one end and SD card at the other.

This 5.4 ounce device that measures a mere 3.82 x 1.06 x 2.13 inches is WiFi enabled with a USB port on one end and a SD card reader on the other. Using the free iOS or Android FileHub Plus app, travelers can copy files from the SD card to an USB Flash drive for backup. There are many more functions available with the RavPower, but this one in particular is vital to mobile photographers.

The Workflow

rav-power - 4.jpg

Insert a MS DOS Flash drive in the USB port and a memory card full of pictures in the opposite slot, then fire up the RavPower. Join the FileHubPlus network in the WiFi settings of your device. If you don't see it there, press the button on the RawPower and wait a few seconds. Now launch the FileHub Plus app. You should see icons for both the SD card and the USB device at the bottom of the screen.

Tap on File/Folder and navigate to your SD card. Drill down until you see the pictures on the card. Tap the images you want to copy to the USB drive, then tap on the wrench icon and choose Transfer to from the popup menu. Select FileHub Plus from the popup menu. That will reveal the USB drive. Navigate to the folder on the drive where you want the pictures to reside. You can create folders here too. Tap Transfer. The images will be copied to your USB device.

rav-power2.jpg

You can move entire folders too with just a couple taps. So this process can be fast and easy. Once the images have been copied to the USB device, you can view them in the app, and even copy your favorites to the mobile device, for editing and sharing. You have an array of options available to you.

But Wait, There's More

The RavPower is also a 6000 mAh power bank that can recharge your mobile devices in the field. First, use the eject command for your USB device by tapping on its icon at the bottom of the main screen. (You should do this too for the SD card before removing.) Once the port is free, connect the charging cable for the mobile device to the RavPower. Energy will begin to flow into your smartphone or tablet. You can monitor the reserve amount by pressing the button on the top of the battery. Four LED dots indicate that there's lots of juice. The dots go down as power is transferred from the battery to your devices.

PB120435-ravpower.jpg Recharging an iPhone 6S with the RavPower Filehub.

Final Thoughts

There are more functions available too, such as wireless routing via the built-in Ethernet port, and streaming of music, movies, and pictures from USB storage to your mobile devices.

But the ability to backup my SD cards while on the go is the unique feature that I think makes the RavPower All-in-1 Filehub a steal at $46.

More Nimbleosity

Do you want to keep up with the best content from The Digital Story and The Nimble Photographer? Sign up for The Nimbleosity Report, and receive highlights twice-a-month in a single page newsletter. Be a part of our community!


Nimble Photographer Logo

The RavPower All-in-1 Filehub has a high Nimbleosity Rating. What does that mean? You can learn about Nimbleosity and more by visiting TheNimblePhotographer.com.

Want to Comment on this Post?

You can share your thoughts at the TDS Facebook page, where I'll post this story for discussion.

IMG_0333.jpg

Personally, I like electronic viewfinders. And part of the reason why I enjoy composing with them is because I can calibrate the view to better match the results that I actually see afterward on the camera's LCD.

Olympus OM-Ds actually provide a fair amount of control for their EVFs. I just went through the process again while setting up my new Olympus OM-D E-M10 Mark II. These adjustments also work with other OM-D bodies.

evf-menu-1.jpg

  • Press the Menu button and navigate to the Gear tab and choose Gear J Built-In EVF.
  • While in the Gear J submenu, scroll down to EVF Adjust.
  • Inside EVF Adjust, set EVF Auto Luminance to "Off".
  • Move down to the manual adjust submenu, and as a starting point, try -1 for temperature and +2 for luminance. Press OK.
  • Compose a photo through the EVF and take a picture. Compare the rendered image to what you saw through the viewfinder. Adjust accordingly to fine tune.

I've found that this process is easier if I change Rec View to 2 seconds. That way I can take the picture then seen the image follow right there in the EVF. Rec View is located in the Wrench Menu at the bottom of the general Setup Menu.

A new option with the Olympus OM-D E-M10 Mark II is the Simulated Optical Viewfinder. It's listed as S-OVF in Gear J. The intent of S-OVF is to simulate what your eyes would see in real life. It's great for those who want to bring a little of the DSLR experience to mirrorless.

When you enable S-OVF, realtime exposure compensation feedback is disabled, much like shooting with your DSLR. You have to look at the rendered image to see if you nailed it. The way I use S-OVF is that I programmed the Fn3 button to toggle it on and off. So when I'm evaluating a scene through the EVF, I can look at it a couple different ways.

I think you'll like your camera even more after customizing these adjustments to your personal tastes. And I've found that it makes my results even more predictable.

The Nimbleosity Report

Do you want to keep up with the best content from The Digital Story and The Nimble Photographer? Sign up for The Nimbleosity Report, and receive highlights twice-a-month in a single page newsletter. Be a part of our community!

Want to Comment on this Post?

You can share your thoughts at the TDS Facebook page, where I'll post this story for discussion.

This is The Digital Story Podcast #505, Nov. 10, 2015. Today's theme is "Getting Our House in Order." I'm Derrick Story.

Opening Monologue

As we settle in to the new format for the show, I have to say that I'm really excited about our momentum going in to 2016. Participation is at an all time high, the photo industry is showing signs of creativity, and we're going to get some stuff done.

Getting the House in Order

We have roughly 6 weeks before the end of 2015. Some of that will be consumed by the holidays. What I'm proposing is that we use this time to get ourselves organized so we can have a solid start to 2016. Here are some of the items to consider.

  • Equipment Inventory - have you logged your purchases for 2015?
  • Hard Drive Evaluation. What is the state of your archiving system, and do you have the hardware to match your needs?
  • Photo Management Software. Would be nice to start our the New Year with the system you're going to rely on for 2016. Are you in good shape with that?

I talk about these in today's first story.

In the News

How to create a mirror image photo effect in-camera. I found this interesting post on Digital Camera World where they show you how to duplicate a cityscape and create a mirror image effect in-camera using little more than plexiglas, perspective, and precision. The result is a water-like reflection... without the water.

In other news, DP Review's 2015 Roundup of Fixed Prime Lens Cameras. The included on their list: (can you guess?)

  • Leica Q (Typ 116)
  • Sony Cyber-shot DSC-RX1R II
  • Fujifilm FinePix X100T
  • Ricoh GR II
  • Sigma Quattro series
ricoh-all-weather-cam.png

Gear We Like

The Ricoh WG-M1 Waterproof Action Video Camera with 1.5-Inch LCD ($133) initially caught my eye with its intense rugged looks. But the features are noteworthy too - Wi-Fi enabled, waterproof to an impressive depth of 32 feet without requiring a protective housing, shock-resistant against a fall from 6 feet, and cold-resistant to temperatures as low as -10 Degree C.

With its ultra-wide-angle lens, this rugged little camera captures dynamic Full HD movies with a realistic sense of depth. The WG-M1 provides a host of advantageous features including multitasking that allows the user to check real-time images during both still and movie recording, and a 1.5-inch color LCD monitor. Approximately 14.0 effective megapixels captures high-resolution still images, while its high-speed, continuous shooting capability records subjects at a speed of roughly 10 images per second.

Brighten Up Your Store Front

The folks over at Zenfolio have added some new features that will help you better serve your customers. If you're a freelance photographer who wants present a professional customer experience, check out these additions to the comprehensive Zenfolio experience.

  • Email Templates - Customize your email templates for group, gallery, collection and event invitations to make sending personalized invitations a snap. You can also personalize gallery expiration emails and create your own custom templates to use for any kind of client communication. To change a system template or create a new one, go to Visitors from Edit View and look for the new Email Templates page.
  • One-Click Price Lists - Price lists are easier than ever to create now that we do the work for you! Your new price list comes with the most popular products pre-selected. You can start bringing in sales in 2 clicks and with no hassle. You can of course still easily add or remove products and adjust each product pricing to suit your needs.
  • Shopping Improvements - We've made the shopping experience more visual, sleek, and simpler to navigate. Large preview images of your products add more detail and polish to the Shop, and the new sidebar makes it easier for your clients to browse products with fewer clicks. These improvements will help your customers find the products they want quickly and customize and buy them with ease.

Member Quote of the Week

Intelligent comments culled from The Digital Story Facebook page.

In regard to my post, Aerial Photography Without a Drone, David Michael Rogers writes, "I used a similar setup to investigate some squirrels who'd taken up residence in a brick column in my building. I couldn't see exactly where they were getting in and out, so I stuck the Air on a monopod and poked it up into the rafters. Got a somewhat oof shot of a squirrel sticking her nose up out of the access they'd made. I have an inexpensive monopod that doesn't have a quarter-twenty at both ends. But I can use a small Pedco Ultrapod (the tiny one), and the velcro strap wraps just tightly enough around the bottom extension that I can use the full length of the monopod."

Post your thoughts on our Facebook page. Believe me, I read them.

Software Download

Pixelmator Rewritten, Now OS X Photo Extension Too. Pixelmator 3.4 was rewritten for Mac OS X El Capitan and includes support for multitasking via Split View and a Photos Extension with powerful Distort tools. This is the fifth editing extension for Photos for OS X. Pixelmator 3.4 is available in the Mac App Store for $29.99 and is compatible with OS X 10.9.5 or later and a 64-bit processor. Via TDS.

Cash In on Greeting Cards

Red River Paper posts in their blog: "The Greeting Card Association estimates that more than 7 billion paper cards were sold last year at prices ranging from $2 to $10 and that women accounted for 80% of the sales. Despite the e-card phenomenon, nine out of ten people still prefer receiving (and keeping) a card they can display- on a desk, bedside table, or taped to the fridge." Red River Paper is the longest running sponsor of The Digital Story.

Found in the Bottom of the Bag

I've added the Nimble Ultralight Shoulder Bag to the Nimble Photographer Store. This is a limited edition. The Eastern Sierra Fall Color Workshop holds the top spot on the TDS 2016 Workshops Reserve List. And if you plan on ordering through B&H Photo or Amazon, please stop by the TDS site first, click on their respective ad tile, then place your order. That extra step helps support the site.

See you next week!

Download the Show

In addition to subscribing in iTunes, you can also download the podcast file here (31 minutes). You can support this podcast by purchasing the TDS iPhone App for only $2.99 from the Apple App Store.

More Ways to Participate

Want to share photos and talk with other members in our virtual camera club? Check out our Flickr Public Group. And from those images, I choose the TDS Member Photo of the Day.

Podcast Sponsors

lynda.com - Learn lighting, portraiture, Photoshop skills, and more from expert-taught videos at lynda.com/thedigitalstory.

Red River Paper -- Keep up with the world of inkjet printing, and win free paper, by liking Red River Paper on Facebook.

Zenfolio If you want your site to look as good as your photos, visit www.zenfolio.com today.

SizzlPix! - New 5k Ultra High Definition SizzlPix output for your photography. You've never seen your imagery look so good. SizzlPix.com.

Want to Comment on this Post?

You can share your thoughts at the TDS Facebook page, where I'll post this story for discussion.

Pixelmator 3.4 was rewritten for Mac OS X El Capitan and includes support for multitasking via Split View and a Photos Extension with powerful Distort tools. This is the fifth editing extension for Photos for OS X.

pixelmator-el-capitan.png

Additional highlights of version 3.4 include Enhanced Force Touch support that makes painting with Force Touch trackpad even smoother and a new interface font, San Francisco.

Pixelmator 3.4 is available in the Mac App Store for $29.99 and is compatible with OS X 10.9.5 or later and a 64-bit processor.


Get Up and Running with Photos for OS X

Want to get up to speed with Apple's latest photo management application? Then take a look at my latest online video training, Up and Running with Photos for OS X. Soon, both you, and your pictures, will be comfortable in their new home.

And don't forget about the Photos for OS X Special Feature Section on The Digital Story. It's a roundup of tutorials, videos, and articles focused on helping you master Apple's latest photo management software. You can also find it under Photography in the top nav bar.

Want to Comment on this Post?

You can share your thoughts at the TDS Facebook page, where I'll post this story for discussion.

Flickr has updated its mobile app for iOS 9, and it's a beauty. The headline feature is a smart implementation of 3D Touch.

flickr-iphone-ds.jpg 3D Touch now implemented for iPhone 6S. Photos by Derrick Story.

Level one of 3D Touch is available when scrolling through thumbnails and you want a closer look. Not only does the image pop forward with blurred background, but you get the photographer's name and image title.

But wait, it gets better. In your Camera Roll, press on a thumbnail to bring it forward. Now you can scroll through neighboring images by swiping left or right to see an enlarged view of them. When you find the photo that you want to work with, press a bit harder, and it jumps forward into full screen mode. This is as much fun with 3D Touch I've had so far.

For those without an iPhone 6S, Flickr has added Spotlight Search, Universal Links, and App Icon Shortcuts to this update. Helpful indeed, but not quite as sexy. The free update is available now in the iOS App Store.


Nimble Photographer Logo

Flickr for iOS has a high Nimbleosity Rating. What does that mean? You can learn about Nimbleosity and more by visiting TheNimblePhotographer.com.

Want to Comment on this Post?

You can share your thoughts at the TDS Facebook page, where I'll post this story for discussion.

PB040413-ultralight.jpg

The Nimble Ultralight Shoulder Bag is your go-anywhere transporter that flies under the radar, allowing you to carry your gear without attracting unwanted attention.

The Walking Man logo is placed discretely on the inner zippered pocket. Only you know he's accompanying you on your travels. Two outside end pockets are perfect for water bottles, or to serve as a temporary home while changing lenses.

An outside zippered pocket keeps an iPad mini or phablet accessible, but out of sight when not in use. All three zippers, including the top position for the main compartment, are high quality YKK brand with custom pull ties. The adjustable shoulder strap extends to a maximum 50" so you can wear the Ultralight cross-shoulder for added security.

PB040438-ultralight.jpg

Inside dimensions are 13" wide by 10" tall - plenty of space for a light jacket, camera, lunch, and personal accessories to accompany you during a day in the city.

Thanks to the ultralight design, the bag packs easily in a suitcase or backpack. Once you reach your destination, you can use it for exploration, leaving your luggage back in the room.

Tough, durable, and discrete, the Nimble Ultralight Shoulder Bag accompanies you in understated style. It's available now in the Nimble Store for $29.95.

Want to Comment on this Post?

You can share your thoughts at the TDS Facebook page, where I'll post this story for discussion.

Aerial Photography Without a Drone

PB030401-aerial.jpg

Taking pictures from a high vantage point is fun. And you don't necessarily need a drone to do so.

I've put together an "Air Stick" that uses an Olympus Air A01 with a 14-42mm EZ zoom mounted on the end of a Manfrotto Compact Xtreme pole. On the other end of the Xtreme I've attached an iPhone 6S using the very secure MeFOTO SideKick 360 SmartPhone Adapter. This rig allows me to photograph from vantage points high above my head.

I also replaced the cheesy ball head that Manfrotto includes with a more robust model that that features a quick-release plate. Not only does this provide a more secure attachment to the pole, but I can quickly remove the Air for packing in my bag.

Speaking of which, this setup is very compact. The Xtreme pole is only 15" long when collapsed. But when fitted with the Air and SideKick, then completely extended, it's 5 feet in length, plus my 6 feet of height, plus however high I hold it over my head... You get the idea.

IMG_0309-aerial.jpg Rooftop perspective using the Air Stick fully extended. Photos by Derrick Story.

There are a number of applications for this set up. Large group shots suddenly are much easier. Just extend the Olympus Air over your head, comfortably compose on the iPhone LCD, and even make exposure adjustments and control the zoom from the smartphone.

Not to mention great vantage points while traveling, on vacation, covering events, or just seeing your local world from a new perspective. The 16MP Olympus Air produces beautiful images captured in both RAW and Jpeg. And you can immediately post your favorite shots via the iPhone.

PB030404-aerial.jpg iPhone 6S attached to the Xtreme pole using the MeFOTO SideKick.

PB030411-aerial.jpg Olympus Air attached to the Xtreme pole using a ball head with quick release.

You can also use the Manfrotto Xtreme as a standard monopod when not pressed into service as an Air Stick. It's light and compact, making it easy to bring along. If you want to see the world from a higher vantage point, but not crazy about flying drones, consider this option. It's easy and it's a blast!

If you liked this post, you might also enjoy Cycling with the Olympus Air.


Nimble Photographer Logo

The Air Stick has a high Nimbleosity Rating. What does that mean? You can learn about Nimbleosity and more by visiting TheNimblePhotographer.com.

Want to Comment on this Post?

You can share your thoughts at the TDS Facebook page, where I'll post this story for discussion.

This is The Digital Story Podcast #504, Nov. 3, 2015. Today's theme is "We're going to make some changes." I'm Derrick Story.

Opening Monologue

There are only two directions in publishing: moving forward or falling back. In the last year, I've seen plenty of each. In the moving forward category, the team at Rocky Nook is definitely on the rise. They invested in personnel who have brought new ideas to the company, and their risks are paying off. I'm lucky enough to be part of that change, and I'm excited about the prospects for 2016.

As for falling back, I think the old Digital Story served its purpose, but I have not been feeling the passion that I want from this enterprise. So we're going to shake things up, and as of today, I'm presenting to you a new show. If you like what you hear, I want you to get behind it. So let's get to it.

It's Not a Paperweight; It's a Flash

I just finished a new eBook titled Rocky Nook's Guide to Flash Terminology. It's a free download, and in it I illustrate and explain the meaning of all those terms we hear in flash photography.

We all have these things, but I sometimes get the feeling we're too lazy to pull them out of our camera bags. Here's a scenario when I think it's worth your trouble to power up the speedlight.

Twilight Portraits. These are the coolest images. Whether you're shooting a wedding or visiting a big city, go outside at twilight, find a stunning sunset or city light backdrop, steady your camera, and make a portrait using slow synchro flash.

Don't overexpose your subject. Dial down flash exposure compensation to pull the speedlight illumination into alignment with the background lighting. These portraits can be stunning.

Get Your Training On

This week's lynda recommendation is Street Photography: The City at Night with Steve Simon. After you finish your twilight portrait, explore the mysterious side of the city with a fast lens and a sharp eye. Steve Simon will provide the inspiration and technical knowhow to help you get the most out of this adventure.

In the News

  • Olympus OM-D E-M10 Mark II sales to resume on November 7 - DPReview
  • World-Famous Instagram Model Essena O'Neill Quits Social Media, stating that, "Since the age of about 15, O'Neill had cultivated an identity of false perfection that she obsessively shared with the world and filled an endless need to acquire more validation through social media. O'Neill is now reorienting her career to speak about how the creation of this fake persona that was based completely on physical appearance has had a tremendously negative impact on both the perception of her own self-worth as well as starving her from experiencing life outside social media." - FStoppers Original Article.

tenba-shoulder-bag.png

Gear We Like

The Tenba Cooper Luxury Canvas 13 Slim Camera Bag with Leather Accents ($229). The exterior features Peach-wax cotton canvas (20% polyester reinforcement) with 2x water-repellent PU coating, waterproof, full-grain leather base and accents. Inside you'll find ilicone-coated, water-repellent ripstop nylon and soft, brushed tricot. Hardware: YKK® zippers with hand-riveted full-grain leather zipper pulls. The Cooper 13 Slim accommodates a mirrorless camera with 3-5 lenses or a DSLR with 2-3 lenses (up to 70-200mm 2.8). The rear padded sleeve will hold a laptop up to 13 inches.

Support This Show

What does Jon, Christopher, Ed, Craig, Edward, Tim, Kevin, Larry, Thomas, Byron, Gary, Randall, and Sean have in common? They have pledged their support of this podcast by becoming an Becoming an Independent Online Supporter. Their support of Independent Online Publishing has helped fund our latest server upgrade to ensure that this content reaches anyone who wishes to listen. You can do your part today by clicking on the Sponsorship tab at the top of TheDigitalStory.com.

Member Quote of the Week

Intelligent comments culled from The Digital Story Facebook page.

In regard to my post, Why I Take My Bag to Breakfast, Steve Blazevich writes: "I always go straight home after I'm done shooting what I have to, I can't stand the idea of going in a store while leaving my camera bag in the car. Most times it's not practical either for me to carry everything in to a store. I should look in to a better bag." I agree Steve, get yourself a nimble bag and you won't have to rush home after a shoot.

Post your thoughts on our Facebook page. Believe me, I read them.

Software Download

Camra camera app saves photos and video directly to the cloud. The newly released Camra apps aims to make things easier by uploading images and video straight to the cloud as you shoot. The added bonus is that you can keep shooting, even if you are out of storage, as Camra never stores the files locally. A free Camra account offers up to 5GB of storage space but $0.99 a month buys you a full 100GB. If you'd like to give the app and service a closer look you can download Camra now from Google Play and the Apple App Store. Via DPConnect.

How Long Should You Let Your Inkjet Prints Dry?

Red River Paper posts in their latest newsletter: "As a general rule, you can handle and work with photo inkjet prints as soon as the come out of your printer. They are "dry to the touch" but in reality it takes about 24 hours for an inkjet print to fully cure and dry." Red River Paper is the longest running sponsor of The Digital Story.

What the Heck?

My inaugural "What the Heck?" goes to the development team at Apple responsible for Photos for OS X. Why don't you give us star ratings? Really. You've created this beautiful editing interface and integrated cloud connectivity, and yet you refuse to provide a reasonable method for enthusiast photographers to rate their images.

I'm begging you. Get off the stick and give us a front end that's deserving of the genius that we see in the other parts of the app. It's not too late. We're asking you to please give us the tools we need to do our job.

Found in the Bottom of the Bag

I've added the Walking Man Flask Set to the Nimble Photographer Store. The Eastern Sierra Fall Color Workshop holds the top spot on the TDS 2016 Workshops Reserve List. And if you plan on ordering through B&H Photo or Amazon, please stop by the TDS site first, click on their respective ad tile, then place your order. That extra step helps support the site.

See you next week!

Want to Comment on this Post?

You can share your thoughts at the TDS Facebook page, where I'll post this story for discussion.

sandisk-ultra-fit.jpg

I recently purchased a SanDisk Ultra Fit USB 3.0 Flash Drive for my MacBook Pro, hoping to extend its storage capacity for backup files. The concept is great. Insert the tiny drive into an open USB port and leave it there. By doing so, I've added 128 GBs of storage to my laptop.

At first, I used Apple's Disk Utility to erase the Ultra Fit formatting it for the Mac. I was hoping to keep Aperture libraries there. By doing so, however, the performance was so slow that I abandoned that idea and reformatted again with MSDOS. But the read/write speed didn't improve.

For example, a 3 GB audio file took 1:21 to copy from the Mac to the Ultra Fit. That is not blazing fast.

So unless I'm missing something, this isn't up to USB 3.0 standards. I have a SanDisk Cruzer Flash Drive that is blazing fast. So I know how a USB 3.0 drive should perform.

The Ultra Fit is a nice idea. But for me, it just didn't work. Back to the drawing board.

Want to Comment on this Post?

You can share your thoughts at the TDS Facebook page, where I'll post this story for discussion.

New Items in The Nimble Store

Two new items have been added to the Nimble Store. We now have a special edition Walking Man Flask Set that features a handsome matte finish with silver walking man logo and metal funnel, all neatly packed in a custom gift box.

nimble-flask-set-1024.jpg

We've also added a handy Silver and Black Microfiber Cloth that not only can be used to keep your optics shiny clean, but can serve as a neutral color swatch for white balance correction in post production.

silver-black-microfiber-cloth-1024.jpg

We're working on additional tempting items for nimble photographers. So be sure to keep an eye on thenimblephotographer.com for swag, journal entries, and daily photos.


Nimble Photographer Logo

These products have a high Nimbleosity Rating. What does that mean? You can learn about Nimbleosity and more by visiting TheNimblePhotographer.com.