November 2005 Archives

FLiXPO Clip
You can download Jerry Seinfeld and a host of other great personalities on FLiXPO...

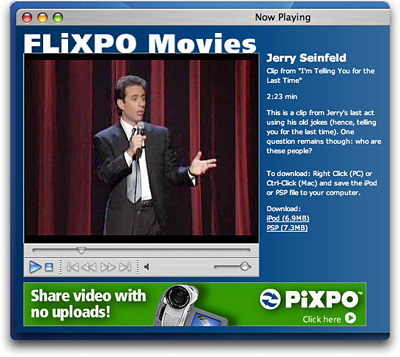
One of the questions readers have been asking here at The Digital Story is if we're going to offer more video content. Indeed we will, but you can download lots of terrific stuff right now at FLiXPO, a brand new service offering comedy, indie video, movie trailers, and funny ads.

Simply browse FLiXPO's various "Channels," preview the clip you're interested in, then choose either the "iPod" or "PSP" link. I downloaded a Jerry Seinfeld standup routine. After a brief wait, the video appeared in its own browser window. I selected "Save as Source" from the dropdown menu in the lower right corner of the QuickTime window (look for the downward pointing triangle), and saved the clip to my Desktop.

I then opened iTunes and dragged the clip to my video playlist. I noticed that the ID3 tags were a little sparse, so I highlighted the title by clicking once on it, then went to File > Get Info. There I clicked on the Info tab and proceeded to clean up the title text, add Jerry as the artist, and choose "Video" for my Genre.

Everything looked ready to go, so I connected my iPod video and uploaded the FLiXPO video. The upload went smoothly and within a few minutes I was watching Jerry do his "Milk" routine right there on the screen of my iPod. The video was quite decent, and the audio was robust and of fair quality. A FLiXPO logo was permanently positioned in the lower right corner of the screen. The price you have to pay for a freebie.

At the end of the clip, you get a quick FLiXPO splash screen, and that's it. The entire process was quite painless and well worth the effort. So if you want to build up your short video collection for your iPod or PSP, I recommend taking a look at the free offerings in FLiXPO.

Technorati Tags: ,

Grab Shot 4 - Majestic Moose

Majestic Moose
Jonathan Diener went fishing but came home with a Moose...

"I was on my way home from a fishing trip in Ontario, Canada," writes Jonathan Diener, "when I thought I should get my Nikon Coolpix 4300 out in case I saw any scenic opportunities during the 9-hour drive. Just as I did, this moose walked out of the woods along the road. I stopped, opened my car door, snapped this shot, then the moose turned around and disappeared back into the forest. BTW, he was much bigger than he looks in this shot."

I don't know... he looks pretty big here to me...

Technorati Tags: , ,

Ultrapod II
The UltraPod II is one of my 12 favorite photo gadgets. Read on for the other 11...

Every photographer has his or her favorite gadgets. This week's show lists 12 attractive ones that I think will interest you, and might make the perfect gift for a special photographer on your holiday shopping list. Here are the links for the dozen I discussed on Podcast #9.

  1. Tamrac Photographer's Vest -- There are lots of great vests on the market, and I've liked most of what I've seen. This Tamrac vest comes in black or khaki and costs about $90 (at the top of the range I would pay). You can also buy quality vests for as low as $40 from Campco and around $65 from Domke.
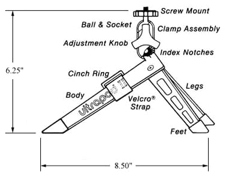
  2. UltraPod II -- I think this is one of the best pocket tripods available. Works for light DSLRs as well as compacts. You can score one of these for about $22.
  3. Cokin Graduated ND filter -- Great for balancing a bright sky with the landscape forground. You can get a kit with 3 filters and the holder for about $55.
  4. SanDisk Ultra PC Card Adapter for CompactFlash -- Laptop users with a PC Card slot can upload images from their CompactFlash memory card with a simple PC Card adapter that costs less than $10, and works great! A good stocking stuffer...
  5. Belkin 15-in-1 Reader Writer -- This speedy USB 2.0 reader/writer can handle just about any type of memory card. And the price has come down recently so you can buy one for less than $30.
  6. Tamrac Expedition 3 Photo Backpack -- I've discussed this backpack, and its bigger sibling, the Expedition 4, in a recent review. I like the Expedition 3 because of its more compact design and affordable $50 price tag.
  7. Giottos Rocket Air Blaster -- I've posted a review of the Rocket Air Blaster because I was impressed by its design and ease of use. This is a great way to kick the "canned air habit" for cleaning lenses, and it only costs about $11. If properly used, it's also safe for blowing dust off DSLR image sensors.
  8. iPod Camera Connector -- iPods (full size models with color screens) are great devices for storing photos as well as music. The Camera Connector costs less than $30 and enables you to connect your camera's USB cable, or the Belkin 15-in-1 Media Reader to your iPod and upload pictures for backup and viewing. You can transfer the images to your computer when you return home.
  9. Tamrac N-5053 Camera Strap -- This lightweight, strong strap holds most digital SLRs and memory cards and features rubber tracks to prevent slippage. Two neoprene memory card holders provide convenient access to memory cards while shooting. The quick-release buckles are interchangeable with other Tamrac quick-release camera straps. They cost about $20 each.
  10. Sony NiMH rechargable batteries and charger -- Power hungry electronic flashes and cameras demand good batteries. This Sony kit is a bargin for $20.
  11. LensPen -- So how do you clean those hard to get areas on your digital camera, such as the optical eyepiece? The folks at LensPen have a solution, and my experience is that it works great. You have lots of different sizes to choose from. I find myself reaching for the miniPRO model most often. You can buy it directly from the LensPen site for $15.
  12. Lowepro Photo Gloves -- I've saved one of my most favorites for last. These gloves keep the hands warm, yet provide enough dexterity to operate your camera. Plus they look great! You can buy them for for less than $20... be sure to get the right size!

Listen to the Podcast

Now that I have your curiosity piqued, it's time to listen to today's audio show titled, "12 Photo Gadgets for Gifts" You can download the podcast here (31 minutes).

Technorati Tags: , , ,

Speaker Wire Salvation

Flat Pin Connector

Twisting the ends of speaker wires, then getting them inside those little holes on the back of your amplifier can be a maddening experience. This is especially frustrating for portable units that you're constantly moving around the house, such as the Sonic Impact Class T Amp that I recently reviewed (and complained about this very problem).

I finally took my punctured finger tips to the local Radio Shack in search of a solution and discovered their Flat-Pin Connectors that are 24-karet gold plated and easy to secure on the ends of your speaker wires with a standard crimping tool. They cost $3.29 a pair.

Another advantage to these connectors is that they include colored protective sleeves that keep the wires from coming in contact with one another. The sleeves also help you match red-to-red and black-to-black to maintain the proper polarity between speaker and amplifier.

It took me about 15 minutes to attach the connectors to the wires. Now speaker setup takes only seconds, and no more punctured finger tips.

Technorati Tags: , ,

Grab Shot 3 - Tired Kitty

Tired Kitty
Sometimes you're just so "tired" that you need a nap...

While visiting friends in Asheville, NC, Ginny Brady spotted their pet kitty Samantha taking a cat nap on the tire of their truck. She grabbed this quick shot and titled it, "Samantha's Truck Stop."

Technorati Tags: ,

Low Horizon Line for Dramatic Skies

Low Horizon Line
By placing your horizon line low in the frame, you can emphasize a dramatic sky...

One habit that I see many photographers fall into is placing the horizon line in the center of the composition. Sometimes this is appropriate, but often it creates a static image that doesn't "move" the viewer.

Try instead, to consciously lower the horizon line, especially when you have a dramatic sky to work with. At first this may feel awkward. But when you review those shots later at home, I think many of them will be among your favorites. And don't forget to use a polarizer if you have blue skies with billowy clouds.

Technorati Tags: , , , ,

Grab Shot 2 - Nosey Horse

Nosey Horse
This friendly horse just kept coming closer and closer...

Sometimes you just want a nice picture of a pretty horse. As Sarah Kim composed this bucolic scene, she noticed that the subject kept coming closer and closer... until he practically "nosed" her camera. As it turned out, this was the best shot of the series anyway!

If you have an interesting candid you'd like to share, take a look at our Submissions page, then send us your Grab Shot. If we publish it, you'll receive an ultra cool custom carabineer keychain.

Technorati Tags: ,

Flash Tip
Try using a slower shutter speed for your holiday flash shots to capture more ambiance...

When shooting flash shots indoors, most cameras default to 1/60th of a second for the shutter speed. This is a reasonable setting in most situations. The problem is, your background -- outside of flash range -- often goes dark providing stark contrast to the flash-illuminated subjects.

By slowing down the shutter speed to 1/30th or a second, or even 1/15th, you can capture more of the background information, providing some "atmosphere" for your shots. The easiest way to do this (if your camera has a "Manual" mode) is to set the shutter to 1/30th of a second and the aperture to f-5.6. The flash will automatically emit the correct amount of light for your main subjects (usually within range of 8 feet or less). If it doesn't fire, change the flash mode to "Flash On."

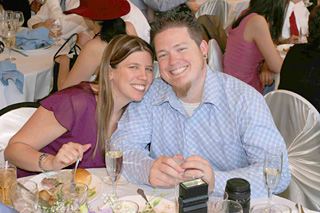
Compact camera shooters can try the "Nighttime Flash," "Party," or "Slow Synchro" modes. These work great if you have a decent amount of ambient light, such as in my example shot here. If the room light is too dark, however, the shutter speed will slow down too much causing motion blur.

But don't be afraid to experiment. Try a few shots using one of these settings, then go back to your normal automatic mode. Afterward, evaluate your shots and experiment some more at your next holiday event.

You might also want to review the Show Notes for Podcast #1 that cover flash photography.

Technorati Tags: , ,

"Hottest Digital SLRs" - Podcast #8

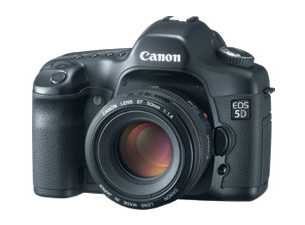
This week, I take a look at my favorite Digital SLRs. I start with the megapixel king in this roundup, the Canon 5D, and work down the list from there. All of these cameras are excellent. One of them may be right for you.

Canon 5D DSLR
The Canon 5D is the 12.8MP king in this roundup of advanced cameras...

  • Canon 5D -- $3,300 without lens or memory card. The Canon 5D is a "full frame" 12.8 Megapixel CMOS sensor. Full frame means that the image sensor (35.8 x 23.9mm) is roughly the same size as 35mm film. So your existing collection of lenses behave similarly on the 5D as they do mounted on your film SLRs. This feature is great if you have a handful of EF lenses; not as good if you've recently purchased EF-S lenses that don't work on this camera. RAW file size is approx. 12.9MB (4,368 x 2,912) and Large/Fine Jpegs are approx. 4.6MB (4,368 x 2,912). Use your best lenses on the 5D to get the highest quality results.
  • Nikon D2X -- $5,000 without lens or memory card. Nikon's CMOS image sensor (23.7 x 15.7mm) is smaller than the Canon 5D resulting in a 1.5X magnification factor for your lenses. This is a rugged, well-built SLR body that provides great resolution, wide tonal range, and is extremely responsive. You have good connectivity with the USB 2.0 interface and optional WiFi transmitter. Other niceties include good battery life, fast CF write performance, and fast start up time. Full image size from this 12.4 MP sensor is 4,288 x 2,848.
  • Nikon D200 -- $1,700 without lens or memory card. The much-anticipated Nikon D200 uses a 10.2MP sensor to capture sharp, clean high resolution images that you can preview on its 2.5" LCD monitor. Instant "power up" and almost immeasurable shutter lag will make this DSLR a favorite among sports photographers and photojournalists. It produces both Raw and Jpeg images as large as 3,872 x 2,592 pixels.
  • Canon 20D -- $1,300 without lens or memory card. With its 8.2 MP image sensor, the 20D combines high performance with a rugged magnesium alloy body, plus lots of shooting modes and features. Canon's EF-S lenses are perfectly suited for the 20D as well as the extensive line of regular EF glass, although with a 1.6X magnification factor for the latter. Other notables include fast start-up time, 5 fps second burst mode, and 9-point AF system. RAW file size is approx. 8.7MB (3,504 x 2,336) and Large/Fine Jpegs are approx. 3.6MB (3,504 x 2,336).
  • Canon Digital Rebel XT (350D) -- $780 without lens or memory card, $880 with 18-55mm EF-S Lens. The Digital Rebel XT sports an 8MP CMOS sensor in a very light and compact body. Photo quality is excellent and on par with the 20D at low ISOs. The 20D performs slightly better at ISO 800 and above. The Rebel shoots up to 3 fps and has a 7-point AF system. Battery life isn't as good as the 20D, so be sure to buy an extra one with the camera. RAW file size is approx. 8.3MB (3,456 x 2,304) and Large/Fine Jpegs are approx. 3.3MB (3,456 x 2,304).
  • Nikon D50 -- $650 without lens or memory card, $800 with 18-55mm DX Zoom Nikkor lens. The D50 is high quality and very affordable for a DSLR. Its 6.1MP sensor provides plenty of resolution for large prints and cropping. The battery life is outstanding and it sports a 2" LCD monitor. Burst mode is up to 2.5 fps and it uses a 5-area sensor for autofocus. The D50 performs very well in low light situations. Image size is 3,008 x 2,000 pixels.
  • Nikon Coolpix 8800 -- $860 with 35-350mm built-in lens. This 8MP "all in one" camera isn't a Digital SLR, but might appeal to the serious photographer who wants high performance in a compact package. It can capture both Jpeg and Raw formats (3,264 x 2,448), plus includes all of the shooting and metering modes most photographers would want. Yet, it weights only 21 ounces without battery.

Listen to the Podcast

Now that I have your curiosity piqued, it's time to listen to today's audio show titled, "Hottest Digital SLRs" You can download the podcast here (35 minutes).

Technorati Tags: , , ,

Rocket Air
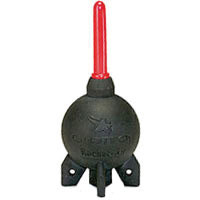
The Giottos Rocket Air Blaster does not use potentially harmful propellents to blow dust off camera components...

Dust control is just as important in digital photography as it is with film. You still have to carefully clean the fronts and backs of lenses, and more importantly for Digital SLR owners, keep the inside of the camera particle-free too. The Giottos Rocket Air Blaster has become my gizmo of choice for blowing away unwanted dust.

Unlike with canned air, you don't have to worry about harmful propellents accidently spraying out onto the lens surface with the Air Blaster -- or worse yet, on to your image sensor (with disastrous results!). The Giottos emits a steady stream of pure air and nothing else. Its extra long red tip nozzle enables you to clean tight areas. And it even has feet so you can stand it on the camera shelf where it serves as a conversation piece when not in use.

The Giottos Rocket Air Blaster is available in a couple different sizes. They all work great. And if you're looking for an affordable gift for your favorite photographer, they cost only about $11 each.

Technorati Tags: , ,

Grab Shots: Reader Submitted Candids

One of the reasons why I'm a big fan of compact cameras is because they're perfect for candids. The odds of having a camera with me when something interesting happens are much higher when it fits comfortably in my pocket. As a result, I'm capturing more "slices of life" pictures these days than in the past.

Psychic Sign
Grab Shot: Missing letters can lead to humorous compositions. Photo by Derrick Story.

Thinking about all of this has inspired me to create a new feature on The Digital Story called Grab Shots. Basically, it works like this.

I'm looking for interesting "grab shots" that you're willing to share with the rest of us. On our Submissions page, I've spelled everything out so you can refer to it at any time. But the bottom line is, if you have a cool candid, size it down to 400 pixels wide or less and send it to derrick@thedigitalstory.com. Be sure to put "Grab Shots" in the subject line. I'll pick one a week, or run one of my own, and keep them all grouped together in a special "Grab Shots" area of the site so you can check them out via the "Jump To" menu in the upper right corner of the page.

I'm looking for clever, humorous, heart warming, or just downright unusual images. I'll keep them all in my photo database with your contact information. So if I don't run it right away, that doesn't mean you won't see it later on. I'm the final judge on all of this stuff... so no complaining!

If you send me your website url with your name, and your photo gets published, I'll hyperlink your photo credit so folks can go see more of your work. And if that isn't enough ;) I'll ship you an ultra-cool custom carabineer keychain as a thank you. Does it get any better than that?

Technorati Tags: ,

Tamrac 5574 Bag
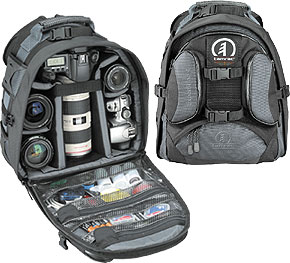
The new Expedition 4 adds outer "wing" pockets for quick access...

I've been using the Tamrac Expedition 3 bag ($49.99 from Porters) for about a year now, and I'm hooked on it. The reason it continues to be my favorite is that it's very nimble (2 pounds, easy to throw over the shoulder or grab by the handle), yet holds my Digital Rebel XT, two lenses, Casio EX P505 digicam, two iPods, cords, filters, extra batteries, Palm LifeDrive, reading glasses, and a few other odds and ends. It's small enough to take in a restaurant and slide between my feet or throw over my shoulders when going for a quick bike ride.

Tamrac recently announced the Expedition 4 ($89.94 from Amazon; Porters doesn't carry it at the moment) that sports a redesigned exterior and more room inside. Are the new features worth the extra $40? Yes and no.

As you study the bag on the Tamrac site, you'll see that they improved the harness system to provide more stability during extreme activities. I think this is worthwhile if you're an extreme shooter. But for me, it means extra cross strap getting in my way when I'm bouncing around town. So this isn't a plus for this non-extreme photographer.

I do like, however, the new front "wing accessory" pockets that enable you to quickly access memory cards, batteries, phone, iPod, etc. without having to open the bag itself. The interior of the bag seems to be the same design as the Expedition 3, which is fine with me. It is however, bigger than the Expedition 3 (and you should note the overall bag weighs more too).

My buying advice is to score the Expedition 3 from Porters for $49.99, that is, if you can live without the extra storage space inside and the really cool wing accessory pockets on the outside -- but for $40 more and more weight to carry.

Technorati Tags: , , ,

Sigma 55-200mm Lens

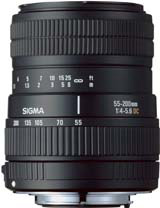
One of the best deals in the world of lenses is the Canon 18-55mm lens that's available in a kit with the Digital Rebel XT (350D). It's weighs only 6 ounces (190 grams) and takes sharp, saturated photos. Sigma has designed what I consider to be the perfect complement to this lens. Their 55-200mm DC Zoom weights only 11 ounces (310 grams) and extends the zooming range of the Rebel all the way to 200mm. When you consider that on the Rebel this 200mm focal length is actually 320mm because of the 1.6X magnification factor, you gain a lot of reach without adding much weight to your camera bag.

I've been toting the Rebel with the two lenses for a couple months testing to see if I could get by with just these two options for the variety of assignments I encounter. I have to say, this tandem works great and weighs almost nothing. Unfortunately, the filter ring size is different for each optic -- the Canon takes 58mm filters and the Sigma uses 55mm. I could go with a 55-58mm step-up ring and carry only one diameter of filter, but I've opted for packing both a 55mm and 58mm polarizer -- just seems more convenient in the long run.

The performance of the Sigma 55-200 is outstanding. The images are crisp and saturated. The lens doesn't have the silky smooth autofocusing that you get with Canon lenses, but the action is precise and not too loud. One thing that long-time Canon shooters will notice is that the zooming ring turns the opposite direction that Canon lenses rotate. This does take some getting used to, and is really the only drawback I encountered with this tandem.

You can buy the Sigma 55-200mm on Amazon for $125, and that includes a lens hood. The only other lens that I would include in my "basic on-the-go DSLR kit" would be the Canon 50mm f-1.8 optic. This gives you a lightweight (4.6 ounces / 130 grams) low-light capable lens without much additional bulk.

Technorati Tags: , , ,

Signs Can Be Beautiful Too...

Open Sign

I've long advocated taking pictures of signs instead of taking notes. If you're visiting a historical site, for example, snap a photo of the placard that lists all of the important events that happened there. Don't you dare reach for a pen and start writing.

Signs can be beautiful too. I keep an eye out for compositions that are aesthetic as well as informative. I took this photo in New Mexico outside a store in a small village. I wish I had thought at the time to see if there was an equally attractive "Closed" on the other side...

Technorati Tags: , ,

"ISO Settings and More" - Podcast #7

The main discussion in this week's show focuses ISO settings (and how far you can go with them). I also revisit the memory card fiasco from last week and touch on the new WiFi cameras offered by Nikon and Canon.

ISO Settings

ISO Setting

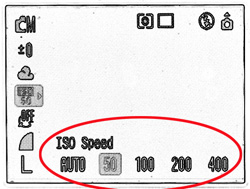
Sometimes referred to as film speed, ISO speed is actually a better term for expressing the light sensitivity of your digital camera. ISO stands for International Organization for Standardization. This entity has established many standards, including the light sensitivity of photographic materials. If your camera has multiple ISO speed settings, then you can use these adjustments to increase the light sensitivity of the image sensor. The default setting for most digicams is ISO 100. This is the speed setting for general photography. If you’re in a low-light situation and need to increase the sensitivity of you image sensor, change the ISO Speed setting from 100 to 200, 400 or even 800, if necessary. Each setting is the equivalent to one f-stop of light.

The general rule of thumb is to keep your ISO setting as low as possible on compact cameras (100 or 200), but understand that you have more latitude with Digital SLRs, which have larger image sensors and more robust electronics. I've had good luck with my Canon Rebel XT at ISO 400 and 800.

Noise Reduction Plug-ins

If you do end up with an image that's nosier that you'd like, here are some Photoshop plug-ins to help you correct the image:

Listen to the Podcast

Now that I have your curiosity piqued, it's time to listen to today's audio show titled, "ISO Settings and More" You can download the podcast here (30 minutes).

Technorati Tags: , ,

Frame Your Composition

Jack London Wolf House

You can add depth to your compositions by "framing" them with natural elements in the landscape. This technique can transform your images for two-dimensional pleasing to three-dimensional stunning. Trees are often the most available options for this technique.

Take into account the exposure difference between your main subject and the frame. You may want to try an exposure that's in-between the two. Why? If you can retain some shadow detail in the frame, it makes for a more interesting image than if it goes totally black. If you have Photoshop CS2, try using the "Shadow/Highlight..." command (Image.. Adjustments.. Shadow/Highlight...)

I once knew a photographer who would create his own frames by carrying a small tree branch around with him. Crazy? Yes. Effective? He got some nice shots...

Technorati Tags: , , ,

More on the Sonic Impact Class T Amp

Sonic Impact Amp
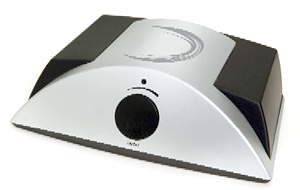
I've been reading all sorts of good things about the Sonic Impact Class T Amp. It's the battery-powered amplifier that fits in the palm of your hand and produces sound that has audiophiles harmonizing with joy. I bought mine for $30 at Amazon.

I agree that the sound is excellent. I've connected my iPod nano to the Sonic and wired up a couple of two-way speakers and was throughly impressed with the output. But I want to cover a few other aspects of the device that aren't as widely discussed.

The Sonic amp takes 8 AA batteries. I loaded mine up with Duracell "Ultra" alkalines. Installing the batteries isn't as easy as I would like. The spring-contacts on the Sonic are too long making it difficult to install the bottom row of AAs. I recommend that you use the best batteries possible, or the optional 12-volt power brick to avoid changing batteries any more than necessary.

With the batteries, the Sonic generates up to 10 watts per channel, which is noticeable better than many other units that typically provide 4 watts per channel. Good batteries, such as the Duracell Ultras should get around 8 hours of play. If you use the optional power adapter, you can get up to 15 watts per channel.

The speakers are attached using traditional speaker wire. The connectors on the Sonic are small and it takes some patience to get the wire in there correctly. I only mention this because many people will use the Sonic as a portable amp, and having either a stereo mini-plug option or even RCA jacks would make it easier to connect the speakers on the go.

You do have a stereo mini-plug jack for input, and the Sonic comes with a connecting cord so you can attach your iPod or other device immediately. I found that keeping the iPod's volume set to 60-70 percent, especially for songs with "lots of punch," kept the Sonic's sound sweet and clear.

I did have some occasional "cutting out" of audio. At first I thought that maybe I had a loose wire that was short-circuting. It sounded like that. But when I readjusted the volume outputs on the iPod and the Sonic, the cutting out would go away.

The Sonic does get warm with extended play. But the heat is dissipated on top, so I didn't worry about setting it directly on wood surfaces. It's actually amazing that it stays as cool as it does considering the output it's generating.

Overall, count me among the legions who consider this a worthy $30 investment. I'm going to try NiMH batteries to see if I can cut down on my alkaline consumption. Will add a comment to this piece after more testing.

Technorati Tags: , ,

Rim Lighting for Better Portraits

Rim Lighting Portrait
A little natural light adds definition to subject's hair...

One of the things I'm always on the lookout for is a chance to position my models so I can use fill-flash for their faces, and natural "rim lighting" for their hair and shoulders. The best locations are often at the edge of the "shade line" from a tree.

The technique is simple. Turn on your flash by using the "flash on" command. Position your subjects so their faces are in the shade, but the sun is illuminating their hair. Make sure you're within flash range -- usually about 8 to 10 feet. Then try a test exposure.

Once you get a shot you like, don't forget to share it on the LCD monitor. It will give your models confidence that the session is going well.

Technorati Tags: , ,

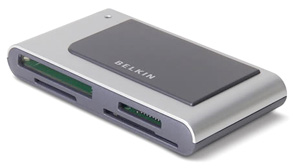
Favorite Card Reader: Belkin 15-in-1

Belkin 15-in-1 Reader
This Belkin Hi-Speed device is the only card reader you'll need...

Since I recently discussed memory card management, I wanted to follow up with my favorite card reader. The Belkin Hi-Speed USB 2.0 15-in-1 Media Reader & Writer uses USB 2.0 connectivity to upload pictures directly from memory cards, usually faster than most cameras can manage tethered to the computer. Plus, it doesn't drain your batteries in the process.

You can also write data from the computer to memory cards using the 15-in-1. My testing confirms that it does work as advertised. The reader is slim and easy to stash in your laptop case or camera bag. It's also one of the chosen devices that work with Apple's Camera Connector, enabling you to transfer images from your memory card to a full size iPod with color screen -- again, without draining your camera's batteries. No computers required!

Downsides to the Belkin card reader? I'm not crazy about its thick cord I have to lug around. But was happy to discover that my thiner Canon Rebel XT USB cord also works with the Belkin. So I carry it and leave the thicker Belkin cord at home. Also, the $49 price tag is steep. But if you transfer lots of high resolution images, you'll probably judge the device worth the money.

Technorati Tags: ,

If you need a good camera while on the go, I'd recommend that you start by comparing compact models. They're easier on the wallet and fit into a pocket or purse. Compact cameras typically range from 2 to 7 megapixels of resolution. Their picture quality can be outstanding, but they usually don't offer the array of features and controls that larger models do. The zoom lens tend to be 3X, which translates into 35-105mm for most models.

After you listen to this week's podcast, use this handy checklist to help you, or a friend, find the right digital camera. I recommend that you print it out, then mark the features that are important to you. Then bring it with you to the store.

Compact Camera Features Checklist

Megapixels

  • ( ) 3-5 megapixels -- great snapshots, quality enlargements possible up to 8" x 10"
  • ( ) 5-8 megapixels -- quality prints possible up to 11" x 14", ability to crop and still have enough resolution for decent sized enlargements

Memory Card (Spare Recommended)

  • ( ) Are the read and write speed specifications of your spare memory card matched to camera for maximum performance? This is particularly important for cameras that have robust burst modes and high quality video capture. Generally speaking, you'll need a spare 256MB card for 3-4 MP cameras, 512MB for 5-7MP cameras, and a 1GB card if you plan on shooting any video.

Batteries (Spare Recommended)

  • ( ) Rechargeable Lithium -- most common these days. Designed specifically for the camera by the manufacturer
  • ( ) Rechargeable NiMH AAs -- Are more bulky, but you can always use regular AA alkalines in an emergency
  • ( ) Charger included in camera kit?
  • ( ) Charger compact and easy to pack?

LCD Monitor

  • ( ) Fixed back -- Mounted to the back of the camera
  • ( ) Vari-angle -- can swivel screen, and sometimes rotate. Versatile viewing options for shooting low angle compositions or for holding the camera about your head.
  • ( ) Screen size -- 1.5" to 2.5" Bigger is better if you like to show others your pictures on the camera's LCD monitor
  • ( ) Image quality -- sharp, smooth motion, rich colors
  • ( ) Magnification -- allows to "zoom in" on recorded images to study detail. Very useful function, but some cameras implement this better than others
  • ( ) Data viewing -- enables to review settings such as white balance, ISO, and flash

Flash

  • ( ) Settings for built-in flash easily accessible

Shooting and Exposure Modes

  • ( ) Continuous or Burst mode -- How many frames can be recorded without pause to write to memory card
  • ( ) Subject shooting modes -- predefined settings for action photography, as well as portraits, nature, low light, and close-up
  • ( ) Self-Timer -- Some models have 2 sec and 10 sec settings
  • ( ) Remote Control -- Is a remote control included in the kit or available as an accessory?
  • ( ) Macro -- How close can you focus?

White Balance

  • ( ) Are settings easily accessible?
  • ( ) Is there a good variety or white balance presets?
  • ( ) Is there a manual white balance setting for tricky lighting situations?

Exposure Compensation

  • ( ) Is the exposure compensation setting easy to get to, or buried deep within the menu?

Special Features

  • ( ) Movie mode -- records QuickTime video at 10, 15, or 30 frames per second and/or at 160x120, 320x240, or 640x480 pixel dimensions
  • ( ) Panorama mode -- provides visual guides in the LCD viewfinder for aligning overlaping frames for panorama images
  • ( ) Special effects -- usually includes Black & White mode, sepia, and vivid colors
  • ( ) Audio annotations -- enables to add short voice recording to images
  • ( ) Weather resistant -- provides for photography in rain or sometimes even shallow immersion. Is there an underwater housing available for your model?

Software

  • ( ) Bundled software -- How good is the included software for special camera functions such as creating panoramas?
  • ( ) Will your new camera work with your existing photo software?

Listen to the Podcast

Hope you enjoy today's audio show titled, "Compact Camera Buying Tips" You can download the podcast here (46 minutes).

Technorati Tags: , ,

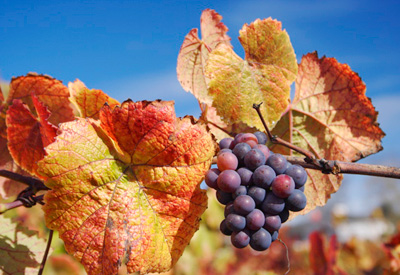
Polarizers Help Saturate Colors

Fall Grapes
Using a polarizer helps saturate colorful scenes...

The white balance function on our digital cameras has allowed us to leave many of our filters at home. Instead of toting a warming filter, for example, we can now switch to the "cloudy" white balance setting. One filter, however, still needs to accompany us for our landscape photography: the polarizer.

The polarizing filter helps reduce glare and saturate colors. It deepens the blue in skies and helps add punch to the clouds. The trick to reaping the most from this essential accessory is to have the sun coming from an angle, preferable over your right or left shoulder. Then look through the lens and rotate the filter until you have the desired effect.

This shot of fall grapes was captured with a Canon Digital Rebel XT in Raw mode. I set the 18-55mm lens to 48mm. I made the exposure at 1/90 @ f-6.7.

Technorati Tags: , , , ,

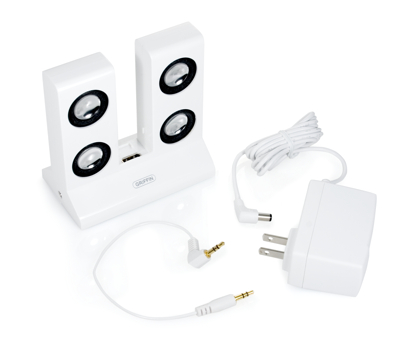
Griffin TuneBox: Hot or Not?

TuneBox Contents
Griffin TuneBox is a speaker system that doubles as a charger...

I've been using the Griffin TuneBox, which is an iPod shuffle speaker system/charger, for a couple months now. During that time I've been debating what my final opinion is about it. As a speaker system, the sound is average to above. Good midrange and treble, not much bass. Not too surprising since we're talking about four 1" speakers with a total of 4 watts of power. The TuneBox does have plenty of volume, however, which I really appreciate. It's very much like listening to a quality portable radio.

It's handy around the house or office. For example, keep it on the night stand, and you can spontaneously listen to music from your iPod shuffle, nano, or 5th Generation full size (iPod video). But what really hooked me was that the TuneBox is a convenient charger as well as a speaker system. And I can charge all of my current pods with it (iPods need to be USB-compatible since the TuneBox's power port is USB).

So it really comes down to expectations. Originally I was thinking that the TuneBox would be a portable speaker system for my iPods. The required power brick weighed down that idea. When you start lugging the TuneBox around, the power brick literally feels like a ball and chain. But once I started thinking of the TuneBox as my home base station for both listening to music and charging my iPods, my fondness grew for it.

So, hot or not? If you want a convenient speaker system that will reside on your desk or night stand and charge your iPods, I'd say hot. If you're looking for a truly portable sound system with great bass response, then not. It's all about expectations.

The TuneBox is available on the Griffin website for $39.99.

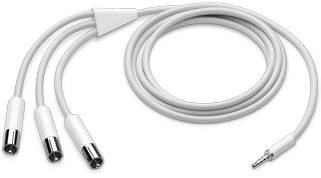
iPod AV cable
The $19 iPod AV cable opens a new world of viewing content...

I've just finished testing the iPod AV cable that enables me to connect the current 5th Gen iPod (video model) to a TV or other display via standard RCA jacks. I've reported my findings in this O'Reilly post, iPod video Plugged into Your TV: Is It Good Enough?. The experience is surprisingly good -- so much so that I'm already aching for more video content on iTMS. Between you and me, I think we have another revolution beginning...

"Raw Workflow" - Podcast #5

As we wait for Aperture and software like it to help us manage Raw files more efficiently, many of us are forced to using two or more applications to complete our workflow.

When I was shooting with a Canon 10D, I stuck with iPhoto 5 for organizing and browsing my .CRW files. But everything broke with my new Canon 5D that produces .CR2 files. iPhoto 5 couldn't read those images until the recent Mac OS X 10.4.3 update that added .CR2 file compatibility (among others). Even so, iPhoto just seems too underpowered for this type of work.

So I've been playing with different combinations of software that will help me manage my Raw files, and this is what I discuss in this week's audio show. I'm a big fan of editing Raw files with Adobe's Camera Raw, but I'm not crazy about Adobe Bridge, especially the length of time it takes to render thumbnails for my .CR2 files.

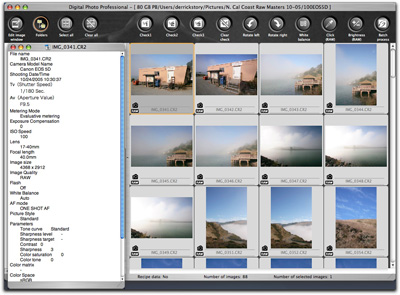
As a result, I've been playing with Canon's Digital Photo Professional (version 2) to browse my Raw images. It renders thumbnails quickly and provides lots of metadata that helps me understand what went right and what didn't. Minolta, Nikon, and Olympus also provide bundled software for managing their Raw files. If anyone is using those flavors, please post a comment with your impressions of them.

Canon Digital Photo Pro
Canon's Digital Photo Professional software has come of age with version 2.

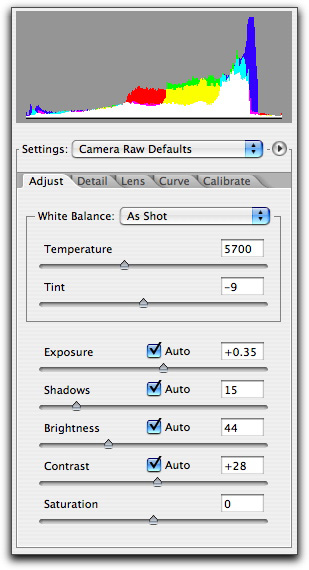
As much as I like the Canon software for browsing, I don't enjoy it for editing. So once I find a picture I want to work on, I note its file name and open it in Camera Raw. I like to use the "Auto" settings in Camera Raw 3.2 (available with Photoshop CS2) as a starting point for my image editing. You can override any of the auto settings by simply sliding the adjuster. But I've found that the Auto settings are often a good starting point.

Camera Raw Adjusters
The Auto settings are often a good starting point for image editing in Camera Raw

Once I've adjusted my Raw image, I save it as a Photoshop file that becomes my working master. Then if I need to post the picture on the web or share via email, I save a copy as a JPEG. I mentioned in the audio show that I think it's important to retain the original file number through all of these iterations. It makes it easier to find these files later. So the original Raw file might be "IMG_0421.CR2" then the Photoshop master could be "Sunset_0421.psd" then the working Jpeg could be "Sunset_0421.jpg".

For some of us, new applications such as Aperture will improve this process. But for others, you could get by with using your bundled software and spending less than $100 for Adobe's Photoshop Elements 4, and work quite effectively.

Listen to the Podcast

Now that I have your curiosity piqued, it's time to listen to today's audio show titled, "Raw Workflow" You can download the podcast here (30 minutes).

Overexpose for Foggy Scenes

Foggy Landscape
Remember to change exposure compensation to +1 for foggy scenes...

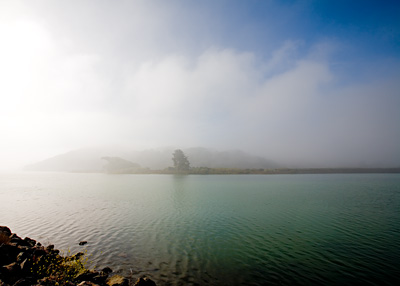
One of the exciting aspects of taking pictures in the morning costal fog is that, in a matter of minutes, you can have a variety of shots without ever moving your feet. One thing to keep in mind however, is that your light meter can be fooled by the brightness of the fog, much in the same way it can by snow or a bright, sandy beach. Generally speaking, you can compensate for this by setting your "exposure compensation" dial to +1. That will force your camera to overexpose the image by 1 f-stop, which should be enough to compensate for the fog.

Technorati Tags: , , ,